
1. Introduzzjoni
The Shark ChillPill is a portable 2-in-1 personal cooling system designed to provide relief from heat both indoors and outdoors. It features a high-speed fan and a dry-touch evaporative misting system. This manual provides instructions for the safe and effective use, maintenance, and troubleshooting of your ChillPill device.
2. Istruzzjonijiet Importanti dwar is-Sigurtà
- Aqra l-istruzzjonijiet kollha qabel tuża l-apparat.
- Żomm l-apparat 'il bogħod mill-ilma u l-umdità. Tgħaddasx fl-ilma.
- Do not block the fan intake or outlet during operation.
- Uża biss il-kejbil tal-iċċarġjar USB-C provdut.
- Żomm fejn ma jintlaħaqx mit-tfal.
- Tippruvax iżarma jew isewwi l-apparat lilek innifsek. Ikkuntattja l-appoġġ tal-klijent għall-assistenza.
- Avoid direct contact of the mist with electronic devices.
3. X'hemm fil-Kaxxa
Ivverifika li l-komponenti kollha huma preżenti fil-pakkett tiegħek:
- Shark ChillPill device
- Fan Cap
- Dry-Touch Misting Pod
- Cable tal-iċċarġjar USB-C
- 3 replacement misting wicks
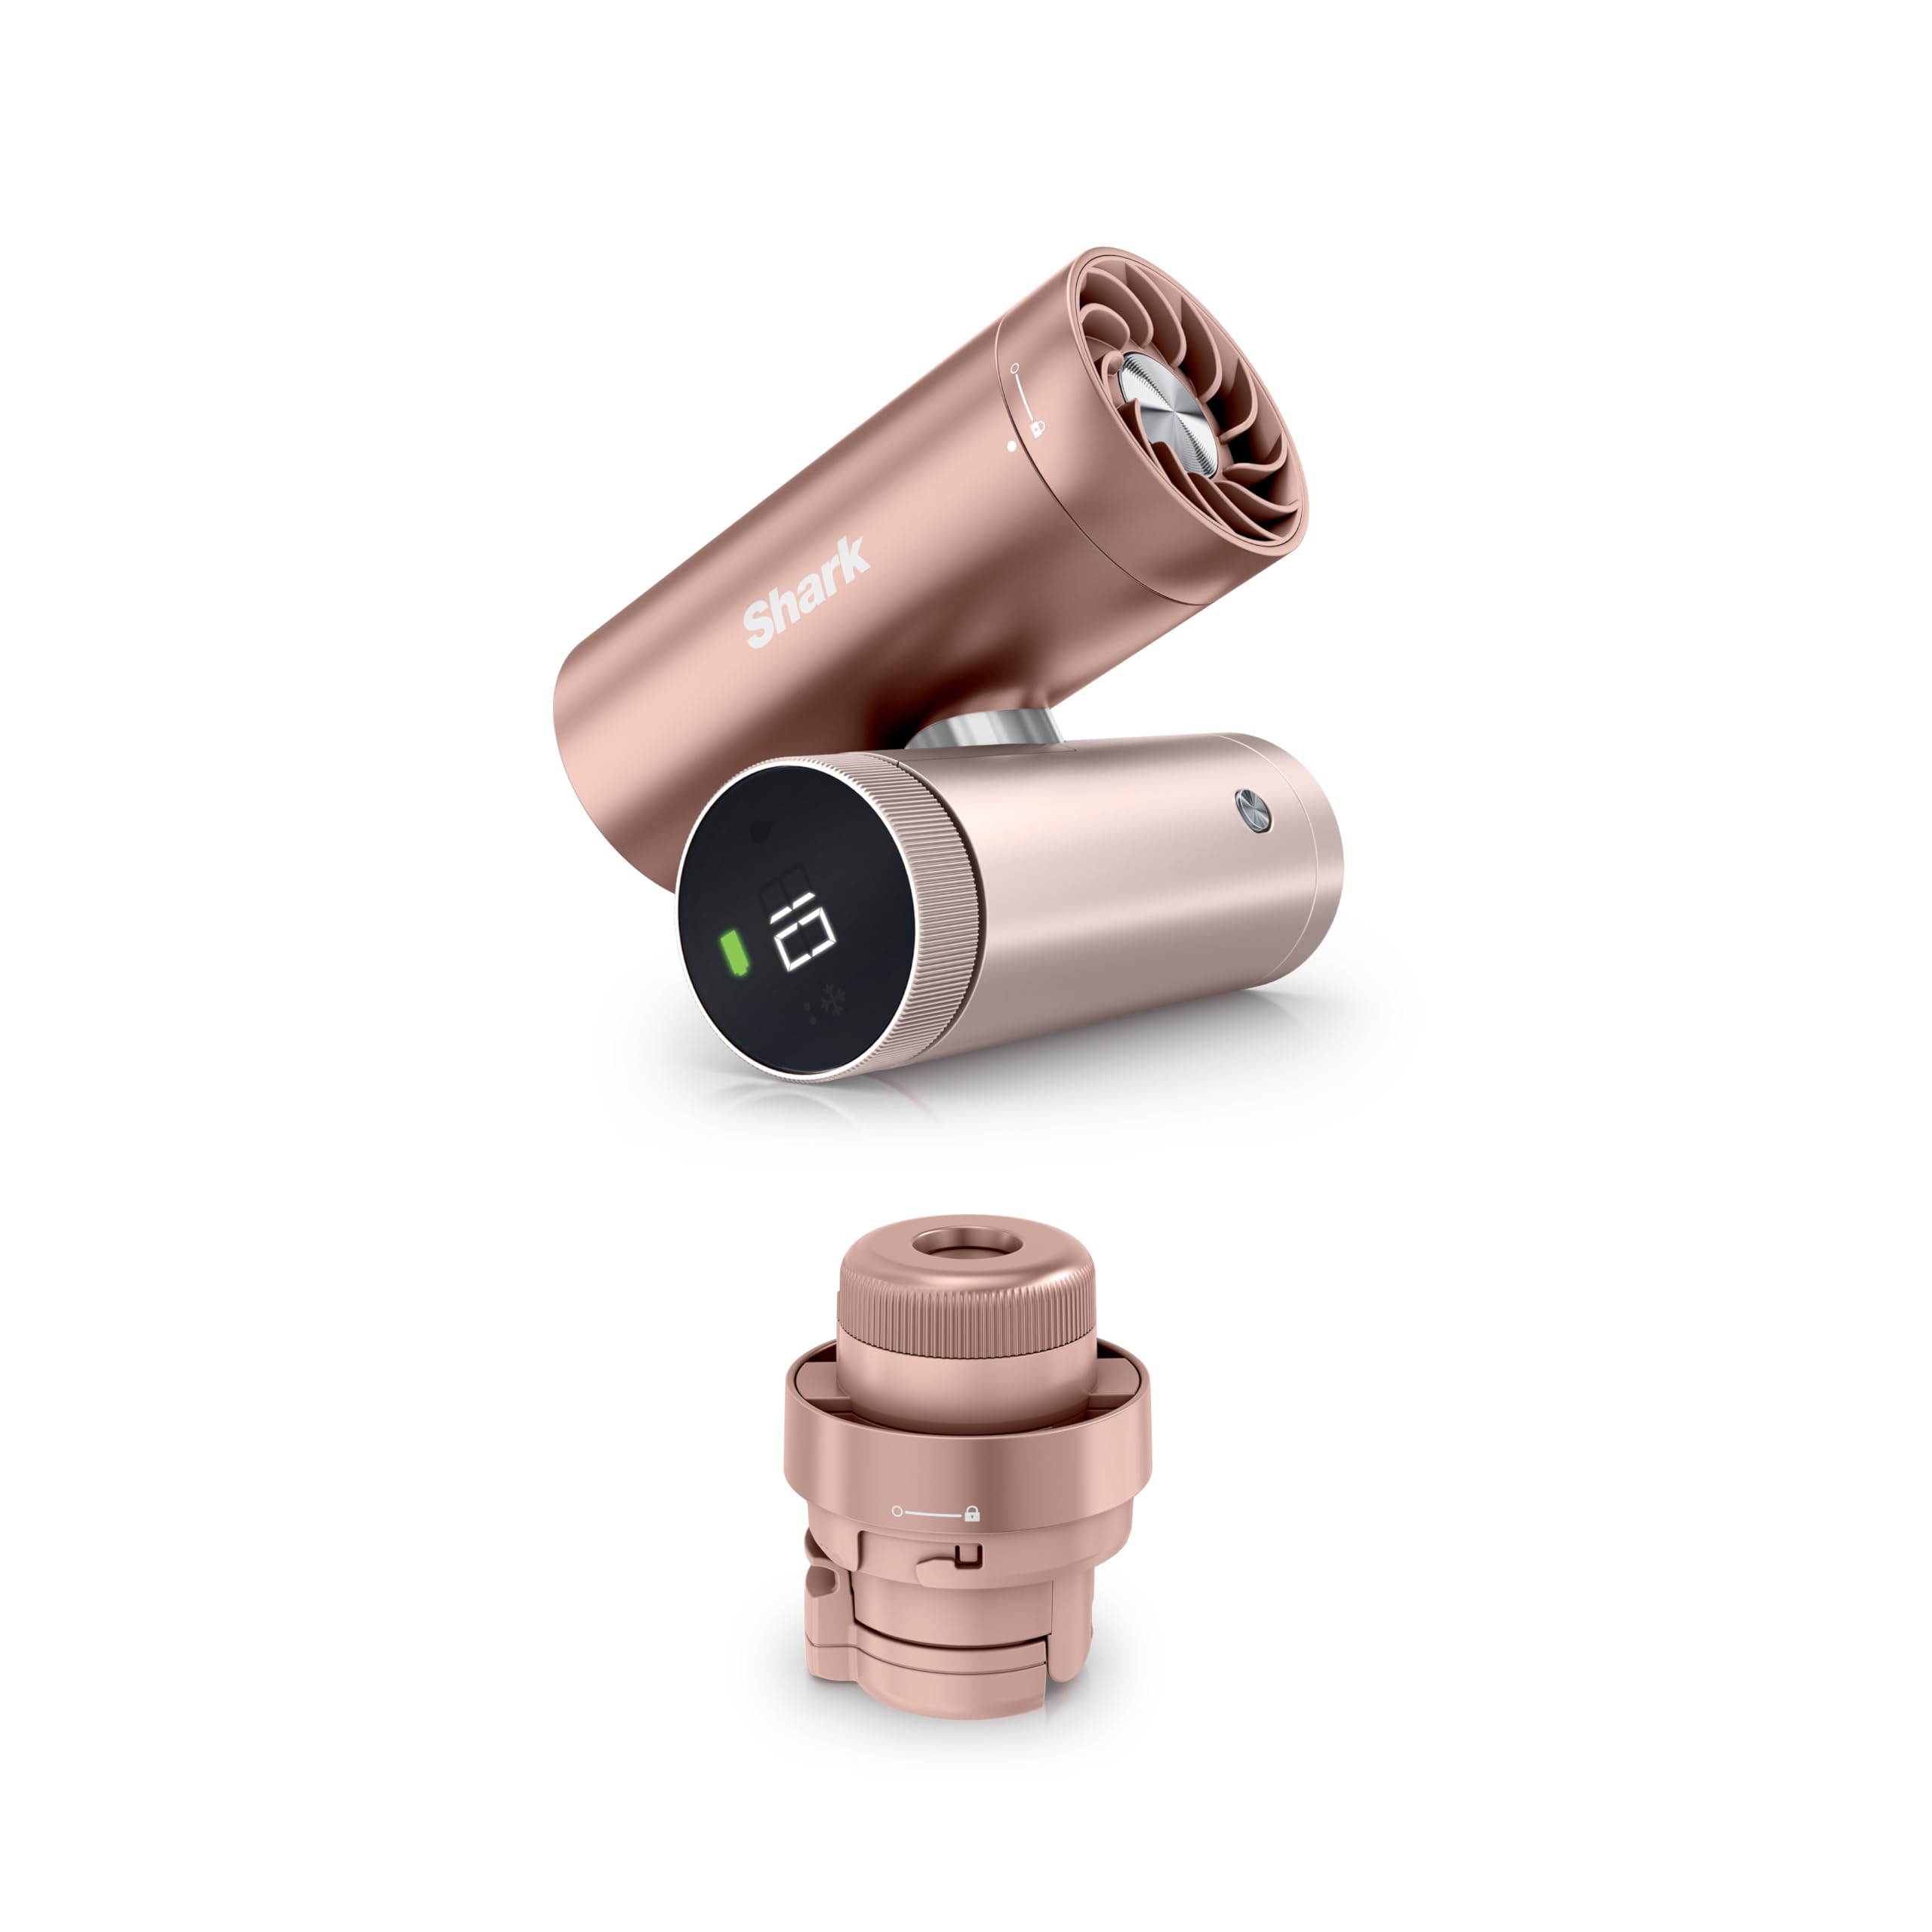
Image: The Shark ChillPill device in Rose Gold, showcasing id-disinn kompatt tiegħu.
4. Komponenti tal-Prodott
The Shark ChillPill consists of a main unit and interchangeable cooling attachments:
- Unità Prinċipali: Contains the battery, controls, and connection point for attachments.
- Fan Cap: Provides high-speed airflow.
- Dry-Touch Misting Pod: Delivers a fine, evaporative mist.

Immaġni: Sploda view of the Shark ChillPill, illustrating the main unit, fan cap, and dry-touch misting pod.
5. Setup
5.1 Iċċarġjar tal-Apparat
- Connect the USB-C charging cable to the charging port on the ChillPill device.
- Ipplaggja t-tarf l-ieħor tal-kejbil ma' adapter tal-enerġija USB kompatibbli (mhux inkluż).
- The battery indicator on the device will show charging status. A full charge takes approximately 3.5 hours.
5.2 Attaching the Fan Cap or Misting Pod
- Align the desired attachment (Fan Cap or Misting Pod) with the top of the main unit.
- Twist the attachment clockwise until it clicks securely into place.
5.3 Filling the Misting Reservoir (for Misting Pod)
- Ensure the Misting Pod is detached from the main unit.
- Carefully open the reservoir cap.
- Fill the reservoir with clean, cool tap water. Do not overfill.
- Agħlaq sew l-għatu tar-reċipjent.
5.4 Replacing Misting Wicks (for Misting Pod)
- Unscrew the bottom part of the Misting Pod to access the wick chamber.
- Remove the old wick and insert a new replacement wick.
- Reassemble the Misting Pod, ensuring all parts are secure.
6. Istruzzjonijiet Operattivi
6.1 Power On/Off
Press and hold the power button on the main unit to turn the device on or off.
6.2 Aġġustament tal-Veloċità tal-Fann
When the Fan Cap is attached and the device is on, rotate the dial on the main unit to adjust the fan speed. There are 10 speed settings available. Higher speeds provide stronger airflow but may generate more noise.

Image: A person using the Shark ChillPill with the fan cap attached, demonstrating its high-speed airflow.

Image: A table outlining recommended fan speeds (1-10) for different activities, from indoor relaxation to outdoor adventures.
6.3 Using Dry-Touch Mist
When the Misting Pod is attached and filled with water, press the mist button to activate the misting function. You can choose between constant mist or interval mist mode by pressing the button again. Interval mode conserves water for longer use.

Image: A person using the Shark ChillPill with the dry-touch misting pod, showing the fine mist being emitted.
6.4 Użu mingħajr idejn
The ChillPill is designed for versatile hands-free use. It can be worn, clipped, or twisted for tabletop mode. Optional accessories (sold separately) include cross-body lanyards, clips, clamps, and wristlets to enhance portability and hands-free operation.

Image: Individuals demonstrating different hands-free methods of carrying the Shark ChillPill, including wearing it and attaching it to clothing.

Image: A visual representation of different accessories for hands-free use, including a wristlet, clip, clamp, and crossbody strap.
7. Manutenzjoni
7.1 Tindif tal-Apparat
- Kun żgur li l-apparat ikun mitfi u splaggjat qabel it-tindif.
- Imsaħ il-barra tal-apparat b'artab, damp drapp.
- For the Fan Cap, use a dry brush or compressed air to remove dust from the fan blades.
- For the Misting Pod, periodically clean the reservoir with mild soap and water, then rinse thoroughly. Allow to air dry completely before reassembly.
7.2 Misting Wick Replacement
Replace misting wicks regularly, especially if you notice a decrease in mist output or if the wick appears discolored. Refer to section 5.4 for replacement instructions.
7.3 Ħażna
Store the ChillPill in a cool, dry place when not in use. If storing for an extended period, ensure the battery is partially charged (around 50%) to prolong battery life.
8 Issolvi l-problemi
| Problema | Kawża Possibbli | Soluzzjoni |
|---|---|---|
| L-apparat ma jixgħelx | Batterija baxxa; Apparat mhux iċċarġjat | Iċċarġja l-apparat billi tuża l-kejbil USB-C ipprovdut. |
| Fan mhux jaħdem | Fan Cap not securely attached; Obstruction in fan blades | Ensure Fan Cap is twisted securely. Check for and remove any obstructions. |
| No mist or weak mist output | Misting Pod not securely attached; Reservoir empty; Clogged or worn-out wick | Ensure Misting Pod is twisted securely. Refill reservoir with water. Replace misting wick. |
| Ħajja qasira tal-batterija | Operating at high fan speeds or continuous mist; Battery degradation | Reduce fan speed or use interval mist mode. Ensure full charge before use. |
9. Speċifikazzjonijiet
- Numru tal-Mudell: FA023
- Dimensjonijiet tal-Prodott: 1.77 x 3.31 x 4.4 pulzieri
- Piż tal-oġġett: 12.3 uqija
- Sors tal-Enerġija: Batterija Rikargabbli (USB-C)
- Veloċitajiet tal-fann: 10 livelli
- Modi taċ-ċpar: Constant, Interval
- Ħin tal-Batterija: Up to 11 hours (low fan speed), Up to 1.5 hours (max power)
- Ħin tal-Iċċarġjar: Madwar sagħtejn
10. Garanzija u Appoġġ
Your Shark ChillPill device is covered by a limited warranty. For specific warranty details, please refer to the warranty card included with your purchase or visit the official Shark website. For technical support, replacement parts, or service inquiries, please contact Shark customer service.


