1. Introduzzjoni
This manual provides essential information for the installation, configuration, operation, and maintenance of your Zyyini X99H Motherboard Kit. Please read these instructions carefully before proceeding with installation to ensure proper setup and optimal performance. Retain this manual for future reference.
2. Prodott Aktarview
The Zyyini X99H Motherboard is designed for high-performance computing, offering robust compatibility and expansion options. It supports a range of CPUs and memory configurations, making it suitable for various computing needs.
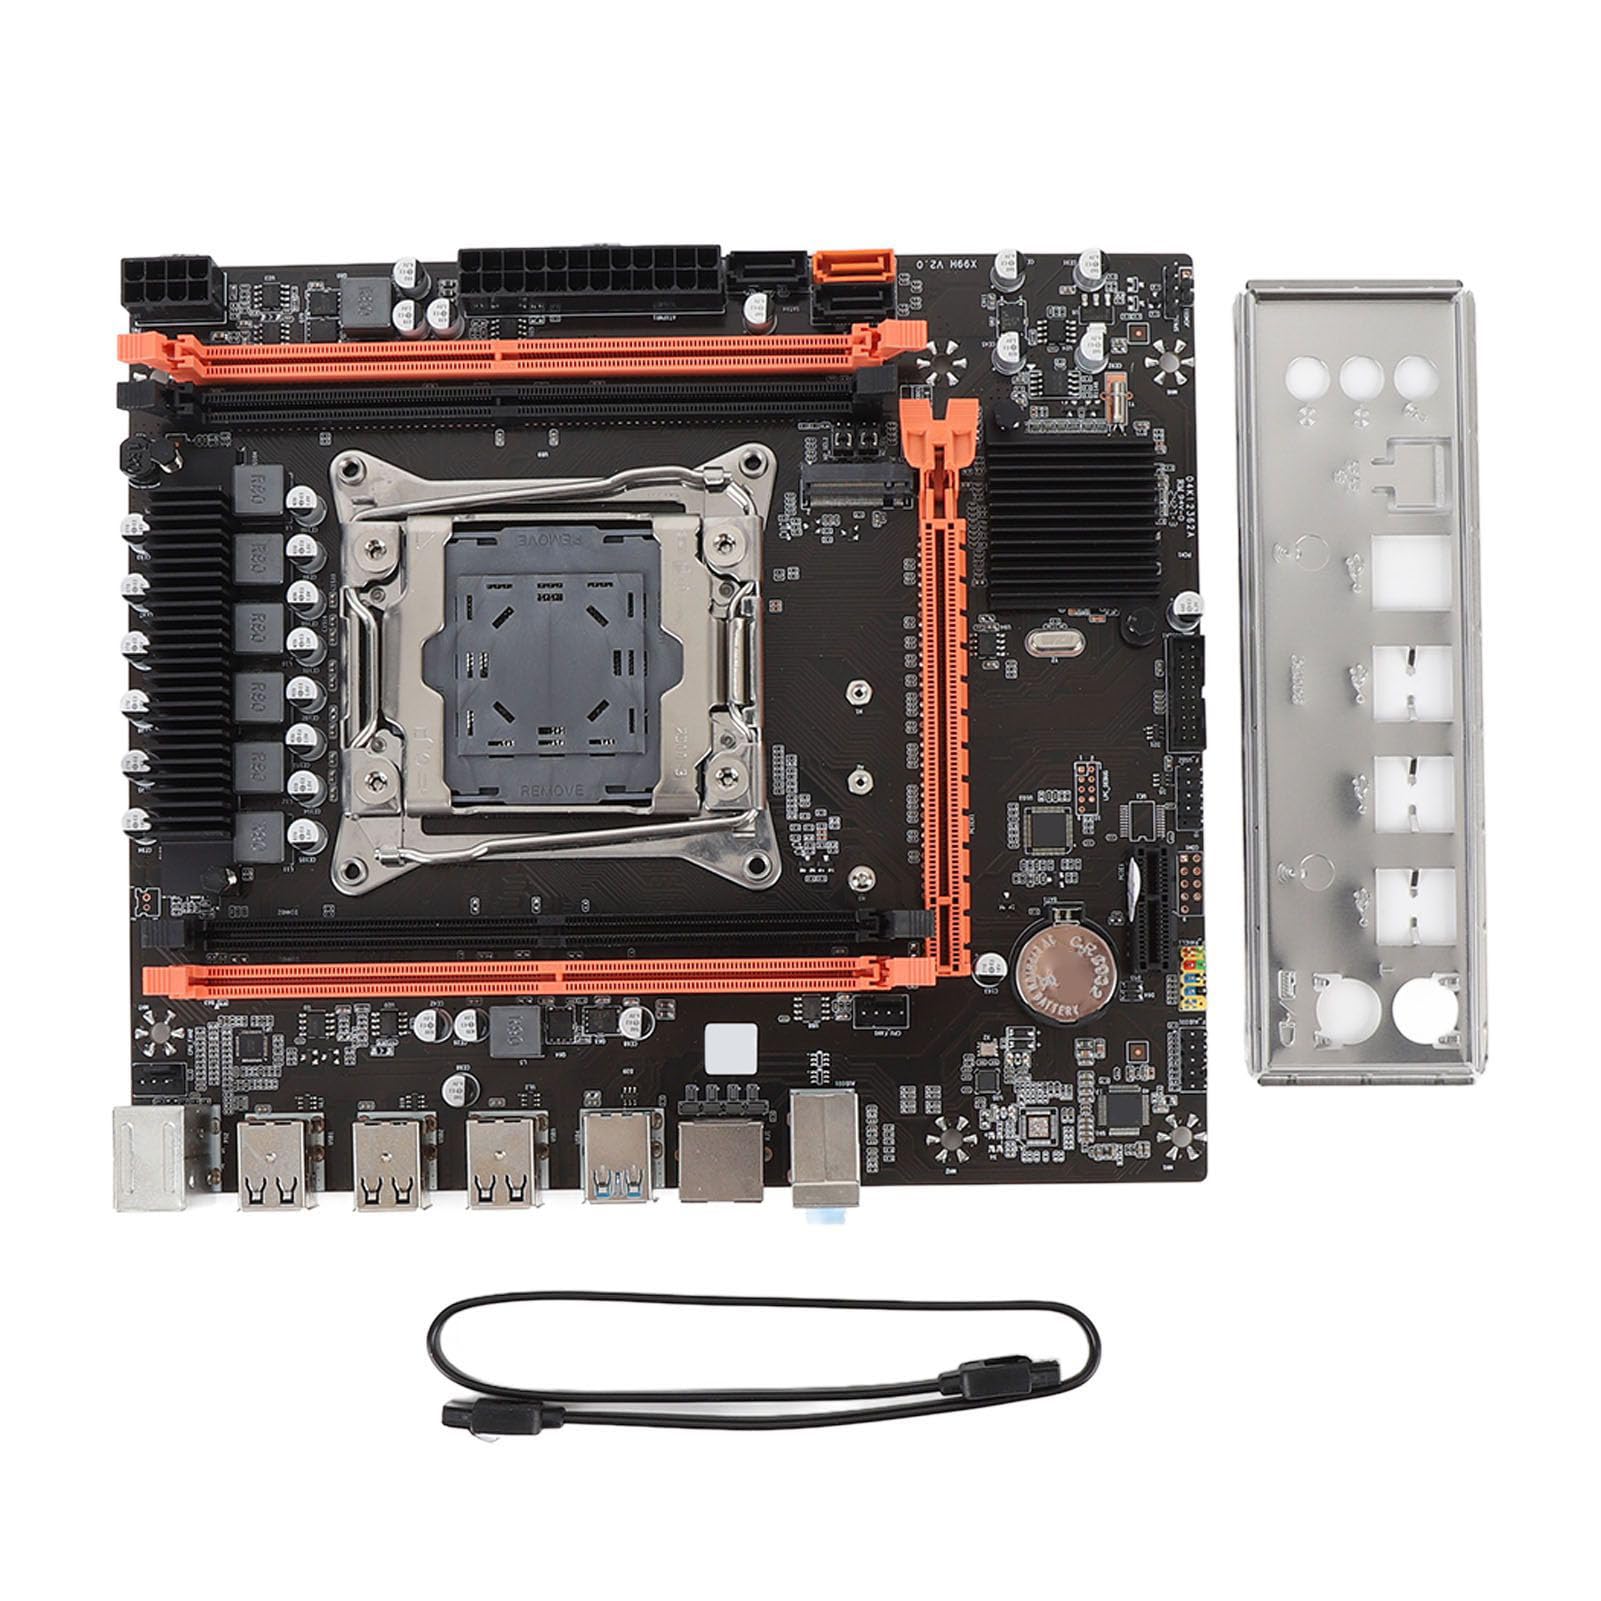
Figura 2.1: Aktarview of the Zyyini X99H Motherboard Kit.
Karatteristiċi ewlenin:
- Kompatibbiltà qawwija: Features an LGA 2011-3 CPU socket, supporting Intel E5 V3/V4 and i7 58xx/68xx series processors. Includes one 8-pin and one 24-pin power socket for stable power delivery.
- Impressive Memory Support: Equipped with four DDR4 DIMM slots, supporting up to 128GB of DDR4 memory at speeds of 2666, 2400, or 2133MHz.
- Serial ATA Ports: Includes Serial ATA ports for compact and easy storage device installation, ensuring high compatibility.
- Prestazzjoni Stabbli: Utilizes all solid capacitors for enhanced stability and extended operational lifespan, contributing to reliable motherboard performance.
- Easy Expansion: Provides HD multimedia (HDMI) and VGA interfaces for display output, along with an M.2 slot that supports both NGFF and NVME protocols for high-speed storage expansion. It also features a PCI Express 16X slot for graphics cards.
3. Speċifikazzjonijiet
Below are the detailed technical specifications for the Zyyini X99H Motherboard Kit:

Figura 3.1: Minn fuq għal isfel view of the Zyyini X99H Motherboard, highlighting component layout.
| Karatteristika | Speċifikazzjoni |
|---|---|
| Motherboard Structure | M-ATX |
| Chipset | X99H |
| Socket tas-CPU | LGA 2011-3 |
| Supported CPU Types | Intel E5 V3/V4, i7 58xx/68xx series |
| Tip ta' Memorja | DDR4 2666/2400/2133MHz |
| Slots tal-Memorja | 4 x DDR4 DIMM |
| Kapaċità Massima tal-Memorja | 128GB |
| Graphics Card Standard Support | PCI Express 16X |
| Slots ta 'Espansjoni | 1 x PCIE x16, 1 x PCIE x1, 1 x NVME M.2 Interface (Serial ATA, PCIE with Jumper Switch) |
| Interfaces USB | 6 x USB 2.0, 2 x USB 3.0 (rear I/O), USB3.0 Pins (1 Set), USB2.0 Pins (1 Set) |
| Serial ATA Ports | 2 x Serial ATA 2.0, 1 x Serial ATA 3.0 |
| Outputs tal-Vidjo | hdmi, vga |
| Interfaċċa tan-Netwerk | 1 x RJ45 |
| Interfaċċja PS/2 | 1 x PS/2 Keyboard/Mouse Universal Interface |
| Mibnija fil-batterija | CR2032x1 240mah |
4. Setup u Installazzjoni
Installazzjoni xierqa hija kruċjali għall-istabbiltà u l-prestazzjoni tas-sistema tiegħek. Segwi dawn il-passi bir-reqqa.
4.1. Preparazzjoni
- Kun żgur li l-ispazju tax-xogħol tiegħek huwa nadif u mdawwal sew.
- Iġbor l-għodda meħtieġa: tornavit Phillips, ċinga tal-polz anti-statika (rakkomandata).
- Ħalli l-elettriku statiku jiġi skarikat billi tmiss oġġett tal-metall ertjat qabel ma timmaniġġja l-komponenti.
4.2. Installazzjoni tas-CPU
Carefully install your LGA 2011-3 processor into the CPU socket.
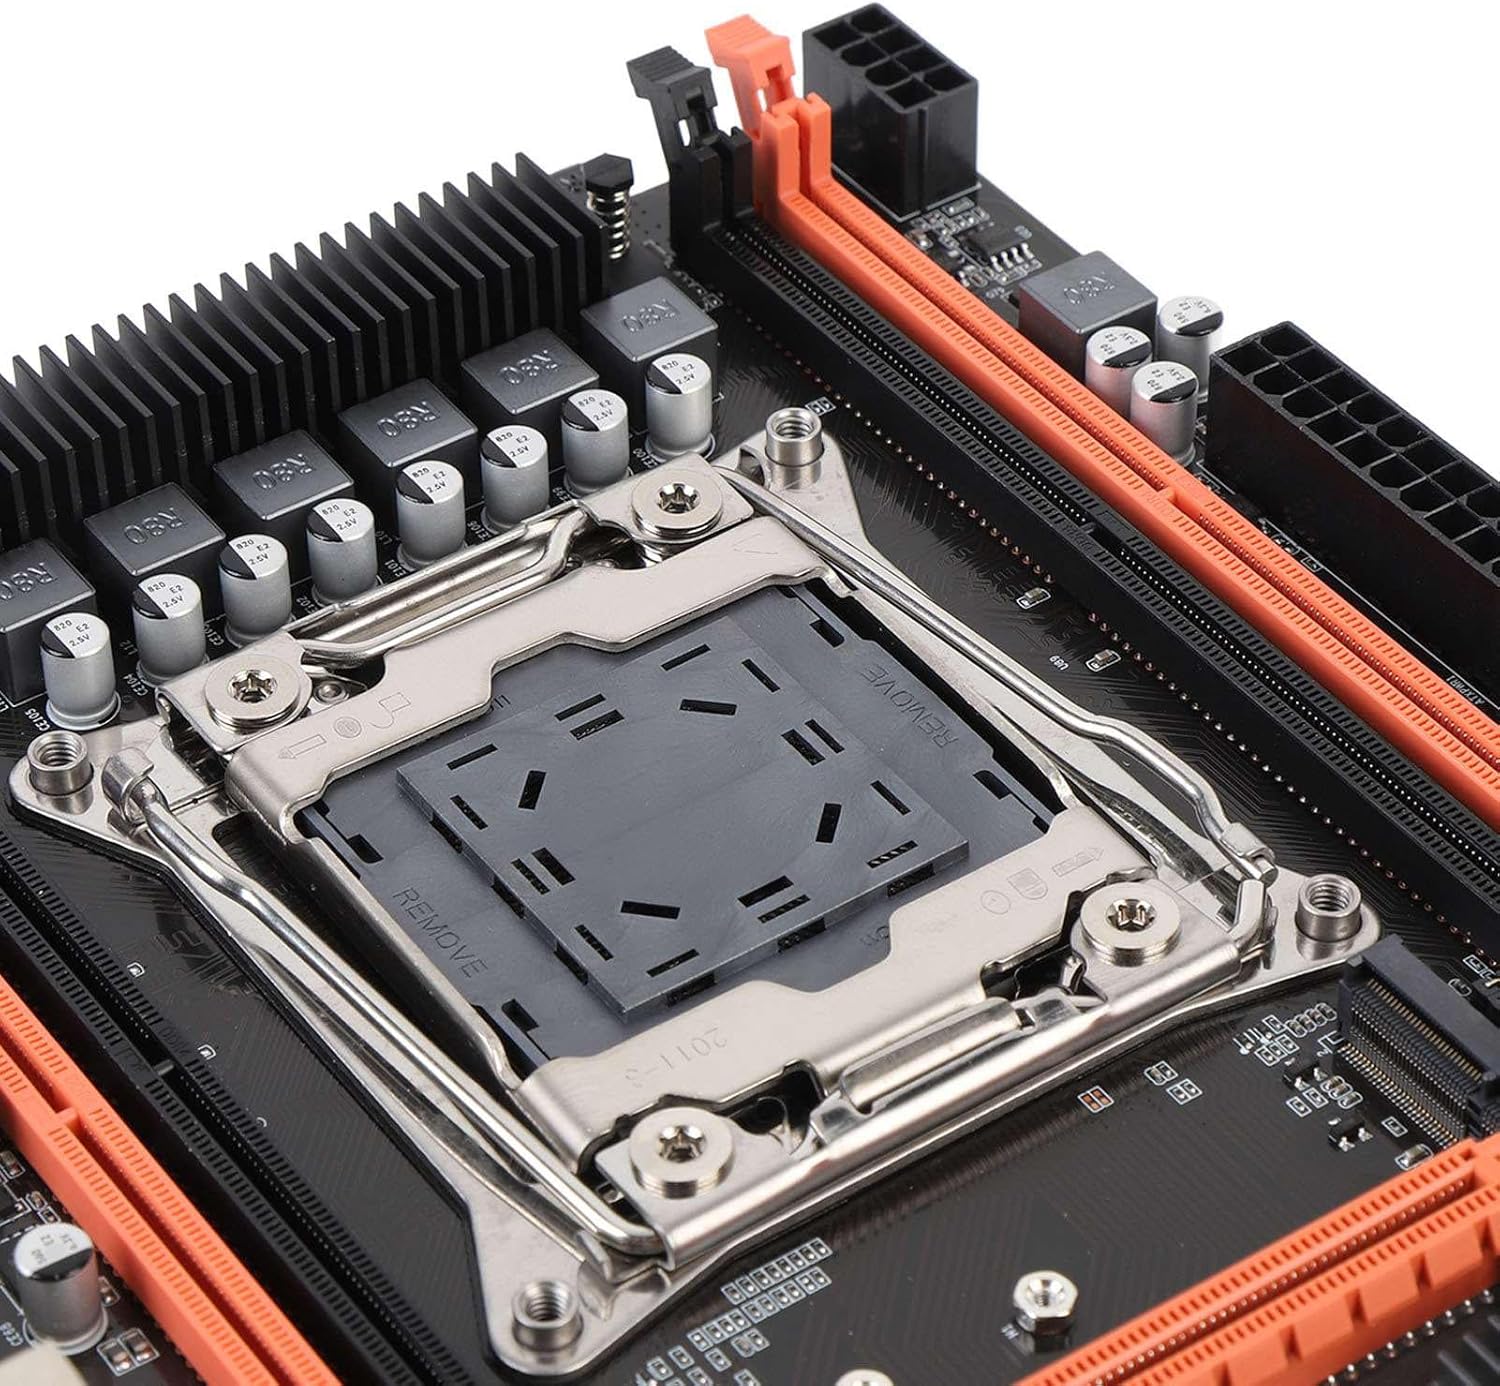
Figura 4.1: Close-up view of the LGA 2011-3 CPU socket.
- Iftaħ il-mekkaniżmu taż-żamma tas-sokit tas-CPU.
- Align the CPU with the socket, ensuring the gold triangle on the CPU matches the indicator on the socket.
- Poġġi s-CPU bil-mod fis-sokit mingħajr ma tisforzah.
- Agħlaq il-mekkaniżmu taż-żamma biex twaħħal is-CPU.
- Installa l-cooler tas-CPU skont l-istruzzjonijiet tal-manifattur tiegħu.
4.3. Installazzjoni tar-RAM
Install DDR4 memory modules into the DIMM slots.
- Iftaħ il-klipps fiż-żewġt itruf tas-slots tad-DIMM.
- Allinja l-modulu tal-memorja mas-slott, filwaqt li tiżgura li l-islott fuq il-modulu taqbel maċ-ċavetta fis-slott.
- Agħfas sew 'l isfel fuq iż-żewġt itruf tal-modulu tal-memorja sakemm il-klipps jidħlu f'posthom.
4.4. Immuntar tal-Motherboard
Mount the motherboard into your PC case.
- Installa l-ilqugħ tal-I/O fil-ftuħ ta' wara tal-kaxxa.
- Allinja l-motherboard mal-istandoffs fil-kaxxa tal-PC tiegħek.
- Sikura l-motherboard bil-viti.
4.5. Qawwa tal-Konnessjoni
Connect the power supply unit (PSU) cables to the motherboard.
- Connect the 24-pin ATX power cable to the main power connector.
- Connect the 8-pin CPU power cable to the CPU power connector.
4.6. Konnessjoni ta' Apparati tal-Ħażna
Connect your SATA and NVME M.2 storage devices.

Figura 4.2: Close-up view of the M.2 slot and SATA ports.
- For SATA drives, connect one end of the SATA data cable to the motherboard's SATA port and the other to the drive. Connect the SATA power cable from the PSU to the drive.
- For NVME M.2 SSDs, insert the M.2 module into the M.2 slot and secure it with the provided screw.
4.7. Connecting Peripherals and Front Panel
Connect USB devices, front panel connectors, and other I/O.

Figura 4.3: Close-up view of the rear I/O ports.
- Connect your mouse and keyboard to the PS/2 or USB ports.
- Connect front panel USB, audio, power switch, reset switch, and LED indicators to the corresponding headers on the motherboard. Refer to your PC case manual for specific pin assignments.
- Connect network cables to the RJ45 port.
4.8. Installazzjoni tal-Kard Grafika
Install your PCI Express graphics card.
- Open the retention clip on the PCIe x16 slot.
- Align the graphics card with the slot and press down firmly until it clicks into place.
- Waħħal il-karta grafika mal-kaxxa b'vit.
- Qabbad kwalunkwe kejbil tal-enerġija PCIe meħtieġ mill-PSU mal-karta grafika.
5. Istruzzjonijiet Operattivi
Once all components are installed, you can proceed with powering on your system.
5.1. L-Ewwel Boot
- Ensure all power cables are securely connected and the power supply is switched on.
- Agħfas il-buttuna tal-qawwa fuq il-kaxxa tal-PC tiegħek.
- Is-sistema għandha tixgħel, u għandek tara display fuq il-monitor tiegħek.
5.2. Aċċess għall-BIOS/UEFI
The BIOS (Basic Input/Output System) or UEFI (Unified Extensible Firmware Interface) allows you to configure fundamental system settings.
- During system startup, repeatedly press the designated key (commonly DEL, F2, F10, jew F12) biex tidħol fl-utilità tas-setup tal-BIOS/UEFI.
- Within the BIOS/UEFI, you can adjust boot order, system time, fan speeds, and other hardware-related settings.
5.3. Installazzjoni tas-sewwieq
After installing your operating system, install the necessary drivers for your motherboard and other components.
- Obtain the latest drivers from the Zyyini website or the component manufacturers' websites (e.g., chipset, audio, LAN, graphics card).
- Install drivers in the recommended order (typically chipset first, then graphics, audio, LAN, etc.).
5.4. Installazzjoni tas-Sistema Operattiva
Installa s-sistema operattiva preferuta tiegħek (eż., Windows, Linux) minn USB drive jew DVD li tista' tibda.
- Configure the boot order in BIOS/UEFI to prioritize your installation media.
- Follow the on-screen instructions of your operating system installer.
6. Manutenzjoni
Manutenzjoni regolari tgħin biex tiżgura l-lonġevità u t-tħaddim stabbli tal-motherboard u s-sistema tiegħek.
- Żommha Nadif: Naddaf it-trab minn ġewwa l-kaxxa tal-PC tiegħek perjodikament, speċjalment madwar il-fannijiet u s-sinkijiet tas-sħana, bl-użu ta' arja kkompressata. Kun żgur li s-sistema tkun mitfija u skonnettjata qabel ma tnaddafha.
- Iċċekkja l-Konnessjonijiet: Occasionally verify that all cables (power, data, peripheral) are securely connected to the motherboard and other components.
- Aġġornamenti tal-BIOS/UEFI: Check the Zyyini support websit għal aġġornamenti tal-BIOS/UEFI. L-aġġornamenti jistgħu jtejbu l-kompatibilità, l-istabbiltà, u l-prestazzjoni. Segwi l-istruzzjonijiet tal-aġġornament bir-reqqa biex tevita ħsara lis-sistema.
- Aġġornamenti tas-Software: Żomm is-sistema operattiva u d-drivers tiegħek aġġornati biex tiżgura prestazzjoni u sigurtà ottimali.
7 Issolvi l-problemi
Din it-taqsima tipprovdi soluzzjonijiet għal kwistjonijiet komuni li tista’ tiltaqa’ magħhom.
7.1. Ebda Qawwa / Is-Sistema Ma Tixgħelx
- Iċċekkja l-Konnessjonijiet tal-Enerġija: Ensure the 24-pin ATX and 8-pin CPU power cables are firmly connected to the motherboard and the power supply.
- Swiċċ tal-Provvista tal-Enerġija: Verify that the power switch on the PSU is in the 'ON' position.
- Konnetturi tal-Panew ta' Quddiem: Double-check the power switch connector on the motherboard's front panel header.
- Sokit tal-ħajt: Ittestja s-sokit tal-ħajt b'apparat ieħor biex tiżgura li għandu l-enerġija.
7.2. L-ebda Wiri fuq il-Monitor
- Konnessjoni tal-monitor: Ensure the display cable (HDMI/VGA) is securely connected to both the graphics card/motherboard and the monitor.
- Karta Grafika: If using a dedicated graphics card, ensure it is properly seated in the PCIe slot and any required power cables are connected.
- RAM: Reseat the RAM modules. Try booting with only one RAM stick if you have multiple.
- CPU: Ensure the CPU is correctly installed and the CPU cooler is making proper contact.
7.3. System Instability / Random Crashes
- Is-sħana żejda: Check CPU and GPU temperatures. Ensure all fans are working correctly and heatsinks are free of dust.
- Kwistjonijiet tar-RAM: Mexxi għodda dijanjostika tal-memorja (eż., Windows Memory Diagnostic) biex tiċċekkja jekk hemmx RAM difettuża.
- Kwistjonijiet tas-sewwieq: Ensure all drivers are up-to-date and correctly installed.
- Provvista tal-Enerġija: An insufficient or failing power supply can cause instability.
7.4. Component Not Detected (e.g., Storage, USB Device)
- Iċċekkja l-Konnessjonijiet: Verify that the component's power and data cables are securely connected.
- Is-Settings tal-BIOS/UEFI: Check if the component is enabled in the BIOS/UEFI settings. For M.2 drives, ensure the correct protocol (NVME/SATA) is selected if applicable via jumper switch.
- Sewwieqa: Install the latest drivers for the component.
- Maniġer tal-Apparat: In your operating system, check Device Manager (Windows) or equivalent to see if the device is listed, even with an error.
8. Appoġġ u Garanzija
For technical support or warranty inquiries, please contact Zyyini customer service through the retailer where you purchased the product or visit the official Zyyini support website. Please have your product model (X99H) and purchase information ready when contacting support.
Specific warranty terms and conditions may vary by region and retailer. Please refer to your purchase documentation for detailed warranty information.