1. Introduzzjoni
Thank you for choosing the Lydsto WL09 Robot Window Cleaner. This device is designed to simplify window cleaning with its advanced features, including a dual ultrasonic spray system, intelligent suction power, and multiple cleaning modes. Please read this manual carefully before use to ensure safe and efficient operation.
2. Informazzjoni dwar is-Sigurtà
- Always connect the safety rope to a secure, immovable object before operating the robot.
- Ensure the power cord is securely connected to prevent accidental disconnection.
- Do not use the robot on cracked, damaged, or excessively dirty glass surfaces.
- Avoid using the robot in extreme temperatures (below 0°C or above 40°C).
- Żomm ir-robot 'il bogħod mit-tfal u l-annimali domestiċi waqt l-operazzjoni.
- Only use clean water or recommended window cleaning solution in the water tank.
- The robot has an emergency battery for power outages, providing approximately 25 minutes of operation.
3. Setup
3.1 Tneħħija tal-kaxxa u l-komponenti
The Lydsto WL09 package includes:
- Lydsto WL09 Robot Window Cleaner (x1)
- Storage Box (x1)
- Kontroll mill-bogħod (x1)
- Cleaning Cloths (x8, including 1 pre-installed pair)
- Adapter (x1)
- Ħabel tas-Sigurtà (x1)
- Kejbil tal-Enerġija (x1)
- Replacement Nozzles (x2)
- Empty Bottle (x1)

Image: All components of the Lydsto WL09 Robot Window Cleaner, including the robot, remote control, power adapter, safety rope, cleaning cloths, and empty bottle.
3.2 Installing Cleaning Cloths
Attach the microfiber cleaning cloths to the rotating discs on the underside of the robot. Ensure they are stretched smoothly and cover the entire disc surface.

Image: A close-up of hands attaching the microfiber cleaning cloths to the rotating pads of the Lydsto WL09 robot.
3.3 Mili tat-Tank tal-Ilma
Open the water tank cover and use the provided empty bottle to fill the 80ml tank with clean water or a suitable window cleaning solution. Close the cover tightly to prevent leakage.
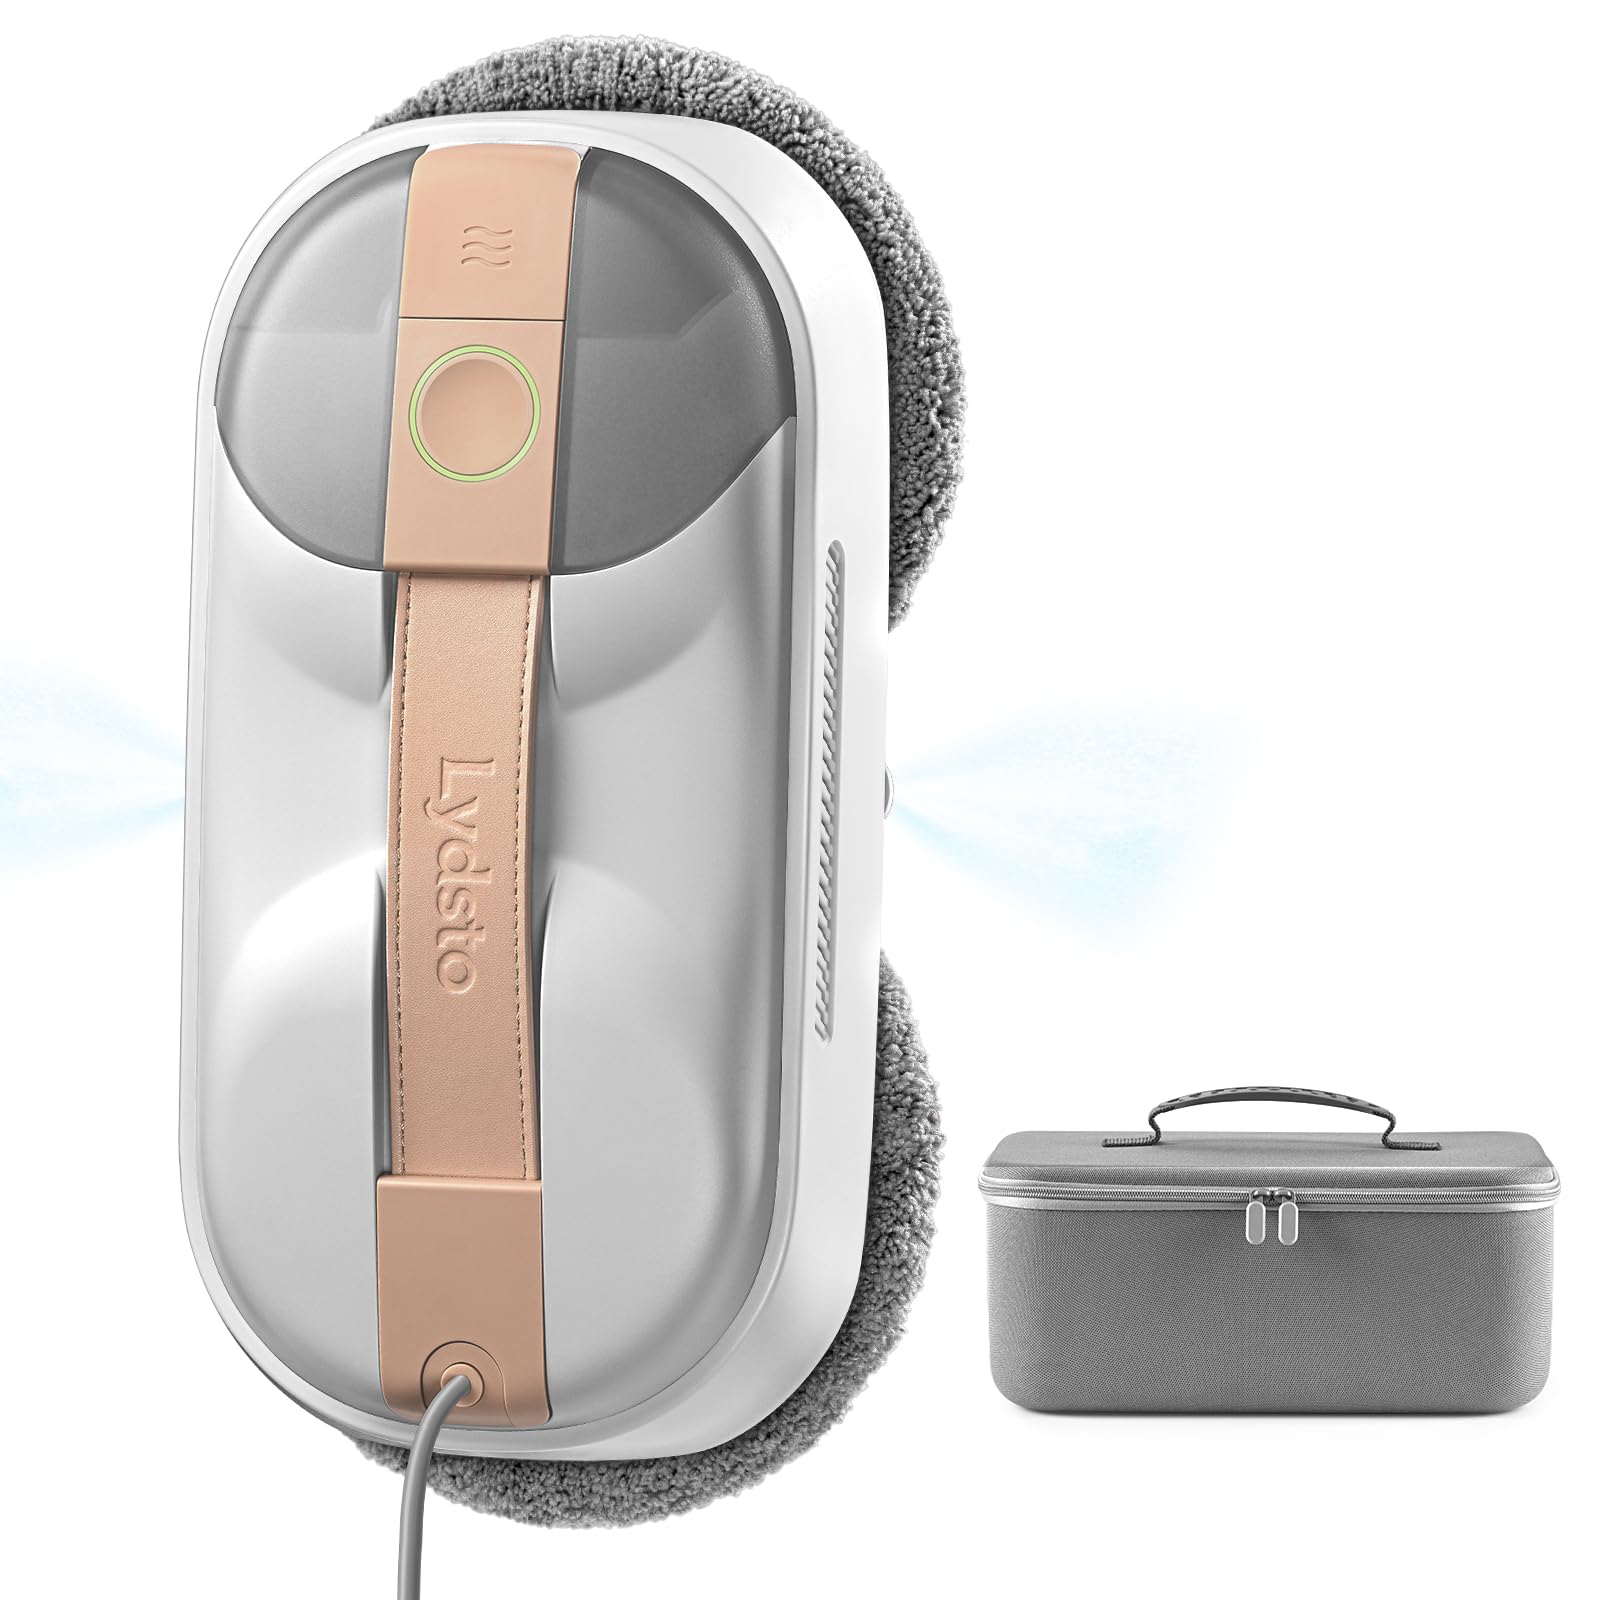
Image: The Lydsto WL09 robot showing its visible 80ml water tank and dual ultrasonic spray nozzles.
3.4 Connecting Power and Safety Rope
Connect the power cable to the robot and the adapter, then plug the adapter into a power outlet. Securely attach the safety rope to a fixed point, such as a window frame or a sturdy furniture leg, to prevent the robot from falling.
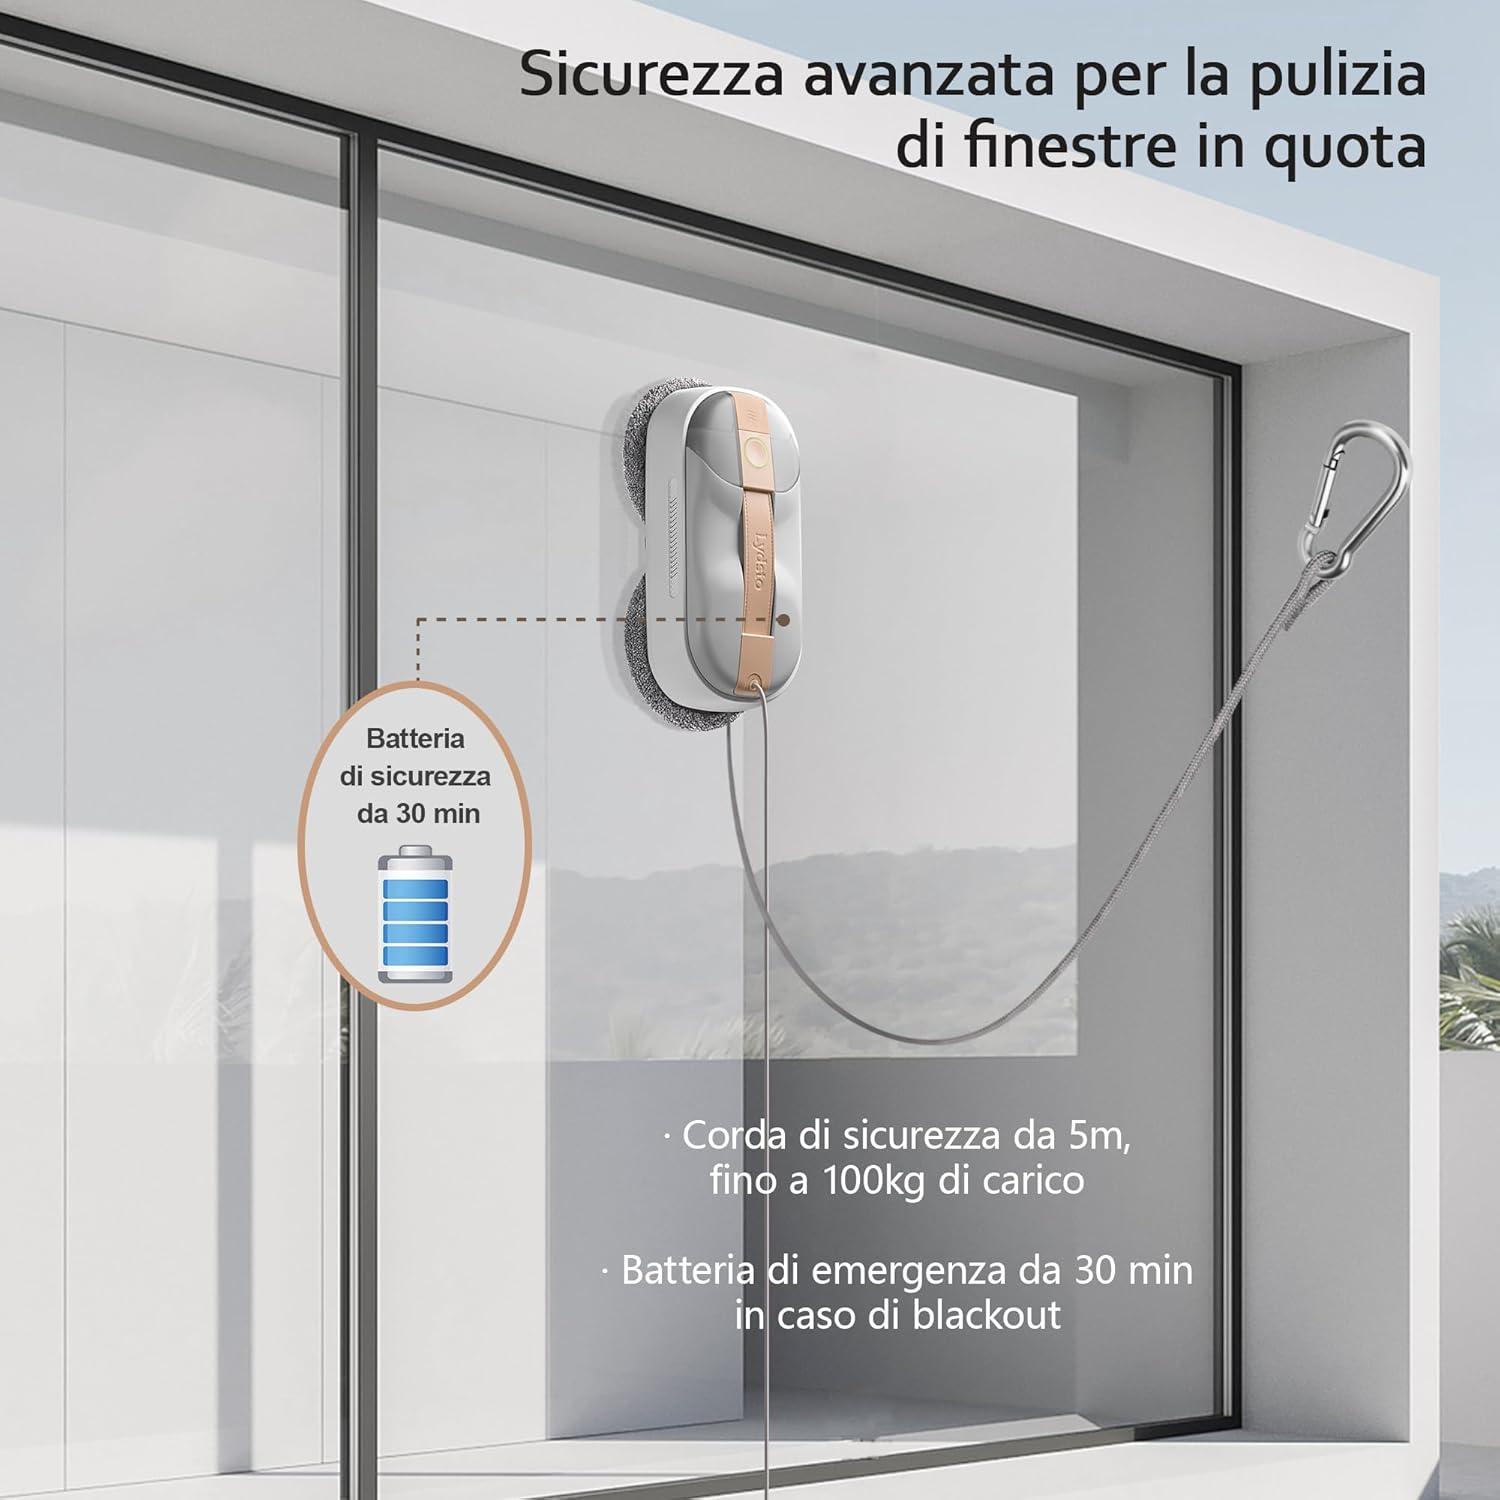
Image: The Lydsto WL09 robot attached to a window, illustrating the safety rope connected to a secure point.
4. Istruzzjonijiet Operattivi
4.1 Tibda tal-Magni
Place the robot on the glass surface. Press and hold the power button on the robot for 3 seconds to turn it on. Once the robot is securely adsorbed to the glass, briefly press the start button to begin cleaning.
Video: A demonstration of a robot window cleaner being placed on a window and starting its cleaning cycle. This video is provided by a seller and shows general operation.
4.2 Automatic Route Planning
The Lydsto WL09 features intelligent AI navigation. After starting, the robot will automatically detect the window edges and plan an efficient S-shaped cleaning path to cover the entire surface.

Image: The Lydsto WL09 robot cleaning a window, illustrating its intelligent navigation and cleaning patterns.
4.3 Użu tal-Kontroll mill-bogħod
Use the remote control to manually direct the robot, select different cleaning modes (automatic, deep clean, targeted clean), and control the water spray function. The remote allows for convenient operation without manual adjustment.
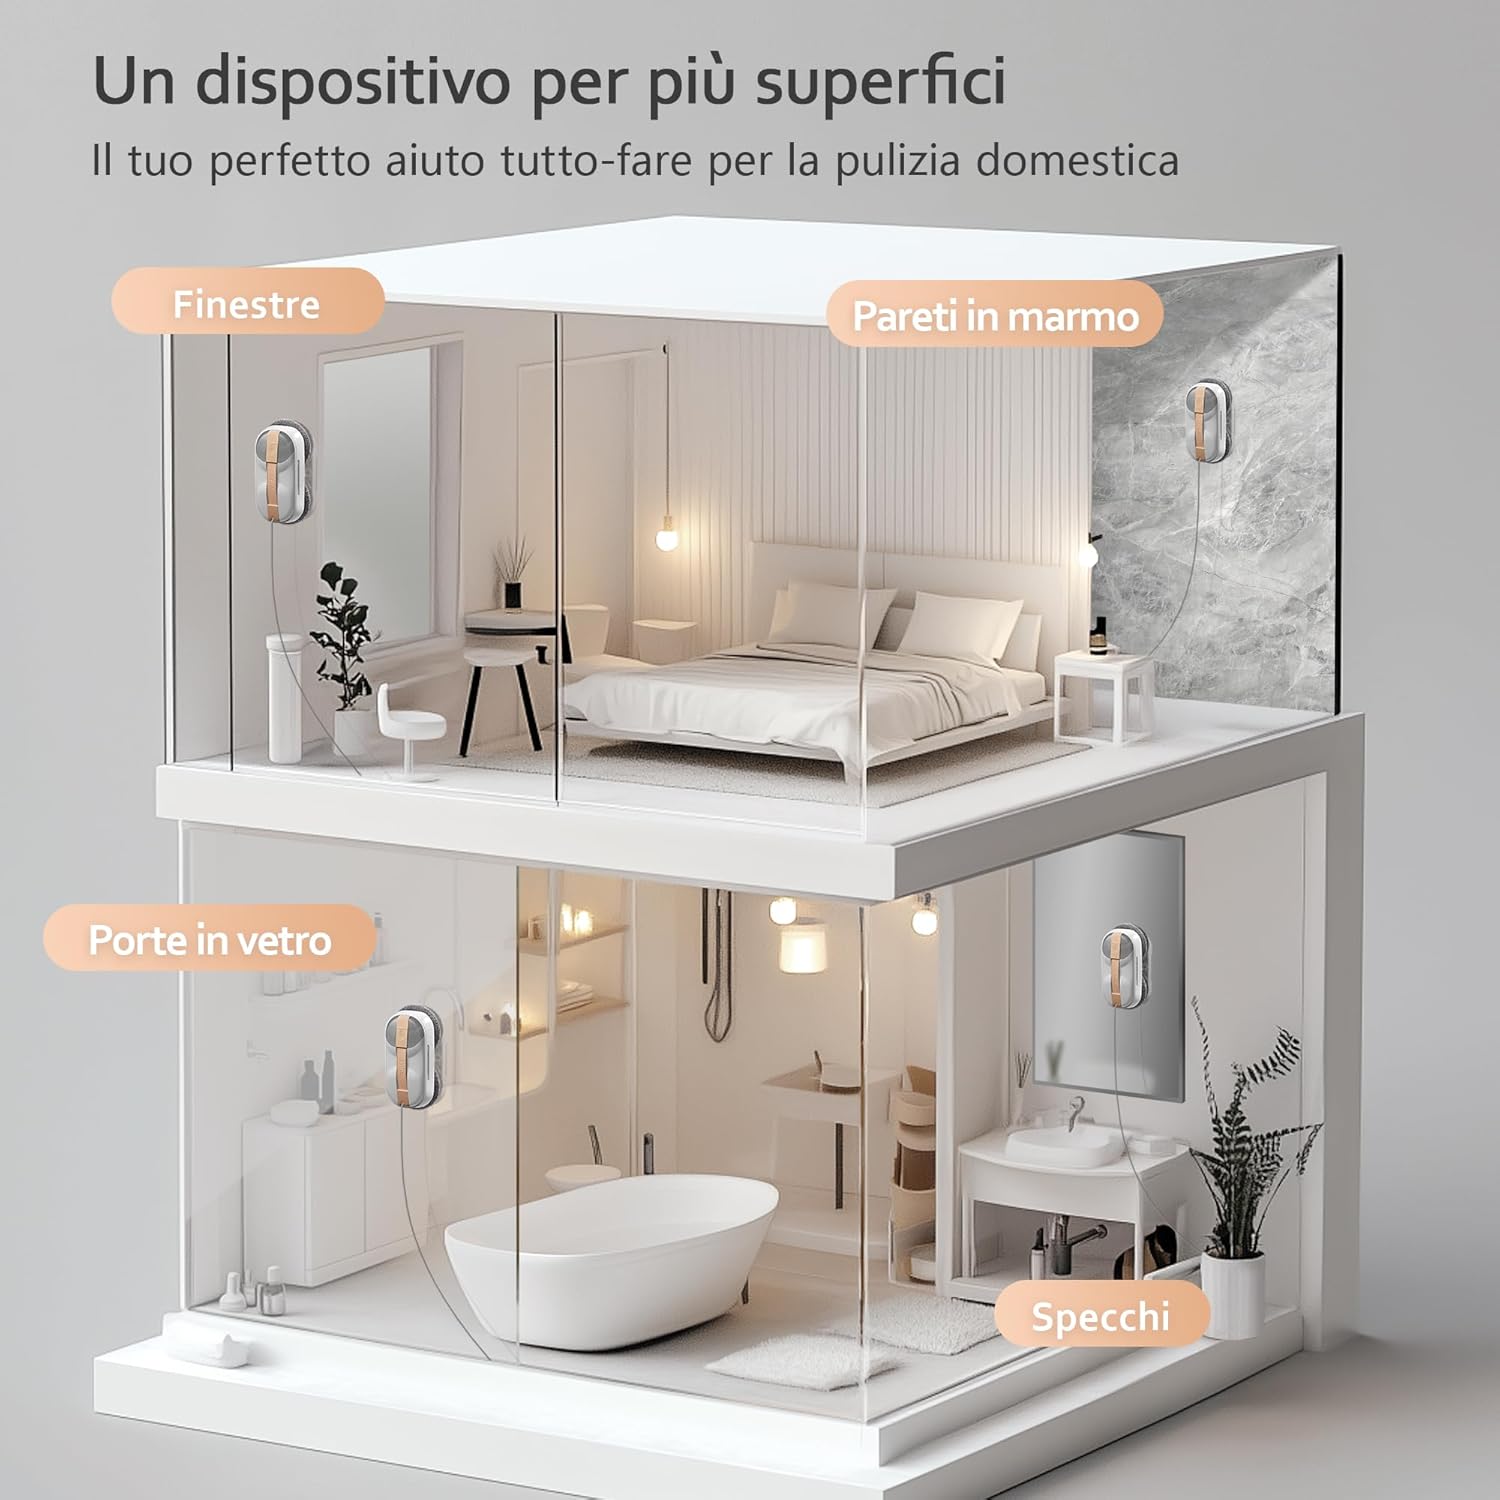
Image: The remote control for the Lydsto WL09 robot, highlighting buttons for automatic, deep, and targeted cleaning modes, as well as water spray control.
Video: A robot window cleaner operating on a window, demonstrating its movement and the use of a remote control. This video is provided by a seller and shows general operation.
5. Manutenzjoni
5.1 Cleaning Cloths
After each use, remove the cleaning cloths from the rotating discs. They can be washed in a washing machine (gentle cycle) but should not be tumble-dried or ironed. Allow them to air dry naturally.
5.2 Chassis Cleaning
Wipe the robot's chassis clean with a dry cloth. For the bottom suction port, wipe it clean with a dry cloth to avoid damage to the product's suction force.
5.3 Sostituzzjoni taż-Żennuna
If the robot cannot spray water in wet wiping mode, the nozzle may be blocked. Use pliers to gently pull off the old nozzle and replace it with a new one from the packaging accessories.
6 Issolvi l-problemi
- Robot not adhering: Ensure the glass surface is clean and dry. Check for sufficient suction power (6000Pa).
- Uneven cleaning: Replace dirty cleaning cloths. Ensure the water tank is filled.
- Il-kontroll mill-bogħod ma jaħdimx: Iċċekkja l-batteriji fil-kontroll remot. Kun żgur li m'hemm l-ebda ostaklu bejn il-kontroll remot u r-robot.
- Machine stops unexpectedly: Check power connection. The emergency battery provides temporary power during outages.
7. Speċifikazzjonijiet
- Ditta: Lydsto
- Isem tal-Mudell: WL09
- Kulur: Griż
- Dimensjonijiet tal-Prodott: 29.2 x 14.3 x 8.7 ċm
- Piż tal-oġġett: 2.8 Kilogrammi
- Voltage: 14.8 Volts
- Karatteristiċi Speċjali: Dual ultrasonic spray system, Intelligent suction power adjustment, Two high-speed rotating discs
- Uċuħ Rakkomandati: Glass, Plywood (smooth surfaces)
8. Garanzija u Appoġġ
For warranty information and customer support, please refer to the contact details provided with your purchase or visit the official Lydsto websit. Żomm l-irċevuta tax-xiri tiegħek bħala prova tax-xiri.