
Introduzzjoni
The Wio Tracker L1 Pro is a versatile and robust device designed for off-grid communication and tracking. It comes ready-to-use with a durable 3D-printed enclosure and pre-flashed Meshtastic firmware, ensuring a seamless setup experience. This device offers triple power supply options, including a built-in 2000mAh battery, Type-C fast charging, and solar input support, making it ideal for various outdoor and mobile applications. Its high expandability, compatible with the Grove ecosystem, and inclusion of PTH headers and an SWD debugging interface, allow for custom hardware expansion and advanced development.
- Ready-to-Use 3D-Printed Enclosure: The L1 Pro comes with a rugged, lightweight 3D-printed enclosure designed for immediate use—no additional assembly needed. Whether handheld or clipped onto gear, it’s built for adventure in any environment.
- Pre-flashed with Meshtastic firmware: Ready to use out of the box with pre-installed Meshtastic firmware for seamless setup.
- Triple Power Supply Options: Equipped with a built-in 2000mAh battery, Type-C fast charging, and solar input support, enabling flexible deployment in diverse environments—perfect for outdoor and mobile use.
- Espandibbiltà Għolja: Fully compatible with the Grove ecosystem, and includes PTH headers and an SWD debugging interface for custom hardware expansion and advanced development.
X'hemm fil-Kaxxa
- Wio Tracker L1 Board with 1.3 inch OLED Display, 3D-Printed Enclosure and battery
- LoRa Antenna
Prodott Overview

Figure 1: Wio Tracker L1 Pro device with antenna and key features highlighted, including nylon 3D-printed case, OLED & L76K GPS, and 2000mAh built-in battery.

Figura 2: Dettaljat view of Wio Tracker L1 Pro highlighting its components: 1.3 inch OLED Display, Menu Button, 4-Way Joystick, Buzzer, RST Button, Power Switch, Yellow LED for Mesh Status, USB Type-C port, Red LED for Charging Status, and Yellow LED for Solar Status.
Setup
Video 1: Unboxing Introduction for L1 Pro. This video demonstrates the unboxing process and introduces the components of the Wio Tracker L1 Pro.
Video 2: Assemble the N37 Kit. This video guides you through the assembly process of the N37 kit, which includes the Wio Tracker L1 Pro.
Video 3: How to Flash Firmware for Wio Tracker L1 Pro. This video provides instructions on how to flash the firmware for your Wio Tracker L1 Pro device.
Operazzjoni
Video 4: How to Connect the L1 Pro to Your Phone. Learn how to connect your Wio Tracker L1 Pro to your mobile phone using this instructional video.
Video 5: Wio Tracker L1 Pro Operating Modes Overview. An fuqview of the various operating modes available on the Wio Tracker L1 Pro.

Figura 3: Quddiem view of the Wio Tracker L1 Pro, showing the OLED display and control buttons.
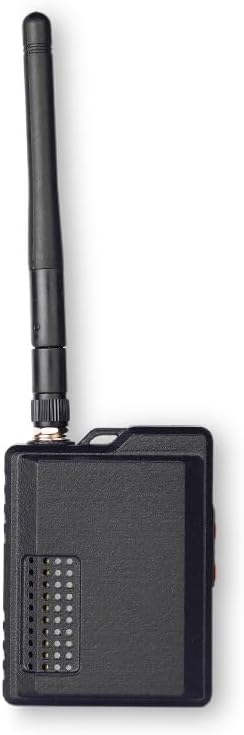
Figura 4: Ġenb view of the Wio Tracker L1 Pro, highlighting the power switch and USB-C port.
Manutenzjoni
To ensure the longevity and optimal performance of your Wio Tracker L1 Pro, follow these maintenance guidelines:
- Tindif: Use a soft, dry cloth to clean the device. Avoid using harsh chemicals or abrasive materials that could damage the casing jew skrin.
- Kura tal-batterija: The device features a built-in 2000mAh battery. For best battery life, avoid extreme temperatures and fully discharge and recharge the device periodically. Utilize the Type-C port for charging or connect a compatible solar panel for sustained power.
- Ħażna: When not in use for extended periods, store the device in a cool, dry place. Ensure the battery is partially charged (around 50%) before storage to prevent deep discharge.
- Antenna: Ensure the LoRa antenna is securely attached. Handle with care to prevent damage to the connector.
Issolvi l-problemi
If you encounter issues with your Wio Tracker L1 Pro, consider the following troubleshooting steps:
- L-Apparat Mhux Jixgħel: Ensure the battery is charged. Connect the device to a power source via the Type-C port. Check the power switch position.
- Connectivity Issues (Bluetooth/LoRa): Verify that Bluetooth is enabled on your phone and the device. Ensure the Meshtastic app is updated. Check the LoRa antenna connection. If issues persist, try re-flashing the firmware as shown in the setup video.
- GPS Signal Problems: Ensure the device has a clear line of sight to the sky. Allow sufficient time for GPS acquisition.
- Falliment tal-Aġġornament tal-Firmware: Double-check that the correct firmware file is being used and that the device is in DFU mode. Ensure a stable USB connection during the flashing process.
- Apparat li ma jirrispondix: Use the RST button to perform a soft reset. If unresponsive, toggle the power switch off and on.
Speċifikazzjonijiet
| Karatteristika | Dettall |
|---|---|
| Dimensjonijiet tal-Prodott | 2.59 x 1.45 x 3.93 pulzieri |
| Piż tal-oġġett | 3.68 uqija |
| Numru tal-Mudell tal-Oġġett | L1Pro |
| Teknoloġiji tal-Konnettività | Bluetooth, GPS, LoRa |
| Applikazzjoni Appoġġjata | Meshtastic app |
| Użi Speċifiċi Għall-Prodott | Container racking, Maker Develop, Outdoor Activities |
| Materjal | 3D-Printed Enclosure |
| Manifattur | studio taż-żerriegħa |
| Data L-Ewwel Disponibbli | 22 ta’ Awwissu, 2025 |
Garanzija
The Wio Tracker L1 Pro is covered by a manufacturer's warranty. Please refer to the official seeed studio website or contact customer support for detailed warranty terms and conditions. Keep your proof of purchase for any warranty claims.
Appoġġ
For further assistance, technical support, or to explore additional products and resources, please visit the official seeed studio store or contact their customer service:
- Maħżen Uffiċjali: seeed studio Amazon Store
- Mistoqsijiet Ġenerali: Refer to the contact information provided on the product packaging or the official seeed studio websit.