
1. Introduzzjoni
This manual provides detailed instructions for the installation, operation, and maintenance of your Duronic DM6A2 Dual Monitor Arm. The DM6A2 is designed to securely hold two computer monitors, offering flexible adjustments for an ergonomic workspace. It features a gas spring mechanism for smooth height adjustments and integrated cable management to maintain an organized desk.
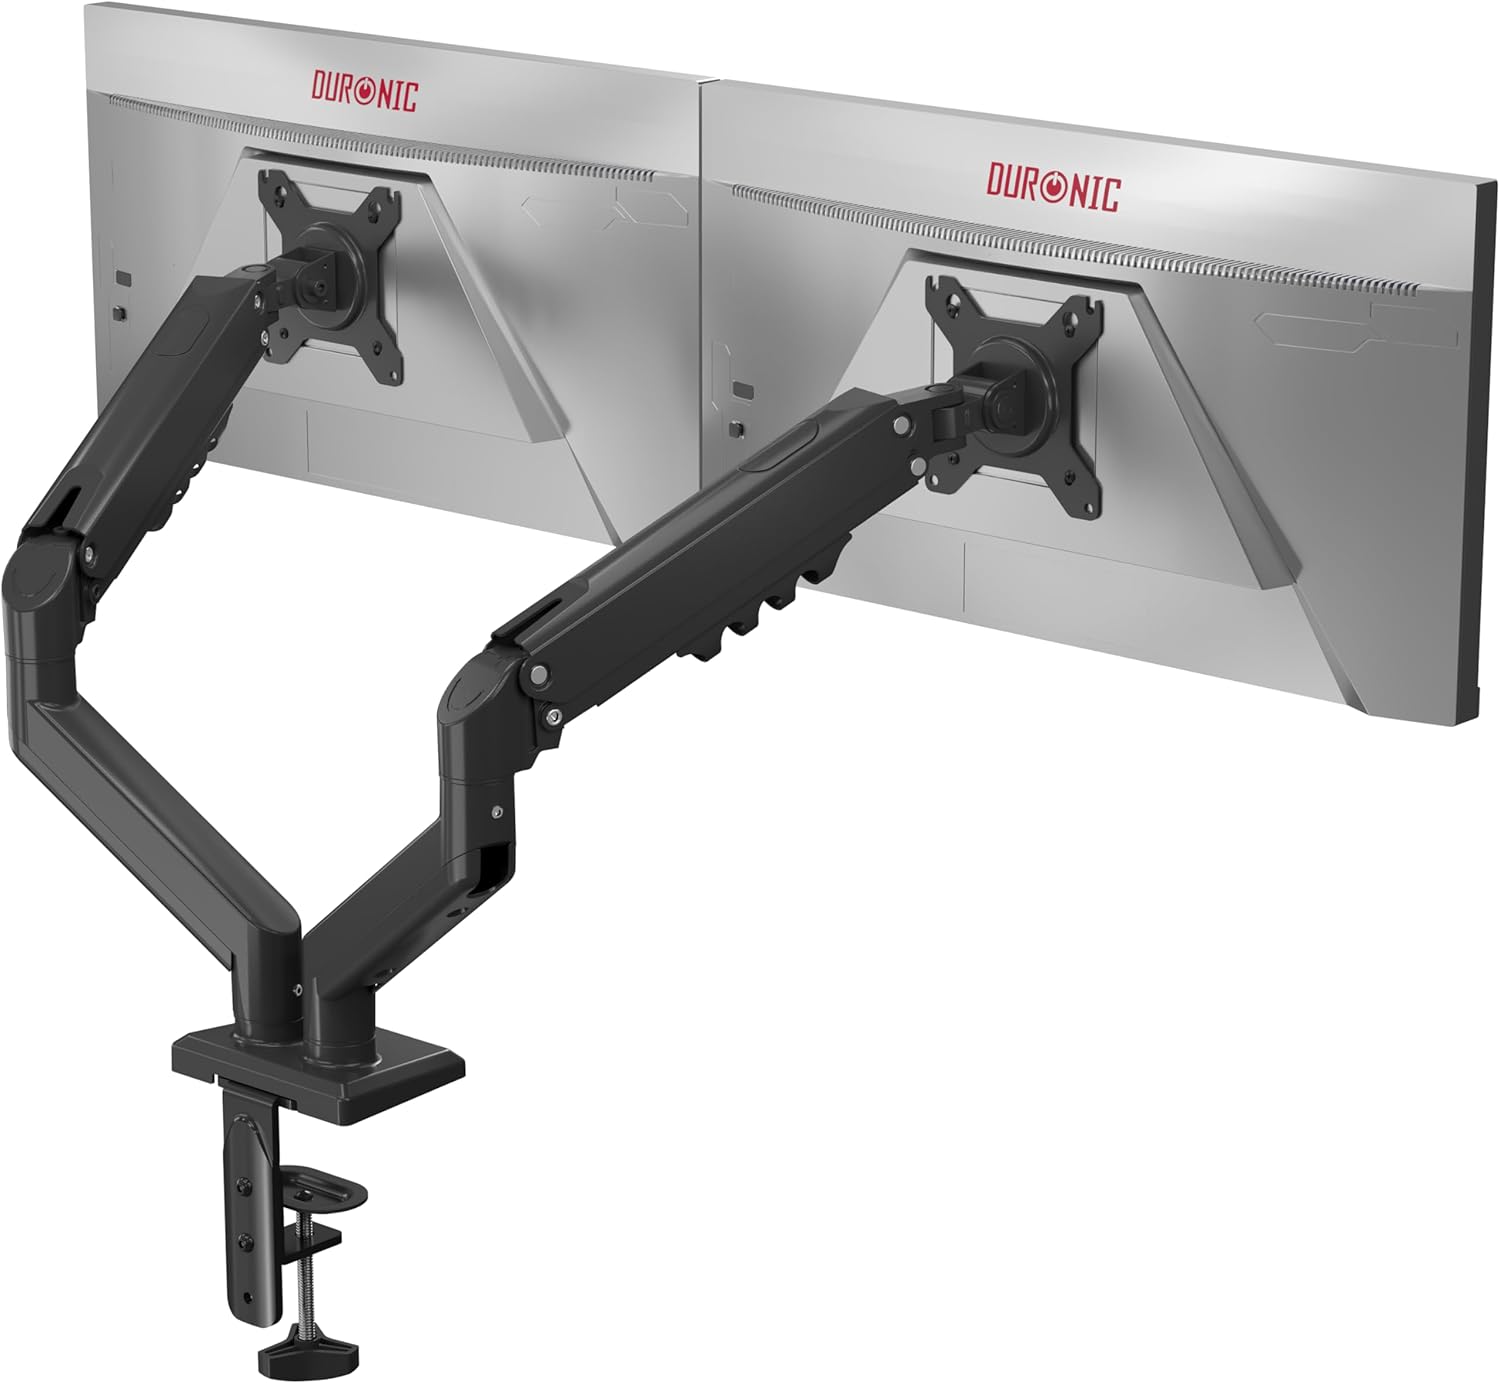
Image 1.1: The Duronic DM6A2 Dual Monitor Arm supporting two monitors.
2. Informazzjoni dwar is-Sigurtà
Jekk jogħġbok aqra l-istruzzjonijiet kollha bir-reqqa qabel l-installazzjoni u l-użu. Jekk ma ssegwix dawn l-istruzzjonijiet, dan jista' jirriżulta fi ħsara lill-prodott, korriment, jew ħsara lill-proprjetà.
- Kun żgur li l-wiċċ tal-iskrivanija tiegħek huwa b'saħħtu biżżejjed biex isostni l-piż ikkombinat tad-driegħ tal-monitor u ż-żewġ monitors.
- Teċċedix il-kapaċità massima ta' piż ta' 9 kg (19.8 lbs) għal kull driegħ.
- Ensure all screws are tightened securely before use. Do not overtighten.
- Żomm it-tfal u l-annimali domestiċi 'l bogħod miż-żona tal-installazzjoni.
- Adjust the gas spring tension carefully to match your monitor's weight. Improper tension can cause monitors to drop or spring up unexpectedly.
3. Kontenut tal-Pakkett
Verify that all components are present before beginning installation. If any parts are missing or damaged, please contact Duronic customer support.
- Main pole and base
- Two monitor arms with gas springs
- Two VESA mounting plates
- Desk clamp and grommet mounting hardware
- Cable management clips/covers
- Assembly tools (Allen keys, screws)
4. Istruzzjonijiet ta' Setup
4.1. Choose Your Mounting Method (Clamp jew Grommet)
The DM6A2 offers two installation options: desk clamp or grommet mount. Select the method suitable for your desk.

Immaġni 4.1: Klabb tal-iskrivanijaamp supports thickness from 15mm to 100mm. Grommet mount supports thickness from 15mm to 50mm.
4.1.1. Desk Clamp Installazzjoni
- Waħħal il-clamp base to the main pole.
- Poġġi l-clamp fit-tarf tal-iskrivanija tiegħek.
- Issikka l-clamp screw until the arm is securely fastened to the desk. Ensure it is stable.
4.1.2. Installazzjoni tal-Grommet Mount
- Jekk l-iskrivanija tiegħek għandha toqba tal-grommet, daħħal il-bażi tal-grommet mit-toqba.
- Waħħal il-bażi minn taħt l-iskrivanija billi tuża l-pjanċa u l-iskorfina pprovduti.
- Attach the main pole to the grommet base.
4.2. Waħħal il-Pjanċi VESA mal-Monituri
The DM6A2 supports VESA 75x75mm and 100x100mm mounting patterns.

Image 4.2: The DM6A2 supports monitors from 13 to 32 inches and VESA patterns 75x75mm and 100x100mm, with a maximum weight of 9kg per arm.
- Poġġi l-monitor tiegħek b'wiċċu 'l isfel bir-reqqa fuq wiċċ artab u nadif.
- Align the VESA mounting plate with the screw holes on the back of your monitor.
- Secure the plate using the appropriate screws provided. Do not overtighten.
4.3. Mount Monitors to Arms
- Slide the VESA plate with the attached monitor onto the end of each monitor arm.
- Ensure the monitor is securely seated on the arm.
- Tighten any locking screws on the VESA head to prevent accidental detachment.
4.4. Aġġusta t-Tensjoni tar-Rebbiegħa tal-Gass
The gas spring mechanism allows for smooth and stable monitor positioning. You must adjust the tension to match the weight of your monitors.

Image 4.3: The internal gas spring mechanism provides smooth monitor adjustments.

Image 4.4: Adjust the gas spring tension using the provided tool.
- Use the provided Allen key to adjust the tension screw located on the arm.
- Turn clockwise to increase tension (for heavier monitors) or counter-clockwise to decrease tension (for lighter monitors).
- Adjust until the monitor stays at the desired height when released, without drifting up or down.
4.5. Ġestjoni tal-Kejbil
Route your monitor cables through the integrated cable management clips or covers on the arms to keep your workspace tidy.
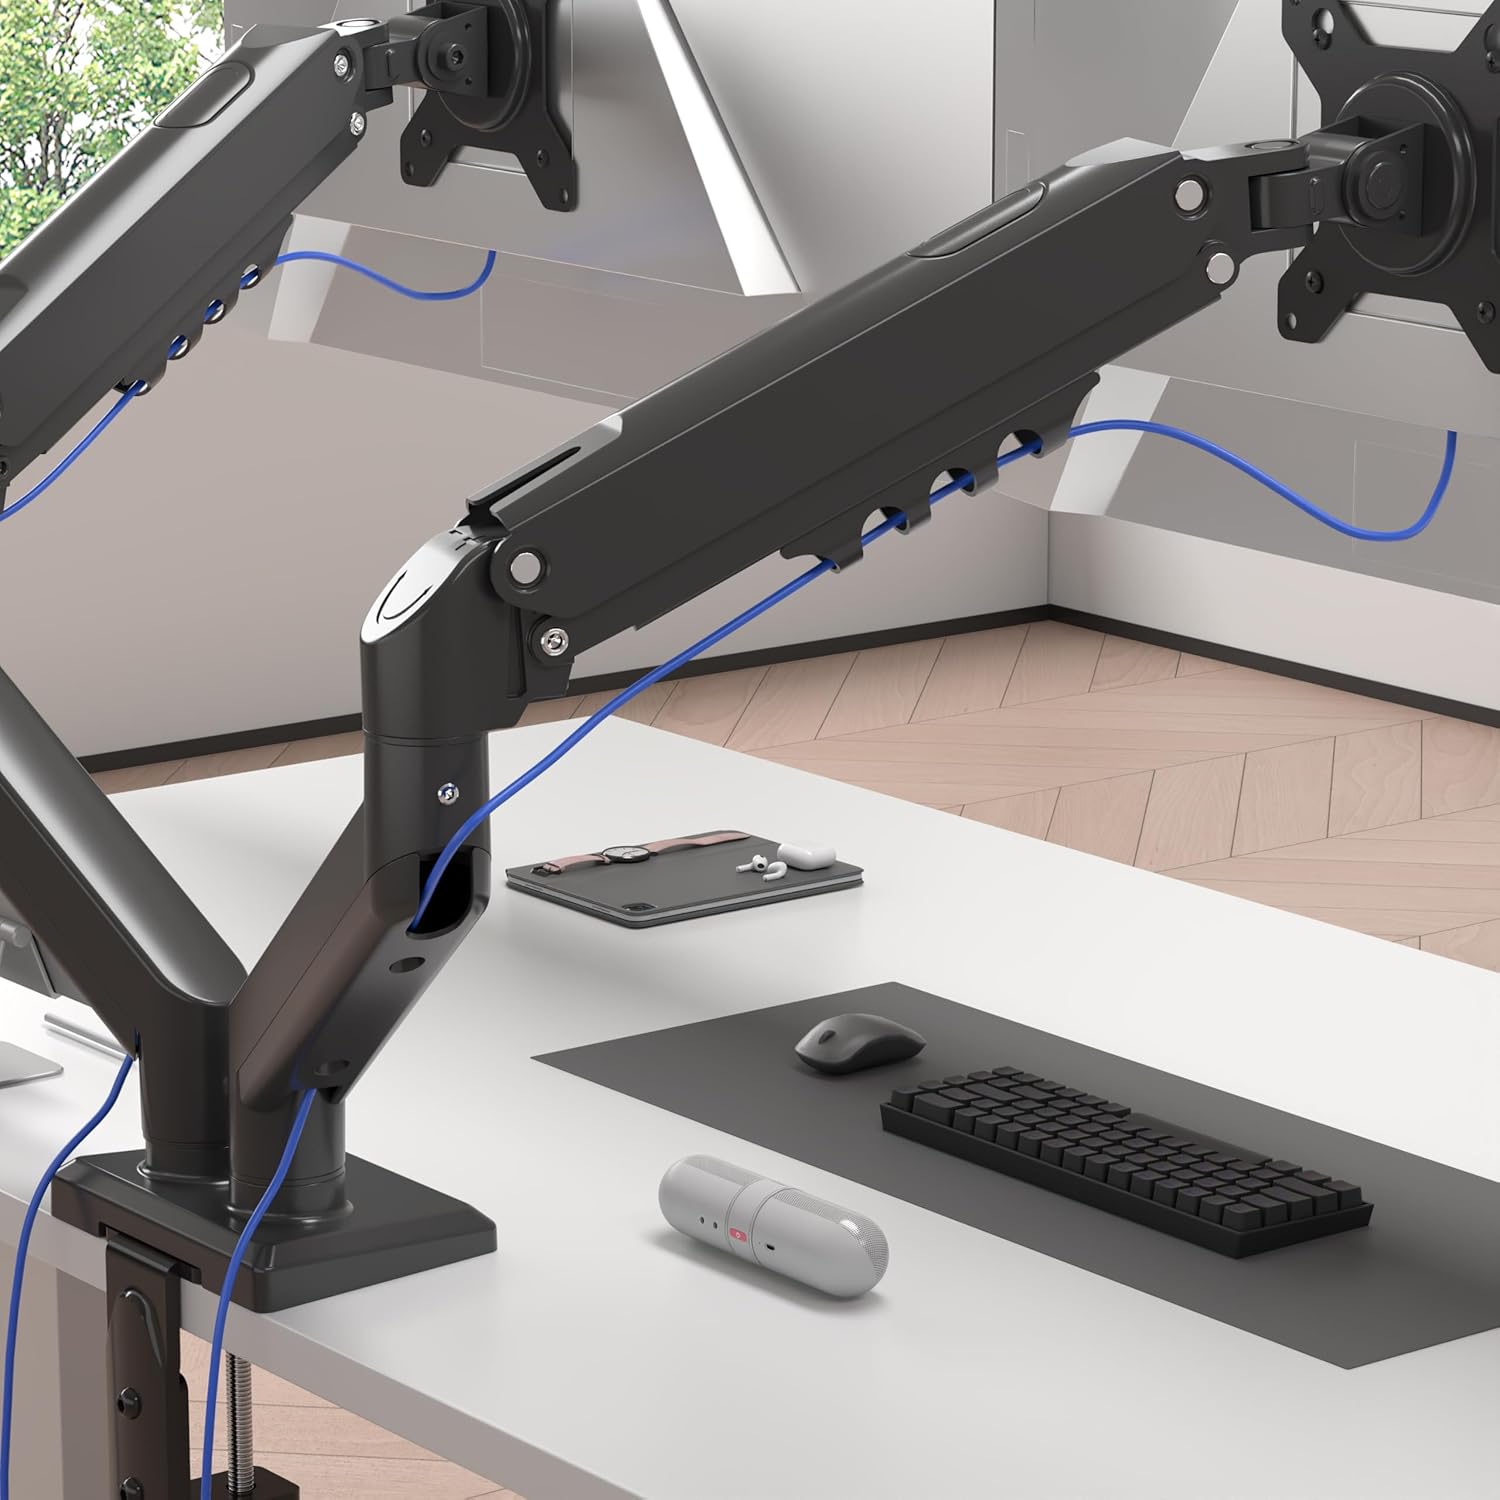
Image 4.5: Cables are neatly organized using the arm's cable management system.
5. Istruzzjonijiet Operattivi (Aġġustamenti)
The Duronic DM6A2 offers a range of adjustments for optimal viewkumdità.
5.1. Aġġustament tal-Għoli
Gently push or pull the monitor to the desired vertical position. The gas spring will hold it in place once the tension is correctly set.
5.2. Aġġustament tal-Mejjel
The monitor can be tilted up or down to reduce glare and improve viewangoli.

Image 5.1: The monitor can be tilted from -90° to +85°.
5.3. Aġġustament tad-dawrien
Swivel the monitor left or right to share your screen with others or adjust your viewangolu tal-ing.

Image 5.2: The monitor can swivel +/-90°.
5.4. Rotation Adjustment
Dawwar il-monitor 360 grad biex taqleb bejn l-orjentazzjonijiet orizzontali u vertikali.

Image 5.3: The monitor can rotate 360° for landscape or portrait viewing.
6. Manutenzjoni
- Tindif: Imsaħ id-driegħ tal-monitor b'ċarruta ratba uamp drapp. Evita cleaners li joborxu.
- Kontrolli perjodiċi: Regularly check all screws and connections to ensure they remain tight and secure. Retighten if necessary.
- Aġġustament tar-Rebbiegħa tal-Gass: If your monitor's weight changes, or if the arm starts to drift, readjust the gas spring tension as described in Section 4.4.
7 Issolvi l-problemi
- Monitor sags or drops: The gas spring tension is too low for the monitor's weight. Increase tension by turning the adjustment screw clockwise.
- Monitor springs up or is difficult to push down: The gas spring tension is too high for the monitor's weight. Decrease tension by turning the adjustment screw counter-clockwise.
- Id-driegħ mhux stabbli: Żgura li l-iskrivanija clamp or grommet mount is securely tightened to the desk. Check all arm connections for tightness.
- Monitor does not rotate/tilt/swivel smoothly: Check for any obstructions. Ensure the pivot points are not overtightened. A small amount of silicone lubricant can be applied to moving parts if needed, but avoid contact with electrical components.
8. Speċifikazzjonijiet
| Numru tal-Mudell | DM6A2 |
| Brand | Duronic |
| Daqs tal-Monitor Kompatibbli | 13 - 32 pulzieri |
| Weight Capacity per Arm | Sa 9 kg (19.8 lbs) |
| Kompatibilità VESA | 75x75mm, 100x100mm |
| Medda Mejjel | -90° sa +85° |
| Medda li ddur | +/- 90 ° |
| Rotazzjoni | 360° (Landscape/Portrait) |
| Għażliet ta 'Immuntar | Desk Clamp, Grommet Mount |
| Desk Clamp Ħxuna | 15mm - 100mm |
| Ħxuna tal-Immuntar tal-Grommet | 15mm - 50mm |
| Materjal | Aluminju, Metall |
9. Garanzija u Appoġġ
For warranty information or technical support, please refer to the documentation included with your purchase or visit the official Duronic website. If you encounter any issues not covered in this manual, please contact Duronic customer service for assistance.