Introduzzjoni
This manual provides detailed instructions for the assembly, operation, and maintenance of your Generic L-Shaped Desk D7456963245. Please read all instructions carefully before beginning assembly and retain this manual for future reference.
Informazzjoni dwar is-Sigurtà
- Kun żgur li l-partijiet kollha huma preżenti qabel l-immuntar.
- Arma fuq wiċċ artab u nadif biex tevita l-grif.
- Tissikkax iżżejjed il-viti waqt l-assemblaġġ.
- Żomm partijiet żgħar 'il bogħod mit-tfal.
- Do not exceed the desk's weight capacity.
- For electrical components (charging station, LED lights), ensure proper power supply and avoid liquid contact.
Kontenut tal-Pakkett
Your desk is shipped in two packages. Please verify all components are present before starting assembly.
Refer to the included parts list diagram in your physical manual for identification of all hardware and furniture panels.
Setup u Assemblea
Assembly is required for this L-shaped desk. Follow the numbered steps carefully. It is recommended to have two people for assembly.
Pass 1: Iftaħ u Identifika l-Partijiet
Carefully unpack all components and lay them out on a soft, clean surface. Identify each part using the provided hardware and panel lists.

Immaġni: Overall dimensions of the L-shaped desk, including the main desktop, integrated bookshelf, drawers, and side shelving unit. Dimensions are provided in inches.
Step 2: Assemble the Main Desk Frame
Follow the diagram in your physical manual to connect the main desktop panels and support legs. Ensure all cam locks and screws are securely fastened without overtightening.
Step 3: Install Drawers and Shelving
Install the drawer slides onto the designated panels. Assemble the drawers according to the instructions and insert them. Attach the bookshelf and side shelving units to the main desk frame.

Immaġni: Li tħares 'il quddiem view of the fully assembled L-shaped desk, highlighting the spacious desktop, three storage drawers, and various open shelves for organization.
Step 4: Connect the Charging Station and LED Lights
The charging station is pre-installed. Connect its power cord to a wall outlet. For the LED lights, insert the light strip into the designated groove and connect it to the power source. Use the provided remote control to operate the LED lights.

Immaġni: The L-shaped desk set up with a computer, demonstrating the integrated power outlets with USB ports, the pegboard for accessories, and the LED lighting feature. A remote control for the LED lights is also pictured.

Immaġni: A detailed graphic illustrating the specifications of the integrated power strip, including three 110V/12A AC outlets, two 5V/2A USB ports, and the length of the power cord (4.92 feet).
Istruzzjonijiet Operattivi
Uża l-Istazzjon tal-Iċċarġjar
The desk includes a pre-installed charging station with 3 AC power outlets and 2 USB ports. Plug the desk's power cord into a standard wall outlet. You can then plug in your devices such as laptops, monitors, and smartphones directly into the desk's integrated outlets.
Tħaddim tad-Dwal LED
The LED lights are controlled by a remote control. Point the remote at the LED receiver to turn the lights on/off, change colors (16 available), and adjust brightness or modes.
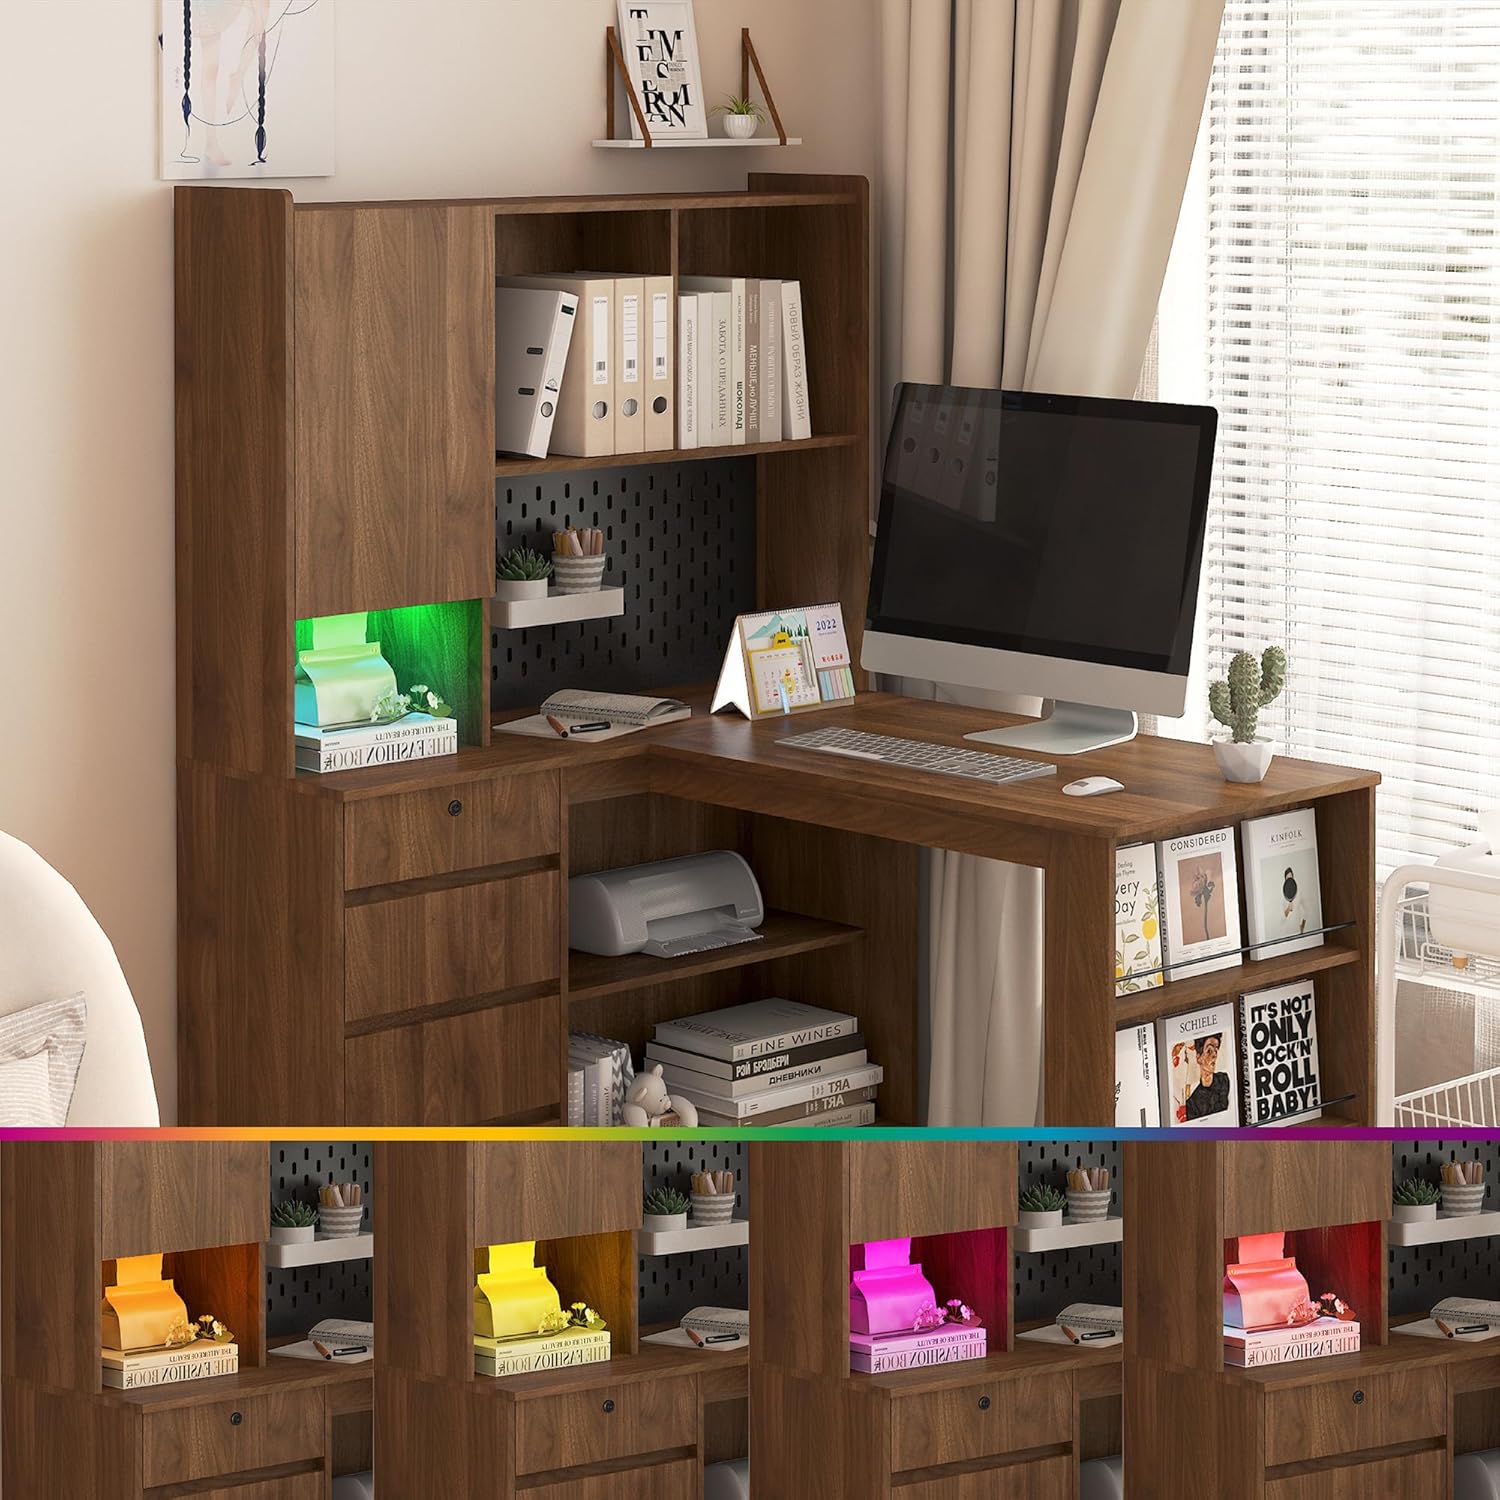
Immaġni: The L-shaped desk with its integrated LED lighting system displaying a range of colors, demonstrating the customizable ambient light feature.
Manutenzjoni
- Tindif: Imsaħ il-wiċċ tal-iskrivanija b'artab, damp drapp. Evita kimiċi ħarxa jew prodotti tat-tindif li joborxu.
- Issikkar: Iċċekkja u ssikka l-viti u l-qafliet kollha perjodikament biex tiżgura l-istabbiltà.
- Tixrid: Clean up spills immediately to prevent damage to the wood finish.
Issolvi l-problemi
- Issue: Desk wobbles after assembly.
- Soluzzjoni: Ensure all screws and fasteners are fully tightened. Check that the desk is on a level surface. Adjust leg levelers if present.
- Issue: Charging station not working.
- Soluzzjoni: Verify the desk's main power cord is securely plugged into a functional wall outlet. Check if the wall outlet itself is working by plugging in another device.
- Issue: LED lights not responding to remote.
- Soluzzjoni: Ensure the remote has working batteries. Point the remote directly at the LED receiver. Check that the LED light strip is properly connected to its power source.
- Issue: Missing parts during assembly.
- Soluzzjoni: Review the package contents list. If parts are genuinely missing, contact customer support with your model number and a description of the missing parts.
Speċifikazzjonijiet
| Karatteristika | Dettall |
|---|---|
| Numru tal-Mudell | D7456963245 |
| Brand | Ġeneriċi |
| Forma | L-Forma |
| Dimensjonijiet tal-Prodott (P x W x H) | 46.06"D x 55.9"W x 62.79"H |
| Tip ta' Materjal | Injam Inġinerija |
| Piż tal-oġġett | 138 Liri |
| Karatteristika Speċjali | Storage, Charging Station, LED Light |
| Assemblea Meħtieġa | Iva |
| Stazzjon ta 'ċċarġjar | 3 Sokits tal-AC (110V/12A), 2 Portijiet USB (5V/2A), Korda tal-Enerġija ta' 4.92 piedi |
Informazzjoni dwar Garanzija
Please refer to the warranty card included in your package for specific warranty terms and conditions. Generally, products are covered against manufacturing defects for a limited period from the date of purchase. Keep your proof of purchase for warranty claims.
Appoġġ għall-Klijent
For assistance with assembly, missing parts, or any other inquiries, please contact our customer support team. Refer to the contact information provided in your product packaging or on the retailer's websit.
When contacting support, please have your model number (D7456963245) and purchase date ready.