
Introduzzjoni
Grazzi tax-xiriasing the VATOS RC Helicopter, Model XK916. This remote-controlled helicopter is designed for both beginners and experienced pilots, offering stable flight with its 2.4GHz technology, altitude hold function, and integrated gyroscope. Please read this manual thoroughly before operating the helicopter to ensure safe and optimal performance.
Twissija tas-Sigurtà:
- Not suitable for children under 3 years old. Recommended age is 10+ years.
- Always operate the helicopter in an open area free from obstacles.
- For outdoor play, ensure windless conditions to prevent loss of control.
- Ensure the helicopter is turned on first, then the remote control, for proper pairing.
Kontenut tal-Pakkett
Before starting, please check the package contents:
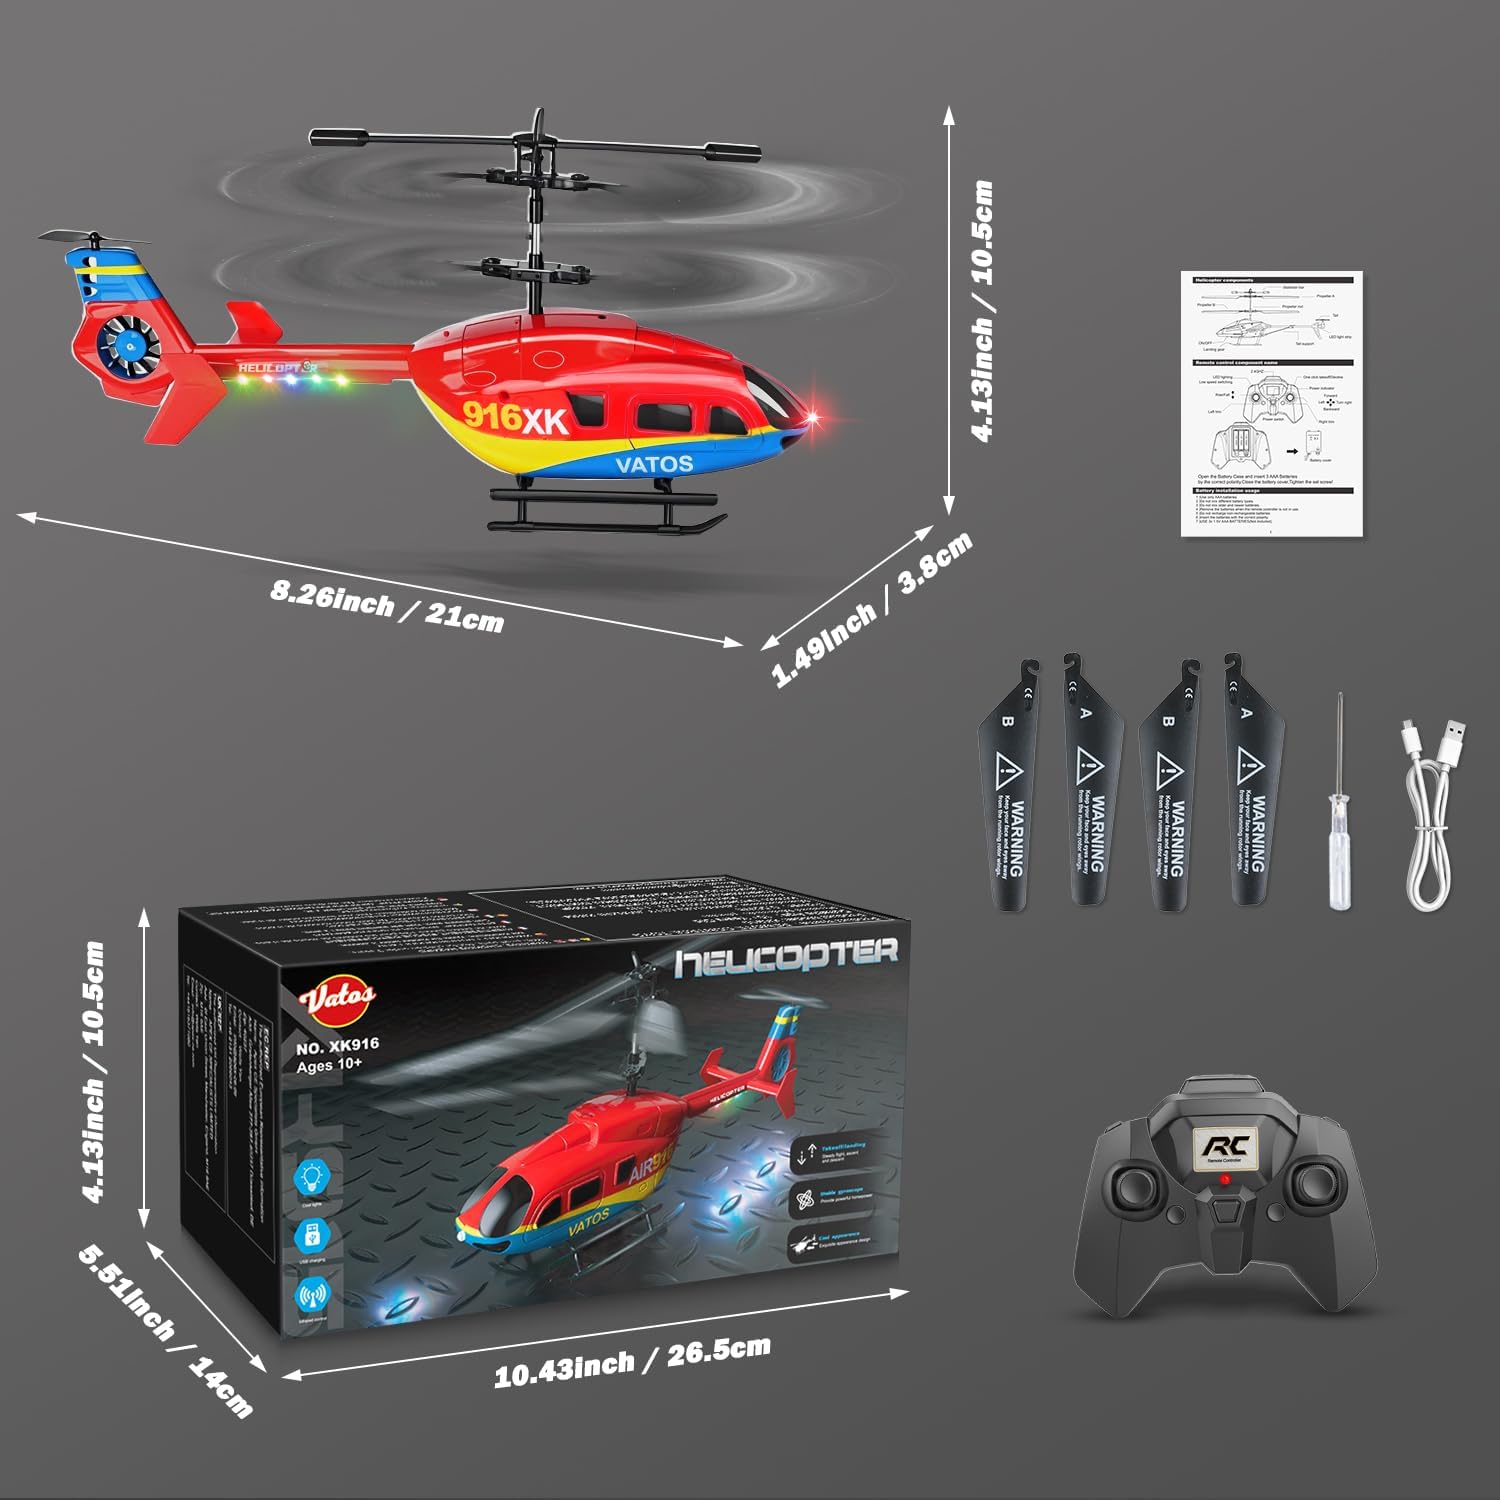
- VATOS RC Helicopter XK916
- Kontroll mill-bogħod
- Cable tal-Iċċarġjar tal-USB
- Spare Blades (A and B)
- Tornavit
- Manwal għall-Utent (dan id-dokument)
Setup
1. Installazzjoni tal-Batterija tal-Kontroll mill-bogħod
Il-kontroll mill-bogħod jeħtieġ 3 batteriji AAA (mhux inklużi).
- Iftaħ l-għatu tal-kompartiment tal-batterija fuq wara tal-kontroll mill-bogħod.
- Daħħal 3 batteriji AAA, waqt li tiżgura l-polarità korretta (+/-).
- Agħlaq l-għatu tal-kompartiment tal-batterija sew.

2. Iċċarġjar tal-Ħelikopter
The helicopter is powered by a built-in Lithium-ion battery. Charge the helicopter using the provided USB charging cable.
- Ensure the helicopter is turned OFF before charging.
- Qabbad il-kejbil tal-iċċarġjar USB mal-port tal-iċċarġjar tal-ħelikopter.
- Plug the other end of the USB cable into a USB power source (e.g., computer, USB wall adapter).
- The charging indicator light will show the charging status (refer to the specific light behavior in your product's quick start guide if available).
- A full charge takes approximately 45 minutes and provides 10-12 minutes of flight time.
- Disconnect the cable once charging is complete. The modular battery system includes overcharge and overcurrent protection.

3. It-tqabbil tal-Ħelikopter u l-Kontroll mill-Bogħod
Follow these steps to pair your helicopter with the remote control:
- Ensure both the helicopter and remote control are fully charged.
- Turn on the helicopter first using its power switch. The LED lights on the helicopter will flash.
- Ixgħel il-kontroll remot. Id-dawl indikatur fuq il-kontroll remot se jteptep.
- Mexxi l-joystick tax-xellug (throttle) 'il fuq kollha, imbagħad 'l isfel kollha.
- The indicator lights on both the helicopter and remote control will become solid, indicating successful pairing.
- Jekk it-tqabbil ifalli, itfi ż-żewġ apparati u rrepeti l-passi.
Istruzzjonijiet Operattivi
Kontroll mill-Bogħod Fuqview

The remote control features a 2.4GHz frequency for interference-free operation and a control range of 140-160 feet.
- Joystick tax-Xellug (Throttle): Jikkontrolla l-altitudni ('il fuq/'l isfel).
- Joystick tal-lemin: Jikkontrolla l-moviment 'il quddiem/lura u lejn ix-xellug/il-lemin.
- One Key Take Off/Land Button: Initiates automatic take-off or landing with a single press.
- Kontrolli tat-Trim: Used to correct any drifting during flight.
- Buttuna tal-Modalità tal-Veloċità: Switches between two speed modes (suitable for beginners and experts).
Flight Controls and Maneuvers

- Tlugħ: Place the helicopter on a flat surface. Press the "One Key Take Off/Land" button. The helicopter will automatically ascend and hover at a stable altitude.
- Inżul: Press the "One Key Take Off/Land" button again. The helicopter will slowly descend and land automatically.
- Żamma tal-Altitudni: The integrated gyroscope and intelligent height setting ensure stable hovering, making it easier for beginners to control.
- Kontroll Direzzjonali: Use the right joystick to move the helicopter forward, backward, left, or right.
- Tidwir: Use the left joystick to rotate the helicopter left or right while maintaining altitude.
- Aġġustament tat-Trim: If the helicopter drifts without input, use the trim buttons on the remote control to correct its flight path until it hovers steadily.
Night Flight with LED Lights
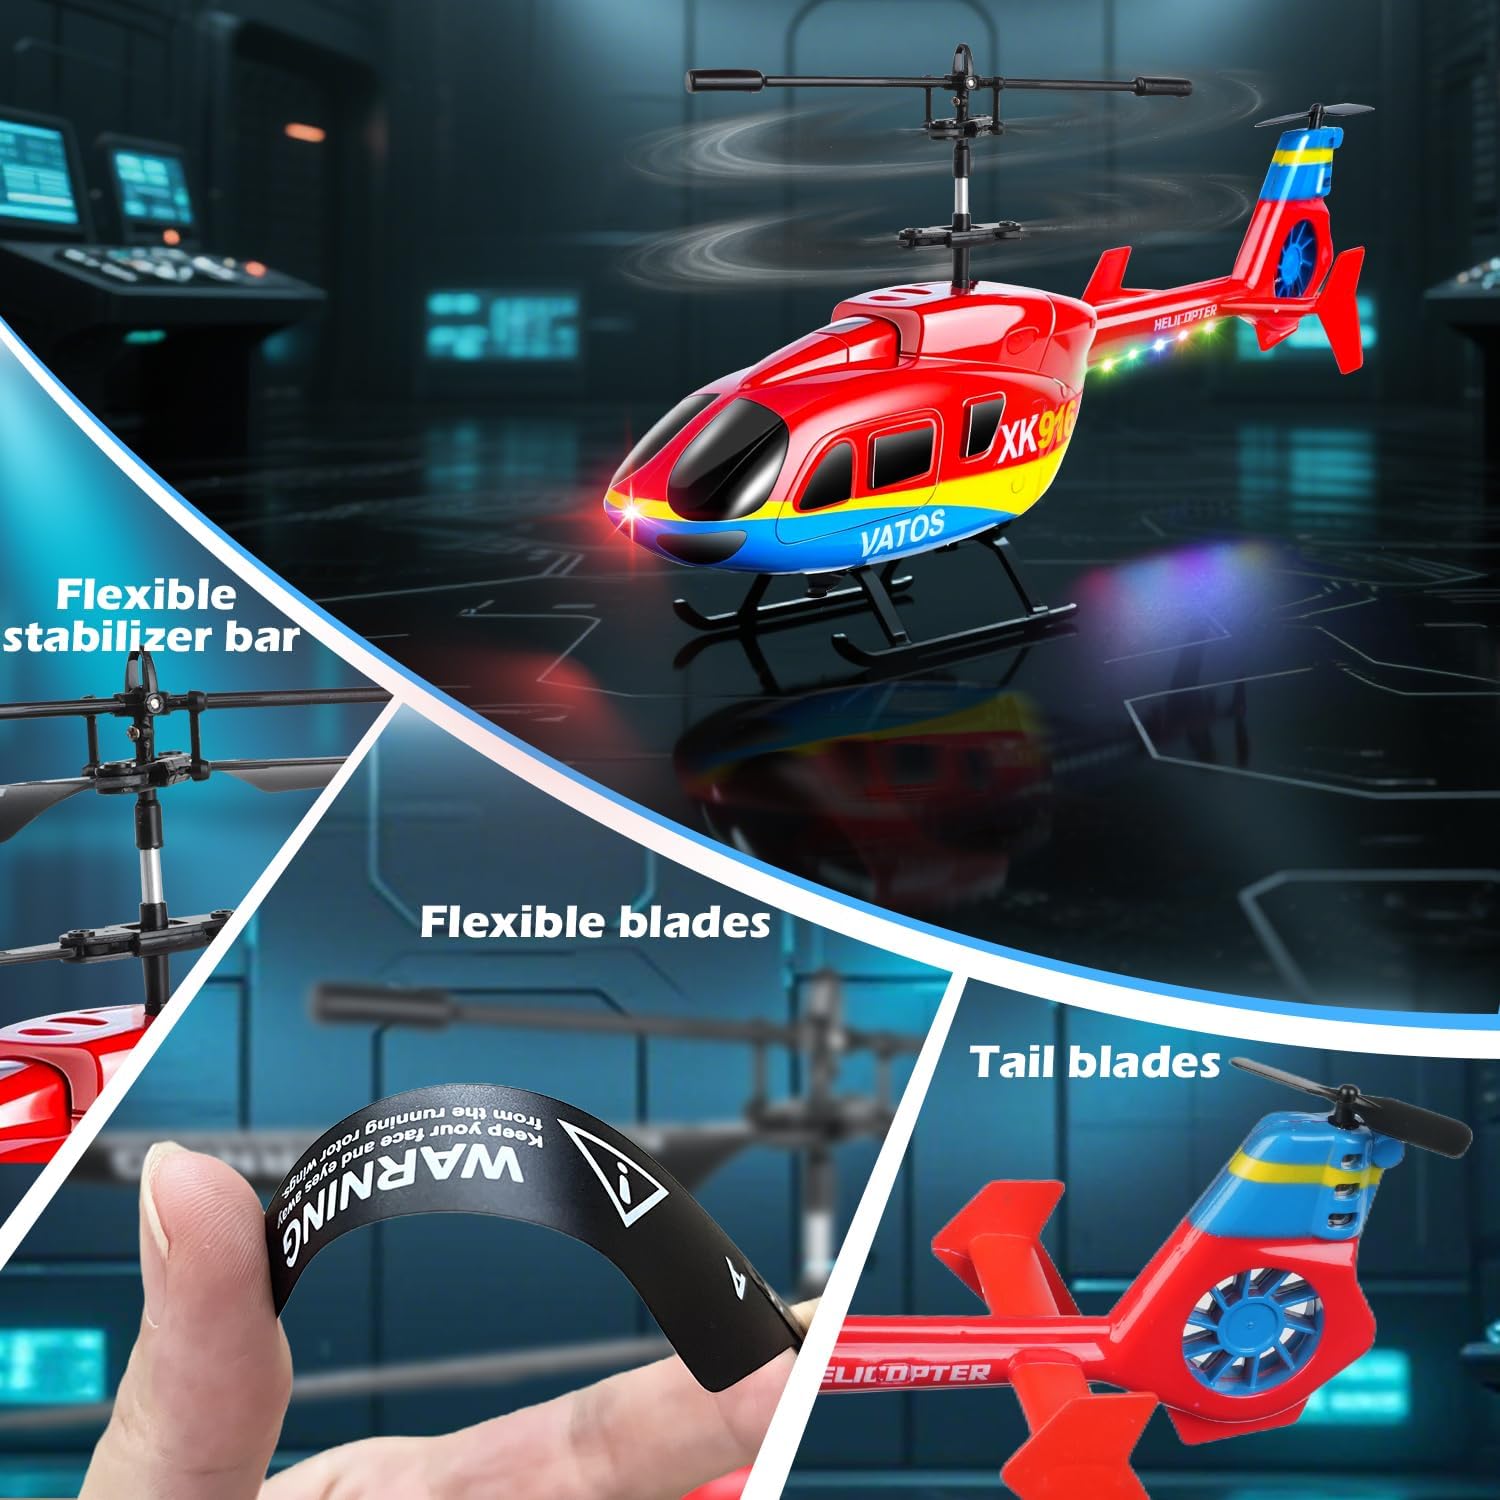
The helicopter features colorful LED lights, enhancing visibility and adding an exciting element to night flights. These lights are automatically active when the helicopter is powered on.

Manutenzjoni
Proper maintenance ensures the longevity and performance of your helicopter.
- Tindif: Use a soft, dry cloth to clean the helicopter and remote control. Avoid water or harsh chemicals.
- Sostituzzjoni tax-xafra: If blades are damaged, use the provided screwdriver to carefully replace them with the spare A and B blades. Ensure correct orientation.
- Kura tal-batterija: Do not overcharge the helicopter battery. If storing for extended periods, charge the battery to about 50% and store in a cool, dry place. Remove AAA batteries from the remote control if not in use for a long time.
- Durabilità: The helicopter is constructed from ultralight yet robust materials designed to withstand minor collisions and falls. Its flexible stabilizer bar and blades contribute to its anti-collision design.
Issolvi l-problemi
| Problema | Kawża Possibbli | Soluzzjoni |
|---|---|---|
| Il-ħelikopter ma jirrispondix għall-kontroll mill-bogħod. | Not paired correctly; low battery in helicopter or remote. | Ensure helicopter is turned on first, then remote. Re-pair by moving throttle up and down. Charge helicopter battery. Replace remote control batteries. |
| Il-ħelikopter jitbiegħed waqt it-titjira. | Trim settings incorrect; environmental factors (wind). | Use the trim buttons on the remote control to adjust. Ensure you are flying in a windless environment (indoors or calm outdoors). |
| Helicopter cannot take off or flies weakly. | Low helicopter battery; damaged blades. | Fully charge the helicopter battery. Check blades for damage and replace if necessary. |
| Id-dwal LED mhumiex qed jaħdmu. | Helicopter not powered on; internal fault. | Ensure the helicopter is turned on. If the issue persists, contact customer support. |
Speċifikazzjonijiet
| Karatteristika | Dettall |
|---|---|
| Numru tal-Mudell | XK916 |
| Dimensjonijiet (L x W x H) | 21 x 3.8 x 10.5 ċm (8.26 x 1.49 x 4.13 pulzieri) |
| Piż | 250 Gramm |
| Frekwenza tal-Kontroll | 2.4 GHz |
| Kanali | 3.5 CH (Up/Down, Left/Right, Forward/Backward) |
| Karatteristiċi Speċjali | Altitude Hold, Gyroscope, One-Key Take Off/Land, LED Lights, Two Speed Modes |
| Batterija tal-Ħelikopter | 1 C Lithium-ion (inkluża) |
| Batterija tal-Kontroll mill-bogħod | 3 batteriji AAA (mhux inklużi) |
| Ħin tal-Iċċarġjar | Approx. 45 minutes (via USB) |
| Ħin tat-Titjira | 10-12 minuta |
| Firxa ta 'Kontroll | 140-160 pied |
| Materjal | Plastik |
| Età Rakkomandata | 10+ snin |
Garanzija u Appoġġ
This product comes with standard manufacturer support. For any issues not covered in this manual, or for further assistance, please contact VATOS customer service through your retailer or the official VATOS websit.
Jekk jogħġbok żomm il-prova tax-xiri tiegħek għal kwalunkwe talba ta' garanzija.