
1. Introduzzjoni
This manual provides detailed instructions for the installation, operation, and maintenance of your Orno OR-VID-ME-1056FHD/B Video Intercom System. Please read this manual thoroughly before installation and use to ensure proper function and safety. Keep this manual for future reference.
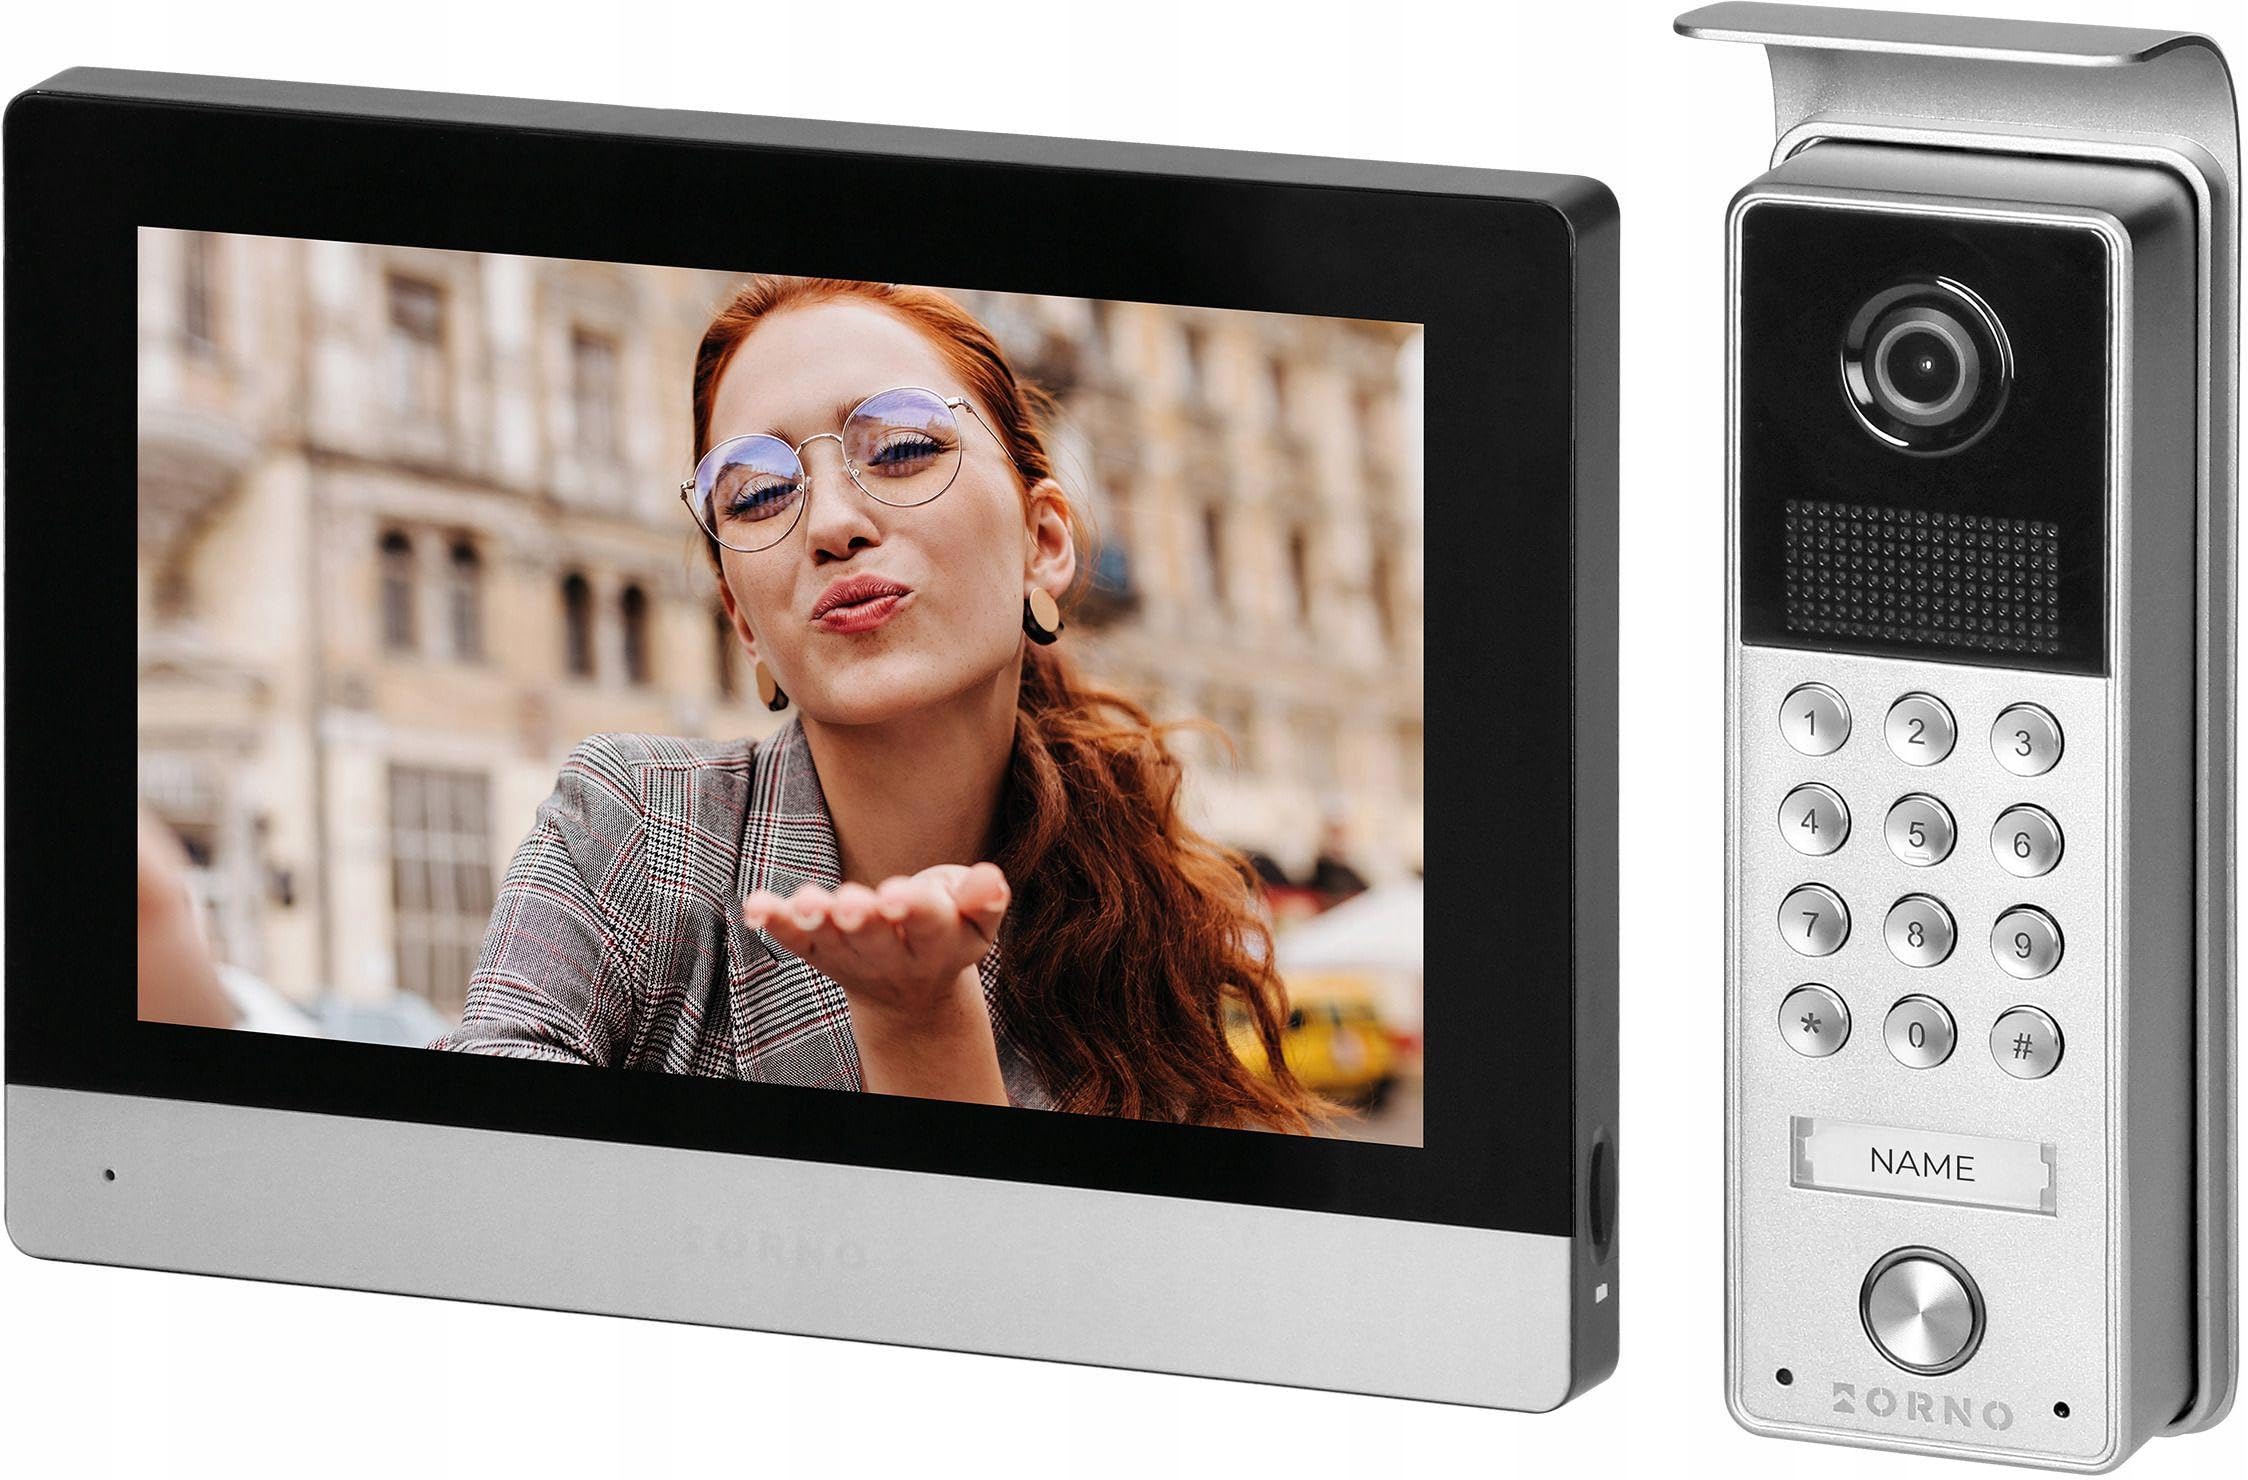
Image 1.1: Orno OR-VID-ME-1056FHD/B Video Intercom System. This image displays the complete video intercom system, including the outdoor unit and indoor monitor, showcasing id-disinn modern tiegħu.
2. Informazzjoni dwar is-Sigurtà
Dejjem osserva l-prekawzjonijiet ta' sigurtà li ġejjin biex tevita korriment jew ħsara lill-apparat:
- Sigurtà Elettrika: Installation must be performed by a qualified electrician in accordance with local electrical codes. Disconnect power before installation or servicing.
- Espożizzjoni għall-Ilma: Do not expose the indoor monitor to water or high humidity. The outdoor unit is designed for outdoor use but should not be submerged.
- Temperatura: Operate the device within the specified temperature range (refer to specifications).
- Tindif: Uża drapp artab u niexef għat-tindif. Tużax prodotti tat-tindif jew solventi li joborxu.
- Modifiki: Do not attempt to modify or repair the device yourself. Contact qualified service personnel for assistance.
3. Kontenut tal-Pakkett
Ivverifika li l-komponenti kollha huma preżenti fil-pakkett:
- 1x Outdoor Unit (Door Station)
- 1x Indoor Monitor
- 1x Mounting Bracket for Indoor Monitor
- 1x Power Adapter for Indoor Monitor
- 1x Set of Mounting Screws and Wall Plugs
- 1x Manwal tal-Utent (dan id-dokument)
- Connection Cables (specific lengths may vary)
Image 3.1: Package Contents. This image would typically show all items listed above neatly arranged, confirming the completeness of the product delivery.
4. Setup
4.1. Rekwiżiti ta 'Installazzjoni
- Appropriate wiring (e.g., 4-wire cable) between outdoor unit and indoor monitor.
- Power outlet near the indoor monitor for the power adapter.
- Tools: Drill, screwdriver, wire strippers, level.
4.2. Immuntar tal-Unità ta' Barra
- Choose a suitable location at the entrance, typically at a height of 1.4-1.6 meters from the ground, avoiding direct sunlight or rain.
- Mark the drilling points for the mounting screws using the outdoor unit as a template.
- Drill toqob u daħħal plugs tal-ħajt.
- Route the necessary cables through the wall to the outdoor unit's connection points.
- Secure the outdoor unit to the wall using the provided screws.
Image 4.1: Outdoor Unit Mounting. This image would illustrate the process of marking drilling points and securing the outdoor unit to a wall, showing cable routing.
4.3. Connecting the Indoor Monitor
- Attach the indoor monitor's mounting bracket to the desired wall location, ensuring it is level and near a power outlet.
- Connect the cables from the outdoor unit to the corresponding terminals on the indoor monitor (refer to the wiring diagram).
- Connect the power adapter to the indoor monitor and then plug it into a power outlet.
- Carefully mount the indoor monitor onto its bracket.
Image 4.2: Indoor Monitor Connection. This image would show the back of the indoor monitor with clearly labeled connection terminals and the power adapter plugged in.
4.4. Dijagramma tal-Wajers
The following diagram illustrates the standard wiring connections between the outdoor unit, indoor monitor, and optional electric lock.
Image 4.3: Wiring Diagram. This diagram would visually represent the electrical connections, showing which wires connect to which terminals for the outdoor unit, indoor monitor, and any external devices like an electric strike or gate opener.
5. Istruzzjonijiet Operattivi
5.1. Funzjonijiet Bażiċi
- Jirċievu Sejħa: When a visitor presses the call button on the outdoor unit, the indoor monitor will ring and display the visitor's image. Press the Tweġiba button to communicate.
- Komunikazzjoni f'żewġ direzzjonijiet: Speak into the monitor's microphone and listen through its speaker.
- Unlocking the Door/Gate: During a call or while viewing the outdoor unit, press the Nisfruttaw button to activate the connected electric lock or gate opener.
- Monitoraġġ: Agħfas il- Monitor button on the indoor unit to view the outdoor camera feed at any time.
5.2. L-aġġustament tas-Settings
The indoor monitor features an OSD (On-Screen Display) menu for adjusting various settings:
- Luminożità/Kuntrast: Adjust the display quality of the video feed.
- Volum: Control the ringtone and communication volume.
- Għażla ta' Ringtone: Choose from available ringtones.
- Funzjoni Intercom: If multiple indoor monitors are installed, use this function for internal communication.
Image 5.1: Indoor Monitor Interface. This image would display the indoor monitor's screen with its on-screen display menu, highlighting buttons for answer, unlock, and monitor functions.
6. Manutenzjoni
- Tindif: Wipe the outdoor unit and indoor monitor with a soft, damp drapp. Tużax kimiċi ħarxa jew materjali li joborxu.
- Kontrolli regolari: Iċċekkja perjodikament il-konnessjonijiet tal-kejbil kollha għal issikkar u sinjali ta' xedd.
- Tindif tal-Lenti: Ensure the camera lens on the outdoor unit is clean and free from obstructions for clear video quality.
7 Issolvi l-problemi
Irreferi għat-tabella t'hawn taħt għal kwistjonijiet komuni u s-soluzzjonijiet tagħhom:
| Problema | Kawża Possibbli | Soluzzjoni |
|---|---|---|
| L-ebda immaġni fuq il-monitor ta' ġewwa | Power not connected; Loose cable connection; Faulty outdoor unit/monitor | Check power supply; Reconnect cables securely; Contact support |
| L-ebda ħoss waqt il-komunikazzjoni | Volume too low; Loose audio cable; Faulty microphone/speaker | Adjust volume settings; Check audio connections; Contact support |
| Door/Gate unlock not working | Incorrect wiring to electric lock; Faulty electric lock; Insufficient power | Verify wiring diagram; Test electric lock separately; Ensure adequate power supply |
| Kwalità fqira tal-vidjo | Dirty camera lens; Poor lighting; Cable interference | Clean camera lens; Ensure adequate lighting; Check cable shielding |
8. Speċifikazzjonijiet
Technical specifications for the Orno OR-VID-ME-1056FHD/B Video Intercom System:
| Karatteristika | Dettall |
|---|---|
| Numru tal-Mudell | OR-VID-ME-1056FHD/B (model790) |
| Manifattur | ORNO |
| Kulur | Multicolor |
| Sors tal-Enerġija | Mains Powered (No batteries required) |
| Komponenti Inklużi | Supplied as combination set |
| ASIN | B0F1YYQTV5 |
| L-Ewwel Data Disponibbli | 26 ta’ Ottubru 2024 |
9. Garanzija u Appoġġ
This Orno product is covered by a standard manufacturer's warranty. For specific warranty terms and conditions, please refer to the documentation provided with your purchase or contact your retailer.
For technical support, troubleshooting assistance, or service inquiries, please contact your point of purchase or the official Orno customer service channels. Ensure you have your product model number (OR-VID-ME-1056FHD/B) and purchase details ready when contacting support.