1. Introduzzjoni
This manual provides essential information for the safe and efficient operation of your Generic 1.5-Amp Smart Battery Charger. This device is a microprocessor-controlled, fully automatic 4-stage battery charger designed for 6V and 12V lead-acid batteries, including AGM, GEL, VRLA, SLA, and WET types. It is ideal for charging and maintaining batteries in cars, motorcycles, ride-on toys, trucks, lawn mowers, boats, and marine vehicles.
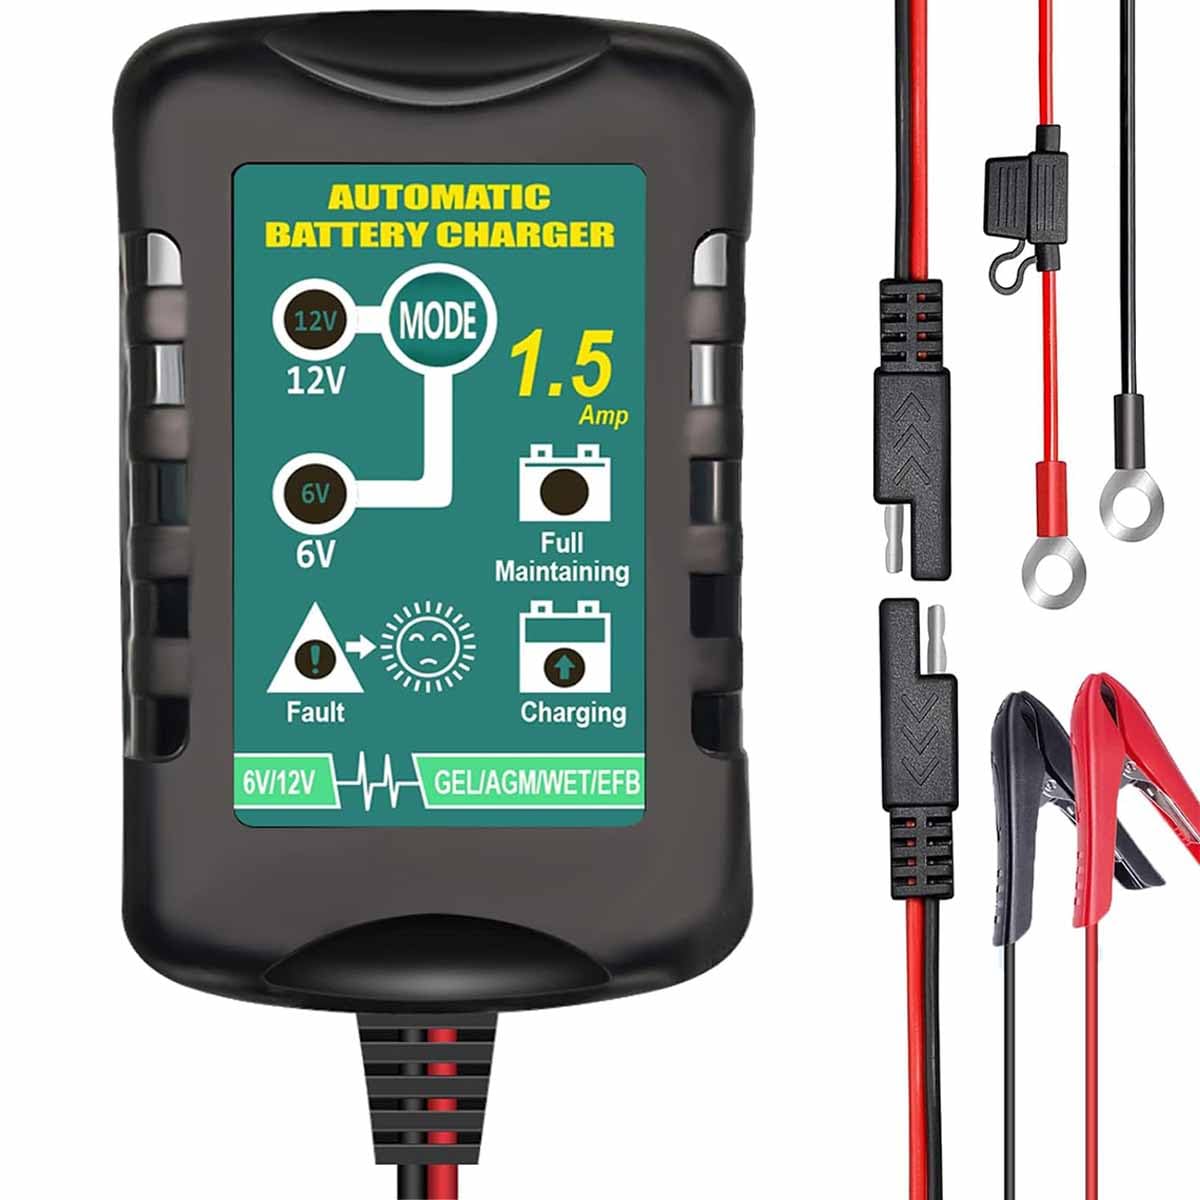
Image 1: The Generic 1.5-Amp Smart Battery Charger with its included clamp and ring connectors.
2. Karatteristiċi tal-prodott
- Charge and Maintain: Provides 1.5A charging for both 6V and 12V SLA / VRLA / GEL / AGM / WET Lead Acid batteries.
- Kompatibilità Wiesgħa: Suitable for automotive, motorcycles, ATVs, RVs, watercraft, powersport vehicles, scooters, snowmobiles, campers, trolling motors, and boats.
- Karatteristiċi ta' Sigurtà Avvanzati: Automatic protection against short circuit, over voltage, over current, over charge, overload, overheat, and reverse polarity.
- 4-Stage Fully-Automatic Charging: Features a comprehensive 4-step charging program: Initialization, Bulk Charge, Absorption Mode, and Float Mode. Automatically switches to float mode after full charge.

Image 2: Illustration of the wide range of applications for the battery charger, including cars, motorcycles, boats, and lawn mowers.
3. Kontenut tal-Pakkett
Malli tiftaħ il-pakkett, għandek issib l-oġġetti li ġejjin:
- Ċarġer tal-batterija x1
- DC Output Cable with Clamp Konnetturi x1
- DC Output Cable with Ring Connectors x1
- Manwal tal-Utent x1 (dan id-dokument)
4. Speċifikazzjonijiet
| Karatteristika | Speċifikazzjoni |
|---|---|
| Input | 100-240VAC @ 50/60Hz 0.5rms |
| Ħruġ (6V) | DC 6.9V @ 1.5Amp |
| Ħruġ (12V) | DC 13.8V @ 1.5Amp |
| Vol limitattage | 7.2~7.3V (for 6V) or 14.5~14.7V (for 12V) |
| Float Current | 300mA ~ 400mA |
| Modalità tal-Iċċarġjar | Kompletament Awtomatiku |
| Tipi ta 'batteriji xierqa | 6V or 12V AGM, GEL, VRLA, SLA, WET |
| Kapaċità tal-Batterija tal-Iċċarġjar | 6-12Ah |
| Maintaining Battery Capacity | 4-36Ah |
| Daqs tal-Ċarġer tal | 85mm x 53mm x 39mm (approximately 3.35in x 2.09in x 1.54in) |
| Approvazzjonijiet tas-Sigurtà | EN60950-1, EN60335 |
| Konformità EMC | EN55022 |
| Ċertifikazzjonijiet | CE, RoHS |

Image 3: Product dimensions: Charger is approximately 3.36 inches long, 2.1 inches wide, and 1.57 inches thick. Cables are 23.6 inches and 47.2 inches long.
5. Informazzjoni dwar is-Sigurtà
TWISSIJA IMPORTANTI:
- Before charging, ensure the correct battery voltage (6V or 12V) matches the device's selected voltage. Vol mhux korretttagL-għażla tista' tagħmel ħsara lill-batterija jew lill-ċarġer.
- Always connect the charger to the battery terminals correctly: positive (+) to positive (+), and negative (-) to negative (-). Reverse polarity will trigger a fault indicator.
- Tippruvax tiċċarġja batteriji mhux rikarikabbli.
- Kun żgur li jkun hemm ventilazzjoni adegwata waqt l-iċċarġjar.
- Żomm il-ċarġer 'il bogħod minn materjali li jaqbdu.
- Avoid short-circuiting the output cables.
- This charger is designed for lead-acid batteries only. Do not use with other battery types.
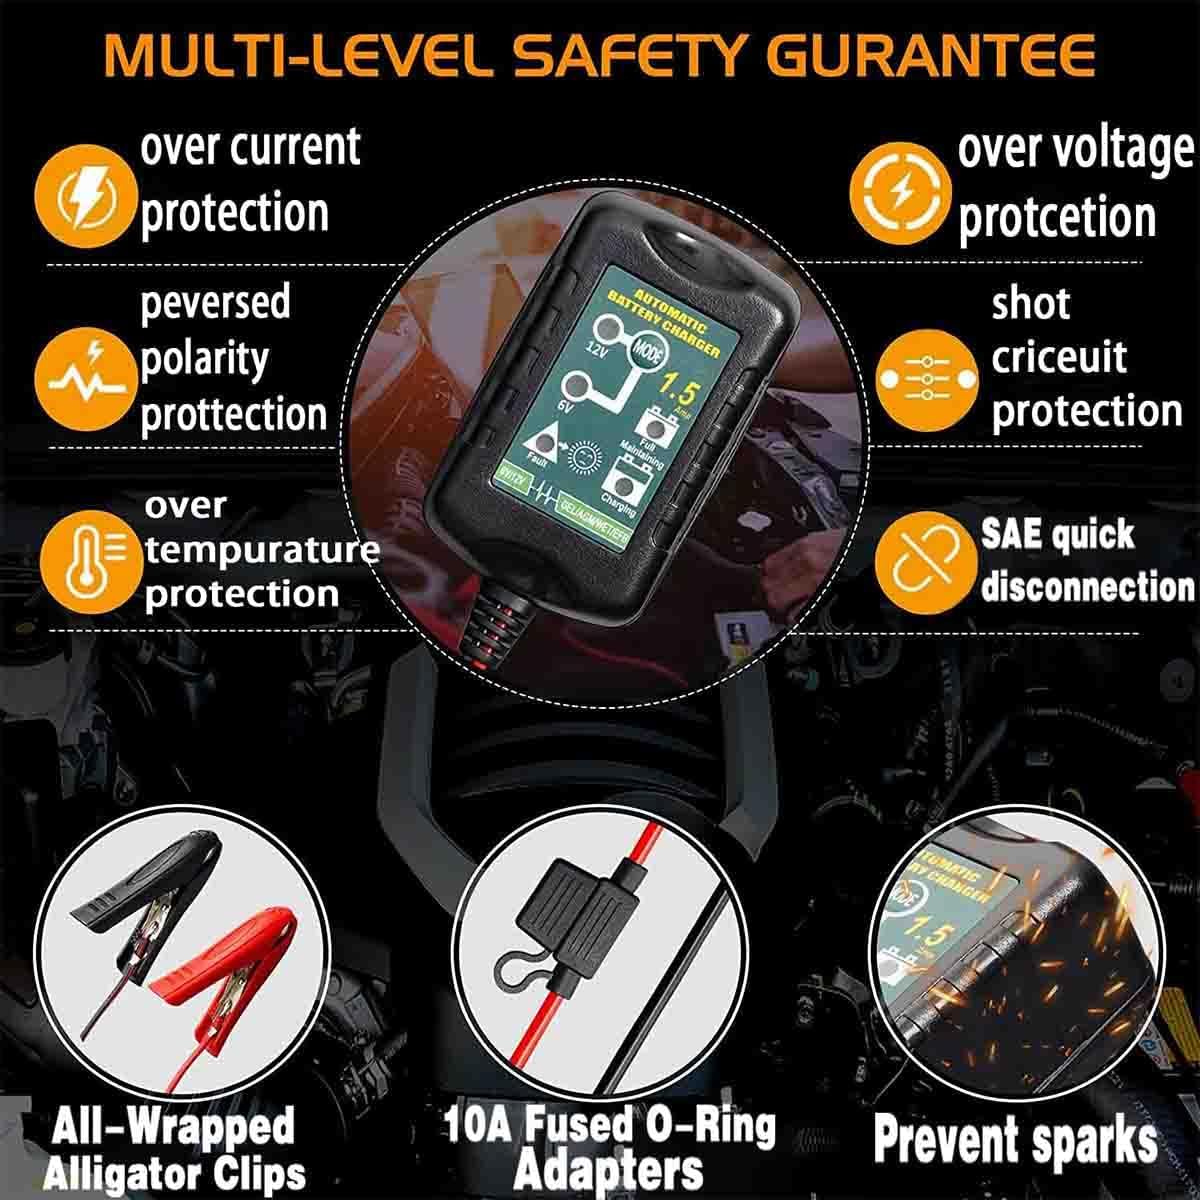
Image 4: The charger features multi-level safety protections including over current, over voltage, reversed polarity, short circuit, over temperature protection, and SAE quick disconnection.
6. Setup
- Connect Output Cables: Attach the desired DC output cable (clamp or ring connectors) to the charger's output port. Ensure a secure connection.
- Qabbad mal-Batterija: Qabbad l-aħmar (+) clamp/terminal taċ-ċirku mat-terminal pożittiv (+) tal-batterija u l-klamp iswed (-)amp/ring terminal to the negative (-) battery terminal. Ensure a firm connection.
- Ipplaggja l-Enerġija: Plug the charger's AC power cord into a standard 100-240VAC wall outlet.
- Kontroll Inizjali: The charger will perform a self-check. If the 'Fault' LED lights up, check the polarity of your battery connections.

Image 5: The smart battery charger connected to a vehicle battery for automatic diagnosis, charging, and maintenance.
7. Istruzzjonijiet Operattivi
The charger operates in a fully automatic 4-stagProċess tal-iċċarġjar elettroniku:
- Stage 1: Initialization
When powered on, the charger performs a self-check and detects if the battery is correctly connected. If the 'Fault' LED illuminates, there might be a polarity issue or a severely discharged battery. Verify connections. - Stage 2: Bulk Charge
The charger delivers its highest rated current (1.5A) to the battery until it reaches approximately 80% capacity. During this stage, the '50%' LED will blink, and the '100%' LED will be off. - Stage 3: Assorbiment
L-output voltage is limited to 7.3V (for 6V batteries) or 14.5V (for 12V batteries) while the current gradually declines. This stage charges the battery to its full capacity without overheating. The '50%' LED will be on, and the '100%' LED will blink. - Stage 4: Float
Once the battery is fully charged, the charger switches to float mode. It maintains the battery through pulse charging, ensuring the battery remains at optimal charge without overcharging. Both the '50%' and '100%' LEDs will be on.
Indikaturi LED
The charger features clear LED indicators to show the charging status:
- Dawl ta' 6V: On when charging a 6V battery.
- Dawl ta' 12V: On when charging a 12V battery.
- Fault Light: Flashing indicates a bad battery or incorrect connection.
- Battery Icon (below 50%): Lighting indicates charging below 50% capacity.
- Battery Icon (above 50%): Light on indicates charging above 50% capacity.
- Battery Icon (below 100%): Lighting indicates charging nearing 100% capacity.
- Battery Icon (100%): Light on indicates the battery is fully charged.

Image 6: Detailed explanation of the LED lights indicating different charging statuses and voltage għażla.

Image 7: The charger's display is easy to read, showing current status. It also features security against overcharging even in maintenance float mode.
Vidjo ta' Dimostrazzjoni tal-Prodott
Video 1: A demonstration of a 12V smart repair charger, showcasing its display, mode selection, and connection process. This video illustrates general operation principles applicable to this charger.
8. Manutenzjoni
- Tindif: Disconnect the charger from power and the battery before cleaning. Use a dry, soft cloth to wipe the exterior. Do not use harsh chemicals or abrasives.
- Ħażna: Aħżen il-ċarġer f'post frisk u niexef meta ma jkunx qed jintuża. Żomm il-kejbils imkebba sew biex tevita l-ħsara.
- Spezzjoni tal-Cable: Regularly inspect the power cord and output cables for any signs of damage, such as cuts or fraying. Do not use the charger if cables are damaged.
- Manutenzjoni tal-batterija: For optimal battery life, ensure battery terminals are clean and free of corrosion before connecting the charger.
9 Issolvi l-problemi
- Il-Ċarġer Mhux Mixgħul: Ensure the AC power cord is securely plugged into a live outlet. Check for power at the outlet.
- 'Fault' LED On/Flashing:
- Polarità Żbaljata: Disconnect the charger and re-connect the clamps/ring terminals to the correct battery terminals (red to positive, black to negative).
- Batterija Ħażina: The battery may be severely discharged, sulfated, or damaged beyond repair. Consult a professional for battery testing.
- Vol mhux korretttage: Ensure the charger is set to the correct voltage (6V or 12V) for your battery.
- Batterija Mhux Iċċarġja: Verify all connections are secure. Ensure the battery type is compatible with the charger. Allow sufficient time for charging, especially for larger capacity batteries.
- Is-sħana żejda: If the charger feels excessively hot, disconnect it immediately. Ensure it is in a well-ventilated area and not covered.
10. Garanzija u Appoġġ
For warranty information or technical support, please refer to the contact details provided by your retailer or the manufacturer, Eztronics Corp. Keep your purchase receipt as proof of purchase for any warranty claims.


