
1. Informazzjoni Importanti dwar is-Sigurtà
Jekk jogħġbok aqra u ifhem l-istruzzjonijiet kollha qabel tibda l-installazzjoni. Jekk ma ssegwix dawn l-istruzzjonijiet, dan jista' jirriżulta f'xokk elettriku, nar, jew korriment personali.
- Kun żgur li l-enerġija tkun mitfija mis-circuit breaker qabel l-installazzjoni jew il-manutenzjoni.
- Il-wajers kollha għandhom ikunu skont il-kodiċijiet elettriċi nazzjonali u lokali.
- The ceiling fan must be mounted to a structure capable of supporting a minimum of 35 lbs (15.9 kg).
- Tħaddimx il-fann b'xfafar jew housing bil-ħsara.
- Żomm idejk, ħwejjeġ, u oġġetti oħra 'l bogħod mix-xfafar tal-fann meta l-fann ikun qed jaħdem.
- Dan il-fann huwa ddisinjat għall-użu fuq ġewwa biss.
2. Kontenut tal-Pakkett
Verify that all components listed below are included in your package. If any parts are missing or damaged, contact LEDLUX customer support before proceeding with installation.
- Assemblea tad-Djar tal-Mutur
- Xfafar tal-Fann (8 biċċiet)
- Downrods (4.5", 12", 24" options)
- Bracket tal-Immuntar
- Kontroll mill-bogħod u Riċevitur
- Pakkett tal-Ħardwer (viti, woxers, ġewż tal-wajer)
- Manwal ta' Istruzzjoni
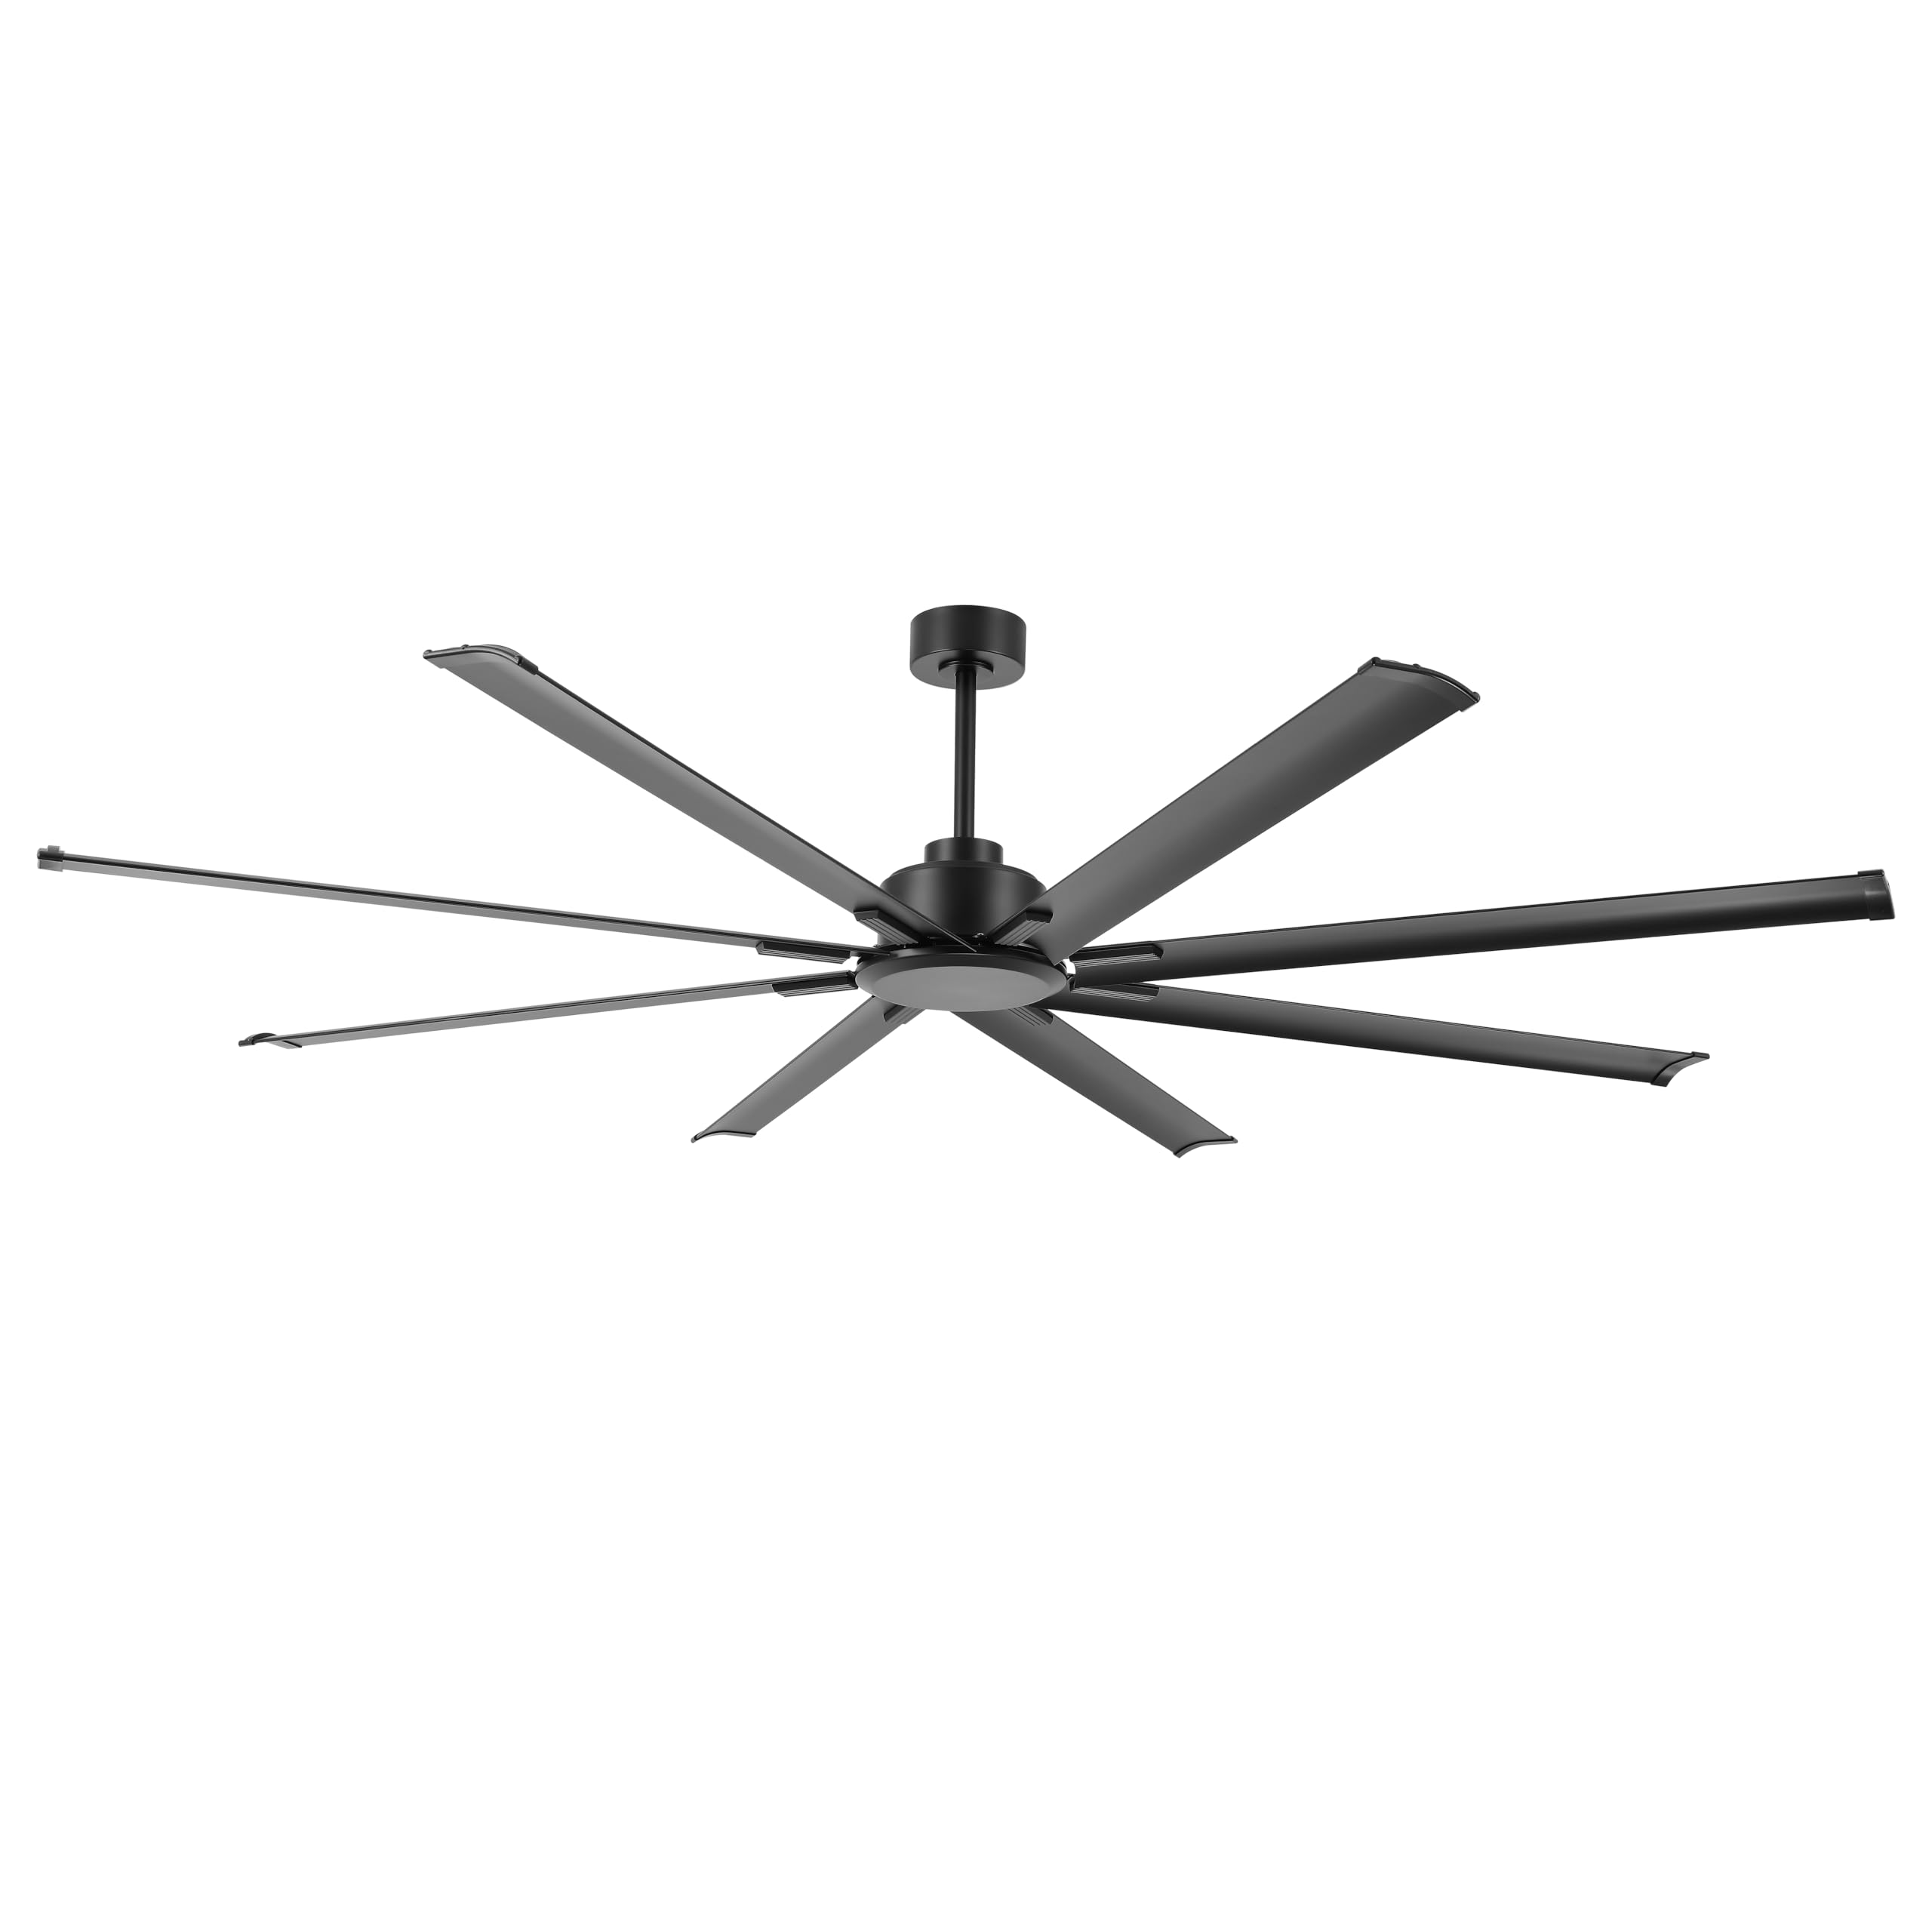
Image: The LEDLUX 96-inch ceiling fan, showcasing its eight black aluminum blades, central motor housing, and the included remote control. This image provides an overview of the main product components.
3. Setup u Installazzjoni
Follow these steps carefully for proper installation of your LEDLUX ceiling fan.
3.1 Lista ta 'Kontroll ta' Qabel l-Installazzjoni
- Itfi l-enerġija mill-circuit breaker prinċipali.
- Kun żgur li l-post tal-immuntar jista' jsostni l-piż tal-fann.
- Gather necessary tools (screwdriver, wire strippers, ladder, etc.).
3.2 Immuntar tal-Fann
- Attach the mounting bracket to the ceiling junction box. Ensure it is securely fastened to a structural beam.
- Select the appropriate downrod (4.5", 12", or 24") for your ceiling height.
- Feed the fan wires through the chosen downrod.
- Secure the downrod to the motor housing.
- Erfa' l-assemblaġġ tal-fann bir-reqqa u dendlu mal-bracket tal-immuntar.

Image: A diagram illustrating the overall dimensions of the 96-inch ceiling fan, including its width and height with different downrod lengths (12.7", 20.3", 32.5"). It also shows how the fan can be mounted on both flat and sloped ceilings, along with the three included downrod sizes (4.5", 12", 24").

Image: This image displays the LEDLUX ceiling fan installed in three different room settings: a high ceiling, a low ceiling, and a slanted ceiling, demonstrating its versatility for various architectural styles.
3.3 Konnessjonijiet tal-Wiring
- Connect the fan's wires to the household wiring according to the wiring diagram provided in the full manual. Use wire nuts to secure connections.
- Install the remote receiver into the mounting bracket canopy.
- Connect the receiver wires to the fan and household wires as instructed.
3.4 Twaħħil tax-Xfafar
- Attach each of the 8 fan blades to the motor housing using the provided screws and washers. Ensure all screws are tightened securely.
4. Istruzzjonijiet Operattivi
Your LEDLUX ceiling fan is controlled by the included remote control. Ensure batteries are installed correctly in the remote.
4.1 Funzjonijiet ta' Kontroll mill-bogħod

Immaġni: Dettaljata view of the remote control for the LEDLUX ceiling fan, highlighting buttons for speed adjustment (1-6), fan on/off, forward/reverse function, natural wind mode, and timer settings (1H/2H/4H/8H).
- Buttuna mixgħul/mitfi: Jixgħel jew jitfi l-fann.
- Buttuni tal-Veloċità (1-6): Adjusts fan speed from low (1) to high (6).
- Buttuna 'l quddiem/reverse: Tibdel id-direzzjoni tar-rotazzjoni tax-xafra.
- Timer Buttons (1H/2H/4H/8H): Sets the fan to turn off automatically after the selected duration.
- Natural Wind Button: Simulates a natural breeze by cycling through various speeds.
4.2 Funzjoni Riversibbli (Modalità Sajf/Xitwa)
The fan features a reversible DC motor, allowing for year-round use to optimize air circulation.
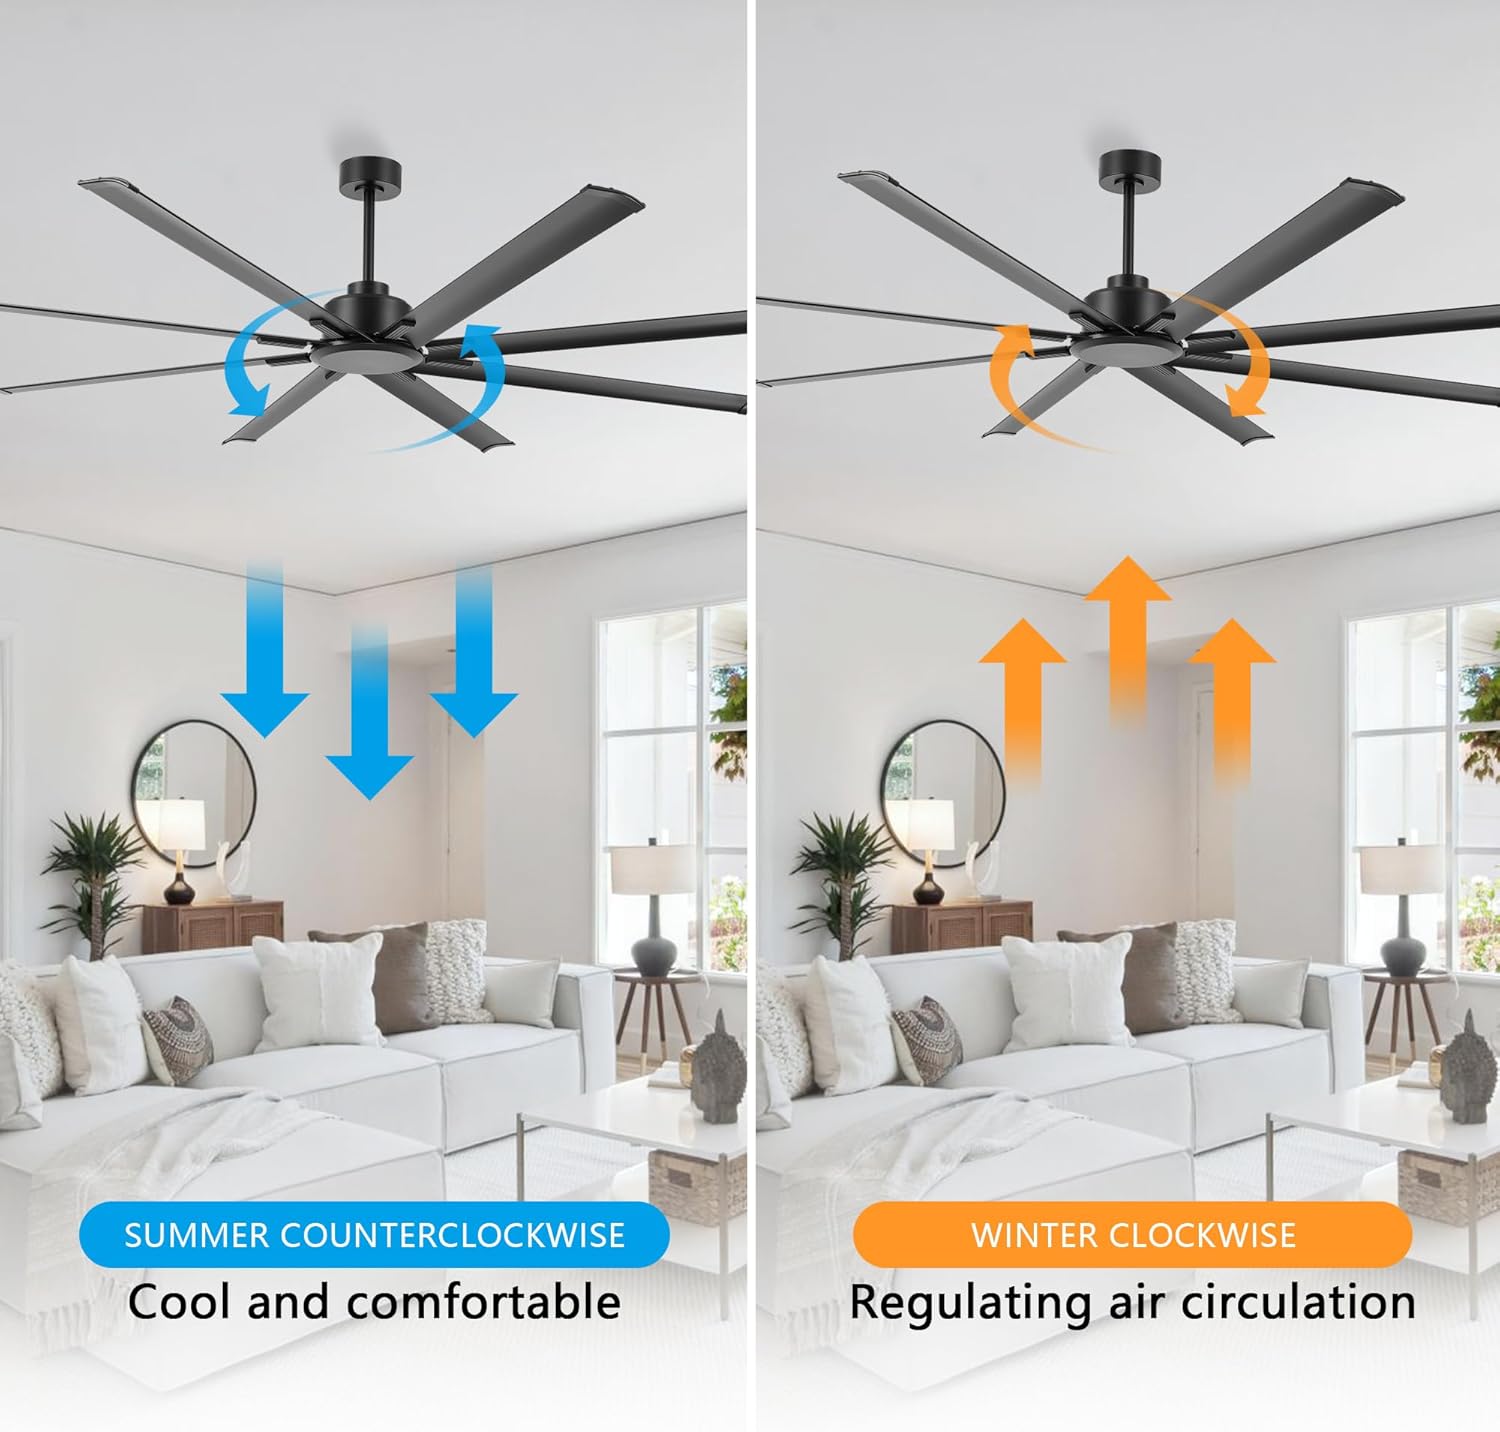
Image: This image illustrates the reversible function of the ceiling fan. On the left, blue arrows indicate counter-clockwise rotation for a cooling downdraft in summer. On the right, orange arrows show clockwise rotation for an updraft to circulate warm air in winter.
- Modalità tas-Sajf (Kontra l-arloġġ): Press the reverse button to make the blades rotate counter-clockwise, creating a downward airflow that produces a cooling effect.
- Modalità tax-Xitwa (Lejn l-Arloġġ): Press the reverse button again to make the blades rotate clockwise, creating an upward airflow that helps circulate warm air trapped near the ceiling.
4.3 Funzjoni Timer
Use the timer buttons on the remote control to set the fan to operate for a specific duration before automatically turning off.

Image: This graphic highlights the silent operation of the fan, stating sound is less than 35dB, and illustrates the available timer settings: 1 hour, 2 hours, 4 hours, and 8 hours.
- Press the 1H, 2H, 4H, or 8H button to activate the timer. The fan will run for the selected time and then shut off.
- To cancel the timer, press the fan On/Off button or select a different timer setting.
5. Manutenzjoni
Manutenzjoni regolari tiżgura prestazzjoni ottimali u lonġevità tal-fann tas-saqaf tiegħek.
- Tindif: Imsaħ ix-xfafar tal-fann u l-kaxxa tal-mutur perjodikament b'ċarruta ratba u driegħ.amp drapp. Tużax tindif jew solventi li joborxu.
- Viti li jissikkaw: Check all screws on the fan blades and mounting hardware annually to ensure they are secure.
- Bilanċ tax-Xafra: If the fan wobbles, ensure all blades are securely attached and consider using a blade balancing kit (not included) if necessary.
6 Issolvi l-problemi
Jekk tiltaqa' ma' problemi bil-fann tiegħek, irreferi għall-problemi u s-soluzzjonijiet komuni li ġejjin:
| Problema | Kawża Possibbli | Soluzzjoni |
|---|---|---|
| Fan ma jibda | Ebda enerġija għall-fann | Check circuit breaker and wall switch. Ensure all wiring connections are secure. |
| Il-kontroll mill-bogħod ma jaħdimx | Dead batteries or incorrect pairing | Ibdel il-batteriji tar-remote. Irreferi għall-manwal sħiħ għal struzzjonijiet dwar it-tqabbil tar-remote. |
| Il-fann jitbandal b'mod eċċessiv | Loose blades or unbalanced blades | Ensure all blade screws are tight. Check for bent blades. Use a blade balancing kit if needed. |
| Operazzjoni storbjuża | Loose screws or motor issues | Issikka l-viti kollha. Jekk l-istorbju jippersisti, ikkuntattja l-appoġġ għall-klijenti. |
7. Speċifikazzjonijiet
| Karatteristika | Dettall |
|---|---|
| Brand | LEDLUX |
| Numru tal-Mudell | SYCF9605 |
| Kulur | Iswed |
| Tip ta 'Immuntar | Muntatura tal-Limitu |
| Numru ta' Veloċitajiet | 6 |
| Voltage | 12 Volts (DC) |
| Użu fuq ġewwa/barra | Ġewwa |
| Metodu ta' Kontroll | Remote |
| Effiċjenza | Effiċjenza Għolja |
| Numru ta' Xfafar | 8 |
| Materjal tax-xafra | Aluminju |
8. Garanzija u Appoġġ
LEDLUX stands behind the quality of its products.

Image: A graphic detailing the LEDLUX "Worry-Free Promise," which includes a 3-Year Full Warranty on all parts and a 10-Year Motor Warranty.
- Garanzija tal-Mutur: The DC motor is covered by a 10-year free replacement warranty.
- Garanzija tal-Partijiet: All other parts of the fan are covered by a full 3-year warranty.
For warranty claims, technical assistance, or missing parts, please contact LEDLUX customer support through the retailer where the product was purchased or visit the official LEDLUX websit.