
1. Introduzzjoni
This manual provides detailed instructions for the installation, operation, maintenance, and troubleshooting of your ASUS PRIME B840M-A WIFI motherboard. Designed for AMD Ryzen 9000, 8000, and 7000 series desktop processors, this mATX motherboard offers robust performance and connectivity for your computing needs.

Image 1.1: The ASUS PRIME B840M-A WIFI motherboard alongside its retail packaging, showcasinid-disinn u l-branding tal-prodott.
2. Karatteristiċi ewlenin
- Kunsinna tal-Enerġija robusta: Features a 14+2+2 power solution with 80A stages and 8+8 pin ProCool power connectors, utilizing high-quality alloy chokes and durable capacitors for stable power delivery to multi-core AMD Ryzen processors.
- AI Computing Readiness: Engineered to support future artificial intelligence computing demands with optimized power and connectivity features.
- AMD AM5 Socket Compatibility: Supports AMD Ryzen 9000, 8000, and 7000 series desktop processors.
- User-Friendly Design Features: Includes PCIe Slot Q-Release Slim, M.2 Q-Latch, M.2 Q-Release, M.2 Q-Slide, Q-Antenna for easy WiFi setup, Q-Dashboard, Q-LED indicators, a BIOS FlashBack button for convenient firmware updates, a Clear CMOS button, and a pre-assembled I/O shield for simplified installation.
- Konnettività Avvanzata: Equipped with WiFi 6E, 2.5Gbit LAN, USB 3.2 Gen 2 (20Gbps) Type-C, and multiple M.2 slots for high-speed data transfer and networking.
- Included Software and Utilities: Access to ASUS DriverHub, TurboV Core, ASUS GlideX, HWiNFO, and a user-friendly UEFI BIOS interface. Trial subscriptions for Norton 360 (60-day) and AIDA64 Extreme (60-day) are also provided.

Image 2.1: Visual representation of key features including WiFi 6E, 2.5Gb Ethernet, M.2 Heatsink, ASUS Fan Xpert 2+, and USB 5Gbps Type-C connectivity.
3. Setup u Installazzjoni
Before beginning installation, ensure your system is powered off and unplugged. Always handle components with care and use anti-static precautions.
3.1. Kontenut tal-Pakkett
Ivverifika li l-komponenti kollha huma preżenti fil-pakkett tal-motherboard tiegħek:
- ASUS PRIME B840M-A WIFI Motherboard
- Antenna Q tal-WiFi tal-ASUS
- Kejbils SATA
- M.2 screw packages and rubber standoffs
- Manwal għall-Utent u Gwida ta' Bidu Mgħaġġel

Image 3.1: An illustration of the items typically found inside the ASUS PRIME B840M-A WIFI motherboard packaging.
3.2. Installazzjoni tal-Motherboard
- Ipprepara x-Chassis: Install the motherboard standoffs in your PC case according to the mATX form factor.
- Installa s-CPU: Open the CPU socket lever, align the AMD Ryzen processor with the triangle marker on the socket, gently place it, and close the lever.
- Installa l-Cooler tas-CPU: Mount your compatible CPU cooler following its specific instructions.
- Installa l-Memorja (RAM): Open the DIMM slot clips, align the DDR5 memory modules with the notch, and press firmly until the clips lock into place.
- Installa SSDs M.2: Insert M.2 SSDs into the M.2 slots. Utilize the M.2 Q-Latch or M.2 screw packages for secure installation. The motherboard features an M.2 heatsink for optimal thermal performance.
- Immuntar tal-Motherboard: Carefully place the motherboard into the chassis, aligning it with the standoffs and the pre-assembled I/O shield. Secure it with screws.
- Installa Karta Grafika: Insert your PCIe graphics card into the primary PCIe x16 slot. The PCIe Slot Q-Release Slim feature assists in easy removal.
- Qabbad l-Enerġija: Connect the 24-pin ATX power connector and the 8+8 pin ProCool CPU power connectors from your power supply to the motherboard.
- Ikkonnettja l-Periferali: Connect SATA drives, front panel connectors (USB, audio, power/reset buttons), and case fans.
- Install WiFi Q-Antenna: Screw the provided Q-Antenna onto the designated connectors on the I/O panel for wireless connectivity.
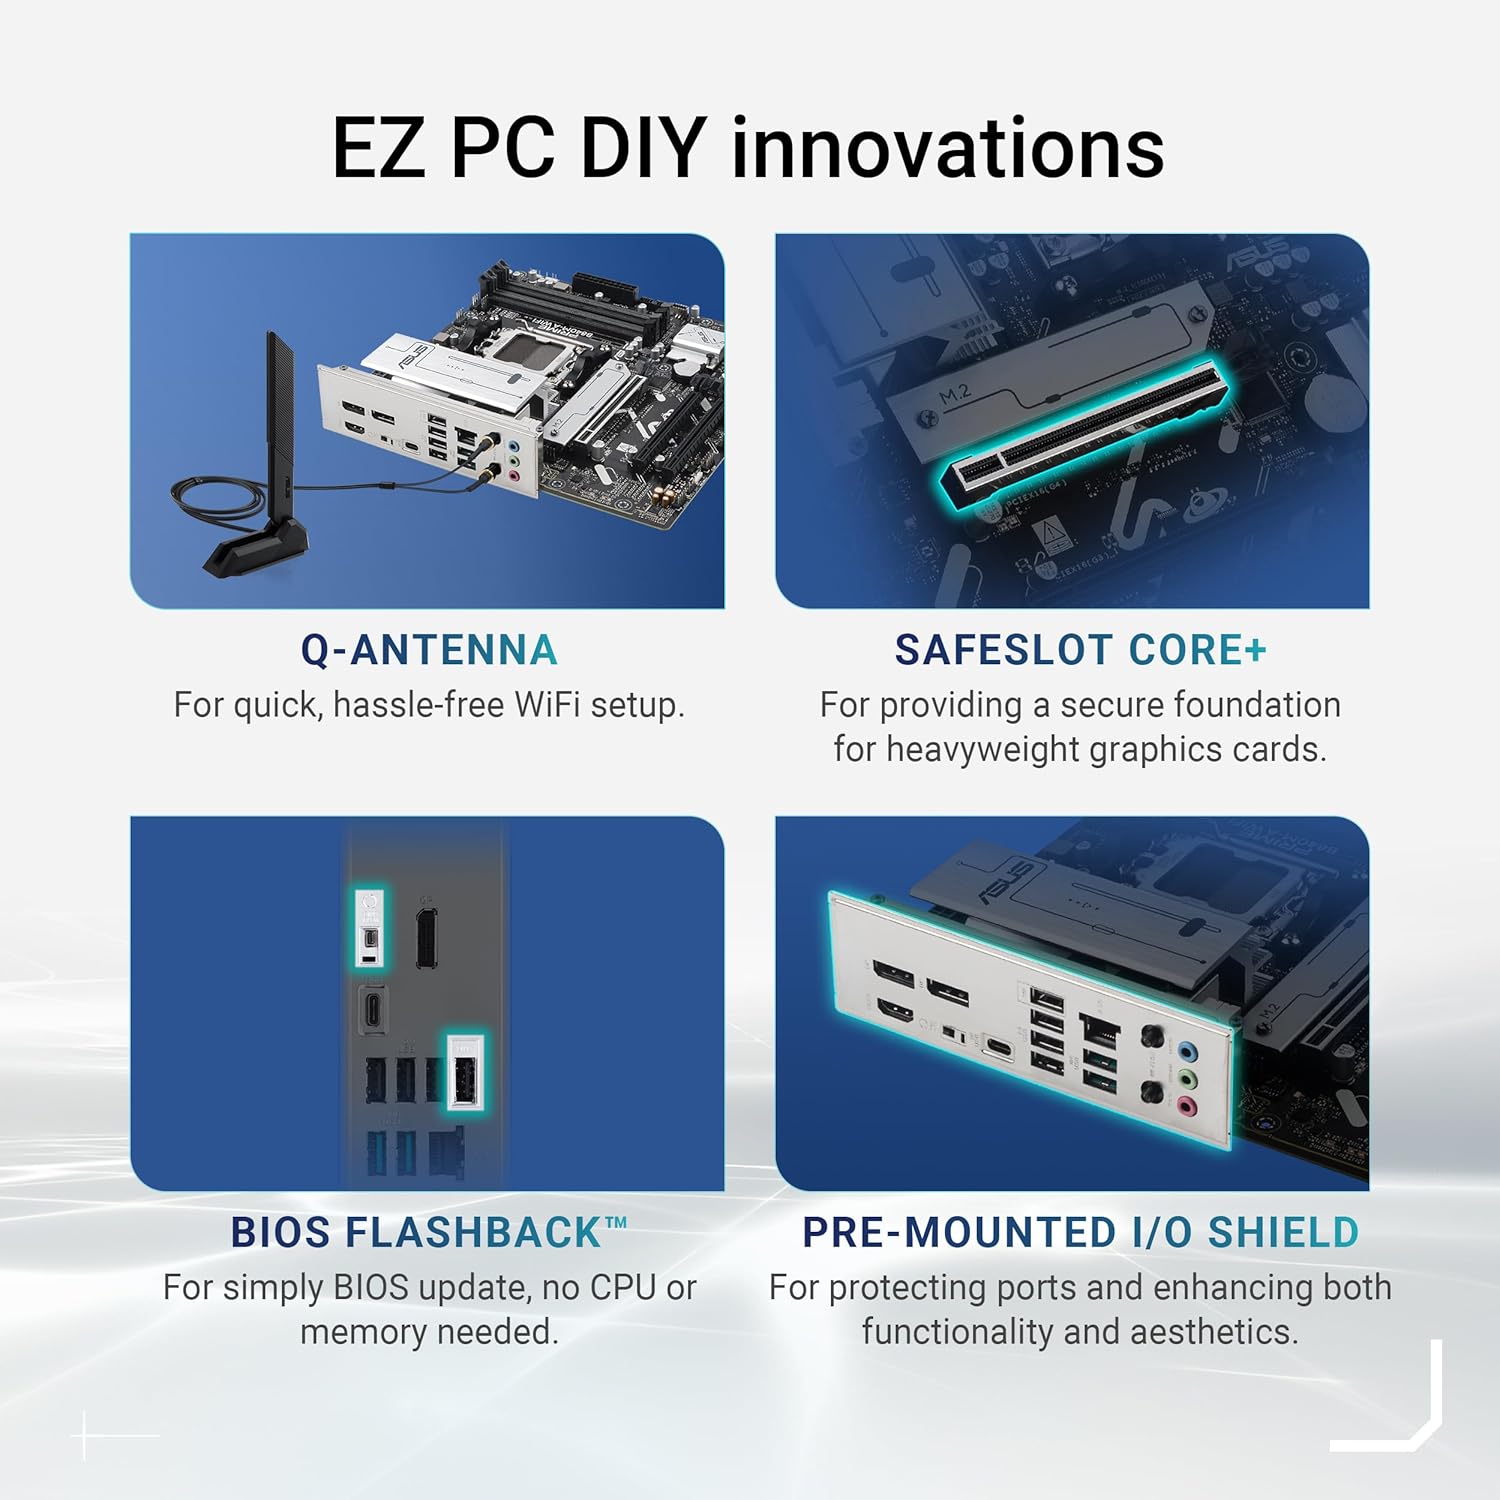
Immaġni 3.2: Fuqview of user-friendly DIY innovations such as the Q-Antenna, SafeSlot Core+, BIOS FlashBack button, and pre-mounted I/O shield.
4. Istruzzjonijiet Operattivi
4.1. First Boot-Up
After completing all hardware installations, connect your monitor, keyboard, and mouse. Power on your system. The motherboard's Q-LED indicators can provide diagnostic feedback during the boot process.
4.2. UEFI BIOS Access
To enter the UEFI BIOS utility, press the Ħassar or F2 key during the Power-On Self-Test (POST) sequence. The UEFI BIOS provides a graphical interface for configuring system settings, boot order, and hardware parameters.
4.3. Installazzjoni tas-sewwieq
After installing your operating system, install the necessary drivers for your motherboard components. You can use the included ASUS DriverHub utility or download the latest drivers from the official ASUS support websit (www.asus.com/support/).
5. Manutenzjoni
5.1. Aġġornamenti tal-BIOS
Regularly updating your BIOS can improve system stability, compatibility, and performance. The ASUS PRIME B840M-A WIFI features a BIOS FlashBack button, allowing you to update the BIOS without a CPU or memory installed. Refer to the ASUS support website for detailed instructions on using BIOS FlashBack.
5.2. Driver and Software Updates
Keep your system drivers and ASUS utilities updated to ensure optimal performance and security. Use ASUS DriverHub or visit the ASUS support websit għall-aħħar verżjonijiet.
5.3. Tindif Fiżiku
Periodically clean your computer's interior to prevent dust buildup, which can affect cooling and component lifespan. Use compressed air to remove dust from fans, heatsinks, and other components.
5.4. Ġestjoni Termali
Utilize ASUS Fan Xpert 2+ software to monitor and control your system's cooling fans, ensuring efficient thermal performance and quiet operation.
6 Issolvi l-problemi
Din it-taqsima tindirizza kwistjonijiet komuni li tista’ tiltaqa’ magħhom.
6.1. Q-LED Indicators
The motherboard features Q-LEDs (CPU, DRAM, VGA, BOOT) that light up to indicate the status of key components during the boot process. If a specific LED remains lit, it points to a potential issue with that component.
- LED tas-CPU: Indicates a CPU issue. Ensure the CPU is correctly seated and the power connector is attached.
- LED tad-DRAM: Indicates a memory issue. Reseat RAM modules or try one module at a time.
- LED tal-VGA: Indicates a graphics card issue. Ensure the graphics card is properly seated and power cables are connected.
- LED tal-BOOT: Indicates an issue with the boot device. Check SATA/M.2 connections and boot order in BIOS.
6.2. L-ebda Output tal-Wiri
If your monitor shows no signal:
- Verify monitor cables are securely connected to the graphics card or motherboard (if using integrated graphics).
- Ensure the graphics card has sufficient power.
- Ittestja b'monitor jew kejbil differenti jekk possibbli.
6.3. System Instability or Random Restarts
- Check CPU and GPU temperatures using monitoring software (e.g., HWiNFO). Overheating can cause instability.
- Kun żgur li l-konnessjonijiet kollha tal-enerġija huma siguri.
- Mexxi għodod dijanjostiċi tal-memorja biex tiċċekkja għal żbalji fir-RAM.
6.4. CMOS ċar
If your system fails to boot after making BIOS changes, use the Clear CMOS button on the I/O panel to reset BIOS settings to default. Refer to your motherboard's detailed manual for the exact location and procedure.
7. Speċifikazzjonijiet
| Karatteristika | Speċifikazzjoni |
|---|---|
| Isem tal-Mudell | PREMIUM B840M-A |
| Socket tas-CPU | Sokit AM5 |
| Proċessuri Kompatibbli | AMD Ryzen 9000, AMD Ryzen 8000, AMD Ryzen 7000 Series |
| Tip ta' Ċipset | AMD B840 |
| Teknoloġija tal-Memorja RAM | DDR5 |
| Veloċità tal-Arloġġ tal-Memorja | 7600 MHz (Mass) |
| Kapaċità tal-Ħażna tal-Memorja (Massima) | 192 GB |
| Pjattaforma | Windows 11 |
| Dimensjonijiet tal-Prodott | 9.61 x 9.61 x 1.97 pulzieri |
| Piż tal-oġġett | 2.05 liri |
| Numru tal-Mudell tal-Oġġett | 90MB1J20-M0EAY0 |
| Konnettività | WiFi 6E, 2.5Gbit LAN, USB 3.2 Gen 2 (20Gbps) Type-C |
| Output tal-vidjo | 2x DisplayPort, HDMI |

Immaġni 7.1: Dettaljata view of the motherboard's digital power design, support for AMD EXPO & AEMP, and the high-speed PCIe 4.0 M.2 slot.
8. Garanzija u Appoġġ
ASUS products are manufactured to the highest quality standards. For detailed warranty information, including terms and conditions, please refer to the warranty card included with your product or visit the official ASUS support websit.
For technical assistance, driver downloads, BIOS updates, and further product information, please visit the ASUS support portal:
Appoġġ Uffiċjali tal-ASUS Websit
When contacting support, please have your product model (PRIME B840M-A WIFI) and serial number ready.