
1. Introduzzjoni
Thank you for choosing the MAXSafes Model 10002V Drop Down Biometric Handgun Safe. This safe is designed to provide secure storage and quick access to your firearm using advanced finger vein recognition, a digital keypad, or a mechanical key. Please read this manual thoroughly before installation and operation to ensure proper use and maximum security.

Figure 1: MAXSafes Model 10002V Drop Down Biometric Handgun Safe
2. Informazzjoni dwar is-Sigurtà
TWISSIJA: Always store firearms unloaded and separate from ammunition. Keep the safe locked and out of reach of children and unauthorized individuals. Never store the mechanical override keys inside the safe. Familiarize yourself with all local and federal laws regarding firearm storage.
- Kun żgur li s-sejf ikun immuntat sew biex tevita li jitneħħa mingħajr awtorizzazzjoni.
- Do not leave the safe open or unattended.
- Test all access methods periodically to ensure proper function.
- Ibdel il-batteriji minnufih meta jidher l-indikatur ta’ batterija baxxa.
3. Kontenut tal-Pakkett
Ivverifika li l-oġġetti kollha huma preżenti fil-pakkett:
- MAXSafes Model 10002V Handgun Safe
- Mechanical Override Keys (2)
- Ħardwer tal-Immuntar (viti, ankri)
- Manwal ta 'Istruzzjoni (dan id-dokument)
4. Prodott Aktarview
The MAXSafes 10002V features a robust design with multiple access options for enhanced security and convenience.

Figure 2: Key Features of the MAXSafes 10002V
Komponenti:
- Finger Vein Scanner: For advanced biometric access.
- Tastiera Diġitali: For 4-6 digit combination code entry.
- Keyhole: For mechanical override key access.
- Kompartiment tal-batterija: Located on the underside or rear of the unit.
- Dawl LED Intern: Illuminates the safe's interior upon opening.
- Punti ta' Muntaġġ: For securing the safe to a wall or desk.

Figure 3: Access Methods - Vein Recognition, Digital Keypad, Mechanical Key
5. Setup
5.1 Installazzjoni tal-batterija
- Locate the battery compartment, typically on the underside or rear of the safe.
- Iftaħ l-għatu tal-kompartiment.
- Daħħal 4 batteriji AA (mhux inklużi), waqt li tiżgura l-polarità korretta (+/-).
- Agħlaq l-għatu tal-kompartiment tal-batterija sew.
- The safe will emit a beep, indicating successful power-up.
5.2 Initial Access and Programming
Upon first use, access the safe using the mechanical override key.
- Insert the mechanical key into the keyhole and turn it to unlock the safe.
- Iftaħ il-bieb sikur.
5.2.1 Setting a Digital Combination Code
- With the safe door open, locate the internal programming button (usually a small red or green button).
- Press the programming button. The indicator light on the keypad will illuminate.
- Daħħal il-kodiċi mixtieq tiegħek b'4-6 ċifri fuq it-tastiera.
- Press the programming button again to confirm. The safe will beep to confirm the new code.
- Ittestja l-kodiċi l-ġdid bil-bieb miftuħ qabel ma tagħlaqha.
5.2.2 Registering Finger Vein IDs
The safe can store up to 50 finger vein IDs.
- With the safe door open, press the programming button. The indicator light will illuminate.
- Place your finger firmly on the vein scanner. The scanner will light up and beep.
- Lift and reposition your finger slightly, then place it on the scanner again. Repeat this process 3-5 times from different angles to ensure a comprehensive scan.
- A successful registration will be indicated by a series of beeps.
- Repeat for additional fingers or users (up to 50).
- Test registered finger veins with the door open before closing it.

Figure 4: Finger Vein Recognition Technology
5.3 Immuntar tas-Sejf
The safe can be mounted to a wall or desk. Choose a secure location that is out of sight and reach of unauthorized persons.
- Select a suitable mounting location (e.g., under a desk, inside a cabinet, on a wall stud).
- Position the safe in the desired location and mark the mounting points through the pre-drilled holes on the safe's back or bottom.
- Drill pilot holes into the mounting surface using an appropriate drill bit size for the provided hardware.
- Align the safe with the drilled holes and secure it using the provided screws and anchors. Ensure the safe is firmly attached and does not wobble.

Figura 5: Eżamples of Wall and Desk Mounting Options
6. Istruzzjonijiet Operattivi
6.1 Opening with Finger Vein Recognition
- Place a registered finger firmly on the vein scanner.
- The scanner will light up, and the safe will emit a confirmation beep if the vein pattern is recognized.
- The safe door will automatically drop down, providing quick access.
6.2 Opening with Digital Keypad
- Enter your programmed 4-6 digit combination code on the keypad.
- The safe will emit a confirmation beep if the code is correct.
- The safe door will automatically drop down.
6.3 Opening with Mechanical Key
Use the mechanical key as a backup in case of battery failure or forgotten codes.
- Locate the keyhole cover (if present) and remove it.
- Insert the mechanical key into the keyhole and turn it to unlock the safe.
- The safe door will open.
6.4 Modalità Siekta
The safe features a silent mode for discreet access. Refer to the safe's specific button layout for activating/deactivating silent mode (often a dedicated button or a combination press).
6.5 Mod ta 'Allarm
The safe is equipped with an audible alarm. This alarm may activate if multiple incorrect access attempts are made or if the safe is tampered with. Consult the safe's interface for specific alarm settings or deactivation procedures.
6.6 Dawl LED Intern
The interior LED light automatically illuminates when the safe door opens, providing visibility in low-light conditions.
7. Manutenzjoni
7.1 Sostituzzjoni tal-batterija
When the low battery indicator (usually a flashing light or specific beep pattern) appears, replace all 4 AA batteries promptly. Use high-quality alkaline batteries for optimal performance.
7.2 Tindif
Imsaħ il-barra tas-sejf b'ċarruta ratba u damp cloth. Avoid using abrasive cleaners or solvents that could damage the finish or electronic components. Keep the finger vein scanner clean and free of debris.
7.3 Regular Function Check
Periodically test all access methods (finger vein, keypad, mechanical key) to ensure they are functioning correctly. This helps identify potential issues before they become critical.
8 Issolvi l-problemi
If you encounter issues with your MAXSafes 10002V, refer to the following common problems and solutions:
| Problema | Kawża Possibbli | Soluzzjoni |
|---|---|---|
| Finger vein not recognized | Improper finger placement, unregistered finger, dirty scanner, skin conditions (e.g., very dry, damaged). | Ensure firm and consistent finger placement. Re-register the finger, trying different angles. Clean the scanner. Try another registered finger or access method. |
| It-tastiera ma tirrispondix | Low batteries, incorrect code, keypad malfunction. | Replace batteries. Re-enter code carefully. Use mechanical key if necessary. |
| Sikur li ma jinfetaħx | Low batteries, incorrect access, mechanical obstruction. | Replace batteries. Try all access methods. Check for any obstructions preventing the door from dropping. |
| Indikatur tal-batterija baxxa | Il-batteriji huma baxxi. | Ibdel l-4 batteriji AA kollha immedjatament. |
9. Speċifikazzjonijiet
Detailed specifications for the MAXSafes Model 10002V:
- Ditta: MAXSafes
- Numru tal-Mudell: 10002V
- Dimensjonijiet tal-Prodott: 11.1"D x 3.8"W x 13.8"H
- Piż tal-oġġett: 9.55 liri
- Tip ta' serratura: Biometric (Finger Vein), Electronic Combination Lock, Key
- Kulur: Iswed
- Kapaċità: 8.7 Liri
- Materjal: Carbon Steel (16 gauge)
- Karatteristika Speċjali: Sensor Light, Audible Alarm
- Tip ta 'Immuntar: Wall Mount, Desk Mount
- UPC: 762736839353
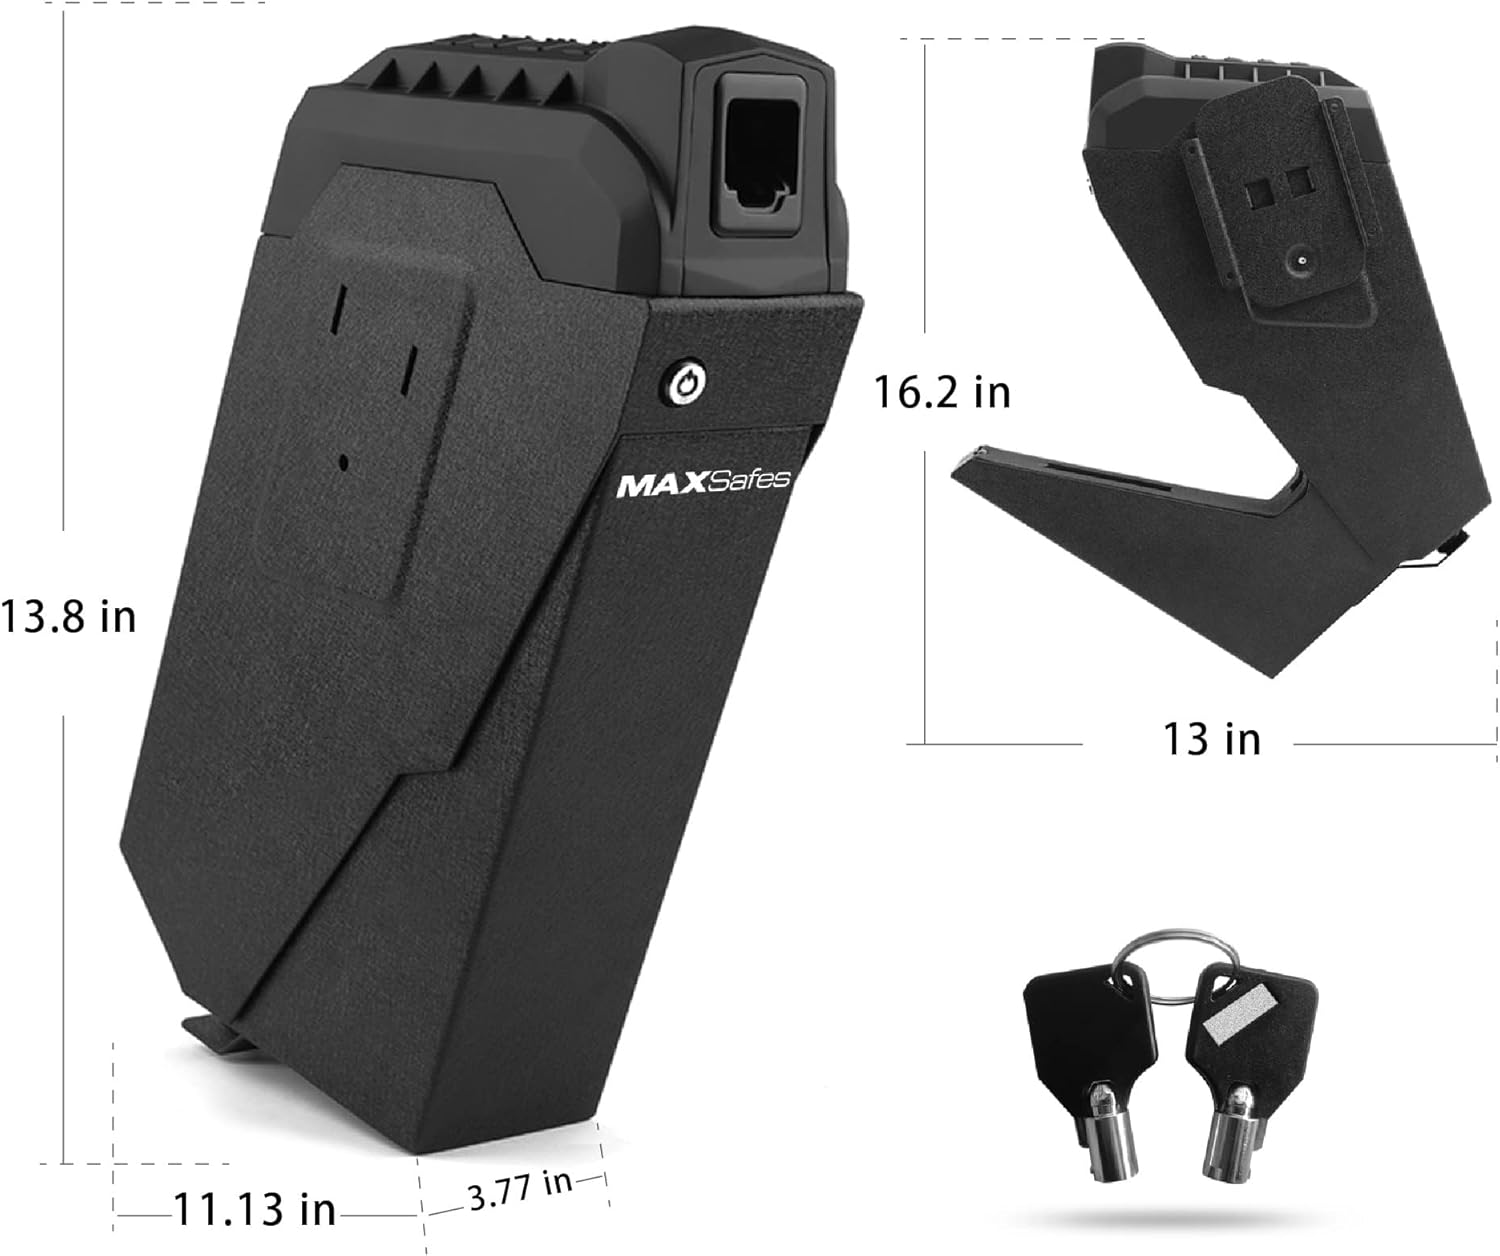
Figure 6: Product Dimensions and Included Keys
10. Garanzija u Appoġġ
MAXSafes products are manufactured to high-quality standards. For warranty information or technical support, please refer to the contact details provided with your purchase documentation or visit the official MAXSafes websit. Żomm l-irċevuta tax-xiri tiegħek bħala prova tax-xiri għal kwalunkwe talba ta' garanzija.