1. Introduzzjoni
Thank you for choosing the Generic Ceiling Embedded LED Rainfall Shower Head. This manual provides essential information for the safe installation, operation, and maintenance of your new shower system. Please read this manual thoroughly before installation and retain it for future reference.
2. Informazzjoni dwar is-Sigurtà
Biex tiżgura tħaddim sikur u tevita ħsara, jekk jogħġbok osserva l-prekawzjonijiet ta' sigurtà li ġejjin:
- Installazzjoni Professjonali Rakkomandata: Installation of this shower system requires plumbing and electrical knowledge. It is highly recommended to have it installed by a qualified professional.
- Konnessjoni Elettrika: The LED lighting feature requires an electrical power connection. Ensure all electrical work is performed by a licensed electrician and complies with local codes.
- Pressjoni tal-Ilma: Ensure your water supply meets the minimum water pressure requirement of 0.3MPA for optimal performance.
- Temperatura tal-Ilma: Always test water temperature before entering the shower to prevent scalding.
- Tindif: Use only mild, non-abrasive cleaners for maintenance to avoid damaging the finish.
3. Kontenut tal-Pakkett
Carefully unpack the box and ensure all the following items are present and undamaged:
- Ceiling Embedded LED Rainfall Shower Head (500x360mm)
- Kontroll mill-bogħod għal Dwal LED
- Adapter tal-Enerġija għal Dwal LED
- Manek flessibbli
- Mounting Hardware (screws, anchors, Allen wrench)
- Manwal għall-Utent (dan id-dokument)

Figura 3.1: Included components of the shower system. This image displays the main shower head unit, a remote control, a power adapter, flexible hoses, and various mounting accessories.
4. Speċifikazzjonijiet
| Karatteristika | Deskrizzjoni |
|---|---|
| Numru tal-Mudell | JXEXAXXAE |
| Materjal | 304 Stainless Steel |
| Temm | Black, Brushed |
| Tip ta' Installazzjoni | Ceiling Embedded |
| Daqs tar-Ras tad-Doċċa | 500mm x 360mm (approx. 19.7 x 14.2 inches) |
| Dawl LED | Multi-color, Remote Control, Requires Power Connection |
| Pressjoni Minima tal-Ilma | 0.3MPA |
| Fluss tal-Ilma | 9L-15L/min |
| Piż tal-oġġett | 1.76 ounces (main unit, excluding accessories) |
| Dimensjonijiet tal-Pakkett | 1.18 x 0.79 x 0.39 inches (This seems to be for a small component, not the full shower head. Refer to shower head size for actual unit dimensions.) |

Figura 4.1: Dimensional drawing of the shower head. The diagram illustrates the length (500mm), width (360mm), and thickness (60mm) of the main shower unit.
5. Installazzjoni
This shower head is designed for ceiling-embedded installation. Due to the complexity involving both plumbing and electrical connections, professional installation is strongly recommended.
5.1. Kontrolli ta 'qabel l-installazzjoni
- Verify that all package contents are present and undamaged.
- Ensure the ceiling structure can support the weight of the shower head and associated plumbing.
- Confirm that water supply lines (hot and cold) and an electrical outlet for the LED power adapter are available at the installation site.
- Itfi l-provvista prinċipali tal-ilma u l-enerġija elettrika fiż-żona tal-installazzjoni qabel tibda.
5.2. Passi ta' Installazzjoni (Aktar minnview)
- Ipprepara l-Ftuħ tas-Saqaf: Create an appropriately sized opening in the ceiling according to the shower head dimensions (500x360mm) and the specific mounting requirements.
- Qabbad il-Linji tal-Ilma: Connect the flexible hoses from the shower head to the hot and cold water supply lines in the ceiling. Ensure all connections are secure and watertight.
- Konnessjoni Elettrika: Connect the LED power adapter to the shower head's LED wiring and then to a suitable electrical power source. This connection must be done by a qualified electrician.
- Secure Shower Head: Carefully insert the shower head into the ceiling opening and secure it using the provided mounting hardware. Ensure it is flush with the ceiling surface.
- Sistema tat-Test: Once installed, turn on the main water supply and electrical power. Check for any leaks and test the shower head's water flow and LED functions.
6. Istruzzjonijiet Operattivi
6.1. Water Flow Operation
- Turn on your shower's water mixer or valve to activate the rainfall function.
- Adjust the water temperature and flow rate to your preference using your existing shower controls.
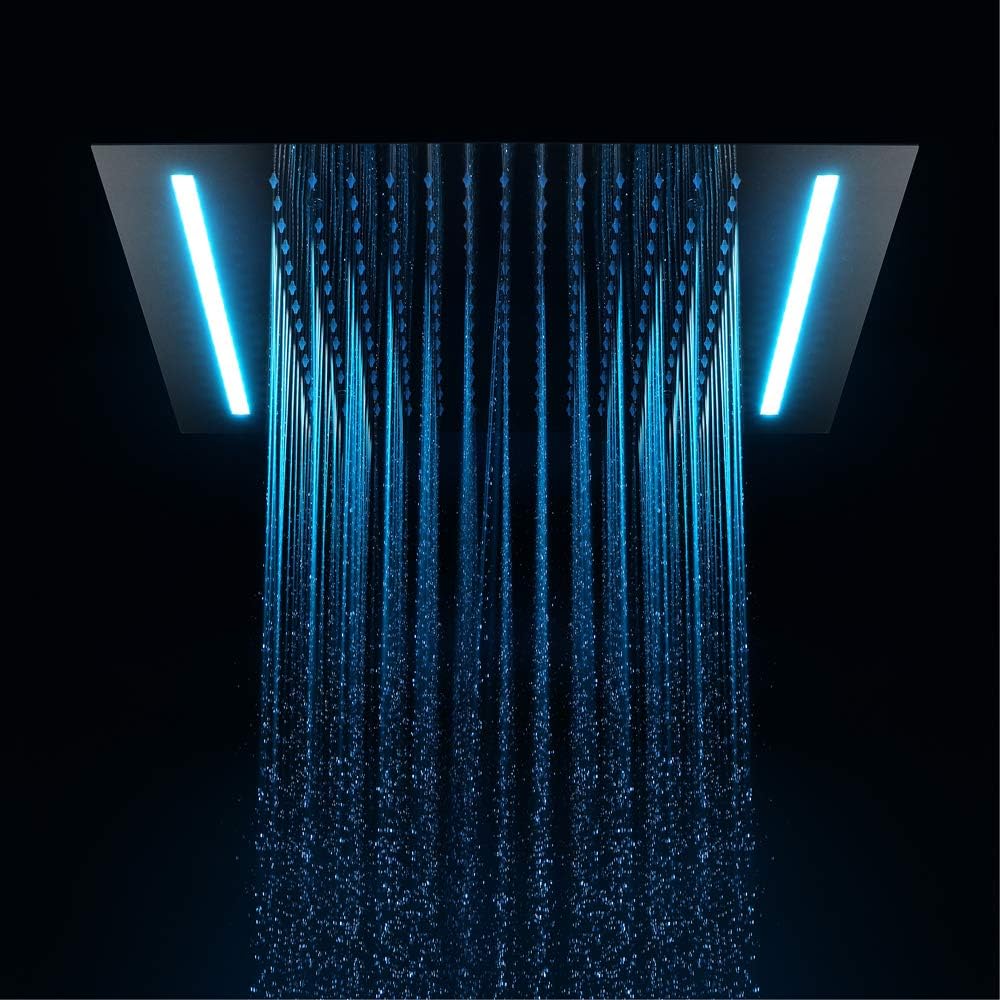
Figura 6.1: Rainfall function with blue LED illumination. This image shows water flowing from the shower head in a rainfall pattern, illuminated by blue LED lights.

Figura 6.2: Rainfall function with purple LED illumination. This image shows water flowing from the shower head in a rainfall pattern, illuminated by purple LED lights.
6.2. Tħaddim tad-Dawl LED
Id-dwal LED huma kkontrollati mill-kontroll remot inkluż.
- Power On/Off: Press the 'ON' or 'OFF' button on the remote to turn the LED lights on or off.
- Għażla tal-Kulur: Use the color buttons (R, G, B, W, and other color swatches) to select a specific static color.
- Aġġustament tal-luminożità: Use the brightness up/down buttons (sun icons) to adjust the intensity of the selected color.
- Modi dinamiċi: The remote features buttons like 'FLASH', 'STROBE', 'FADE', and 'SMOOTH' to activate various dynamic color-changing effects.

Figura 6.3: Remote control in use with purple LED lights. This image shows a hand operating the remote control, with the shower head above displaying purple LED lighting.

Figura 6.4: Dettaljati view of the LED remote control. The remote features buttons for power, individual colors, brightness adjustment, and dynamic lighting modes like flash, strobe, fade, and smooth.

Figura 6.5: Shower head with blue LED lights. This image provides a top-down perspective of the shower head, showing the integrated LED strips illuminated in blue.
7. Manutenzjoni
Regular cleaning and maintenance will help prolong the life and appearance of your shower system.
- Tindif tar-Ras tad-Doċċa: Use a soft cloth and a mild, non-abrasive cleaner to wipe down the stainless steel surface. Avoid harsh chemicals, abrasive pads, or cleaners containing ammonia or bleach, as these can damage the finish.
- Tindif taż-żennuna: Periodically check the silicone nozzles for mineral buildup. Gently rub the nozzles with your fingers to dislodge any deposits.
- Kura tal-LED: Ensure the LED components and power adapter remain dry. Do not attempt to open or repair the LED unit yourself.
8 Issolvi l-problemi
Jekk tiltaqa' ma' problemi bis-sistema tad-doċċa tiegħek, irreferi għall-problemi u s-soluzzjonijiet komuni li ġejjin:
| Problema | Kawża Possibbli | Soluzzjoni |
|---|---|---|
| L-ebda fluss ta' ilma jew pressjoni baxxa | Main water supply off; Clogged nozzles; Insufficient water pressure. | Check main water supply; Clean shower head nozzles; Verify water pressure meets specifications. |
| Dwal LED ma jaħdmux | No power to LED unit; Remote control battery dead; Remote not paired or faulty. | Check electrical connection and power supply; Replace remote control battery; Contact support if issue persists. |
| Tnixxija ta' ilma mill-konnessjonijiet | Loose connections; Damaged seals/gaskets. | Tighten all plumbing connections; Inspect and replace any damaged seals or gaskets. Professional assistance may be required. |
9. Garanzija u Appoġġ
This product is manufactured by Generic. While specific warranty details are not provided in this manual, we are committed to customer satisfaction.
If you encounter any issues with your product or are not satisfied with its performance, please contact the seller directly before leaving a review. We will work with you to find a satisfactory solution.
For technical support or service inquiries, please refer to the contact information provided by your retailer or on the product packaging.