1. Istruzzjonijiet Importanti dwar is-Sigurtà
Jekk jogħġbok aqra l-istruzzjonijiet kollha bir-reqqa qabel ma tuża dan l-apparat. Jekk ma ssegwix dawn l-istruzzjonijiet, dan jista' jirriżulta f'xokk elettriku, nar, jew korriment personali serju.
- Tmissx uċuħ sħan. Uża manki jew pumi.
- Biex tipproteġi kontra xokk elettriku, tgħaddix korda, plaggs, jew apparat fl-ilma jew likwidu ieħor.
- Superviżjoni mill-qrib hija meħtieġa meta xi apparat jintuża minn jew ħdejn it-tfal.
- Spluggja mill-iżbokk meta ma tkunx qed tuża u qabel tnaddaf. Ħallih jiksaħ qabel ma tpoġġi jew tneħħi l-partijiet.
- Tħaddim l-ebda apparat b'korda jew plagg bil-ħsara jew wara li l-apparat ma jaħdimx jew ikun ġie bil-ħsara b'xi mod.
- L-użu ta' aċċessorji aċċessorji mhux rakkomandati mill-manifattur tal-apparat jista' jikkawża korrimenti.
- Tużax barra.
- Tħallix il-korda tistrieħ fuq it-tarf tal-mejda jew tal-bank, jew tmiss uċuħ sħan.
- Tpoġġix fuq jew ħdejn burner tal-gass sħun jew elettriku, jew f'forn imsaħħan.
- Għandha tintuża kawtela kbira meta tiċċaqlaq apparat li jkun fih żejt jaħraq jew likwidi oħra jaħarqu.
- Dejjem waħħal il-plagg mal-apparat l-ewwel, imbagħad daħħal il-korda fis-sokit tal-ħajt. Biex tiskonnettja, itfi kwalunkwe kontroll, imbagħad neħħi l-plagg mis-sokit tal-ħajt.
- Tużax l-apparat għal użu ieħor minbarra dak maħsub.
- Ikel ta’ kobor żejjed jew utensili tal-metall m’għandhomx jiddaħħlu f’forn tat-toaster peress li jistgħu joħolqu nar jew riskju ta’ xokk elettriku.
- Jista 'jseħħ nar jekk il-forn ikun mgħotti jew imiss materjal li jaqbad, inklużi purtieri, drappijiet, ħitan, u simili, meta jkun qed jaħdem.
- Tpoġġix materjali għajr l-aċċessorji rakkomandati mill-manifattur f'dan il-forn meta ma jkunx qed jintuża.
- Tpoġġix xi wieħed mill-materjali li ġejjin fil-forn: karta, kartun, plastik, jew materjali simili.
- Tgħattix trej tal-frak jew xi parti tal-forn b'fojl tal-metall. Dan jikkawża sħana żejda tal-forn.
2. Prodott Aktarview
This 22L tabletop electric mini oven is designed for household baking and toasting. It features adjustable temperature control, a 120-minute timer, and a three-layer baking position for versatile cooking.

Figura 1: Quddiem view of the 22L Tabletop Electric Mini Oven with food cooking inside.

Figure 2: Dimensions of the oven: 421mm (width), 252mm (depth), 273mm (height).
3. Setup
3.1 Disimballaġġ
- Carefully remove the oven and all packaging materials from the box.
- Remove any protective films or stickers from the oven surfaces.
- Iċċekkja għal xi ħsara waqt it-trasport. Jekk ikun hemm ħsara, tħaddimx l-apparat u kkuntattja l-appoġġ għall-klijenti.
3.2 Tqegħid
- Place the oven on a stable, flat, heat-resistant surface.
- Ensure there is adequate ventilation around the oven (at least 10 cm clearance on all sides).
- Tpoġġix il-forn ħdejn materjali fjammabbli bħal purtieri jew ħitan.
- Ensure the power cord is not obstructed or pinched.
3.3 Qabel l-Ewwel Użu
- Wash the baking tray, wire rack, and crumb tray in warm, soapy water. Rinse and dry thoroughly.
- Imsaħ l-intern u l-barra tal-forn b'adamp drapp.
- To eliminate any manufacturing odors, operate the oven empty for approximately 15 minutes at 200°C (400°F). Ensure the area is well-ventilated during this process.
4. Istruzzjonijiet Operattivi
4.1 Kontrolli Fuqview
The oven features three mechanical control knobs:
- Il-Pum ta' Fuq: Temperature Control (0-250°C)
- Pum tan-Nofs: Function Selector (Controls upper/lower heating elements)
- Pum tal-qiegħ: Timer (0-120 minuta)

Figure 3: Temperature control knob, adjustable from 70°C to 250°C.

Figure 4: Timer knob, adjustable from 0 to 120 minutes.
4.2 Tisħin minn qabel tal-Forn
- Place the wire rack or baking tray in the desired position.
- Dawwar il-pum tal-Kontroll tat-Temperatura għat-temperatura mixtieqa.
- Turn the Timer knob to the desired preheating time (e.g., 10-15 minutes). The power indicator light will illuminate.
- Once the preheating time has elapsed, the oven is ready for use.
4.3 Baking and Roasting
This oven offers three-layer baking positions and independent temperature control for upper and lower heating tubes.

Figure 5: The 22L capacity oven features three distinct baking positions for versatile cooking.
- Preheat the oven as described above.
- Carefully place your food on the baking tray or wire rack into the desired baking position. Use oven mitts.
- Select the appropriate temperature using the Temperature Control knob (0-250°C).
- Use the Function Selector knob to choose between upper heating, lower heating, or simultaneous upper and lower heating, depending on your recipe's requirements. This allows for precise control over browning and cooking.
- Set the cooking time using the Timer knob (0-120 minutes). The oven will automatically shut off and ring a bell when the timer expires.
- Monitor food through the wide view tieqa.

Figure 6: The wide viewing window allows for easy monitoring of food changes during cooking.
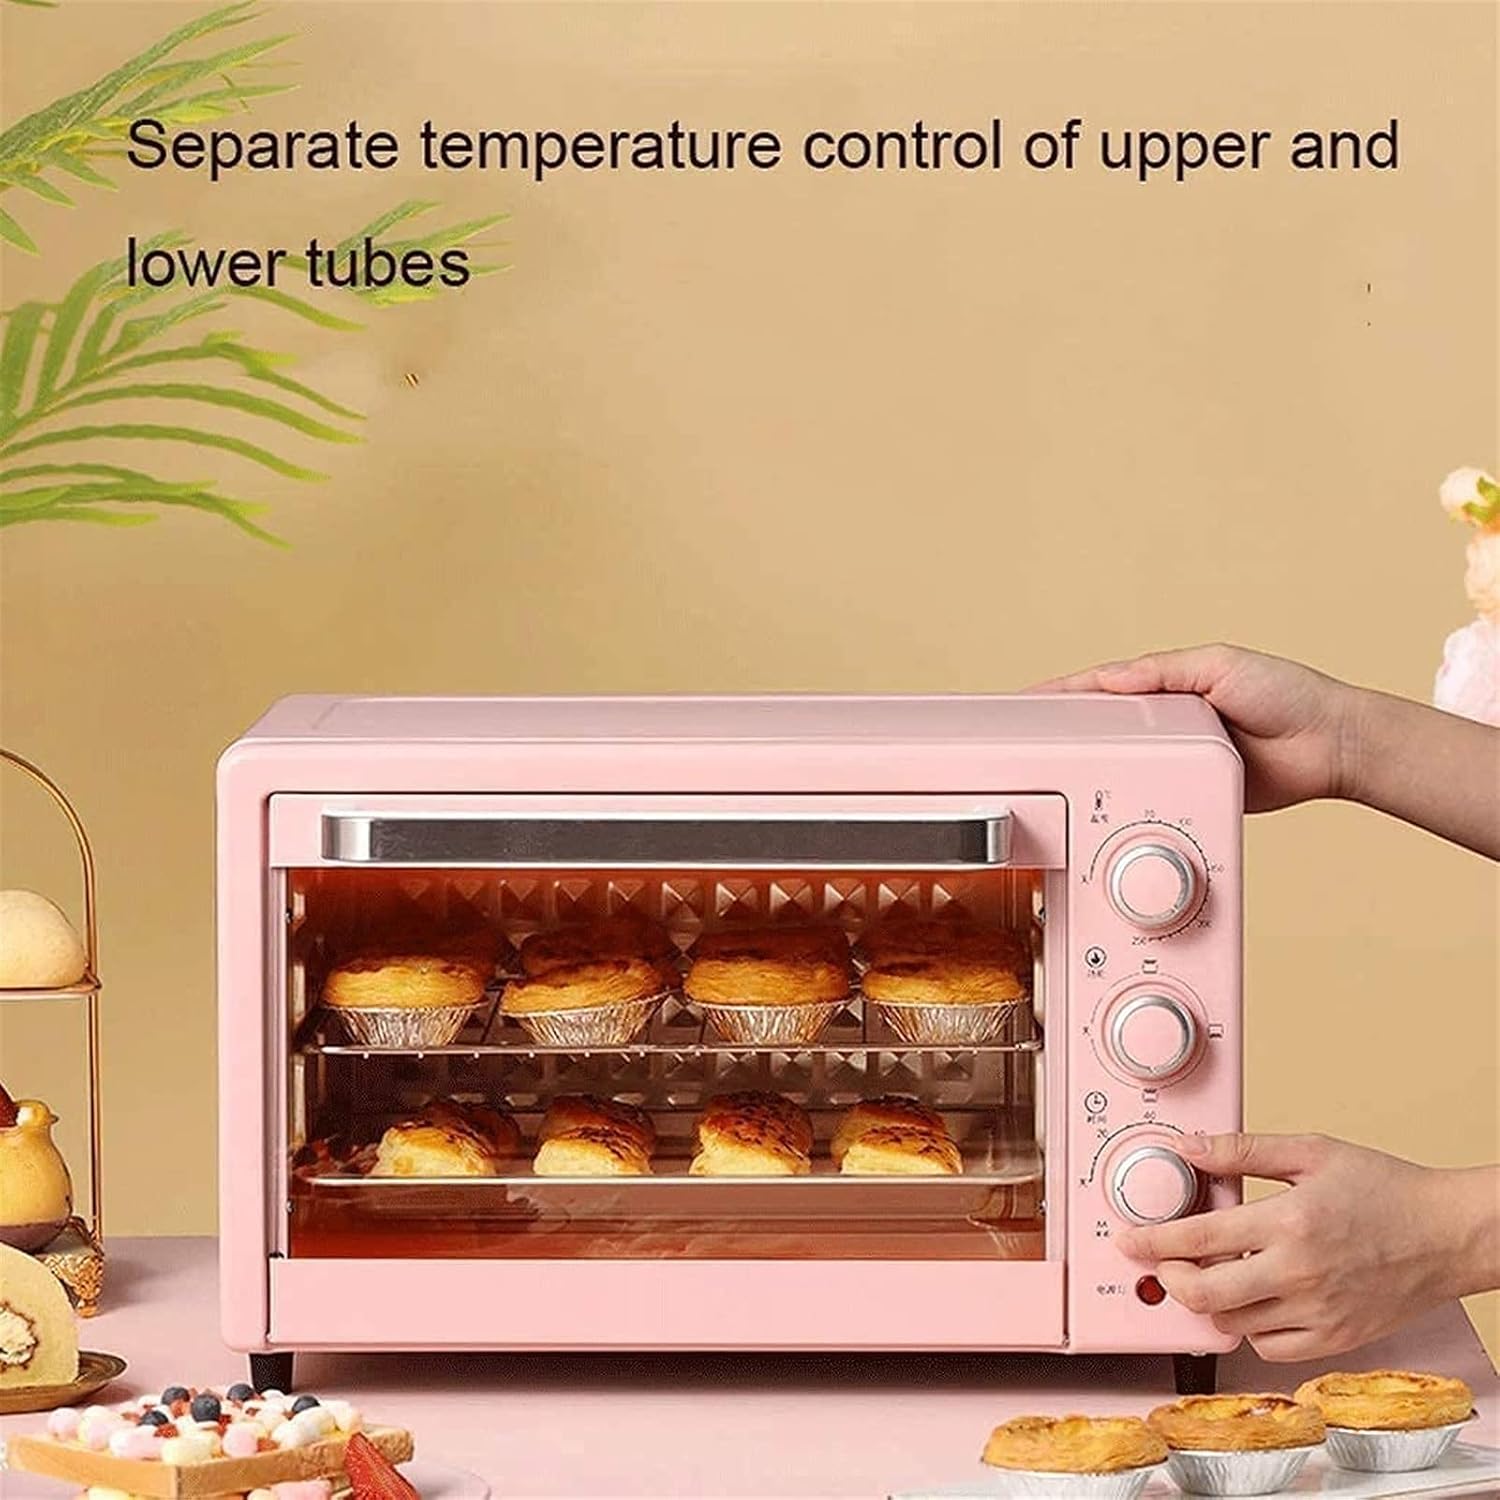
Figure 7: The oven features separate temperature control for upper and lower heating tubes, enabling precise cooking.
5. Manutenzjoni u Tindif
5.1 Tindif Ġenerali
- Dejjem aqla’ l-forn mill-plagg tal-elettriku u ħallih jiksaħ kompletament qabel ma tnaddfu.
- Tgħaddasx il-korp tal-forn, il-korda, jew il-plagg fl-ilma jew fi kwalunkwe likwidu ieħor.
- Imsaħ il-barra bl-adamp drapp u deterġent ħafif. Tużax cleaners li joborxu jew għorik.
5.2 Cleaning Interior and Accessories
- Remove the baking tray, wire rack, and crumb tray. Wash them in warm, soapy water. For stubborn stains, soak them before cleaning.
- The interior walls can be wiped with a damp cloth and mild detergent. Avoid touching the heating elements.
- Kun żgur li l-partijiet kollha huma niexfa sew qabel ma terġa' tgħaqqad u taħżen il-forn.

Figure 8: The oven door features a three-layer safety explosion-proof glass for enhanced durability and safety, including a transparent layer, tempered glass layer, and oil-proof cleaning layer.
6 Issolvi l-problemi
If you encounter any issues with your oven, please refer to the following common problems and solutions:
- Il-forn ma jixgħelx:
- Kun żgur li l-korda tal-enerġija hija mdaħħla sew f'sokit elettriku li jaħdem.
- Check if the timer knob is set to a cooking duration. The oven will not operate if the timer is at "OFF" or "0".
- Ivverifika li s-circuit breaker ma qabadx.
- L-ikel mhux qed jissajjar b'mod uniformi:
- Ensure the oven is preheated to the correct temperature.
- Check that the correct heating function (upper, lower, or both) is selected for your recipe.
- Rotate food halfway through cooking for more even results.
- Ensure there is adequate space around the food for heat circulation.
- Smoke or unusual odor during first use:
- This is normal during the initial use as manufacturing oils burn off. Ensure good ventilation. If it persists after the first few uses, discontinue use and contact support.
7. Speċifikazzjonijiet
| Karatteristika | Speċifikazzjoni |
|---|---|
| Mudell | Forn Mini 22L |
| Kapaċità | 22 Litri |
| Vol ikklassifikattage | 110V-240V/50Hz |
| Qawwa Rated | 1300W |
| Firxa tat-Temperatura | 0-250°C (Controllable) |
| Tajmer tal-Ħami | 0-120 Minutes with Bell Ring and Auto Shut Off |
| Materjal tat-Tubu tat-Tisħin | Stainless Steel (4 tubes) |
| Materjal tal-inforra | Galvanized Sheet |
| Metodu ta' Kontroll | Mechanical Knobs |
| Dimensjonijiet (W×D×H) | 421mm × 252mm × 273mm |
| Stil Bieb | Dropdown Bieb |
8. Garanzija u Appoġġ
8.1 Garanzija Limitata
This product comes with a limited warranty against defects in materials and workmanship. Please refer to the warranty card included with your purchase or contact the retailer for specific warranty terms and conditions. Keep your proof of purchase for warranty claims.
8.2 Appoġġ għall-Klijent
For technical assistance, troubleshooting, or parts replacement, please contact the retailer where you purchased the product. If purchased directly from the manufacturer, refer to the contact information provided in your packaging or on their official websit.