
Flashpoint R2 Nano
Flashpoint R2 Nano Touchscreen TTL Wireless Flash Trigger User Manual
For Panasonic and Olympus Cameras
1. Introduzzjoni
The Flashpoint R2 Nano Remote is a compact and advanced wireless flash trigger designed for Panasonic and Olympus camera systems. It offers precise control over your flash settings through an intuitive touchscreen interface and OLED display, enhancing your photography experience with seamless integration and reliable performance.
Il-karatteristiċi ewlenin jinkludu:
- Integrazzjoni bla xkiel: Full TTL compatibility with Olympus/Panasonic cameras for optimal exposure.
- Ultimate Reliability: Stable 2.4 GHz radio frequency with 32 channels, ensuring consistent triggering up to 328 feet (100 meters).
- Sinkronizzazzjoni b'Veloċità Għolja (HSS): Achieve sync speeds up to 1/8000s for creative effects and motion freezing.
- Kontroll tat-touchscreen intuwittiv: Responsive interface for quick and easy adjustments.
- Versatile Group Control: Manage up to 16 groups (A-F, 0-9) independently for complex lighting setups.
2. X'hemm fil-Kaxxa
Upon unboxing your Flashpoint R2 Nano, please verify that all components are present:
- Flashpoint R2 Nano Remote
- Cable tal-Iċċarġjar tal-USB-C
- Borża tal-Ħażna
- Manwal għall-Utent (dan id-dokument)
3. Prodott Aktarview
Familiarize yourself with the components and controls of your R2 Nano remote.
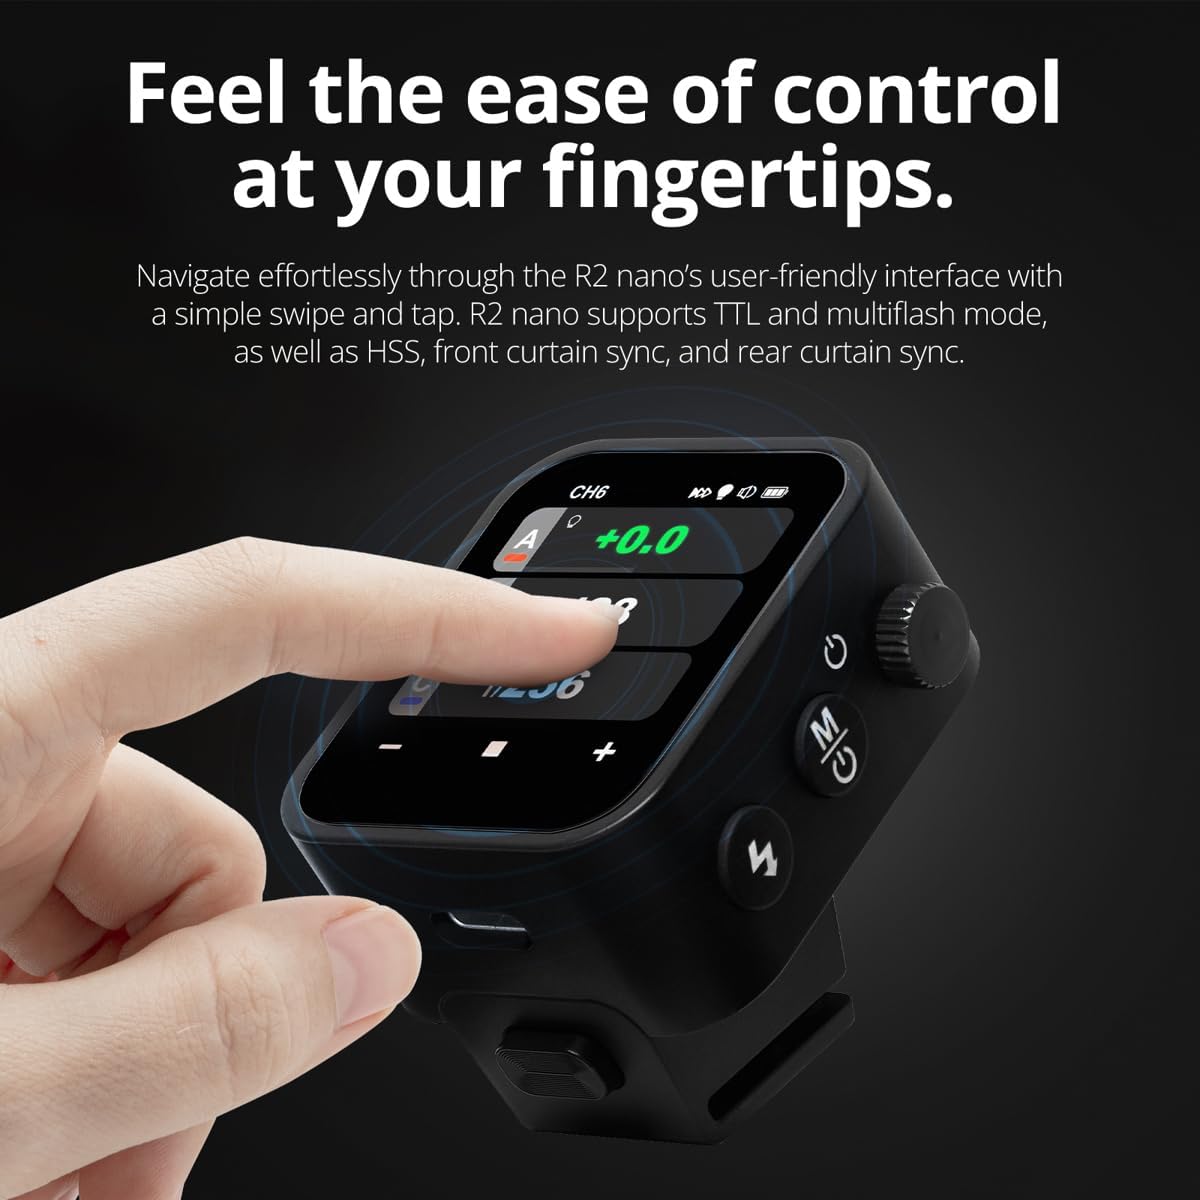
Figura 3.1: Quddiem u Ġenb View of the R2 Nano with Key Components Labeled.
- Touch Screen: Main interface for settings and control.
- Agħżel Dial: Għan-navigazzjoni tal-menus u l-aġġustament tal-valuri.
- Swiċċ tal-Enerġija: Ixgħel/itfi l-apparat.
- Buttuna tat-test: Jattiva flash tat-test.
- Installing/Detaching Button: Releases the remote from the hotshoe.
- Slot tal-Immuntar: Connects to the camera's hotshoe.
- Port tal-Iċċarġjar USB-C: Għall-iċċarġjar tal-batterija.

Figure 3.2: R2 Nano Touchscreen Interface Details.
- Kanal (CH): Displays the current wireless channel (e.g., CH6).
- Group (A, B, C, etc.): Indicates the active flash groups.
- Livell tal-Qawwa tal-Ħruġ: Shows the flash power setting (e.g., +0.0, 1/128).
- Parameters - / +: Touch controls for decreasing/inkrementasinvaluri g.
- Modi ta' Sinkronizzazzjoni: Icons indicating sync modes (e.g., HSS, front curtain, rear curtain).
- Mudellar Lamp: Icon for modeling lamp status.
- Indikatur tal-batterija: Juri l-livell attwali tal-batterija.
4. Setup
4.1 Iċċarġjar tal-batterija
The R2 Nano is equipped with a built-in rechargeable lithium battery. Before first use, fully charge the device.
- Locate the USB-C charging port on the side of the R2 Nano.
- Qabbad il-kejbil tal-iċċarġjar USB-C ipprovdut mal-port.
- Qabbad it-tarf l-ieħor tal-kejbil ma' adapter tal-enerġija USB (mhux inkluż) jew mal-port USB tal-kompjuter.
- The battery indicator on the screen will show charging status. A full charge from 0% to 100% typically takes approximately 2 hours.

Figure 4.1: Charging the R2 Nano via USB-C.
4.2 Immuntar mal-Kamera
The R2 Nano features an easy-mounting, durable hotshoe design for secure attachment to your camera.
- Kun żgur li l-kamera tiegħek hija mitfija.
- Slide the R2 Nano's mounting slot onto your camera's hotshoe.
- Gently push until it clicks into place, ensuring a secure connection.
- To detach, press the Installing/Detaching Button and slide the remote off.

Figure 4.2: Mounting the R2 Nano on a Camera Hotshoe.
5. Istruzzjonijiet Operattivi
5.1 Tixgħel/Jitfi
- To power on, press and hold the Power Switch until the screen illuminates.
- To power off, press and hold the Power Switch until the screen turns off.
5.2 Navigazzjoni tal-Interfaċċja tat-Touchscreen
The R2 Nano features a responsive touchscreen and a select dial for intuitive control.

Figure 5.1: High Definition OLED Screen Interface.
- Interazzjoni tal-Mess: Tap on a group (A, B, C, etc.) to select it for adjustment. Tap on parameters like power level to modify them.
- Agħżel Dial: Rotate the dial to scroll through options or adjust values. Press the dial to confirm selections.
- Aġġustament tal-Parametru: Use the on-screen '-' and '+' buttons or the Select Dial to change flash power, exposure compensation, or other settings.

Figure 5.2: Touchscreen Interaction for Settings Adjustment.
5.3 Setting Channels and Groups
To avoid interference and control multiple flashes, set appropriate channels and groups.
- Access the channel settings through the touchscreen menu. Select a channel from 1 to 32. Ensure your flash units are set to the same channel.
- Assign flash units to different groups (A-F, 0-9) to control them independently. The R2 Nano allows control of up to 16 groups.
5.4 Flash Modes (TTL, Manual, Multi-flash)
The R2 Nano supports various flash modes to suit different shooting scenarios.
- TTL (Minn Ġol-Lenti): Automatically adjusts flash output for correct exposure. Ideal for fast-paced shooting where lighting conditions change frequently.
- Manwal (M): Allows precise control over flash power output (e.g., 1/1 to 1/256). Suitable for consistent lighting setups and creative control.
- Multi-flash (Stroboscopic): Jispara serje ta' flashes rapidi waqt espożizzjoni waħda biex jaqbad movimenti multipli ta' suġġett.
5.5 Sync Modes (HSS, Front Curtain, Rear Curtain)
Select the appropriate sync mode based on your shutter speed and desired effect.
- HSS (Sinkronizzazzjoni b'Veloċità Għolja): Enables flash synchronization at shutter speeds faster than the camera's native sync speed (up to 1/8000s). Useful for overpowering ambient light or using wide apertures in bright conditions.
- Sinkronizzazzjoni tal-Purtiera ta' Quddiem: The flash fires at the beginning of the exposure. This is the standard sync mode.
- Sinkronizzazzjoni tal-Purtiera ta' Wara: The flash fires just before the second curtain closes. This creates a streaking effect behind moving subjects, giving a sense of motion.
6. Manutenzjoni
Proper maintenance ensures the longevity and optimal performance of your R2 Nano remote.
- Tindif: Use a soft, dry cloth to clean the exterior of the device. For the touchscreen, use a microfiber cloth specifically designed for electronics. Avoid using harsh chemicals or abrasive materials.
- Ħażna: When not in use, store the R2 Nano in its provided storage bag to protect it from dust and scratches. Store in a cool, dry place away from direct sunlight and extreme temperatures.
- Kura tal-batterija: Biex iżżomm il-batterija f'saħħitha, evita li tiċċarġjaha kompletament ta' spiss. Jekk taħżinha għal perjodi twal, iċċarġja l-batterija sa madwar 50% kull ftit xhur.
- Kuntatti tal-Hotshoe: Keep the hotshoe contacts clean and free of debris to ensure reliable communication with your camera.
7 Issolvi l-problemi
If you encounter issues with your Flashpoint R2 Nano, refer to the following common problems and solutions.
| Problema | Kawża Possibbli | Soluzzjoni |
|---|---|---|
| L-apparat ma jixgħelx. | Il-batterija hija eżawrita. | Iċċarġja l-apparat billi tuża l-kejbil USB-C. |
| L-unitajiet tal-flash mhux qed jaħarqu. | Incorrect channel or group settings. | Ensure the R2 Nano and flash units are set to the same channel and correct groups. |
| L-unitajiet tal-flash mhux qed jaħarqu. | Remote not securely mounted. | Ensure the R2 Nano is fully seated in the camera's hotshoe. |
| Inconsistent flash triggering. | Interferenza ambjentali. | Change the wireless channel to one with less interference. Ensure no obstructions between remote and flash. |
| Touchscreen ma jirrispondix. | Problema temporanju tas-softwer. | Itfi l-apparat, stenna ftit sekondi, imbagħad erġa' ixgħelu. |
| L-HSS mhux qed jaħdem. | Camera or flash not set to HSS mode. | Verify HSS is enabled on both the R2 Nano and your compatible flash unit. Ensure camera shutter speed is above sync speed. |
8. Speċifikazzjonijiet
| Karatteristika | Dettall |
|---|---|
| Mudell | Flashpoint R2 Nano |
| Kompatibilità | Panasonic and Olympus Cameras |
| Frekwenza bla fili | 2.4 GHz |
| Kanali | 32 |
| Gruppi | 16 (AF, 0-9) |
| Firxa Wireless | Sa 100 metri (328 pied) |
| Sinkronizzazzjoni Veloċità | Sa 1/8000s (HSS) |
| Wiri | Touchscreen OLED |
| Batterija | Batterija tal-litju rikarikabbli built-in |
| Port tal-Iċċarġjar | USB-C |
| Dimensjonijiet tal-Prodott | 5.25 x 4.25 x 2.5 pulzieri |
| Piż tal-oġġett | 6.4 uqija |
| Manifattur | Flashpoint |
| Data L-Ewwel Disponibbli | 19 ta’ Ġunju 2024 |
9. Garanzija u Appoġġ
Flashpoint products are designed for reliability and performance. For warranty information, technical support, or service inquiries, please refer to the official Flashpoint webis-sit jew ikkuntattja lin-negozjant awtorizzat tiegħek.
Jekk jogħġbok żomm il-prova tax-xiri tiegħek għal kwalunkwe talba ta' garanzija.
Ask a question about this manual
Ask about setup, troubleshooting, compatibility, parts, safety, or missing instructions. Manuals+ will review the question and use this page’s manual context to help answer it.