
BirdDog BDX1UW
Manwal għall-Utent tal-Kamera BirdDog X1 Ultra 4K PTZ
Model: BDX1UW
Introduzzjoni
This user manual provides comprehensive instructions for the setup, operation, and maintenance of your BirdDog X1 Ultra 4K PTZ Camera. Please read this manual thoroughly before using the product to ensure proper functionality and to prevent damage.
Informazzjoni dwar is-Sigurtà
- Ensure the camera is placed on a stable, level surface to prevent tipping.
- Do not expose the camera to water, moisture, or extreme temperatures.
- Uża biss il-provvista tal-enerġija u l-kejbils provduti.
- Evita li timblokka l-fetħiet tal-ventilazzjoni biex tevita sħana żejda.
- Tippruvax tiżżarma jew issewwi l-kamera int stess. Irreferi għal kull manutenzjoni f'idejn persunal kwalifikat.
- Żomm il-kamera 'l bogħod minn kampi manjetiċi qawwija.
Kontenut tal-Pakkett
Iċċekkja li l-oġġetti kollha elenkati hawn taħt huma inklużi fil-pakkett tiegħek:
- 1x BirdDog X1 Ultra 12x Zoom 4K PTZ Camera (White)
- 1x Kontroll mill-bogħod
- 1x 12 VDC Power Supply
- 1x High-Speed HDMI Cable with Ethernet
- 1x USB 2.0 Type-A Male to Type-B Male Cable
Prodott Overview

Figura 1: BirdDog X1 Ultra 4K PTZ Camera with included HDMI and USB cables. This image shows the camera from the front, highlighting its compact design and the two included cables.

Figura 2: Quddiem view of the BirdDog X1 Ultra camera, showcasing the lens and the integrated 2.93" E-Ink display on the side, which provides essential camera information.
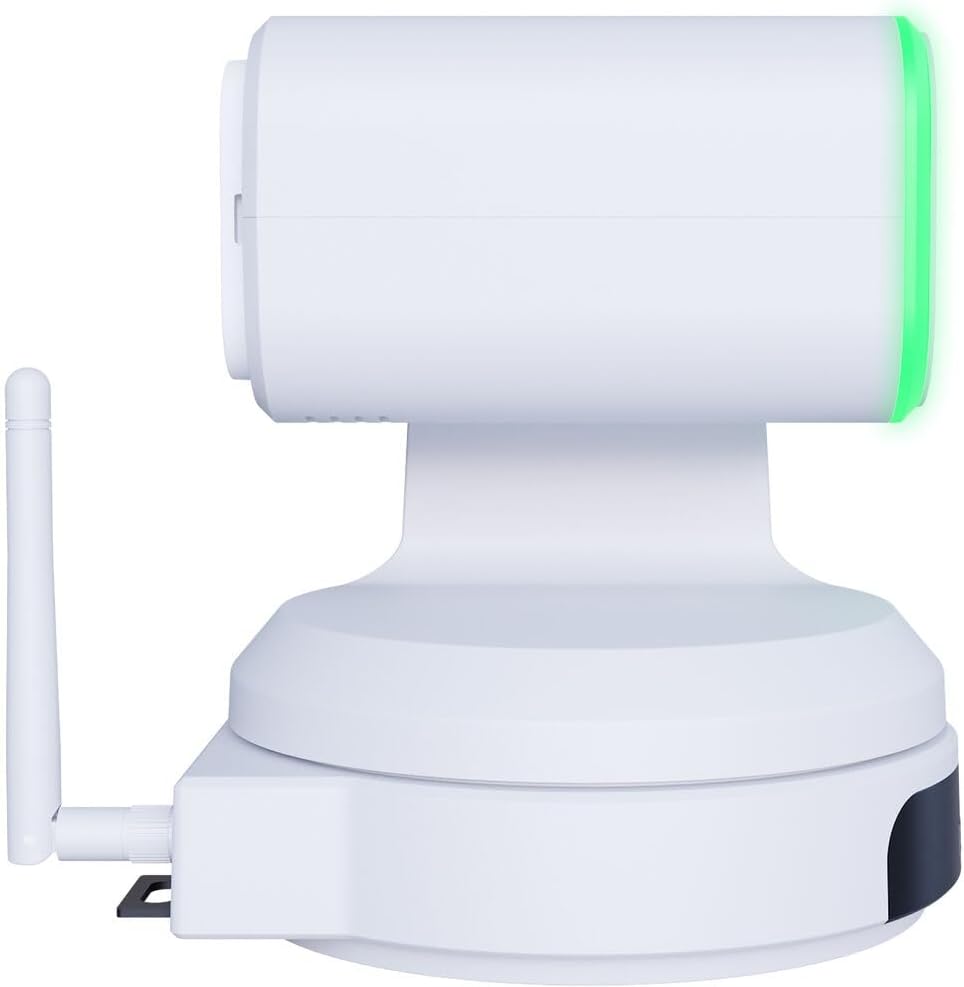
Figura 3: Ġenb view of the BirdDog X1 Ultra camera, illustrating the antenna for wireless connectivity and the sleek profile tal-apparat.

Figura 4: Wara view of the BirdDog X1 Ultra camera, detailing the various connectivity ports including DC12V power input, RS232, USB3.0, HDMI, and PoE/LAN.
Komponenti Ewlenin:
- Lenti: 12x optical zoom lens for capturing UHD 4K30 resolution video.
- Wiri tal-linka elettronika: A 2.93" display providing real-time status and network information.
- Halo Tally: Built-in indicator for live production status.
- Antenna: For Wi-Fi 5 connectivity.
- Portijiet tal-Konnettività: DC12V, RS232, USB3.0, HDMI, PoE/LAN.
Setup
1. Konnessjoni Fiżika
- Konnessjoni tal-Enerġija: Connect the included 12 VDC power supply to the DC12V port on the rear of the camera. Alternatively, if using Power over Ethernet (PoE), connect an Ethernet cable from a PoE-enabled switch to the PoE/LAN port.
- Output tal-vidjo:
- HDMI: Connect the included High-Speed HDMI Cable from the camera's HDMI output to your display or video switcher.
- USB/UVC: Connect the included USB 2.0 Type-A Male to Type-B Male Cable from the camera's USB3.0 port to your computer for direct connection to applications like Microsoft Teams or Zoom.
- Konnessjoni tan-Netwerk:
- Wired (LAN/PoE): Connect an Ethernet cable to the PoE/LAN port for network access and NDI|HX3 support.
- Wireless (Wi-Fi): Ensure the antenna is securely attached. The camera supports Wi-Fi 5. Refer to the operating section for Wi-Fi configuration.
2. L-Ewwel Tixgħil
Once all connections are made, the camera will power on automatically. The E-Ink display will show boot-up information and then display network details and current video resolution.
Operazzjoni
1. Basic Camera Control
The camera can be controlled via the included remote control, a web interface, or compatible NDI software.
- Pan/Tilt/Zoom (PTZ): Use the joystick on the remote control or the PTZ controls in the web interface to adjust the camera's pan, tilt, and zoom.
- Fokus: Adjust focus manually or use autofocus settings.
- Espożizzjoni: Control exposure settings including aperture, shutter speed, and gain. The camera features automatic exposure control.
- Bilanċ abjad: Adjust color temperature for accurate color reproduction. The camera supports Kelvin control.
2. AI Auto Framing
The X1 Ultra features AI auto framing to automatically keep subjects in frame. This feature can be enabled and configured via the camera's web interface.
3. NDI|HX3 and Network Configuration
The camera supports NDI|HX3 for low-latency, high-quality video transmission over IP networks.
- Aċċess Web Interface:
- Ensure your computer is on the same network as the camera.
- Locate the camera's IP address from the E-Ink display or by using BirdDog Central Lite software.
- Iftaħ a web il-browser u daħħal l-indirizz IP tal-kamera.
- Log in using the default credentials (refer to the camera's documentation or the E-Ink display for initial login details).
- Konfigurazzjoni Wi-Fi: Fi ħdan il- web interface, navigate to the network settings to connect the camera to your Wi-Fi network.
- NDI Settings: Configure NDI stream settings, including resolution and bandwidth, within the web interface.
4. USB/UVC Output
When connected via USB, the camera functions as a standard UVC (USB Video Class) device, compatible with most video conferencing applications like Microsoft Teams, Zoom, and OBS Studio. The USB output supports independent resolution from the HDMI/NDI outputs.
Manutenzjoni
- Tindif: Use a soft, dry cloth to clean the camera body. For the lens, use a lens cleaning cloth and specialized lens cleaning solution. Do not use abrasive cleaners or solvents.
- Ħażna: When not in use for extended periods, store the camera in a cool, dry place, away from direct sunlight and dust.
- Aġġornamenti tal-Firmware: Perjodikament iċċekkja l- BirdDog official websit for firmware updates to ensure optimal performance and access to new features.
Issolvi l-problemi
| Problema | Kawża Possibbli | Soluzzjoni |
|---|---|---|
| Ebda qawwa | Power cable not connected; PoE not active; faulty power supply. | Check power connections. Ensure PoE switch is active if using PoE. Try a different power outlet or power supply. |
| No video output (HDMI/USB) | Incorrect cable connection; incorrect input selected on display; driver issue (USB). | Verify HDMI/USB cable connections. Select correct input on your display/software. Reinstall USB drivers if necessary. |
| NDI stream not detected | Network issue; camera not on same subnet; NDI disabled. | Check network cables. Ensure camera and receiving device are on the same network. Verify NDI is enabled in camera's web interface. |
| Il-kontroll tal-PTZ ma jirrispondix | Remote control battery low; IR sensor blocked; software issue. | Replace remote control batteries. Ensure clear line of sight to IR sensor. Restart camera. Check web interface controls. |
Speċifikazzjonijiet
| Karatteristika | Dettall |
|---|---|
| Numru tal-Mudell | BDX1UW |
| Riżoluzzjoni tal-vidjo | UHD 4K30 (4K at 30fps), 1080p (USB) |
| Zoom ottiku | 12x |
| Konnettività | HDMI, USB3.0 (UVC), PoE/LAN, Wi-Fi 5, RS232 |
| Protokoll tan-Netwerk | NDI|HX3 |
| Karatteristiċi Speċjali | AI Auto Framing, Integrated 2.93" E-Ink Display, Built-In Halo Tally, Color Matrix, API & Kelvin Control, Low-Light Performance |
| Provvista tal-Enerġija | 12 VDC or PoE |
| Kulur | Abjad |
Garanzija u Appoġġ
For warranty information and technical support, please refer to the official BirdDog webis-sit jew ikkuntattja lis-servizz tal-konsumatur tagħhom direttament. Żomm il-prova tax-xiri tiegħek għal talbiet ta' garanzija.
Uffiċjali Websit: https://birddog.tv
Ask a question about this manual
Ask about setup, troubleshooting, compatibility, parts, safety, or missing instructions. Manuals+ will review the question and use this page’s manual context to help answer it.