1. Prodott Aktarview
The VIVOTEK FD9383-HTV is a high-performance 5-megapixel outdoor network dome camera designed for robust surveillance applications. It features a 2.8-12mm motorized varifocal lens, providing flexibility in field of view, and integrated IR LEDs for clear night vision up to 98 feet. This camera is built to withstand harsh outdoor conditions with IP66 and IK10 ratings, ensuring protection against dust, water, and vandalism. It also includes a built-in microphone for audio monitoring.
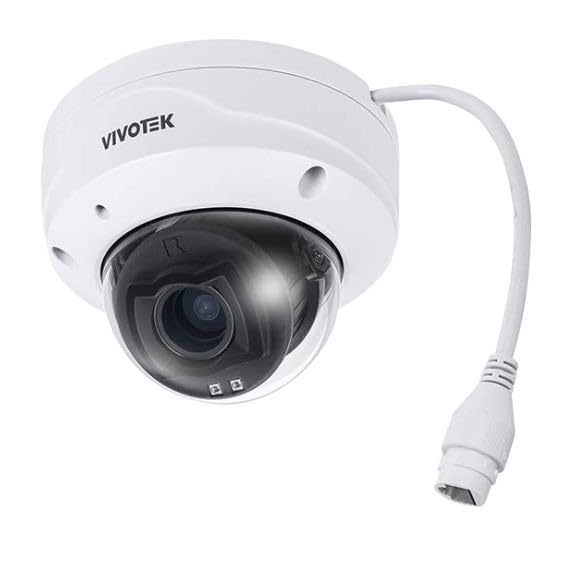
Stampa 1.1: Quddiem view of the VIVOTEK FD9383-HTV 5MP Outdoor Network Dome Camera.
Karatteristiċi ewlenin:
- 2560 x 1920 Resolution at 30 fps for high-quality video.
- IR LEDs for Night Vision up to 98 feet (30 meters).
- 2.8-12mm Motorized Varifocal Lens for flexible viewangoli.
- 95.4 to 28.7° Horizontal Angle of View.
- Built-In Microphone for audio capture.
- IP66-Rated for outdoor use, protecting against dust and water.
- IK10-Rated for vandal resistance.
- Supports microSD Cards up to 1TB for local storage.
- RJ45 Ethernet with Power over Ethernet (PoE) Technology.
- Complies with ONVIF Profiles G, S, T for broad compatibility.
2. Kontenut tal-Pakkett
Verify that all items are present and in good condition. If any items are missing or damaged, contact your vendor immediately.
- VIVOTEK FD9383-HTV Network Dome Camera
- Mounting Screw Kit (screws, wall anchors)
- Kit tal-Konnettur li ma jgħaddix ilma minnu
- Alignment Sticker/Drill Template
- Gwida ta 'Installazzjoni Mgħaġġla
- Software CD (or download link information)
3. Informazzjoni dwar is-Sigurtà
Jekk jogħġbok aqra dawn l-istruzzjonijiet tas-sigurtà bir-reqqa qabel ma tħaddem l-apparat biex tevita li tagħmel ħsara lilek innifsek jew lil ħaddieħor u biex tevita li tagħmel ħsara lill-apparat. Żomm dan il-manwal għal referenza futura.
- Installazzjoni: Installation should be performed by qualified personnel only and must comply with all local codes.
- Sors tal-Enerġija: Use only the specified power source (PoE or 12V DC adapter, if applicable) to avoid fire or electric shock.
- Ambjent: Tesponix il-kamera għal temperaturi estremi, umdità, jew ambjenti korrużivi lil hinn mill-kundizzjonijiet operattivi speċifikati tagħha.
- Tindif: Skonnettja l-provvista tal-enerġija qabel it-tindif. Uża drapp artab u niexef. Tużax prodotti tat-tindif likwidi jew aerosol.
- Servizzi: Tippruvax isservi dan il-prodott int stess. Irreferi l-manutenzjoni kollha lil persunal tas-servizz kwalifikat.
4. Setup
4.1 Installazzjoni Fiżika
The FD9383-HTV camera is designed for wall or ceiling mounting. Ensure the mounting surface is strong enough to support the camera's weight.
- Ipprepara l-Wiċċ tal-Immuntar: Use the provided drill template to mark the screw holes on the desired mounting location.
- Drill toqob: Drill pilot holes for the mounting screws and, if necessary, for the network cable. Insert wall anchors if mounting on drywall or masonry.
- Waħħal il-parentesi tal-immuntar: Waħħal il-bracket tal-immuntar tal-kamera mal-wiċċ billi tuża l-viti pprovduti.
- Qabbad Kejbils: Route the Ethernet cable through the mounting surface or cable entry point. Connect the RJ45 connector to the camera's network port. If not using PoE, connect a 12V DC power adapter (sold separately) to the power input. Ensure waterproof connections for outdoor installations.
- Secure Camera Body: Attach the camera body to the mounting bracket. Adjust the camera's orientation and angle as needed.
- Iffinalizza l-Installazzjoni: Secure all covers and ensure the camera is firmly mounted and protected from the elements.

Image 4.1: Illustrative diagram of camera mounting and cable connection.
4.2 Konnessjoni tan-Netwerk
Il-kamera tappoġġja Power over Ethernet (PoE) għal installazzjoni simplifikata, li tippermetti li kemm l-enerġija kif ukoll id-dejta jiġu trażmessi fuq kejbil Ethernet wieħed.
- Connect the camera to a PoE-enabled switch or a PoE injector using a standard Ethernet cable.
- Alternatively, connect to a standard network switch and use a separate 12V DC power adapter.
- Ensure your network is configured to assign an IP address to the camera (DHCP recommended for initial setup).
4.3 Konfigurazzjoni Inizjali
After physical installation and network connection, you need to access the camera's web interface for initial configuration.
- Skopri l-Kamera: Use VIVOTEK's IP Search utility (available on their website) or a network scanner to find the camera's IP address on your network.
- Aċċess Web Interface: Iftaħ a web browser (e.g., Chrome, Firefox) and enter the camera's IP address in the address bar.
- Idħol: The default username is typically 'root' and the password is 'pass'. You will be prompted to change the password upon first login for security reasons.
- Settings Bażiċi: Configure essential settings such as date/time, network settings (if not using DHCP), and user accounts.
5. Joperaw
5.1 Aċċess għall-Interfaċċja tal-Kamera
Once configured, you can access the camera's live view and settings through its web interface or compatible VIVOTEK software/NVR systems.
- Enter the camera's IP address in your web browser.
- Log in with your configured username and password.
- The interface provides access to live video, recording settings, motion detection, and other advanced features.
5.2 Adjusting Lens and Focus
The FD9383-HTV features a motorized varifocal lens, allowing remote adjustment of zoom and focus.
- Navigate to the 'Video' or 'Lens' settings section in the web interface.
- Use the zoom controls to adjust the focal length (2.8mm to 12mm) to achieve the desired field of view.
- Utilize the focus controls to sharpen the image. Many VIVOTEK cameras offer a one-touch focus feature for automatic adjustment.
5.3 Night Vision Settings
The camera automatically switches to night vision mode in low-light conditions using its IR LEDs.
- In the 'Image' or 'IR' settings, you can configure the IR illuminator's behavior (e.g., auto, manual on/off).
- Adjust IR intensity if available, to prevent overexposure or underexposure in specific scenarios.
5.4 Reġistrazzjoni u Ħażna
The camera supports various recording methods, including local storage on a microSD card and network video recording (NVR).
- Karta MicroSD: Insert a compatible microSD card (up to 1TB) into the camera's slot. Format the card via the web interface. Configure recording schedules and triggers (e.g., continuous, motion-triggered).
- NVR/NAS: Connect the camera to a VIVOTEK NVR or a compatible Network Attached Storage (NAS) device. Configure recording settings on the NVR/NAS.
5.5 Sejbien tal-Moviment
Configure motion detection to trigger recordings, send alerts, or activate other actions.
- Access the 'Event' or 'Motion Detection' settings in the web interface.
- Define detection zones within the camera's field of view.
- Aġġusta l-livelli ta' sensittività biex timminimizza l-allarmi foloz.
- Set up actions to be taken when motion is detected (e.g., record video, send email notification).
6. Manutenzjoni
6.1 Tindif
Tindif regolari jgħin biex tinżamm kwalità ottimali tal-immaġni u jtawwal il-ħajja tal-kamera.
- Lenti: Gently wipe the lens with a soft, lint-free cloth. For stubborn dirt, use a lens cleaning solution specifically designed for optical surfaces. Avoid abrasive materials.
- Djar: Imsaħ il-kisi tal-kamera b'reklamaramp drapp. Tużax deterġenti jew solventi qawwija.
- Għata tad-Domu: If applicable, carefully clean the dome cover to ensure clear visibility.
6.2 Aġġornamenti tal-Firmware
Iċċekkja l-VIVOTEK perjodikament website for firmware updates. Firmware updates often include bug fixes, performance improvements, and new features.
- Download the latest firmware for your FD9383-HTV model from the official VIVOTEK support page.
- Aċċessa l-kamera web interface and navigate to the 'System' or 'Maintenance' section.
- Segwi l-istruzzjonijiet fuq l-iskrin biex ittella’ u tinstalla l-firmware. Titfix il-kamera waqt il-proċess ta’ aġġornament.
7 Issolvi l-problemi
This section provides solutions to common issues you might encounter with your VIVOTEK FD9383-HTV camera.
| Problema | Kawża Possibbli | Soluzzjoni |
|---|---|---|
| Il-kamera ma tixgħelx | No power from PoE switch/injector; faulty power adapter; loose cable connection. | Check PoE status on switch; verify power adapter functionality; ensure all cables are securely connected. |
| Ma nistax naċċessa l-kamera permezz tan-netwerk | Incorrect IP address; network cable issue; firewall blocking access; camera not receiving an IP address. | Verify IP address; check network cable integrity; temporarily disable firewall; use IP Search utility to find camera. |
| Kwalità tal-immaġni fqira (imċajpra, skura) | Lens out of focus; dirty lens/dome; insufficient lighting; incorrect image settings. | Aġġusta l-fokus permezz ta' web interface; clean lens/dome; check IR settings; reset image settings to default. |
| Is-sejbien tal-moviment mhux qed jaħdem | Detection zones not configured; sensitivity too low; event actions not set up. | Configure detection zones; increase sensitivity; ensure event actions (e.g., record, notify) are enabled. |
| Il-karta MicroSD mhux qed tirrekordja | Card not formatted; card full; recording schedule not active; faulty card. | Format microSD card in camera settings; check recording schedule; replace card if faulty. |
8. Speċifikazzjonijiet
Detailed technical specifications for the VIVOTEK FD9383-HTV camera.
| Karatteristika | Speċifikazzjoni |
|---|---|
| Sensor tal-Immaġni | 1/2.8" Type CMOS |
| Riżoluzzjoni | 2560 x 1920 bi 30 fps |
| Tul Fokali | 2.8 to 12mm Motorized Varifocal Lens |
| Angolu Orizzontali ta' View | 95.4 sa 28.7° |
| Viżjoni bil-lejl | IR LEDs up to 98 feet (30 meters) |
| Awdjo | Mikrofonu Inkorporat |
| Ħażna | Supports microSD Cards up to 1TB |
| Interfaċċa tan-Netwerk | 1x RJ45 Input (PoE) |
| Klassifikazzjoni Ambjentali | IP66 (Reżistenti għat-Trab u l-Ilma) |
| Reżistenza vandali | IK10-Rated |
| ONVIF Compliance | Profiles G, S, T |
| Dimensjonijiet tal-Prodott | 5.3 x 4.1 x 4.1 pulzieri (13.5 x 10.4 x 10.4 ċm) |
| Piż tal-oġġett | 1.9 liri (0.86 kg) |
9. Garanzija u Appoġġ
VIVOTEK products are covered by a limited warranty. For specific warranty terms and conditions, please refer to the warranty card included with your product or visit the official VIVOTEK websit.
For technical support, product documentation, and software downloads, please visit the VIVOTEK official support portal:
https://www.vivotek.com/support
When contacting support, please have your camera's model number (FD9383-HTV) and serial number ready.