MakerHawk TC816+TC819
Digital Temperature Controller Thermostat Timer
Models: TC816 & TC819
1. Introduzzjoni
This manual provides detailed instructions for the safe and effective operation of your MakerHawk Digital Temperature Controller Thermostat Timer, encompassing both the TC816 and TC819 models. These devices are designed for precise temperature control and timing functions across various applications, including greenhouses, reptile enclosures, incubators, and home brewing.
Please read this manual thoroughly before operating the device to ensure proper usage and to prevent damage.
2. Informazzjoni dwar is-Sigurtà
- Ensure the power supply matches the device's specifications (230V AC 50HZ).
- Do not exceed the maximum output load (Max 16A 3680W).
- Keep the device and sensor away from water or excessive moisture.
- Tiżżarmax jew timmodifikax l-apparat. Irreferi kull manutenzjoni lil persunal kwalifikat.
- Żgura ventilazzjoni xierqa madwar l-apparat.
- The safety socket design prevents children from misinserting objects. However, always supervise children around electrical devices.
- The PC flame-retardant material provides high-temperature flame retardancy for safety.
3. Prodott Aktarview
The MakerHawk Digital Temperature Controller system includes two distinct models: TC816 and TC819, each offering unique features for versatile temperature and timing control.

Figura 3.1: Fuqview of TC816 and TC819 Digital Temperature Controllers. The image displays both units side-by-side, showcasing their LCD screens, control buttons, and the attached temperature probes.
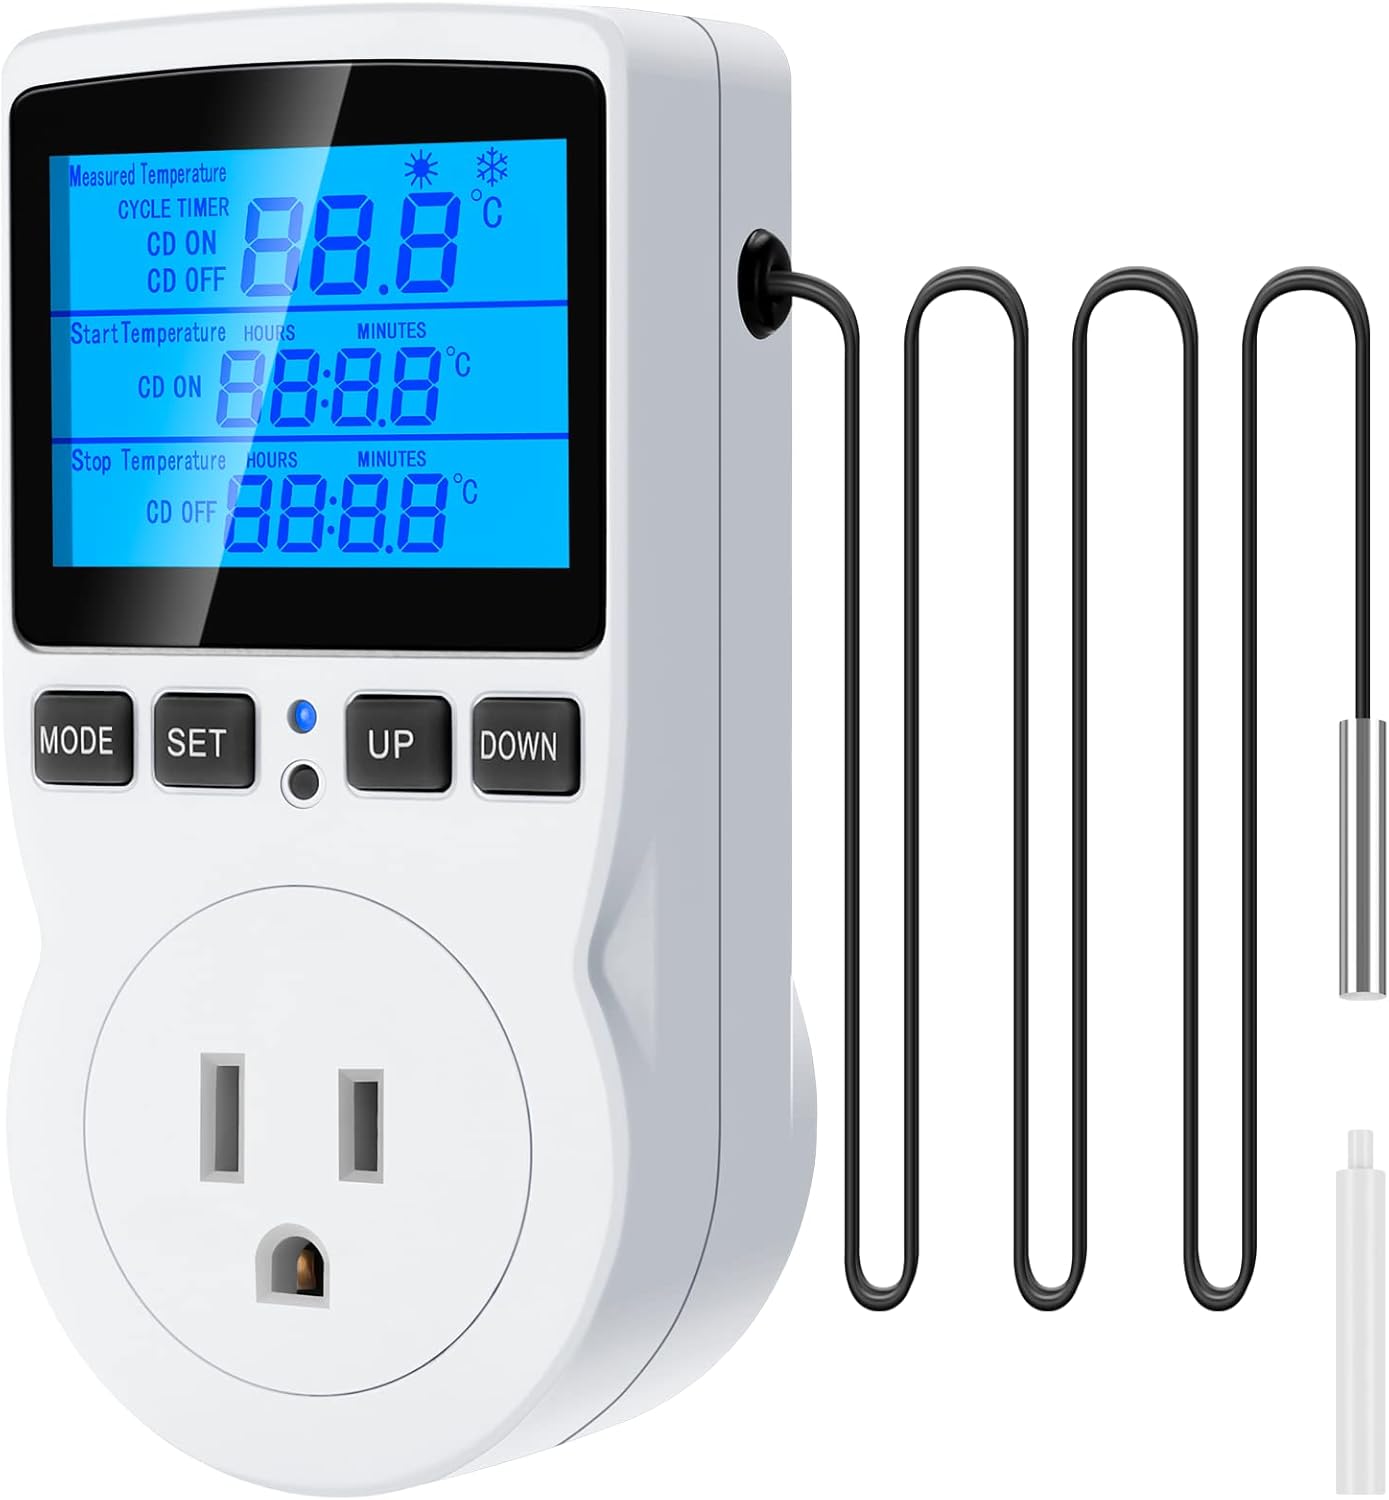
Figura 3.2: MakerHawk TC816 Unit. This image focuses on the TC816 model, highlighting its display showing measured temperature, cycle timer settings, and start/stop temperatures, along with its control buttons (MODE, SET, UP, DOWN) and power outlet.
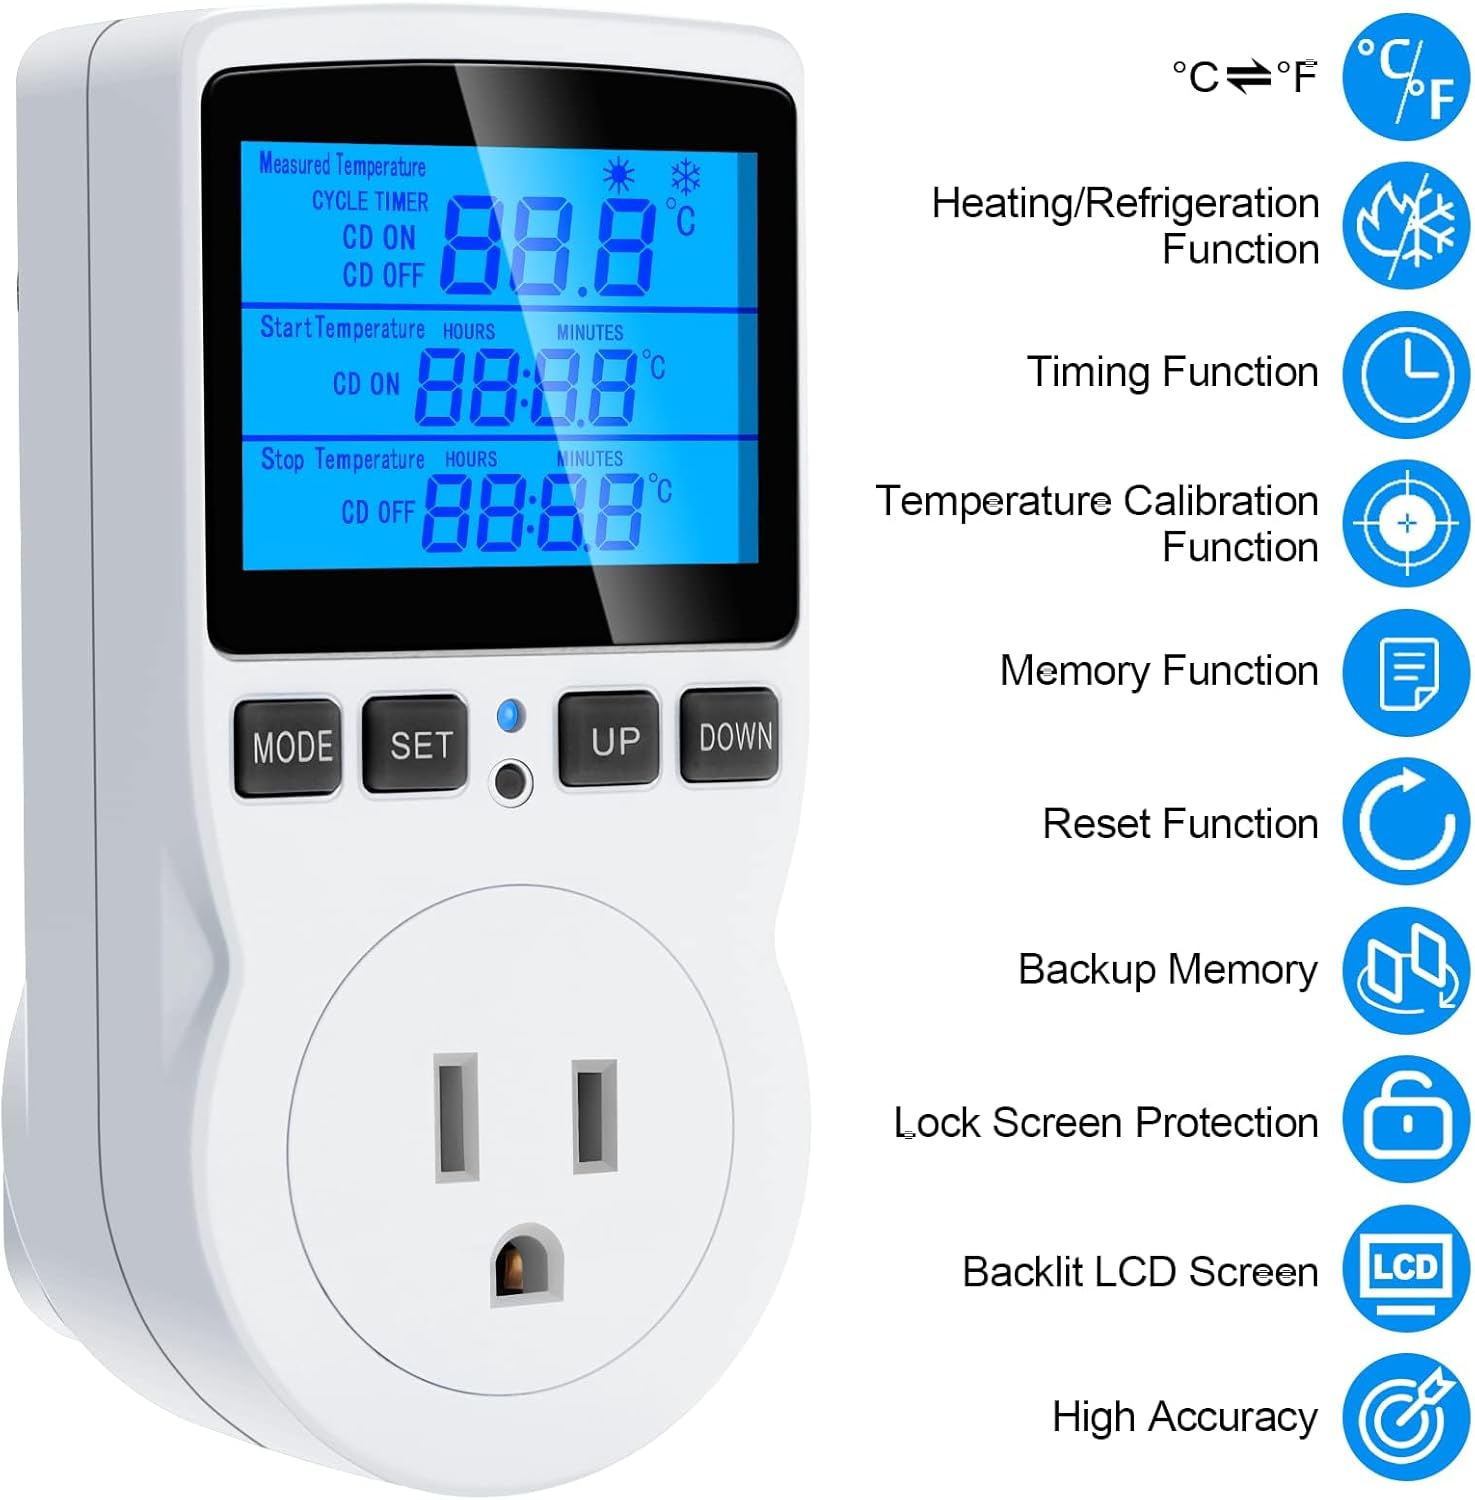
Figura 3.3: TC816 Key Features. This diagram illustrates the various functions of the TC816, such as Celsius/Fahrenheit switching, heating/refrigeration, timing, temperature calibration, memory, reset, backup memory, lock screen protection, backlit LCD screen, and high accuracy.

Figura 3.4: TC819 Key Features. Similar to the TC816, this diagram highlights the functions of the TC819, including Celsius/Fahrenheit switching, heating/refrigeration, timing, temperature calibration, memory, reset, backup memory, lock screen protection, backlit LCD screen, and high accuracy.
4. Setup
4.1 Konnessjoni Inizjali
- Unpack the temperature controller and its accessories.
- Insert the temperature probe into the designated port on the controller. Ensure it is securely connected.
- Plug the temperature controller into a standard 230V AC 50HZ power outlet. The display will illuminate.
- Plug your heating or cooling device (e.g., heater, fan, pump) into the controlled outlet on the temperature controller.
4.2 Probe Placement
Place the temperature probe in the environment where you wish to monitor and control the temperature. Ensure the probe is not directly exposed to heat sources or drafts that could skew readings. For liquids, ensure the probe is fully submerged if applicable.
5. Istruzzjonijiet Operattivi
5.1 General Operation (Both Models)
- Power On/Off: The device powers on automatically when plugged in.
- Wiri: The LCD screen displays the measured temperature, set parameters, and current mode.
- Swiċċjar Celsius/Fahrenheit: For TC819, press and hold the SET button for 3 seconds to switch between °C and °F. For TC816, this function is typically integrated into the settings menu.
- Kontroll tad-dawl ta' wara: For TC819, press the 'L isfel button to turn off the backlight. Press any button to turn it on again.
- Funzjoni tal-memorja: All current settings are saved automatically after power off.
5.2 TC816 Specific Modes and Settings
The TC816 offers various timing and temperature control modes:

Figura 5.1: TC816 Timing Functions. This image displays the four main timing modes of the TC816: F01 (Cycle Timer), F02 (Countdown On), F03 (Countdown Off), and F04 (Countdown On and Countdown Off), along with brief descriptions of each.
- F01 Cycle Timer Mode: Sets a repeating ON/OFF cycle. Useful for intermittent operation.
- F02 Countdown On Mode: The device remains OFF for a set countdown period, then turns ON.
- F03 Countdown Off Mode: The device remains ON for a set countdown period, then turns OFF.
- F04 Countdown On and Countdown Off Mode: Combines F02 and F03, allowing for a delayed ON followed by a delayed OFF.
Issettjar Firxa tat-Temperatura:
- Agħfas il- SET button to enter temperature setting mode.
- Uża l- UP u 'L isfel buttons to adjust the start temperature.
- Agħfas SET again to move to the stop temperature setting.
- Użu UP u 'L isfel to adjust the stop temperature.
- Agħfas SET biex tikkonferma u toħroġ.
Temperature Calibration (TC816):
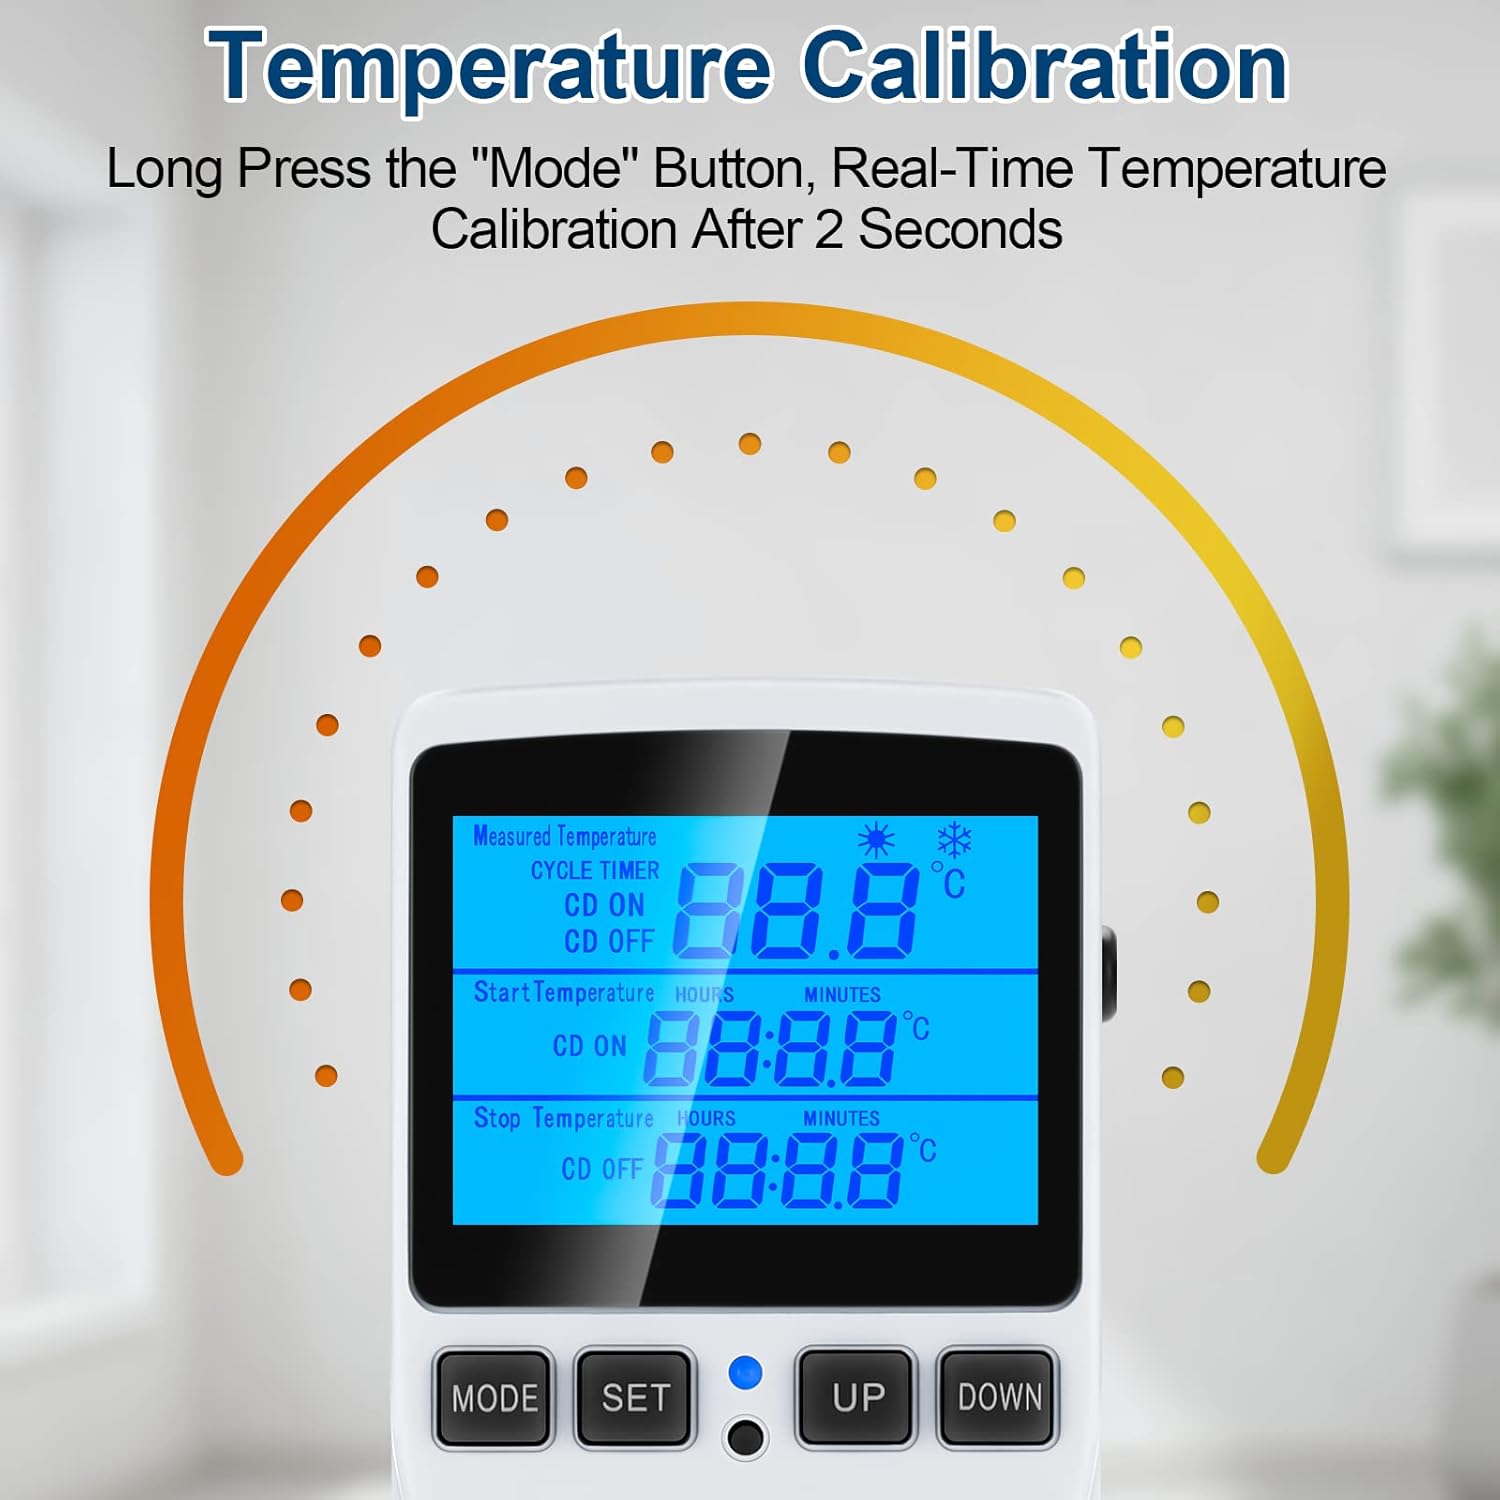
Figura 5.2: TC816 Temperature Calibration. This image illustrates the process of calibrating the temperature on the TC816 by long-pressing the 'Mode' button for 2 seconds to enter real-time temperature calibration.
To correct temperature readings if they deviate from a known standard:
- Agħfas fit-tul il- MODALITÀ button for 2 seconds to enter real-time temperature calibration.
- Uża l- UP u 'L isfel buttons to adjust the calibration value.
- Agħfas MODALITÀ għal darb'oħra biex issalva u toħroġ.
5.3 TC819 Specific Modes and Settings
The TC819 offers 5 distinct modes for temperature and countdown control:

Figura 5.3: TC819 Instructions for Use. This diagram details the functions of the TC819's buttons and features, including how to switch modes, set parameters, adjust temperature correction, switch between Celsius/Fahrenheit, control backlight, and the memory function.
- TC MODE (Temperature Control): Standard temperature control mode, allowing setting of start and stop temperatures for heating or cooling.
- CD TC ON MODE (Countdown to Turn On Temperature Control): The device counts down for a set period, then activates temperature control.
- CD TC OFF MODE (Countdown to Turn Off Temperature Control): Temperature control is active, then deactivates after a set countdown period.
- CD ON MODE (Countdown On): The device turns on after a set countdown period.
- CD OFF MODE (Countdown Off): The device turns off after a set countdown period.
Switching Modes (TC819):
- Agħfas il- MODALITÀ button (represented by the house icon) to cycle through the 5 available modes.
Setting Temperature and Countdown (TC819):
- Agħfas il- SET button (represented by the gear icon) to enter setting mode for the currently selected mode.
- Uża l- UP u 'L isfel buttons (triangle icons) to adjust values (temperatures, hours, minutes).
- Agħfas SET again to confirm and move to the next parameter or exit setting mode.
Temperature Correction (TC819):
- Agħfas u żomm il- MODALITÀ button for 5 seconds to enter real-time temperature calibration.
- Uża l- UP u 'L isfel buttons to adjust the offset.
- Agħfas u żomm il- MODALITÀ button again to exit and save the calibration.
6. Applikazzjonijiet
The MakerHawk Digital Temperature Controllers are highly versatile and can be used in a wide range of environments requiring precise temperature and timing control:

Figura 6.1: Diverse Applications. This collage illustrates common uses for the temperature controller, including maintaining optimal conditions for reptiles, aquariums, greenhouses, fermentation processes, refrigerators, and the storage of aquatic products.
- Reptile Enclosures: Maintain precise temperature gradients for reptiles.
- Akkwarji: Control water temperature for aquatic life.
- Serer: Regulate temperature for optimal plant growth.
- Incubators: Ensure stable temperatures for hatching eggs or culturing.
- Terrarji: Create controlled environments for various species.
- Freezers/Refrigerators: Monitor and control temperatures for storage.
- Home Brewing/Fermentation: Maintain consistent temperatures crucial for yeast activity.
- Pads tat-tisħin: Control the temperature of heating pads for various uses.
7. Manutenzjoni
- Tindif: Disconnect the device from power before cleaning. Wipe the exterior with a soft, dry cloth. Do not use abrasive cleaners or immerse the device in water.
- Kura tas-Sonda: Keep the temperature probe clean and free from debris. Avoid bending or kinking the probe cable excessively.
- Ħażna: Meta ma tkunx qed tuża, aħżen l-apparat f'post frisk u niexef 'il bogħod mid-dawl tax-xemx dirett u temperaturi estremi.
- Spezzjoni: Periodically inspect the power cord and probe cable for any signs of damage. Do not use if damaged.
8 Issolvi l-problemi
| Problema | Kawża Possibbli | Soluzzjoni |
|---|---|---|
| L-apparat ma jixgħelx. | L-ebda enerġija mis-sokit; l-apparat ma jaħdimx sew. | Check power outlet with another device. Ensure device is properly plugged in. |
| Qari mhux preċiż tat-temperatura. | Probe dirty or damaged; incorrect calibration; probe not in optimal position. | Clean probe. Perform temperature calibration (refer to section 5.2/5.3). Reposition probe away from direct heat/cold sources. |
| L-apparat imqabbad mhux qed jixgħel/jitfi. | Incorrect temperature/timer settings; appliance malfunction; device mode error. | Verify start/stop temperatures and timer settings. Check if the appliance works directly from a wall outlet. Ensure correct operating mode is selected (TC, CD ON, etc.). |
| Il-wiri juri kodiċi ta 'żball. | Sensor fault; internal error. | Check probe connection. If error persists, contact customer support. |
9. Speċifikazzjonijiet
- Mudell: TC816, TC819
- Provvista tal-Enerġija: 230V AC 50HZ
- Output: Max 16A 3680W
- Firxa ta 'Kontroll tat-Temperatura: (Specific range varies by model and setting, typically -40°C to 100°C or equivalent Fahrenheit)
- Medda ta' ħin: 0 to 99 hours 59 minutes
- Materjal: Materjal Ritardant tal-Fjamma tal-PC
- Sensor: External Temperature Detector
10. Garanzija u Appoġġ
For warranty information and technical support, please refer to the product packaging or contact MakerHawk customer service directly. Keep your purchase receipt as proof of purchase.
Informazzjoni ta' Kuntatt:
- Visit the MakerHawk Store on Amazon: MakerHawk Store
- Refer to your product packaging for specific customer service contact details.
Ask a question about this manual
Ask about setup, troubleshooting, compatibility, parts, safety, or missing instructions. Manuals+ will review the question and use this page’s manual context to help answer it.