Dannilong B0CWGFWN3V
Dannilong Caged Ceiling Fan User Manual
Model: B0CWGFWN3V
Brand: Dannilong
1. Introduzzjoni
Thank you for choosing the Dannilong Caged Ceiling Fan. This modern farmhouse-style ceiling fan features a distressed paint finish, integrating seamlessly into various spaces such as bedrooms, kitchens, offices, and porches. It combines a unique caged design with a quiet DC motor and convenient remote control for optimal comfort and air circulation. This manual provides detailed instructions for safe installation, operation, maintenance, and troubleshooting.
Informazzjoni Importanti dwar is-Sigurtà
TWISSIJA: Biex tnaqqas ir-riskju ta’ nar, xokk elettriku, jew korriment personali, dejjem segwi dawn il-prekawzjonijiet bażiċi:
- Read all instructions carefully before installing and using the fan.
- L-installazzjoni għandha ssir minn elettriċista kwalifikat.
- Tiżgura l-provvista voltage huwa 120 Volts AC.
- Skonnettja l-enerġija mis-circuit breaker qabel l-installazzjoni jew is-servizz.
- Mount the fan only to an outlet box marked 'Acceptable for Fan Support of 35 lbs (15.9 kg) or less' and use the mounting screws provided with the outlet box.
- Do not bend fan blades when installing or cleaning.
- Evita li tpoġġi oġġetti fil-mogħdija tax-xfafar tal-fann.
- Ensure all electrical connections are secure and comply with local codes.
2. Kontenut tal-Pakkett
Iċċekkja li l-komponenti kollha elenkati hawn taħt huma inklużi fil-pakkett tiegħek. Jekk xi partijiet huma nieqsa jew bil-ħsara, jekk jogħġbok ikkuntattja l-appoġġ għall-klijenti.
- Fan Body Assembly (with integrated motor and fan blades)
- Kanupew
- Bracket tal-Immuntar
- Downrod & Hanger Ball (includes both 3.9-inch and 7.8-inch options)
- Screws and Hardware Kit
- Connecting Pieces (x4)
- T-shaped Connector
- Lampshade Sheets (x4)
- Bottom Bracket of Lampdell
- Kontroll mill-bogħod
- Manwal ta' Istruzzjoni

Figure 2.1: Key components of the Dannilong Caged Ceiling Fan, highlighting the metal cage, E26 bulb base, ABS fan blades, and the reverse DC motor.
3. Speċifikazzjonijiet tal-Prodott
| Karatteristika | Deskrizzjoni |
|---|---|
| Brand | Dannilong |
| Isem tal-Mudell | caged ceiling fan with light |
| Kulur | Deheb Iswed |
| Materjal | Ħadid, metall |
| Stil | Farmhouse |
| Dimensjonijiet tal-Prodott | 18 x 18 x 8 pulzieri |
| Piż tal-oġġett | 11 Liri |
| Sors tal-Enerġija | AC/DC |
| Voltage | 120 Volts |
| Metodu ta' Kontroll | Kontroll mill-bogħod |
| Karatteristiċi Speċjali | Remote Controlled, Adjustable Height, Timer, Bladeless, Reversible Motor |
| Veloċitajiet tal-fann | 6 Veloċitajiet aġġustabbli |
| Funzjoni Timer | 1H / 2H / 4H |
| Bażi tal-Bozza | E26 (meħtieġa 4 bozoz, mhux inklużi) |
| Użu fuq ġewwa/barra | Barra, Ġewwa |
| Assemblea Meħtieġa | Iva |
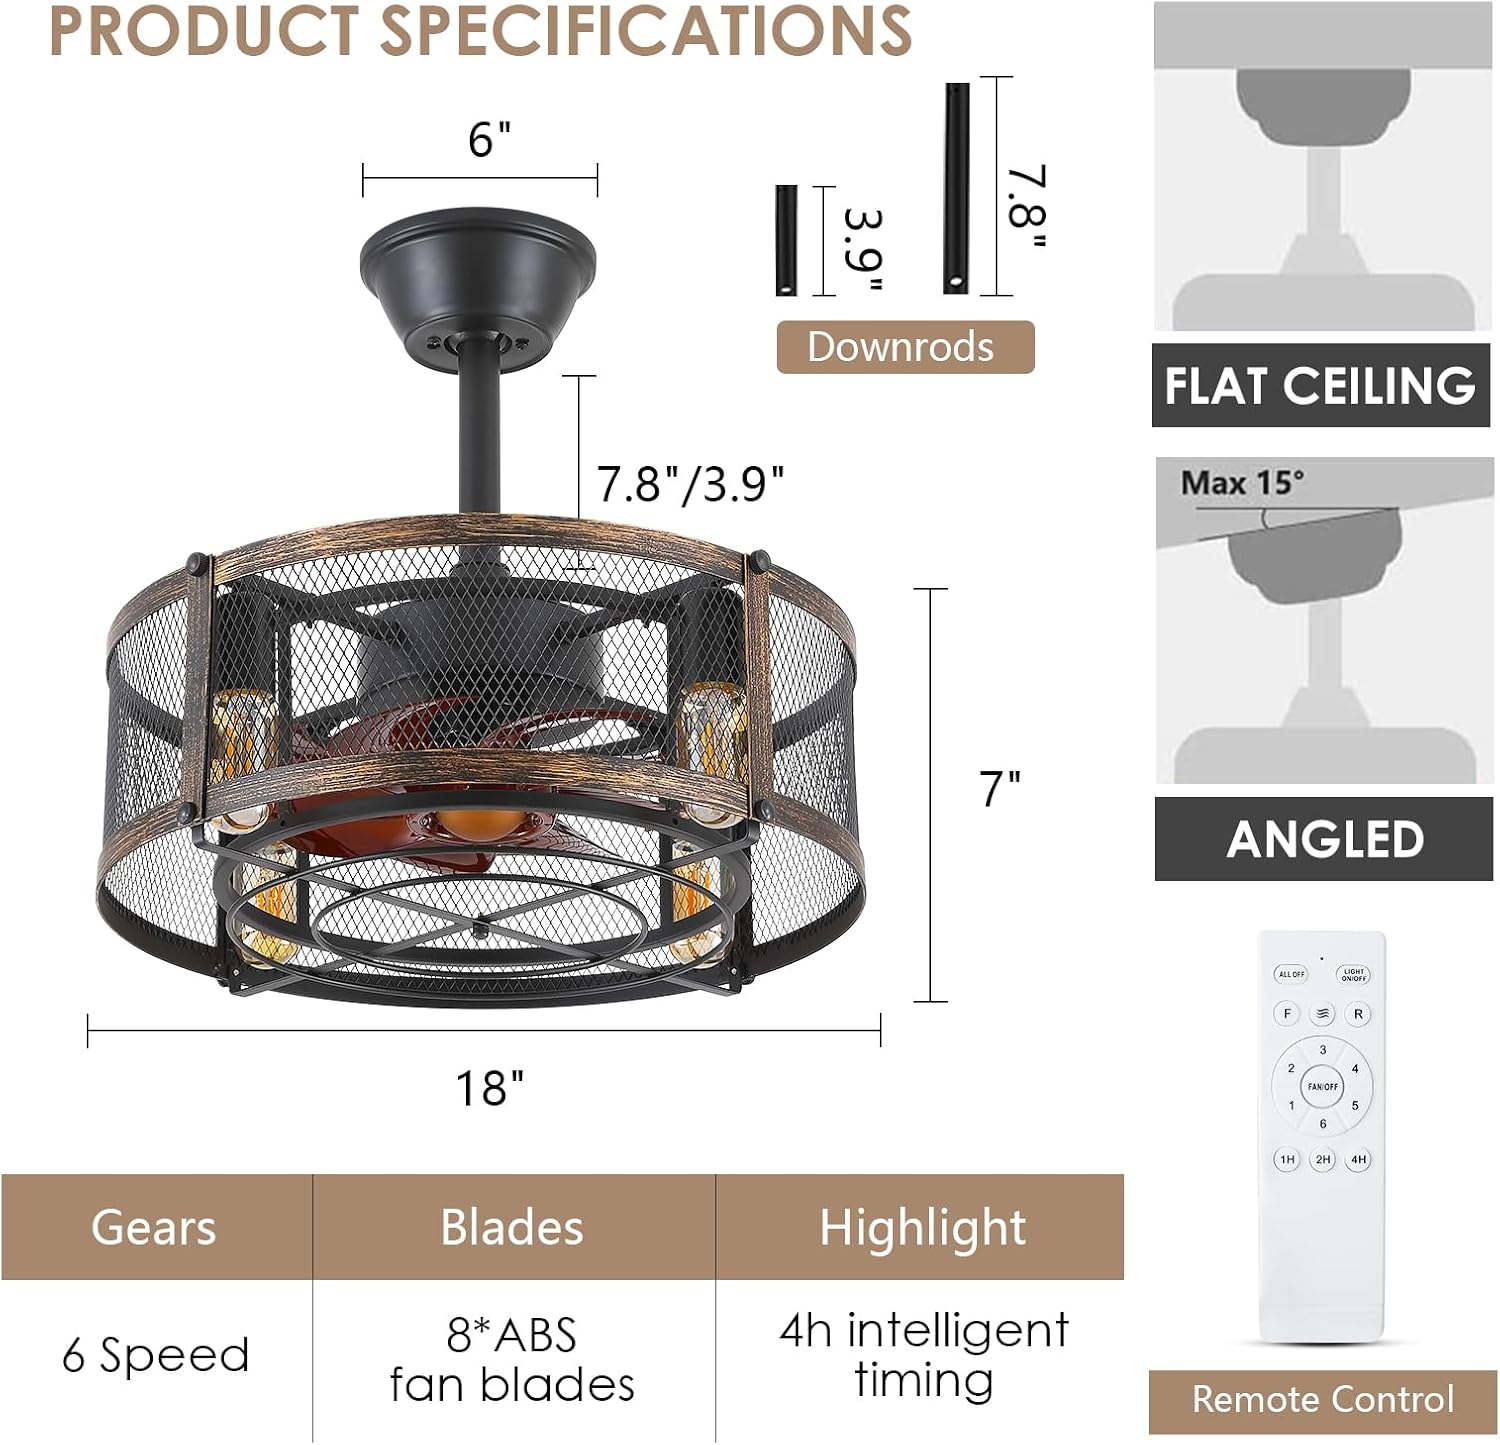
Figure 3.1: Detailed product dimensions and key specifications.
4. Setup u Installazzjoni
Follow these steps for proper installation of your Dannilong Caged Ceiling Fan. It is highly recommended to watch the official installation video for visual guidance.
Passi ta' Installazzjoni:
- Ipprepara l-Korp tal-Fann: Attach the downrod to the fan body assembly, ensuring all wires are properly routed through the downrod. Secure with screws.
- Installa Bozoz tad-Dawl: Screw four E26 base bulbs (not included) into the light sockets on the fan body.
- Arma Lampdell: Waħħal il-lampshade sheets to the fan body using the provided connecting pieces and screws. Ensure the mesh cage is securely fastened.
- Installazzjoni tal-Bracket tal-Immuntar: Secure the mounting bracket to the ceiling outlet box. Ensure it is firmly attached and can support the fan's weight.
- Wiring: Carefully connect the fan's electrical wires to the household wiring according to the wiring diagram in the video. Ensure all connections are secure with wire nuts.
- Hang il-Fan: Lift the fan assembly and place the hanger ball into the mounting bracket.
- Kanupew Sikur: Slide the canopy up to cover the mounting bracket and secure it with screws.
Video 4.1: Official installation guide for the Dannilong Caged Ceiling Fan. This video demonstrates the step-by-step assembly and wiring process.
5. Istruzzjonijiet Operattivi
Your Dannilong Caged Ceiling Fan is controlled by a convenient remote. Familiarize yourself with the remote's functions for optimal use.
Funzjonijiet tal-Kontroll mill-bogħod:
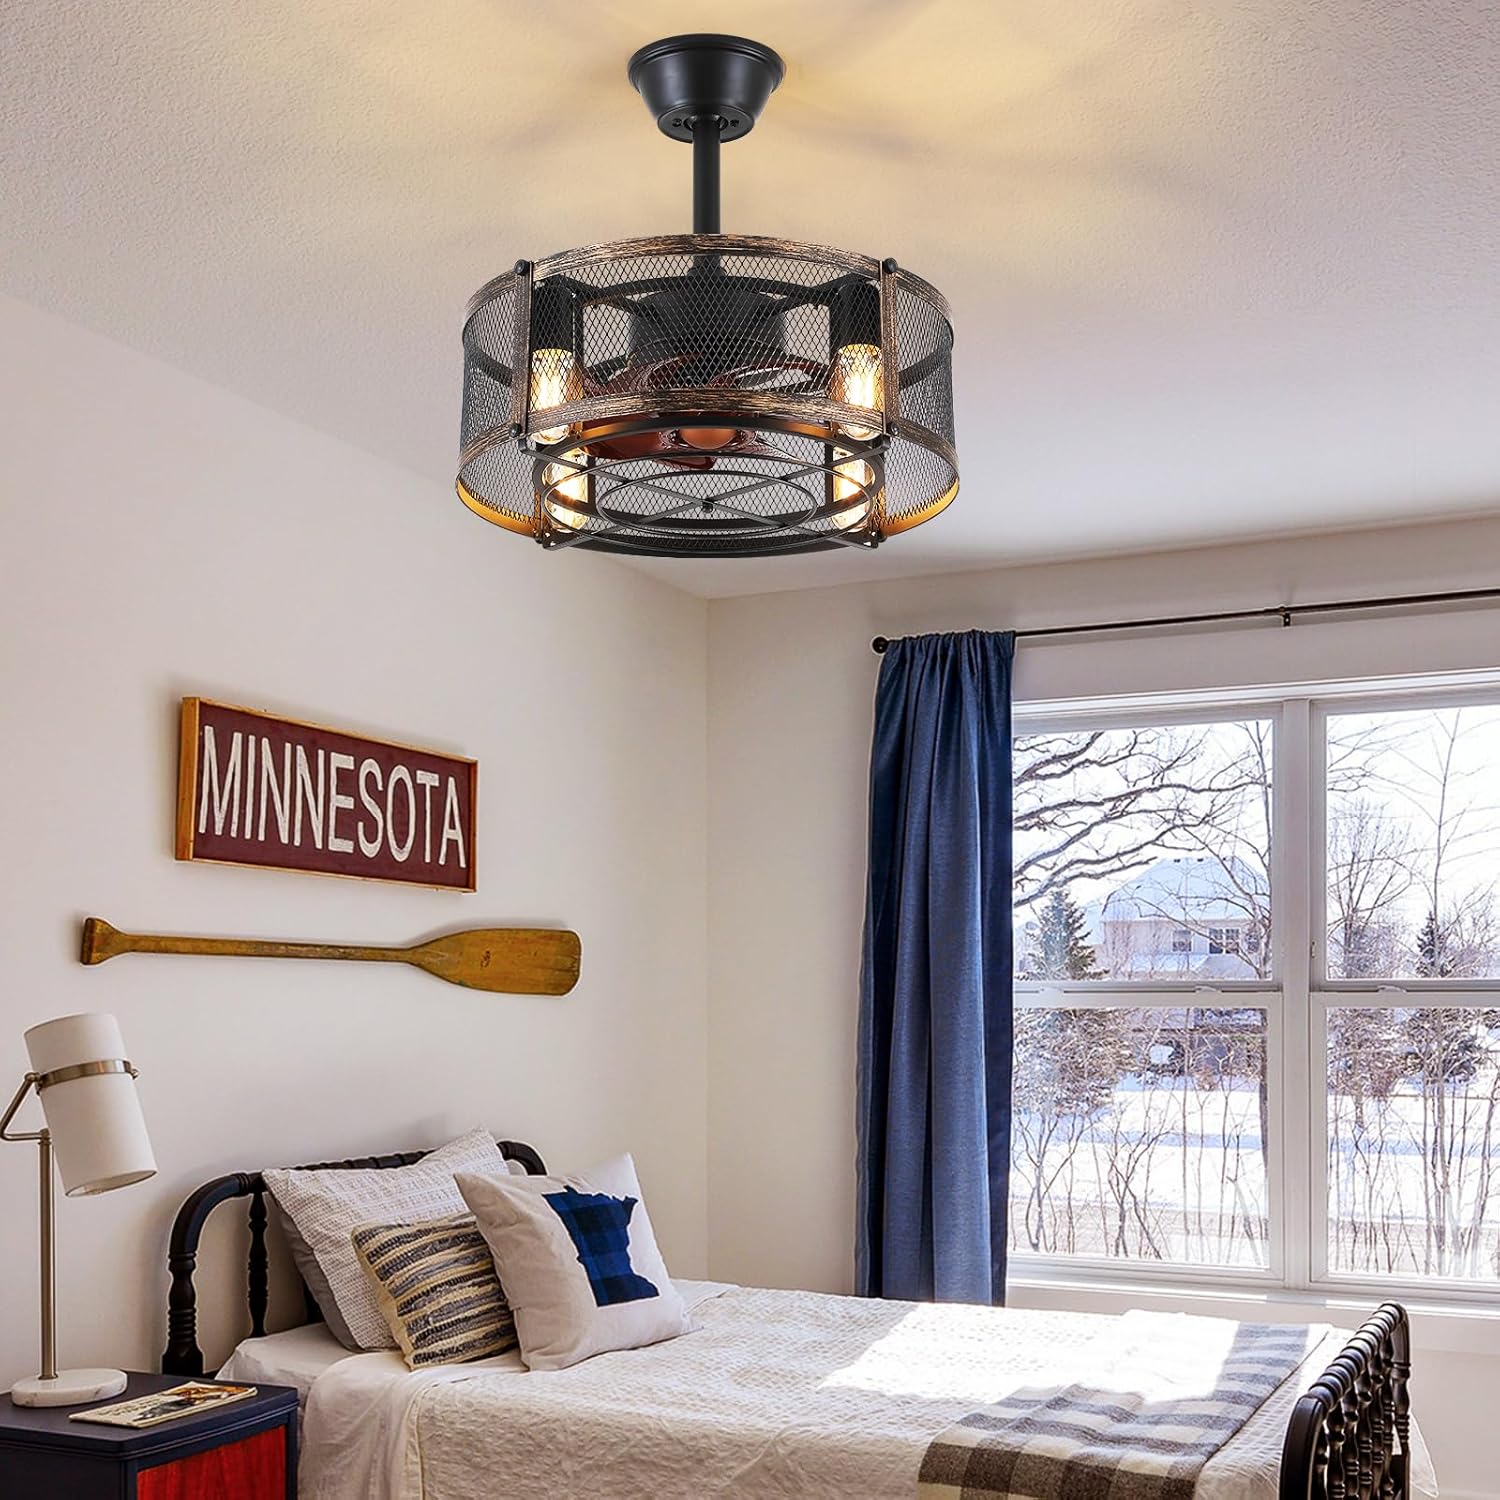
Figure 5.1: Layout of the remote control for the Dannilong Caged Ceiling Fan.
- Power On/Off: Press the power button to turn the fan and lights on or off.
- Dawl mixgħul/mitfi: Use the dedicated light button to control the fan's lighting independently.
- Veloċità tal-fann: Select from 6 adjustable fan speeds (1-6) to customize airflow. The quiet DC motor ensures a peaceful environment even at higher speeds.
- Rotazzjoni Riversibbli: The fan features a reversible motor for year-round comfort. Use the forward (F) button for summer (downward airflow for cooling) and reverse (R) button for winter (upward airflow for heat circulation).
- Funzjoni Timer: Set the fan to automatically turn off after 1, 2, or 4 hours using the timer buttons.
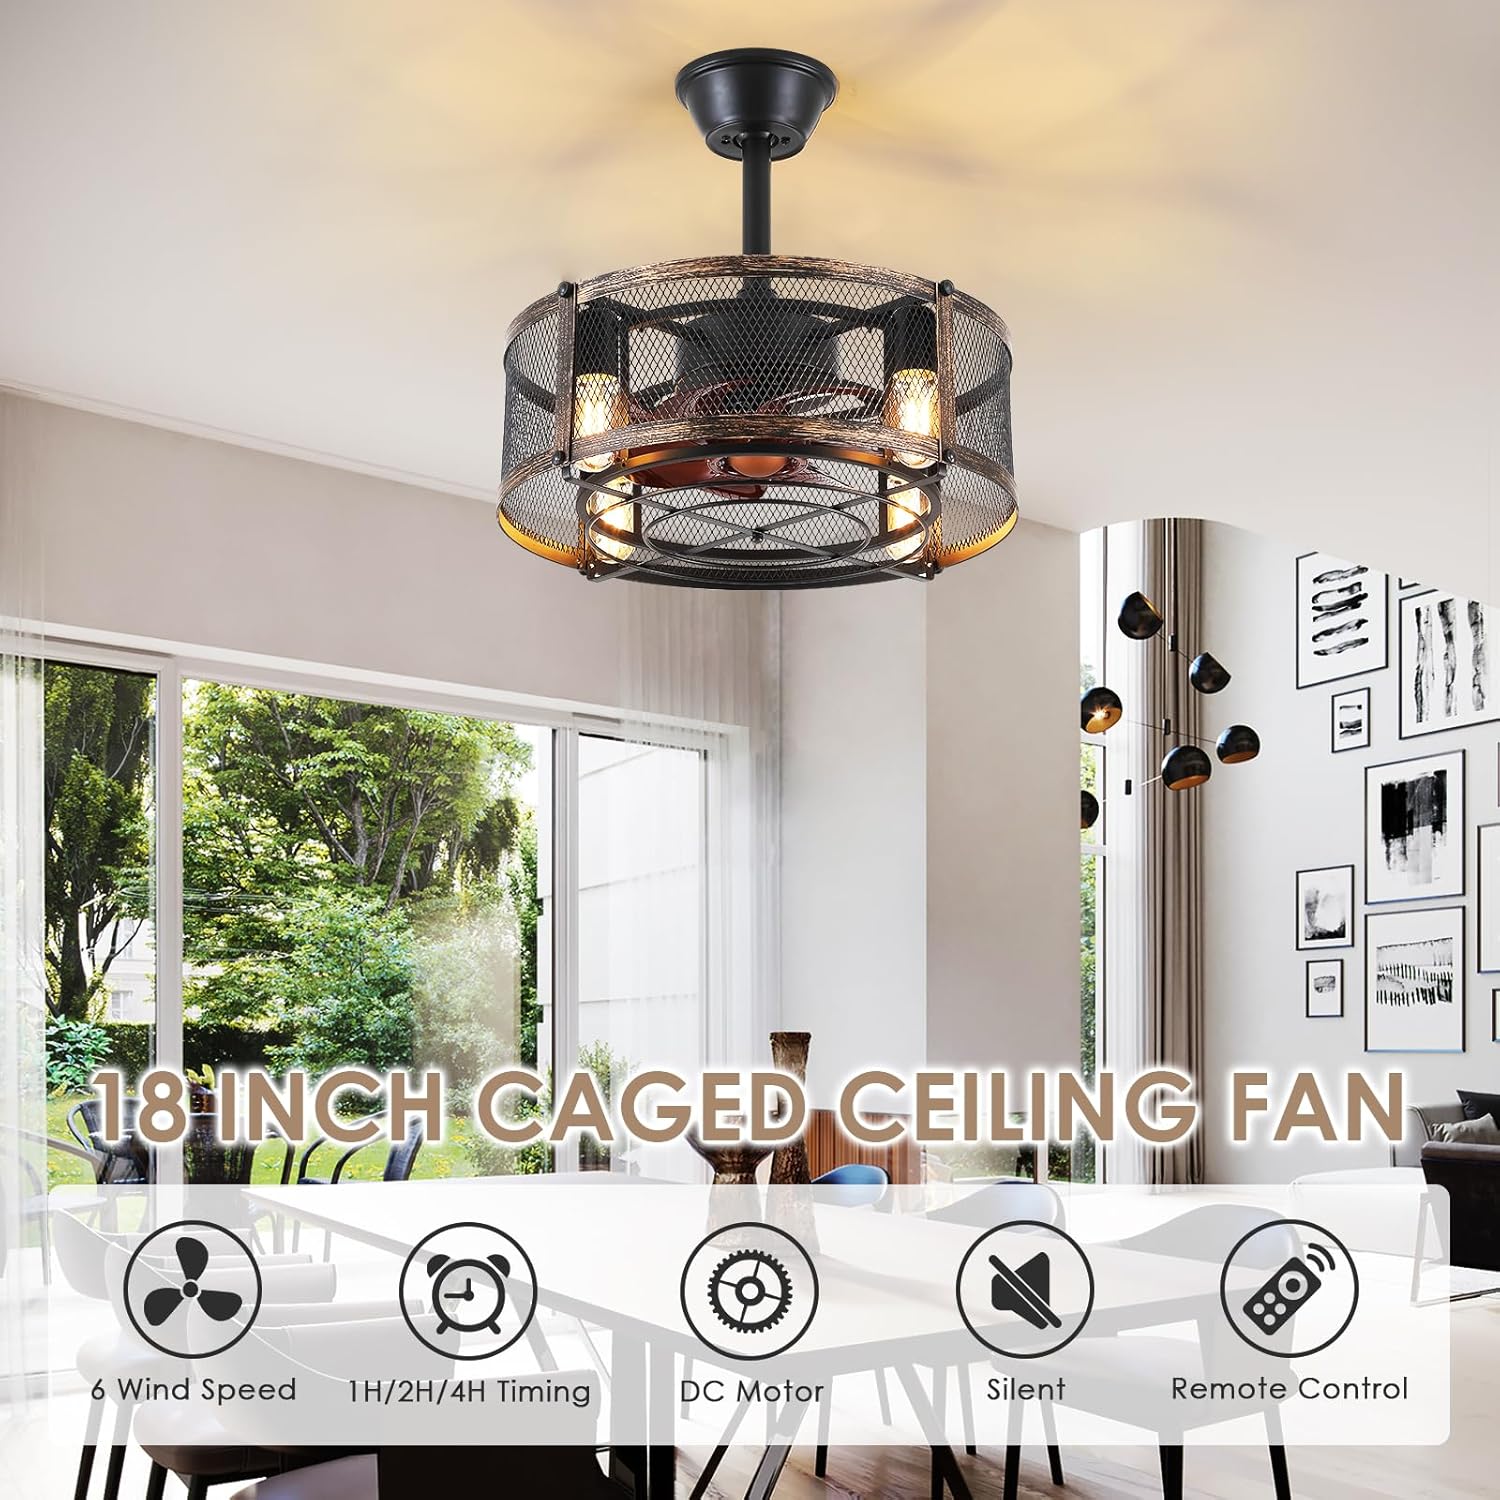
Figura 5.2: Aktarview of the fan's key features.

Figure 5.3: Fan speed settings and their recommended uses.

Figure 5.4: Seasonal operation with forward and reverse rotation.
Vidjo 5.1: Wirja ta' vidjoasing the Dannilong Caged Ceiling Fan with lights in operation.
6. Manutenzjoni
Manutenzjoni regolari tiżgura l-lonġevità u l-prestazzjoni ottimali tal-fann tas-saqaf tiegħek.
Tindif:
- Dejjem itfi l-enerġija mis-circuit breaker qabel ma tnaddaf.
- Uża artab, damp cloth to clean the fan's exterior. Do not use abrasive cleaners or solvents.
- The caged design may require a brush or vacuum attachment for thorough cleaning of the interior and fan blades.
Sostituzzjoni tal-bozza:
The fan requires four E26 base bulbs. Ensure the power is off before replacing bulbs.

Figure 6.1: Bulb requirements and compatible bulb types.
7 Issolvi l-problemi
Jekk tesperjenza problemi bil-fann tiegħek, irreferi għall-problemi u s-soluzzjonijiet komuni hawn taħt. Jekk il-problema tippersisti, ikkuntattja l-appoġġ għall-klijenti.
| Problema | Kawża Possibbli | Soluzzjoni |
|---|---|---|
| Fan ma jibda | Ebda enerġija għall-fann; Konnessjonijiet tal-wajers maħlula; Batterija tal-kontroll remot baxxa. | Check circuit breaker; Ensure all wiring is secure; Replace remote control batteries. |
| Id-dwal ma jaħdmux | Bulbs are loose or burnt out; Incorrect wiring. | Tighten or replace bulbs; Verify light wiring connections. |
| Il-fann huwa storbjuż | Loose screws; Fan not properly balanced; Obstruction in fan path. | Check and tighten all screws; Ensure fan is balanced; Remove any obstructions. |
| Il-kontroll mill-bogħod ma jirrispondix | Batteries are dead or incorrectly inserted; Remote not paired with fan. | Replace batteries, ensuring correct polarity; Refer to remote pairing instructions (usually power cycle and press a button). |
8. Garanzija u Appoġġ
Dannilong is committed to providing professional after-sales service. If you encounter any issues during the installation or use of your Dannilong Ceiling Fan, please do not hesitate to contact us. We will promptly address any concerns to ensure your satisfaction.
For support, please refer to the contact information provided with your purchase or visit the official Dannilong store on Amazon.
Ħanut online: Dannilong Amazon Store
Ask a question about this manual
Ask about setup, troubleshooting, compatibility, parts, safety, or missing instructions. Manuals+ will review the question and use this page’s manual context to help answer it.