
1. Introduzzjoni
This manual provides detailed instructions for the installation, operation, and maintenance of your Energeeks 8 Channel NVR Recorder with 2 Guardian III Outdoor Fixed Cameras and a 1TB Hard Disk Drive. This system is designed for reliable video surveillance, offering high-resolution recording and remote monitoring capabilities. Please read this manual thoroughly before using the product to ensure proper setup and functionality.
2. Informazzjoni dwar is-Sigurtà
Dejjem segwi dawn il-prekawzjonijiet bażiċi ta’ sigurtà biex tnaqqas ir-riskju ta’ nar, xokk elettriku, u korriment:
- Use only the power adapters supplied with the device.
- Do not expose the NVR to rain or moisture.
- Żgura ventilazzjoni xierqa għall-NVR biex tevita li jisħon iżżejjed.
- Do not open the NVR casing; irreferi s-servizz kollu lil persunal kwalifikat.
- Install outdoor cameras in a secure location, away from direct impact or extreme weather conditions beyond their IP rating.
- Protect power cables from being walked on or pinched.
3. Kontenut tal-Pakkett
Ivverifika li l-oġġetti kollha huma preżenti fil-pakkett tiegħek:
- 1 x Energeeks 8 Channel NVR Recorder (Model: EG-NVREXT001)
- 2 x Guardian III Outdoor Fixed Cameras
- 1 x 1TB Energeeks Hard Disk Drive (pre-installed or separate)
- 2 x Power Adapters (for NVR and cameras, if not PoE)
- 1 x USB Mouse
- 1 x Cable Ethernet
- Mounting Screws and Plugs for cameras
- Gwida Quick Start
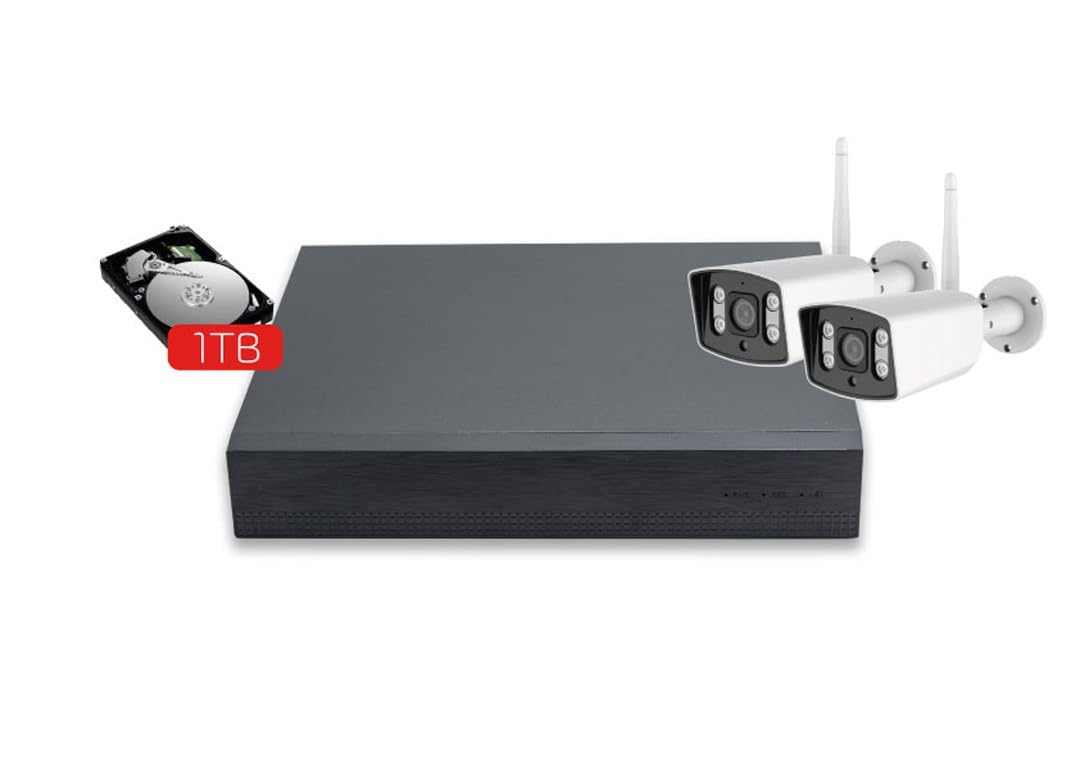
Image: The Energeeks 8 Channel NVR Recorder system, including the NVR unit and two outdoor cameras.
4. Setup
4.1 NVR Hardware Connection
- Qabbad il-Monitor: Qabbad monitor mal-port HDMI jew VGA tal-NVR.
- Qabbad il-ġurdien: Plug the USB mouse into a USB port on the NVR.
- Qabbad in-Netwerk: Connect an Ethernet cable from the NVR's LAN port to your router or network switch.
- Qabbad l-Enerġija: Connect the NVR power adapter to the NVR and then to a power outlet.
4.2 Installazzjoni tad-Drive tad-Disk Ħard (HDD)
The 1TB hard disk drive is typically pre-installed in your NVR. If it is not, or if you are upgrading, follow these steps:
- Unplug the NVR from power.
- Carefully open the NVR casing (refer to the internal diagram if available).
- Mount the HDD into the designated bay and connect the SATA data and power cables.
- Close the NVR casing and reconnect power.
4.3 Installazzjoni tal-Kamera
- Kameras tal-Immuntar: Choose suitable outdoor locations for your Guardian III cameras, ensuring optimal viewing angles and coverage. Use the provided screws and plugs to securely mount them.
- Qabbad il-Kameras: Connect the cameras to the NVR's PoE ports using Ethernet cables. If your NVR does not have PoE, connect cameras to a PoE switch or use individual power adapters and connect them to your network.
4.4 Konfigurazzjoni Inizjali
- Qawwa Mixgħul: Power on the NVR. It will boot up and display the initial setup wizard on the connected monitor.
- Issettja l-Password: Oħloq password b'saħħitha għall-kont tal-amministratur.
- Issettjar tan-Netwerk: Configure network settings (DHCP is usually sufficient, or set a static IP).
- Data u Ħin: Issettja d-data, il-ħin u ż-żona tal-ħin korretti.
- HDD Format: The NVR may prompt you to format the HDD. Confirm to proceed.
- Camera Search: The NVR will automatically search for and add connected cameras. If not, manually add them via the camera management menu.
5. Operating the NVR System
5.1 Ħaj View
After initial setup, the NVR will display the live feeds from all connected cameras. You can switch between single-camera view, grilja b'ħafna kameras view, and sequence view bl-użu tal-kontrolli fuq l-iskrin jew il-maws.
5.2 Settings tar-Reġistrazzjoni
Access the recording settings menu to configure recording schedules (continuous, motion-triggered, alarm-triggered) and recording quality for each camera. Ensure the HDD is formatted and has sufficient space.
5.3 Daqq
Biex terġa 'view irreġistrat footage:
- Go to the Playback menu.
- Agħżel il-kamera u l-firxa tad-data/ħin mixtieqa.
- Uża l-kronoloġija biex tinnaviga fir-reġistrazzjonijiet.
5.4 Sejbien tal-Moviment
Configure motion detection zones and sensitivity for each camera in the alarm settings. This allows the NVR to record only when motion is detected, saving storage space and making event review aktar faċli.
5.5 Aċċess mill-Bogħod
Għal remoti viewing via a mobile app or web browser, ensure the NVR is connected to the internet. You may need to enable P2P (Peer-to-Peer) or configure port forwarding on your router. Refer to the NVR's network settings for details and download the official Energeeks mobile application.
6. Manutenzjoni
6.1 Tindif
Naddaf il-lentijiet tal-kamera regolarment b'drapp artab u dryer.amp cloth. Keep the NVR vents free from dust to ensure proper airflow and prevent overheating.
6.2 Aġġornamenti tal-Firmware
Periodically check the Energeeks official website for firmware updates for your NVR and cameras. Firmware updates can improve performance, add features, and enhance security. Follow the provided instructions carefully when performing updates.
6.3 HDD Management
Monitor the hard drive's health and storage capacity through the NVR's system settings. If the HDD becomes full, the NVR will typically overwrite the oldest recordings. You can also manually format the HDD if needed (this will erase all recorded data).
7 Issolvi l-problemi
- No Video Signal from Camera:
Check camera power supply and Ethernet cable connection. Ensure the camera is properly added and enabled in the NVR's camera management settings. Verify network connectivity. - L-NVR Mhux qed Jirrekordja:
Check if the hard drive is installed, formatted, and healthy. Verify recording schedules and motion detection settings. Ensure sufficient storage space. - Ma nistax naċċessa l-NVR mill-bogħod:
Confirm the NVR has internet access. Check P2P status or port forwarding settings on your router. Ensure the mobile app or web browser settings are correct. - Hard Drive Full:
The NVR is configured to overwrite old recordings by default. If you need more storage, consider upgrading the HDD (supports up to 8TB SATA) or adjusting recording settings (e.g., motion-only recording). - Insejt il-password:
Refer to the NVR's system recovery options or contact Energeeks support for password reset procedures.
8. Speċifikazzjonijiet
- Ditta: enerġeeks
- Mudell: EG-NVREXT001
- Kanali: 8
- Kapaċità tal-Ħżin tal-Memorja: 1 TB (Supports SATA up to 8 TB)
- Riżoluzzjoni massima: Sa 5-il megapixel
- Kompatibilità: ONVIF
- Manifattur: ENERGEEKS
9. Informazzjoni dwar Garanzija
This Energeeks product is covered by a standard manufacturer's warranty. For specific terms, conditions, and duration of the warranty, please refer to the warranty card included in your product packaging or visit the official Energeeks websit. Żomm il-prova tax-xiri tiegħek għal talbiet ta' garanzija.
10. Appoġġ għall-Klijent
For technical assistance, troubleshooting, or any questions regarding your Energeeks NVR system, please contact Energeeks customer support. You can typically find contact information, FAQs, and additional resources on the official Energeeks websit.