
1. Introduzzjoni
This manual provides essential information for the proper setup, operation, and maintenance of your DPVR P2 All-in-One Virtual Reality Headset. The DPVR P2 is designed for professional applications such as arcades, educational environments, corporate training, and medical simulations. It is not intended for personal consumer use or VR gaming.
2. Prodott Aktarview
2.1 Komponenti
- DPVR P2 VR Headset
- 3DoF Controller
- Iċċarġjar Cable
- Manwal għall-Utent
2.2 Karatteristiċi ewlenin
- 4K Resolution Display: Experience clear visuals with a 3664 x 1920 AMOLED display.
- Adjustable IPD: Hardware adjustment for Interpupillary Distance (IPD) at 58mm, 64mm, and 70mm for optimal visual comfort.
- Batterija fit-tul: Equipped with a 5700 mAh large capacity battery, suitable for extended use.
- Operazzjoni faċli għall-utent: Control options include a 3DoF controller and an integrated touchpad for intuitive navigation.
- Disinn tal-Kumdità: Features a bracket to prevent friction with eyeglasses and an ergonomic design for balanced weight distribution and comfort.
- Ħażna espansibbli: Includes 6GB RAM and 128GB internal storage, expandable up to 1TB via an SD card slot.
- Sigurtà tad-Dejta: Incorporates unique encryption and decryption methods to protect data.

Image: The DPVR P2 headset features a 4K resolution display for ultra-clear visuals.

Image: The DPVR P2 offers large storage with an extended SD card slot for up to 1TB expansion.

Image: The DPVR P2 incorporates a Qualcomm chip with data security protection.
3. Setup
3.1 Initial Unboxing and Inspection
Carefully remove all components from the packaging. Inspect the headset and controller for any visible damage. Ensure all listed components are present.
3.2 Iċċarġjar tal-Headset
Connect the provided charging cable to the headset's charging port and a suitable power adapter. The LED indicator will show charging status. Ensure the headset is fully charged before first use.
3.3 Aġġustament għall-Kumdità
- Headstrap Adjustment: Place the headset on your head. Adjust the headstrap to achieve a snug yet comfortable fit. The strap should distribute weight evenly across your head.
- Aġġustament IPD: Rotate the lens cups to adjust the Interpupillary Distance (IPD) until the image appears clear and comfortable for your eyes. The P2 supports IPD settings of 58mm, 64mm, and 70mm.
- Eyeglass Compatibility: The headset includes a bracket designed to prevent friction between eyeglasses and the VR lenses.
Image: Adjust the headstrap and IPD for ultimate comfort and clear viewing.
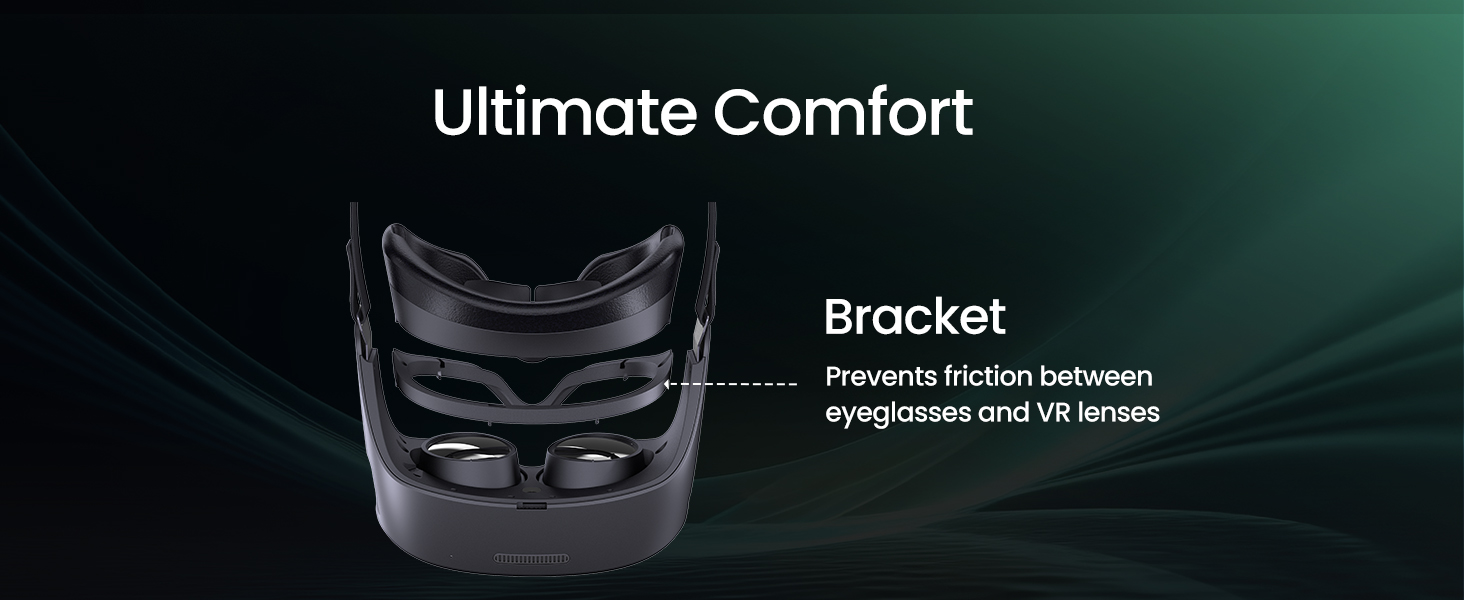
Image: Hardware IPD adjustment by rotating the lens cups to achieve a clear image.
3.4 Ixgħel u Konfigurazzjoni Inizjali
Press and hold the power button on the headset to turn it on. Follow the on-screen prompts for initial setup. If the initial language is not English, navigate to the settings menu to change the language preference.
4. Istruzzjonijiet Operattivi
4.1 Using the 3DoF Controller
The 3DoF controller allows for basic interaction within the VR environment. Use the trigger button for selection and the touchpad for navigation and scrolling. Ensure the controller is paired with the headset before use.
4.2 Using the Touchpad on the Headset
For simpler interactions, the headset features a touchpad. This can be used to select options directly, providing an alternative to the controller, especially useful for users who prefer direct input.
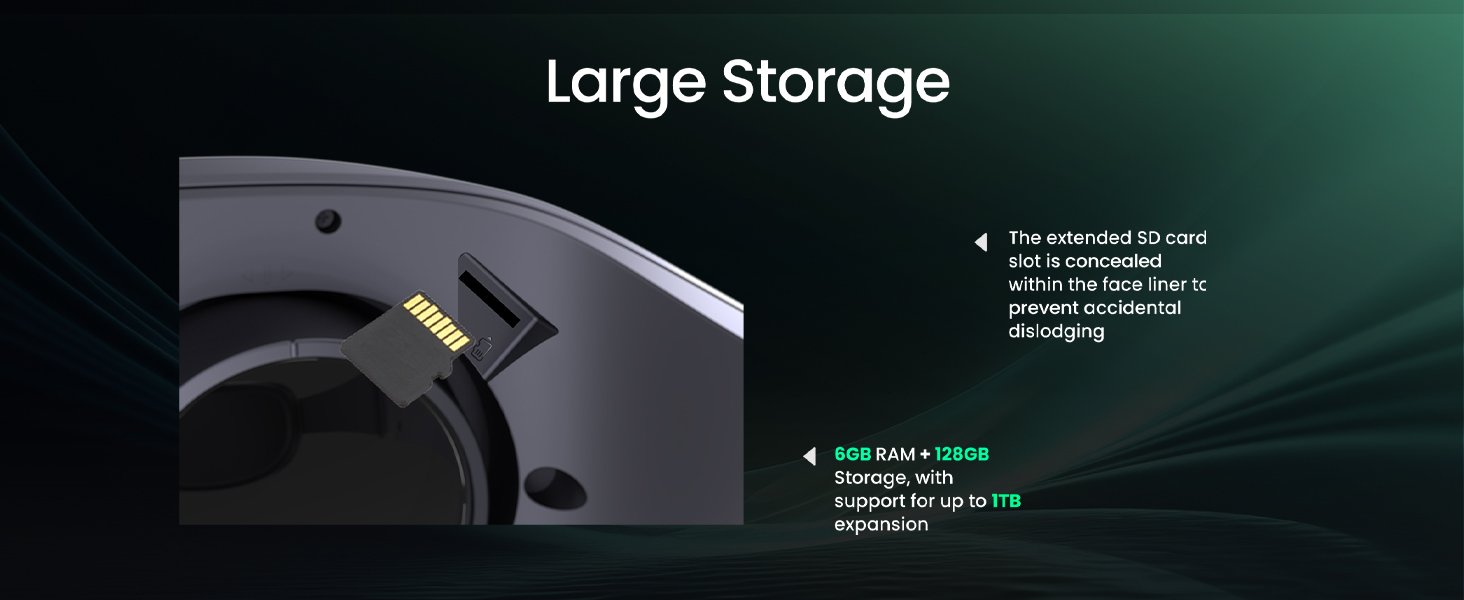
Image: The DPVR P2 offers easy operation via its 3DoF controller and integrated touchpad.
4.3 Konnessjoni ma' Apparati Esterni
The DPVR P2 supports HDMI connectivity for integration with personal computers or other compatible devices. Connect the HDMI cable to the headset and your external device to mirror content or extend your VR experience.
5. Manutenzjoni
5.1 Tindif tal-Lentijiet
Use a microfiber cloth specifically designed for optical lenses to gently wipe the headset lenses. Do not use abrasive materials, chemical cleaners, or excessive force, as this can scratch or damage the lenses.
5.2 Cleaning the Headset and Face Liner
Wipe the exterior of the headset with a soft, damp cloth. The face liner and cushions are replaceable and can be cleaned according to their specific material instructions (leather and fabric surfaces). Ensure the headset is powered off and disconnected from power before cleaning.
5.3 Kura tal-Batterija
To prolong battery life, avoid fully discharging the headset frequently. Store the headset in a cool, dry place when not in use. The P2 contains one battery, with options for replacement batteries and external power accessories (sold separately) for extended use.
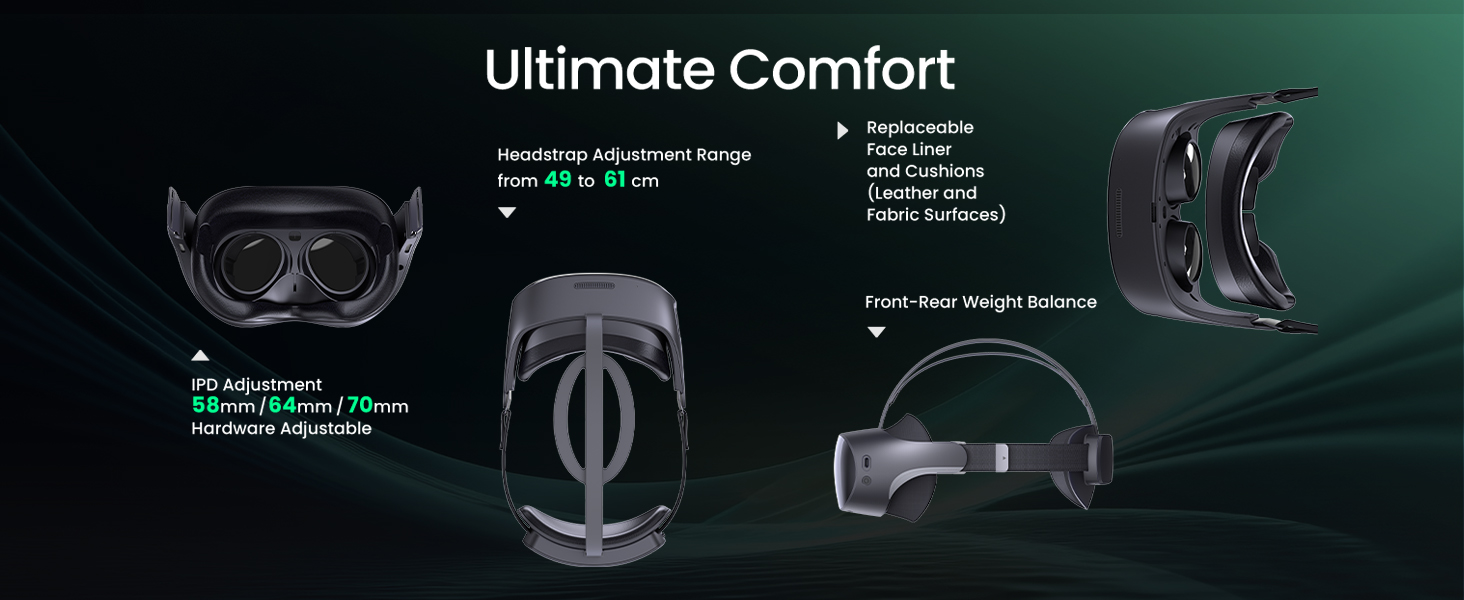
Image: The Marathon Kit includes a large capacity battery and options for charger and DC supply accessories.
6 Issolvi l-problemi
6.1 Headset Not Powering On
- Ensure the headset is fully charged. Connect it to a power source and wait a few minutes before attempting to power on again.
- Iċċekkja li l-kejbil tal-iċċarġjar u l-adapter qed jaħdmu sew.
6.2 Unresponsive Controller
- Check the controller's battery level and replace if necessary.
- Ensure the controller is properly paired with the headset. Refer to the pairing instructions in the initial setup guide.
- If tracking is poor or jittery, try resetting the controller's alignment by holding down the designated button (usually the home or menu button) for a few seconds.
6.3 Display Issues (Blurry, No Image)
- Adjust the IPD settings by rotating the lens cups until the image is clear.
- Ensure the headset is worn correctly and securely on your head.
- Clean the lenses with a microfiber cloth to remove any smudges or dust.
- If connected via HDMI, check the cable connection and ensure the external device is outputting a signal.
6.4 Performance Issues (Slow Loading, Lag)
- Close any unnecessary applications running in the background on the headset.
- Ensure the headset's software is up to date.
- If using a network connection, verify the Wi-Fi signal strength and stability.
6.5 Incorrect Initial Language
- During initial setup, carefully follow the prompts to select your preferred language.
- If already set, navigate to the headset's system settings menu and locate the language option to change it to English or your desired language.
7. Speċifikazzjonijiet
| Karatteristika | Speċifikazzjoni |
|---|---|
| Numru tal-Mudell | P2 |
| Riżoluzzjoni tal-Wiri | 3664 x 1920 |
| Tip ta 'Wiri | AMOLED |
| Teknoloġija tal-Konnettività | HDMI |
| Tip ta' Kontrollur | 3DoF, Button Control |
| Kapaċità tal-batterija | 5700 mAh |
| RAM | 6GB |
| Ħażna Interna | 128GB |
| Ħażna espansibbli | Up to 1TB (via SD card) |
| Aġġustament IPD | 58mm / 64mm / 70mm (Hardware Adjustable) |
| Apparati Kompatibbli | Kompjuter Personali |
| Pjattaforma | PlayStation 4 (as per product specifications) |
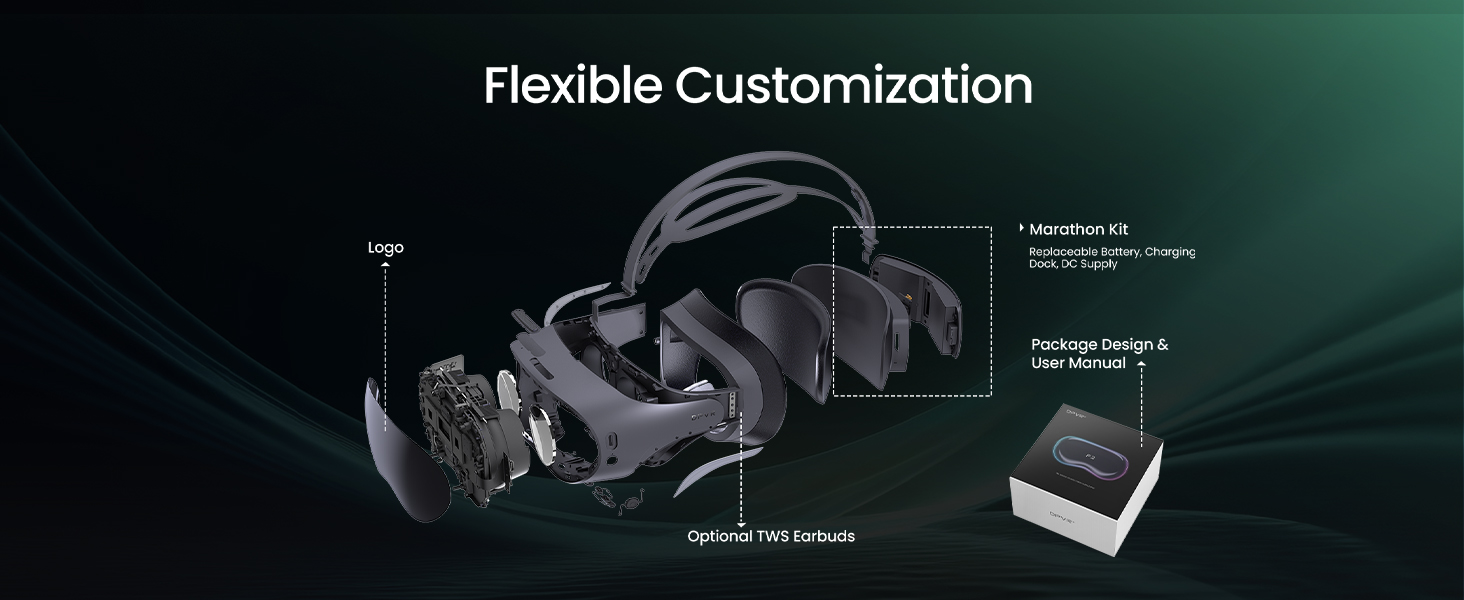
Image: Detailed specifications for the DPVR P2 headset.
8. Garanzija u Appoġġ
8.1 Informazzjoni dwar Garanzija
The DPVR P2 Virtual Reality Headset comes with a Garanzija LimitataJekk jogħġbok irreferi għall-karta tal-garanzija inkluża mal-prodott tiegħek għal termini, kundizzjonijiet u tul ta' żmien speċifiċi tal-kopertura. Żomm il-prova tax-xiri tiegħek għal talbiet ta' garanzija.
8.2 Appoġġ għall-Klijent
For technical assistance, troubleshooting beyond this manual, or warranty inquiries, please contact DPVR customer support. Visit the official DPVR websit għal informazzjoni ta' kuntatt u riżorsi ta' appoġġ.