
Keychron M3
Manwal tal-Utent tal-Maws Ottiku tal-Logħob Wireless Keychron M3
Mudell: M3
Introduzzjoni
Thank you for choosing the Keychron M3 Wireless Gaming Optical Mouse. This manual provides detailed instructions for setting up, operating, and maintaining your new mouse. The Keychron M3 is designed for versatility, offering tri-mode connectivity (2.4 GHz wireless, Bluetooth 5.1, and wired USB-C) and a high-precision sensor for optimal performance in both gaming and productivity tasks. Its lightweight and ergonomic design ensures comfort during extended use.

Figure 1: Keychron M3 Wireless Gaming Optical Mouse (White) with included USB-C and USB-A dongles.
X'hemm fil-Kaxxa
Jekk jogħġbok kun żgur li l-oġġetti kollha huma preżenti qabel ma tipproċedi bis-setup:
- Keychron M3 Wireless Gaming Optical Mouse
- Detachable Type-C to Type-C Cable
- Adapter tat-Tip A għal tat-Tip Ċ
- USB-C 2.4 GHz Receiver
- USB-A 2.4 GHz Receiver

Figure 2: The Keychron M3 mouse alongside its USB-C and USB-A wireless receivers.
Setup
The Keychron M3 offers three connection modes: 2.4 GHz Wireless, Bluetooth 5.1, and Wired USB-C.
Konnessjoni bla fili 2.4 GHz
- Locate the 2.4 GHz receiver (either Type-C or Type-A) from the packaging.
- Plug the receiver into an available USB port on your computer (Windows or Mac).
- Turn on the mouse using the switch on the bottom. Ensure it is set to the 2.4G mode.
- Il-maws għandu jgħaqqad awtomatikament mar-riċevitur.
Konnessjoni Bluetooth 5.1
- Turn on the mouse and set the switch on the bottom to the Bluetooth mode.
- On your computer (Windows or Mac), open Bluetooth settings.
- Fittex għal new devices. The mouse should appear as "Keychron M3".
- Select "Keychron M3" to pair.
Wired USB-C Connection
- Connect one end of the provided Type-C to Type-C cable to the mouse.
- Connect the other end to a USB-C port on your computer. If your computer only has USB-A ports, use the included Type-A to Type-C adapter.
- Il-maws se jiffunzjona bħala maws bil-fili u jiċċarġja simultanjament.
Istruzzjonijiet Operattivi
The Keychron M3 is designed for intuitive use with advanced customization options.
Aġġustament DPI
The mouse features a PixArt PAW 3395 sensor with up to 26,000 DPI. You can adjust the DPI sensitivity on-the-fly using the dedicated DPI button, typically located near the scroll wheel. Pressing this button cycles through preset DPI levels.

Figure 3: The top of the Keychron M3 mouse, highlighting the scroll wheel and the DPI adjustment button.
Programmable Buttons and RGB Lighting
The Keychron M3 includes programmable macro buttons and customizable RGB lighting effects. To personalize these features, download and install the Keychron Engine software from the official Keychron websit.
- Keychron Engine Software: This software allows you to:
- Modify key assignments and set shortcuts.
- Ippersonalizza l-effetti tad-dawl u l-kuluri RGB.
- Create and assign dedicated macros.
- Adjust professional settings such as Lift-Off Distance (LOD), polling rate (up to 1000 Hz), and DPI.
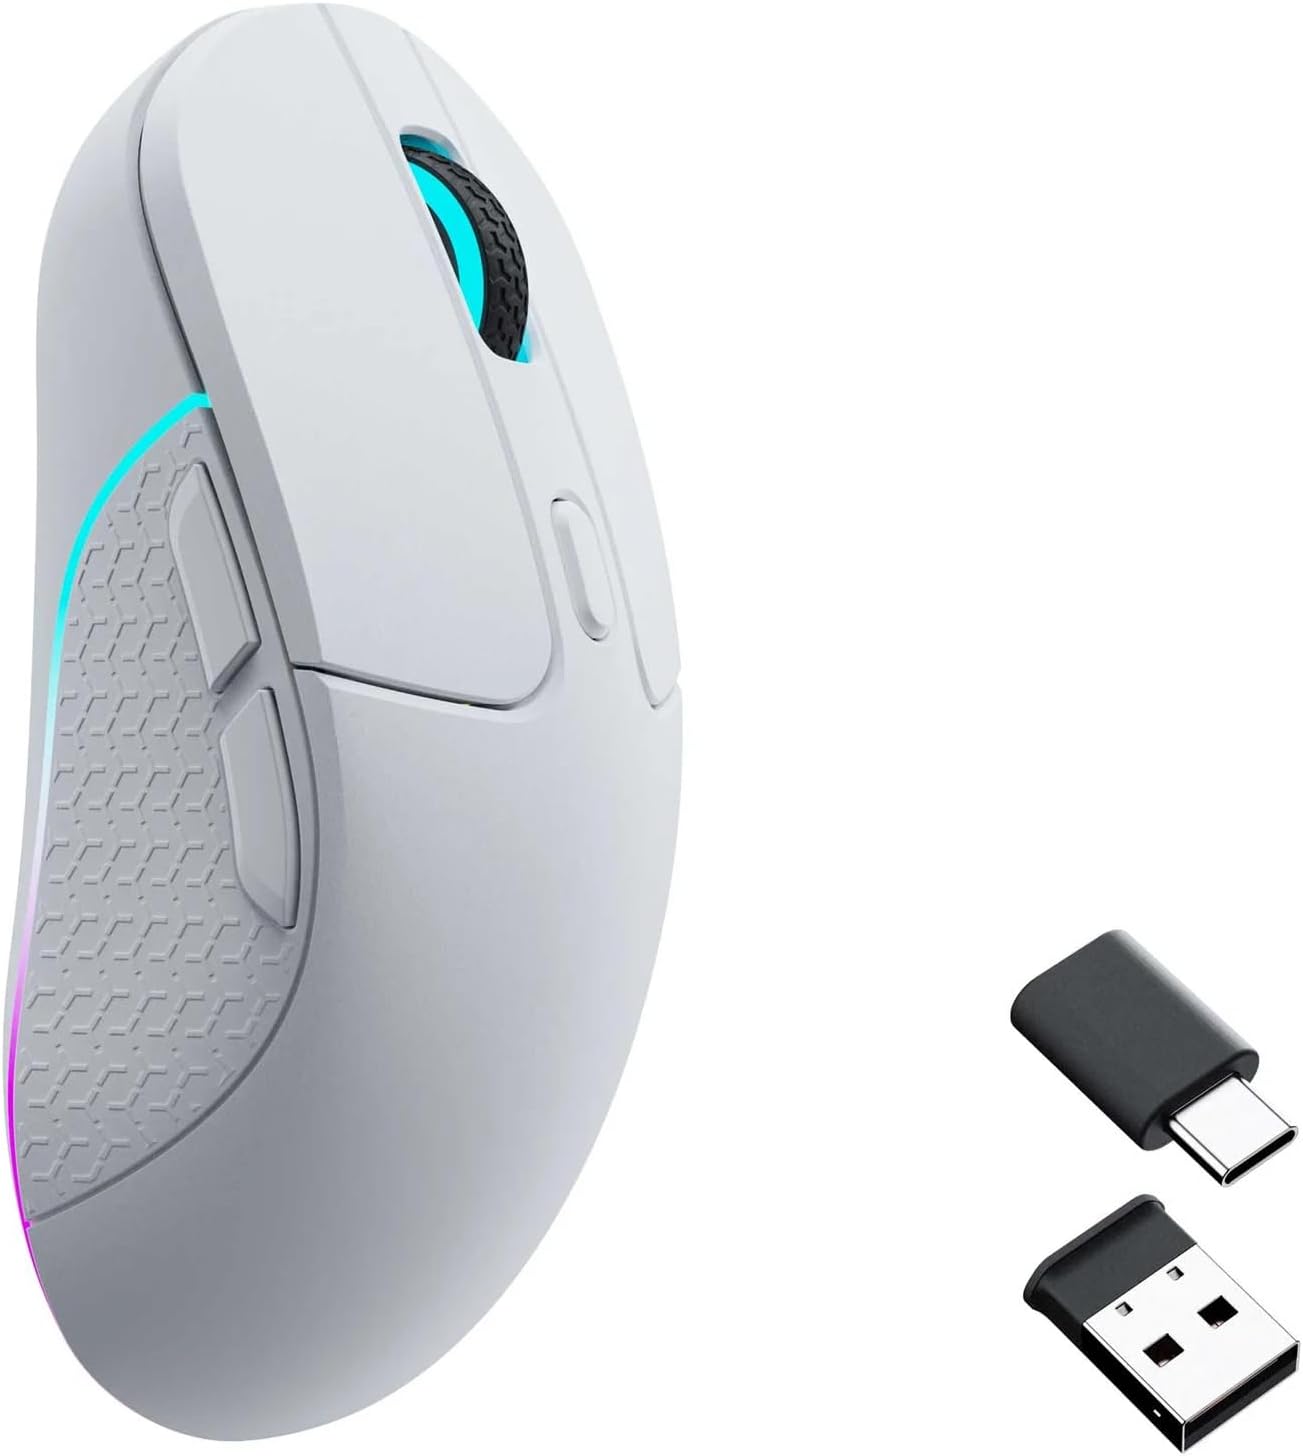
Figure 4: Screenshot of the Keychron Engine software, demonstrating the interface for customizing mouse settings and RGB lighting.

Figure 5: The Keychron M3 mouse displaying its customizable RGB lighting effects.
Manutenzjoni
To ensure the longevity and optimal performance of your Keychron M3 mouse, follow these maintenance guidelines:
- Tindif: Uża drapp artab u niexef biex timsaħ il-wiċċ tal-maws. Għal ħmieġ iebes, nixxef ftit.ampLaħlaħ id-drapp bl-ilma jew b'tindif ħafif u mhux abrażiv. Evita umdità eċċessiva.
- Kura tas-Sensor: Żomm is-senser ottiku fil-qiegħ tal-maws nadif u ħieles mit-trab jew mill-fdalijiet. Uża swab tal-qoton jew arja kkompressata jekk meħtieġ.
- Ħażna: Meta ma tkunx qed tużah għal perjodi twal, aħżen il-maws f'post frisk u niexef 'il bogħod mix-xemx diretta u minn temperaturi estremi.
- Ħajja tal-batterija: The mouse is powered by a nonstandard battery. Charge the mouse using the provided USB-C cable when the battery indicator shows low power.
Issolvi l-problemi
| Problema | Kawża Possibbli | Soluzzjoni |
|---|---|---|
| Mouse not responding (2.4 GHz Wireless) | Receiver not properly connected; mouse not in 2.4G mode; low battery. | Ensure receiver is fully inserted. Check mouse switch is set to 2.4G. Charge the mouse. |
| Il-maws mhux qed jikkonnettja (Bluetooth) | Mouse not in Bluetooth pairing mode; Bluetooth disabled on computer; interference. | Ensure mouse switch is set to Bluetooth. Enable Bluetooth on your computer. Try re-pairing. Move closer to the computer. |
| Traċċar mhux preċiż jew dewmien tal-cursor | Dirty optical sensor; unsuitable surface; low battery; wireless interference. | Clean the optical sensor. Use a mouse pad or a clean, non-reflective surface. Charge the mouse. Reduce wireless interference by moving other devices. |
| Il-buttuni jew ir-rota tal-iscroll ma jaħdmux | Żball fis-softwer; ostruzzjoni fiżika. | Restart your computer. Check for debris around buttons/scroll wheel. Reinstall Keychron Engine software if applicable. |
Speċifikazzjonijiet
- Mudell: M3
- Sensor: PixArt PAW 3395
- DPI: Sa 26,000 DPI
- IPS: Sa 650 IPS
- Rata tal-votazzjoni: Sa 1000 Hz
- Konnettività: Tri-Mode (2.4 GHz Wireless, Bluetooth 5.1, Wired USB-C)
- Piż: Madwar 79g (2.79 uqija)
- Dimensjonijiet: 125.2 mm (Tul) x 66.4 mm (Wisa) x 40.6 mm (Għoli)
- Batterija: 1 Batterija Mhux Standard (Riċarġabbli)
- Apparati Kompatibbli: Windows PC, Mac
- Komponenti Inklużi: Detachable Type-C to Type-C Cable, Type-A to Type-C Adapter, USB-C 2.4 GHz Receiver, USB-A 2.4 GHz Receiver

Figure 6: Detailed dimensions of the Keychron M3 mouse.
Garanzija u Appoġġ
For warranty information and technical support, please refer to the official Keychron website or contact Keychron customer service directly. Keep your purchase receipt as proof of purchase for warranty claims.
Manifattur: Keychron
Uffiċjali Websit: www.keychron.com
Ask a question about this manual
Ask about setup, troubleshooting, compatibility, parts, safety, or missing instructions. Manuals+ will review the question and use this page’s manual context to help answer it.