
HOMEPILOT 10501003
HOMEPILOT Roller Shutter Belt Winder Timer 10501003 Instruction Manual
Mudell: 10501003
1. Introduzzjoni
This manual provides detailed instructions for the installation, setup, and operation of your HOMEPILOT Roller Shutter Belt Winder Timer, model 10501003. This device is designed to automate the opening and closing of roller shutters, blinds, or awnings, enhancing comfort and convenience in your home. It is particularly suitable for existing installations, utilizing the space of a standard belt winder housing.
2. Istruzzjonijiet tas-Sigurtà
Jekk jogħġbok aqra dawn l-istruzzjonijiet tas-sigurtà bir-reqqa qabel l-installazzjoni u t-tħaddim. Jekk ma ssegwix dawn l-istruzzjonijiet, dan jista' jirriżulta f'xokk elettriku, nar, jew korriment serju.
- Sigurtà Elettrika: Always disconnect the main power supply before performing any installation or maintenance work. Work on electrical installations should only be carried out by qualified personnel.
- Użu Intenzjonat: This device is intended for controlling roller shutter motors. Do not use it for purposes other than those described in this manual.
- Ambjent: Do not expose the device to moisture, extreme temperatures, or direct sunlight. Ensure the installation location is dry and protected.
- Tfal: Keep packaging materials and the device out of reach of children.
- Ħsara: Do not operate the device if it shows visible signs of damage. Contact customer support for assistance.
3. Kontenut tal-Pakkett
Ivverifika li l-oġġetti kollha huma preżenti fil-pakkett:
- HOMEPILOT Roller Shutter Belt Winder Timer (Modi Zeitschaltuhr)
- Manwal ta 'Istruzzjoni (dan id-dokument)
4. Prodott Aktarview
The HOMEPILOT Belt Winder Timer is designed for integration into existing belt winder housings, providing an intelligent control solution for your roller shutters. Below is an overview of the device's components and dimensions.
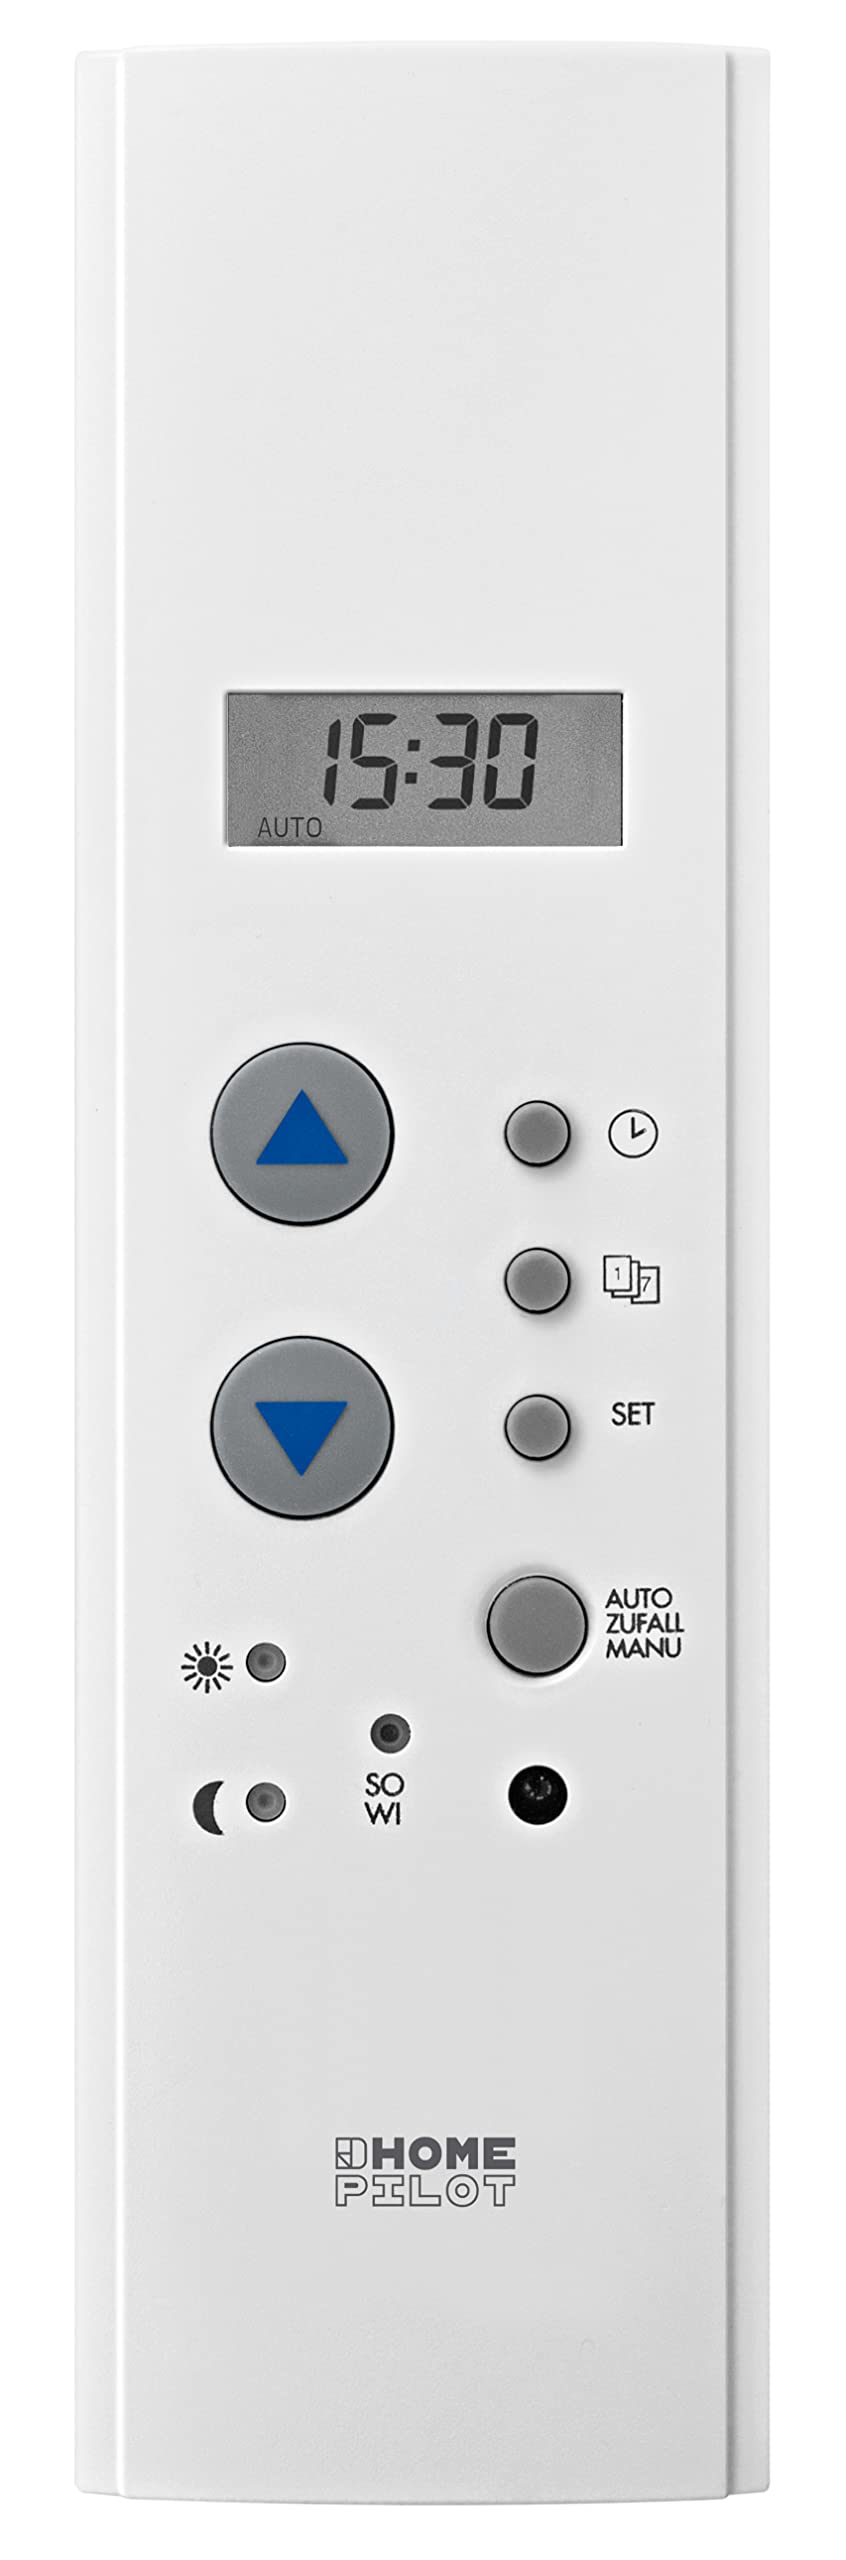
Figura 4.1: Quddiem view of the HOMEPILOT Roller Shutter Belt Winder Timer. Shows the digital display, up/down buttons, SET button, and mode indicators.

Figura 4.2: Ġenb view of the timer, illustrating its compact design for flush mounting.

Figure 4.3: Technical drawing showing the precise dimensions (in mm) of the device, crucial for installation into existing belt winder housings.
4.1. Kontrolli u Wiri
- Wiri: Shows current time, operating mode, and programming settings.
- Buttuni 'l fuq /' l isfel: Used for manual control of the roller shutter and for navigating/adjusting settings during programming.
- Buttuna SET: Jidħol fil-modalità ta' programmar u jikkonferma l-għażliet.
- Indikaturi tal-Modalità: Icons for automatic mode, manual mode, random function, and sun sensor (if connected).
5. Installazzjoni
The HOMEPILOT Belt Winder Timer is designed for easy integration into existing belt winder housings. A roller shutter motor is required for operation. This timer controls the connected motor.
5.1. Prerekwiżiti
- An existing roller shutter system with a motor.
- Basic electrical knowledge and tools.
- Importanti: Ensure the main power supply to the roller shutter circuit is disconnected before starting installation.
5.2. Passi ta 'installazzjoni
- Skonnettja l-Enerġija: Turn off the circuit breaker for the roller shutter system at your main electrical panel. Verify that the power is off using a voltagtester.
- Remove Old Winder (if applicable): Carefully remove the existing manual belt winder from its housing.
- Ipprepara l-Wajers: Identify the wires for your roller shutter motor (usually Live, Neutral, Up, Down, and Ground). The timer requires a 230V power supply.
- Qabbad Wajers: Connect the motor wires to the corresponding terminals on the HOMEPILOT timer. Refer to the wiring diagram (if available in a more detailed manual or on the device itself). Ensure secure connections.

Figura 5.1: Wara view of the timer, showing the green terminal block for electrical connections.
- Immonta t-Tajmer: Insert the HOMEPILOT timer into the existing belt winder housing. The design is made to fit perfectly into the opening. Secure it using screws if provided.
- Irrestawra l-Enerġija: Once the installation is complete and all connections are secure, restore power to the circuit.
- Test Inizjali: Briefly test the manual up/down functions to ensure the motor responds correctly.
Note: For detailed wiring diagrams, please consult the full technical documentation or a qualified electrician.
6. Setup u Konfigurazzjoni Inizjali
After installation and power-up, the device will require initial setup, including setting the current time and date.
6.1. L-issettjar tal-Ħin u d-Data
- Idħol fil-Modalità Setup: Agħfas u żomm il- SET button for approximately 3 seconds until the time display starts flashing.
- Aġġusta Ħin: Uża l- Up u Down buttons to set the current hour. Press SET biex tikkonferma u timxi għal minuti. Irrepeti għal minuti.
- Set Day of Week: After setting the time, the day of the week will flash. Use the Up u Down buttons to select the correct day (e.g., 1 for Monday, 7 for Sunday). Press SET biex tikkonferma.
- Ħruġ Setup: The device will automatically exit setup mode after a few seconds of inactivity, or you can press SET repeatedly until the display returns to normal operation.
6.2. Setting End Positions (Calibration)
For optimal operation, the timer needs to learn the upper and lower end positions of your roller shutter. This process is typically done via the connected roller shutter motor's own calibration function or through a specific sequence on the timer.
- Consult your roller shutter motor's manual for specific instructions on setting end positions.
- If the timer has a dedicated calibration mode, it will usually involve pressing and holding the Up u Down buttons simultaneously for a period, then manually driving the shutter to its limits.
7. Istruzzjonijiet Operattivi
The HOMEPILOT timer offers both manual control and automated programming options.
7.1. Operazzjoni Manwali
- Agħfas il- Up button briefly to open the roller shutter.
- Agħfas il- Down button briefly to close the roller shutter.
- Press either button again during movement to stop the shutter at its current position.
7.2. Programming Automatic Schedules
The timer allows for daily and weekly programs to automatically open and close your roller shutters.
- Idħol fil-Modalità tal-Programm: Agħfas il- SET button repeatedly until the program icon (e.g., a clock or schedule symbol) appears and flashes.
- Select Program Slot: Użu Up/Down to select a program slot (e.g., P1, P2). Press SET.
- Set Opening Time: The hour for opening will flash. Use Up/Down to set the desired hour, then SET għal minuti.
- Set Closing Time: Repeat the process for the closing time.
- Agħżel Jiem: Choose the days of the week for this program to be active (e.g., Mon-Fri, Sat-Sun, or all days). Use Up/Down to cycle through options, SET biex tikkonferma.
- Issejvja u Ħruġ: Kompli agħfas SET to save the program and exit program mode.
Refer to the device's display icons for specific program indicators.
7.3. Funzjoni każwali
The integrated random function can delay programmed operating times by a random interval to simulate presence, enhancing security when you are away.
- To activate/deactivate the random function, locate the "AUTO ZUFALL" or "RANDOM" button/setting on your device.
- Press the corresponding button or navigate through the settings menu to toggle this feature on or off. An indicator light or symbol on the display will confirm its status.
7.4. Solar Sensor Integration (Optional)
If combined with a compatible solar sensor (sold separately), the timer can control sun protection based on brightness levels.
- Connect the solar sensor according to its own instructions and the timer's wiring diagram.
- Activate the solar function through the timer's settings menu. This typically involves setting brightness thresholds for automatic lowering/raising of the shutter.
8. Manutenzjoni
The HOMEPILOT Belt Winder Timer requires minimal maintenance.
- Tindif: Imsaħ l-apparat b'ċarruta ratba u niexfa. Tużax prodotti tat-tindif jew solventi li joborxu.
- Qawwa Outage: The device has approximately 8 hours of power reserve for data retention during power outages. After longer outages, you may need to reset the time.
9 Issolvi l-problemi
If you encounter issues with your HOMEPILOT timer, refer to the following common problems and solutions:
| Problema | Kawża Possibbli | Soluzzjoni |
|---|---|---|
| Id-displej tal-apparat huwa vojt. | Ebda provvista ta 'enerġija. | Iċċekkja s-circuit breaker u l-konnessjonijiet tal-wajers. |
| Roller shutter does not move. | Motor not connected, motor fault, or end positions not set. | Verify motor wiring. Check motor functionality. Perform end position calibration (Section 6.2). |
| Automatic program not running. | Device in manual mode, program not activated, or incorrect time/date. | Ensure the device is in automatic mode. Check program settings and correct time/date. |
| Il-ħin mhux korrett wara li tintefa' l-enerġijatage. | Power reserve depleted. | Reset the time and date (Section 6.1). |
If the problem persists, please contact HOMEPILOT customer support.
10. Speċifikazzjonijiet Tekniċi
| Karatteristika | Speċifikazzjoni |
|---|---|
| Mudell | 10501003 |
| Brand | HOMEPILOT |
| Modalità Operattiva | ON-OFF |
| Vol Operattivtage | 230 Volts |
| Qawwa | 1920 Watts |
| Klassi ta' Protezzjoni | II |
| Klassifikazzjoni tal-IP | IP30 |
| Konsum Standby | <0.5 W |
| Inputs Esterni | 2 |
| Connection Cross-Section | max. 1.5mm² |
| Kapaċità tal-Qlib | max. 8 A resistive, max. 4 A inductive load |
| Power Reserve (Data Retention) | madwar. 8 siegħa |
| Temperatura operattiva | +0°C sa +40°C |
| Front Panel Dimensions (H x W) | 210 x 60 mm |
| Fond tal-Apparat | madwar. 56.4 mm |
| Materjal | Plastik |
| Piż | 390 Gramm |
| Metodu ta' Kontroll | Application (HomePilot), Standalone |
| Apparati Kompatibbli | Roller shutter motor, solar sensor |
| Kompatibilità tad-Dar Intelliġenti | Dar intelliġenti kompatibbli |
| Kulur | Abjad |
| Konformità | CE |
| Manifattur | DELTA DORE RADEMACHER GmbH |
| Isem tat-Tip ta' Prodott | Programmable Belt Winder Timer |
| Komponenti Inklużi | Modi Timer |
11. Garanzija u Appoġġ
For warranty information and technical support, please refer to the documentation provided with your purchase or visit the official HOMEPILOT websit. Żomm il-prova tax-xiri tiegħek għal talbiet ta' garanzija.
Manifattur: DELTA DORE RADEMACHER GmbH
Ask a question about this manual
Ask about setup, troubleshooting, compatibility, parts, safety, or missing instructions. Manuals+ will review the question and use this page’s manual context to help answer it.