1. Informazzjoni dwar is-Sigurtà
Jekk jogħġbok aqra u ifhem l-istruzzjonijiet kollha qabel l-assemblaġġ u l-użu. Żomm dan il-manwal għal referenza futura.
- Ensure the bed frame is properly assembled according to the instructions to prevent instability or collapse.
- The maximum weight capacity of the bed frame is 900 pounds; exceeding this weight recommendation could result in serious injury or damage to the bed frame.
- Oqgħod attent minn punti ta' qris potenzjali jew truf li jaqtgħu waqt l-assemblaġġ u l-użu.
- Always use a compatible mattress with the recommended thickness of 10-12 inches to ensure proper support and stability.
2. Prodott Aktarview
The Keyluv King Upholstered LED Bed Frame is designed for comfort and functionality. It features a velvet upholstered, button-tufted headboard with integrated LED lighting, four spacious storage drawers, and a sturdy metal frame with wooden slat support. This bed frame does not require a box spring.
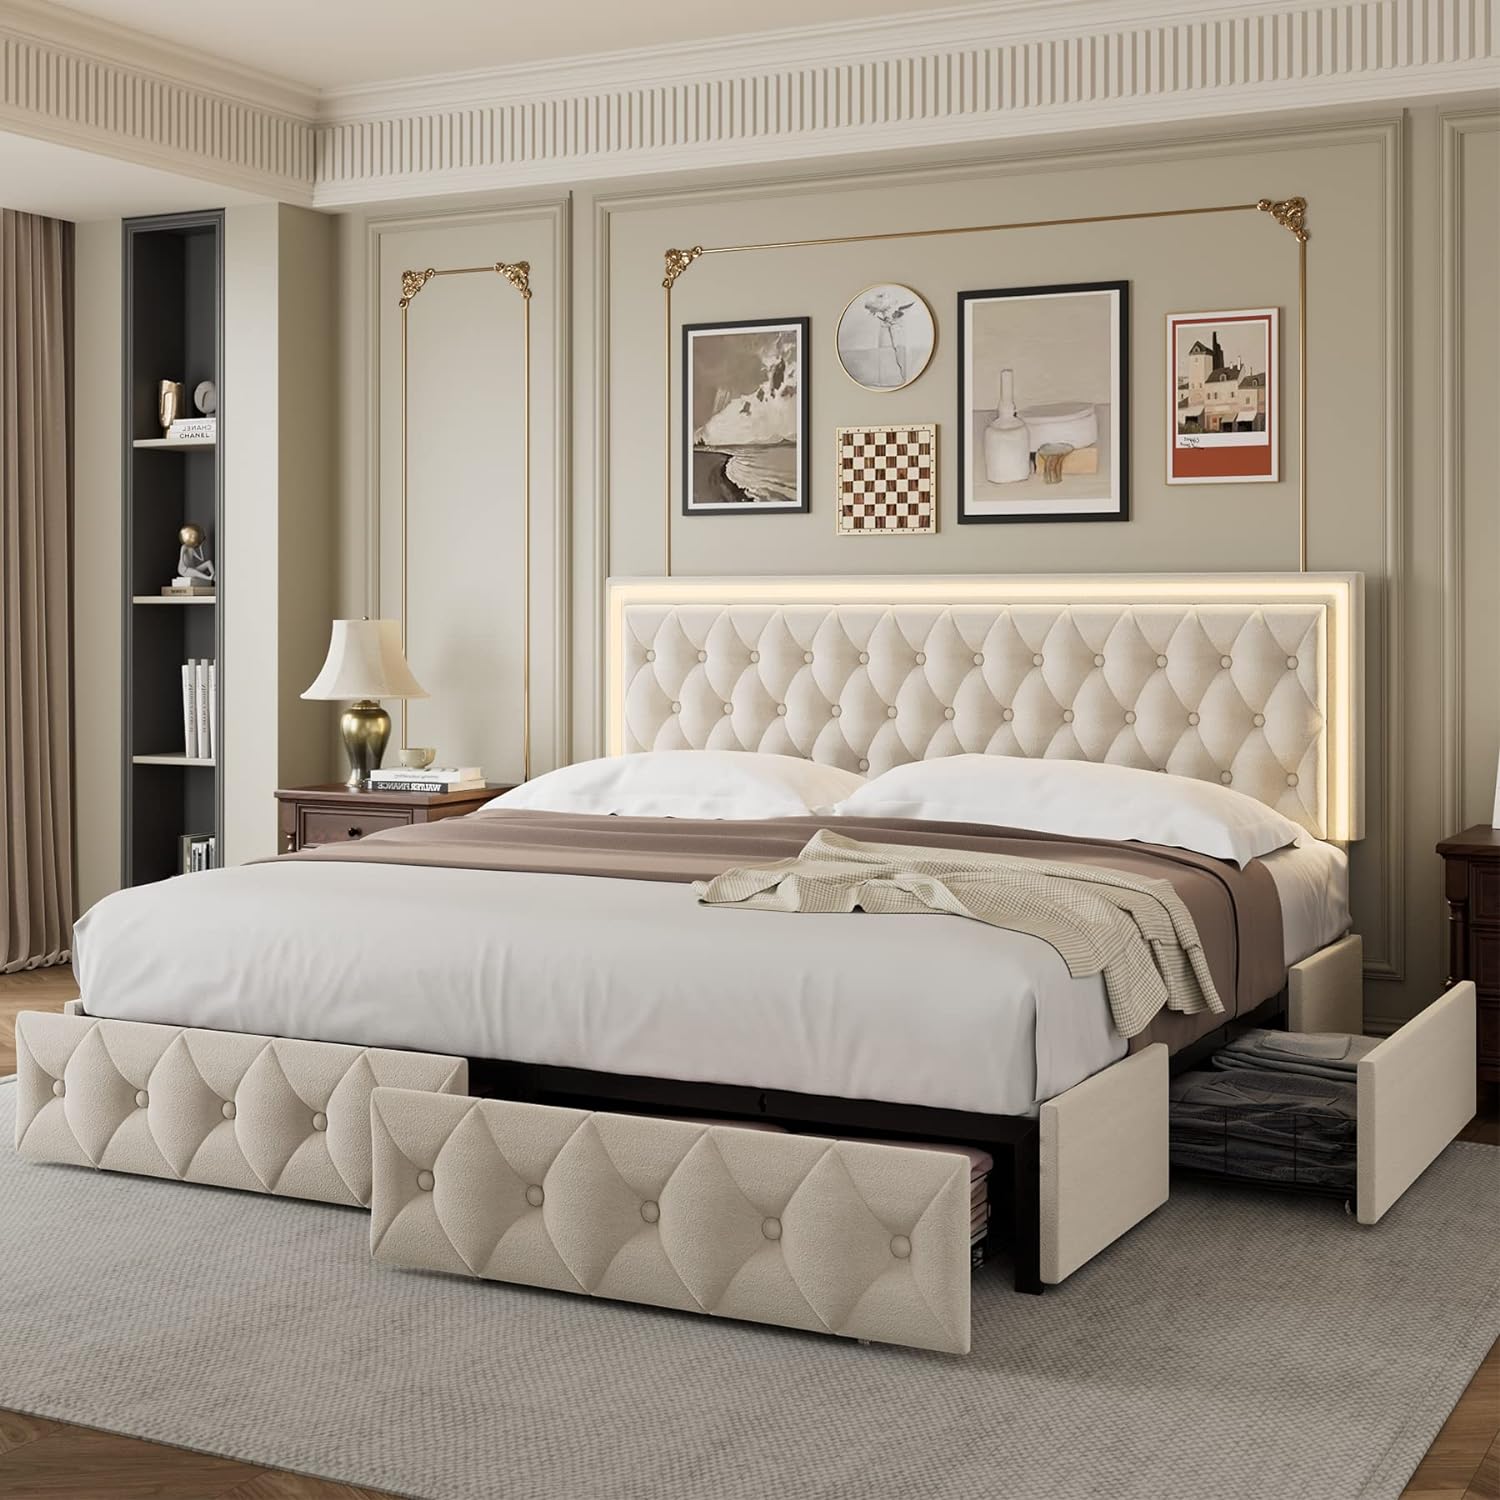
Figura 2.1: B'mod ġenerali view of the Keyluv King Upholstered LED Bed Frame in beige, showcasing the LED headboard and open storage drawers.
Vidjo 2.2: This video highlights the features of the Keyluv LED Bed Frame, including the four large storage drawers and the LED headboard.
3. Kontenut tal-Pakkett
Verify all components are present before beginning assembly. All parts and detailed instructions are included in one box.
- Upholstered Headboard with LED Strip
- Bed Frame Steel Components
- Paletti tal-injam
- 4 Storage Drawers (with wheels and locking mechanism)
- Ħardwer tal-Assemblaġġ (viti, woxers, Allen wrench)
- Kontroll mill-bogħod tad-dawl LED
- USB Power Adapter for LED Lights
- Manwal ta' Istruzzjoni

Figura 3.1: Dettaljati view of the velvet fabric, durable wooden slat support, and easy-assembly slat clips.
4. Istruzzjonijiet tal-Assemblea
Segwi dawn il-passi bir-reqqa għal immuntar xieraq. Huwa rakkomandat li jkun hemm żewġ persuni għall-immuntar.
4.1. Bed Frame Assembly
For a visual guide, please refer to the official assembly video below.
Vidjo 4.1.1: Official assembly instructions for the Keyluv LED Bed Frame with Storage. This video demonstrates the step-by-step process of constructing the bed frame.
- Ħoll il-Komponenti: Neħħi l-partijiet kollha mill-imballaġġ bir-reqqa u poġġihom fuq wiċċ nadif u artab biex tevita l-grif. Iċċekkja li l-partijiet kollha elenkati fil-kontenut tal-pakkett huma preżenti.
- Assemble Headboard Support: Attach the headboard support bars to the upholstered headboard using the provided screws and Allen wrench. Ensure all connections are secure.
- Qabbad il-Binarji tal-Ġenb: Join the side rails to the headboard and footboard sections. Hand-tighten screws initially, then fully tighten once the frame is aligned.
- Installa s-Saqajn ta' Appoġġ taċ-Ċentru: Attach the center support legs to the middle support beam. Adjust the height of the feet if necessary to ensure stability on uneven floors.
- Poġġi l-Paletti tal-Injam: Insert the wooden slats into the designated slots on the side rails. Ensure the plastic caps are securely fitted to prevent movement and noise.
- Arma l-Kxaxen tal-Ħażna: Construct the four storage drawers by attaching the metal frames to the upholstered drawer fronts. Install the wheels on the bottom of each drawer.
- Daħħal il-Kxaxen: Slide the assembled drawers into the designated spaces under the bed frame. Ensure the locking mechanisms are functional to prevent accidental rolling.

Figura 4.1.2: Illustrates the dimensions of the King size bed frame and the individual storage drawers.

Figura 4.1.3: Shows the adjustable height feature of the headboard and recommended mattress thickness (10-12 inches).
4.2. LED Light Setup
Connect the LED strip to the power source and prepare for operation.
- Locate the LED light strip cable extending from the headboard.
- Connect the LED light cable to the provided USB power adapter.
- Plug the USB power adapter into a standard wall outlet.
5. Istruzzjonijiet Operattivi
5.1. Kontroll tad-Dawl LED
The LED lights can be controlled via the included remote or a mobile application.
Vidjo 5.1.1: Demonstrates how to operate the LED lights using both the remote control and the mobile application.
L-użu tal-Kontroll mill-bogħod:
- Ensure the plastic film is removed from the remote control's battery compartment before first use.
- Point the remote directly at the LED receiver on the headboard.
- Use the color buttons (R, G, B, W, and other color dots) to change the light color.
- Use "SPEED+" and "SPEED-" buttons to adjust the speed of dynamic lighting modes.
- Use "MODE+" and "MODE-" buttons to cycle through various lighting effects (e.g., flash, fade, strobe).
- Use the brightness buttons (sun icons) to adjust light intensity.
- The "ON" and "OFF" buttons control the power to the LED lights.
Bl-użu tal-Applikazzjoni Mobbli:
- Scan the QR code provided in the manual or on the LED controller to download the compatible mobile application.
- Enable Bluetooth on your smartphone. The LED light will automatically connect to the app.
- Within the app, you can select colors from a color wheel, choose from various dynamic modes, adjust brightness and speed, and set timers for the lights to turn on/off.
- The app also features a music activation mode, allowing the lights to react to music played through your phone.

Figura 5.1.2: The LED headboard showcasing different color options, controllable via the included remote or a smartphone application.
6. Manutenzjoni
Manutenzjoni regolari tgħin biex ittawwal il-ħajja u d-dehra tal-qafas tas-sodda tiegħek.
- Kura tat-tapizzerija: For general cleaning, gently vacuum the velvet fabric using a soft brush attachment. For spills, blot immediately with a clean, dry cloth. Do not rub. For stubborn stains, consult a professional upholstery cleaner.
- Spezzjoni tal-qafas: Periodically check all screws and bolts to ensure they are tight. Re-tighten if necessary to maintain stability and prevent noise.
- Dwal LED: The LED lights are designed for long-term use and generally do not require maintenance. If issues arise, refer to the troubleshooting section. Avoid exposing the LED strip to excessive moisture.
- Kxaxen tal-ħażna: Keep the drawer wheels clean and free of debris to ensure smooth operation.
7 Issolvi l-problemi
Kwistjonijiet komuni u s-soluzzjonijiet tagħhom.
| Problema | Kawża Possibbli | Soluzzjoni |
|---|---|---|
| Id-dwal LED mhux jixegħlu. | Power cable disconnected, remote battery dead, app not connected. | Check USB cable connection and wall outlet. Replace remote battery. Ensure Bluetooth is enabled and app is connected. |
| L-istruttura tas-sodda titriegħed jew tagħmel storbju. | Loose screws/bolts, uneven floor, improperly installed slats. | Tighten all assembly hardware. Adjust the height of the center support feet. Ensure all wooden slats are correctly seated in their caps. |
| Storage drawers do not slide smoothly. | Debris in wheels, misaligned drawers, damaged wheels. | Clean wheels and tracks. Realign drawers. Contact support if wheels are damaged. |
| Headboard height adjustment issue. | Screws not loosened sufficiently, obstruction. | Ensure the screws allowing headboard height adjustment are loosened before attempting to change height. Check for any obstructions. |
8. Speċifikazzjonijiet
| Karatteristika | Dettall |
|---|---|
| Brand | Keyluv |
| Numru tal-Mudell | MBSDLKSCDKCK |
| Daqs | Re |
| Dimensjonijiet tal-Prodott | 82.7"T x 78.7"W x 40.6"Għ |
| Kulur | Beige |
| Tip Finish | Velvet |
| Karatteristiċi Speċjali | LED adjustable headboard, No Box Spring Needed, 4 Storage Drawers, Sturdy construction |
| Daqs tas-Saqqu Kompatibbli | 10-12 pulzier |
| Piż tal-oġġett | 128.5 liri |
| Assemblea Meħtieġa | Iva |
| UPC | 721718608318 |
9. Garanzija u Appoġġ
For warranty information or technical support, please refer to the product packaging or contact Keyluv customer service directly. Keep your purchase receipt for warranty claims.