Introduzzjoni
Thank you for choosing CDIYTOOL Replacement Trimmer Spool Line. This manual provides essential information for the proper use, installation, and maintenance of your new trimmer spools and cap. Designed for durability and ease of use, these replacement parts ensure your string trimmer operates efficiently.

Image: A set of six black spools pre-wound with red trimmer line, and a single red cap, ready for use.
Karatteristiċi tal-Prodott
- Materjal ta' Kwalità: Constructed from durable ABS plastic for the spool and robust nylon thread for the line, ensuring flexibility and extended service life.
- Reduced Drag: The material composition is designed to minimize drag, facilitating faster and more efficient cutting.
- Faċli biex tużah: Features a pre-wound auto-feed system, simplifying the replacement process. Installation and removal can be done quickly by hand, without the need for additional tools.
- Ippakkjar Konvenjenti: Available in sets of 6 spools + 1 cap or 10 spools + 1 cap, providing ample supply for various usage needs.
Kompatibilità
These replacement trimmer spools and cap are compatible with a range of string trimmer models. Please verify your trimmer model against the list below to ensure proper fit.
Compatible Hyper Tough String Trimmer Models (GT500WU Series):
- HT18-401-004-01 (Hy-per Tough 12 in. 4-Amp Grass Trimmer)
- HT18-401-002-01 (Hy-per Tough 4.6 Amp Corded Electric 13 inch String Trimmer Auto Feed)
- HT10-401-002-01 (Hy-perTough 40VMax Cordless 13-Inch String Trimmer & Wheeled Edger)
- HT19-401-003-03
Compatible WO-RX Trimmer Models:
- WG105, WG106, WG108, WG109
- WG112, WG113, WG115, WG116
- WG117, WG118, WG119, WG120
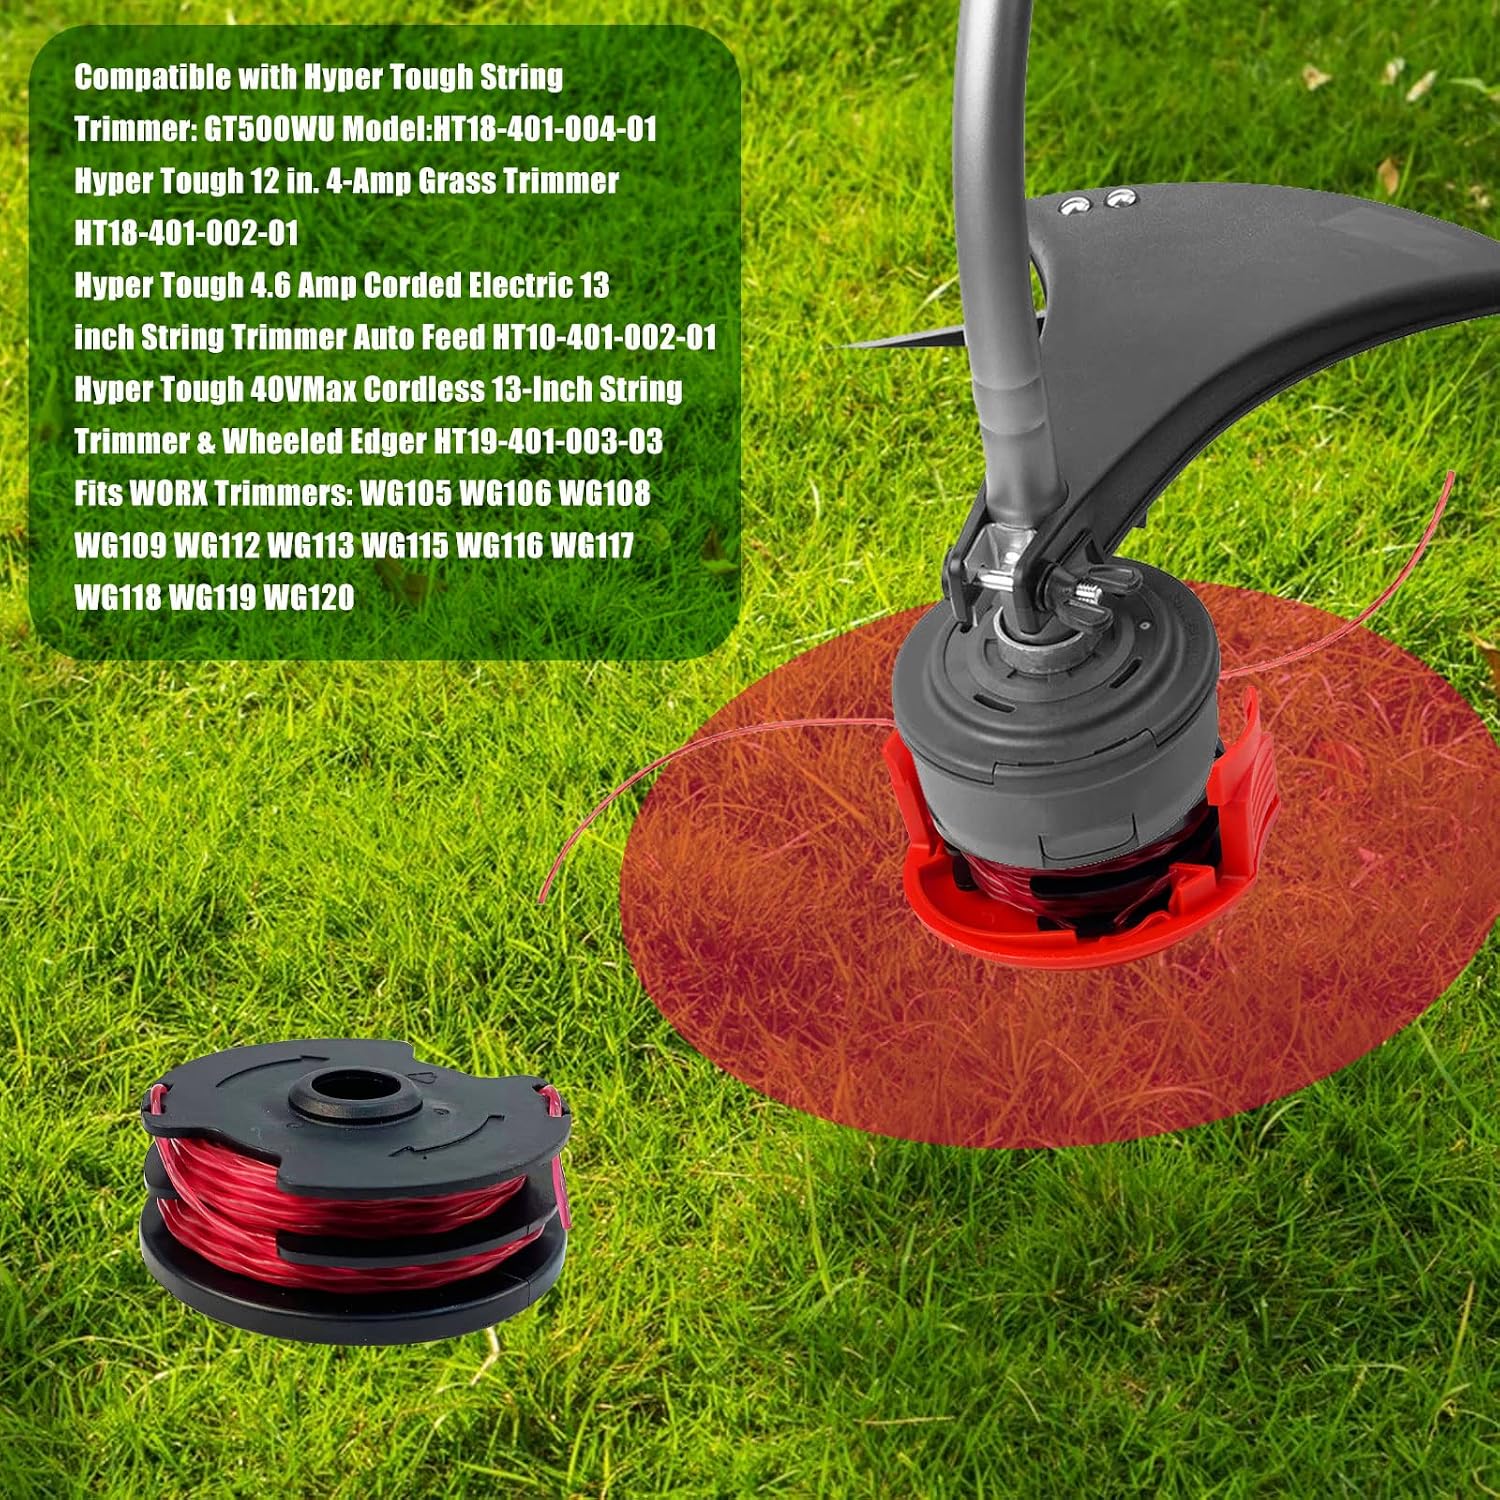
Image: A string trimmer head with a red spool installed, overlaid with text listing compatible Hyper Tough and WO-RX trimmer models.
Speċifikazzjonijiet
| Komponent | Speċifikazzjoni |
|---|---|
| Materjal | ABS Plastic (Spool), Durable Nylon (Line) |
| Spool Diameter | 65mm / 2.56 pulzieri |
| Għoli tal-ispool | 24.5mm / 0.96 pulzieri |
| Cap Diameter | 84mm / 3.3 pulzieri |
| Cap Height | 39mm / 1.54 pulzieri |
| Dijametru tal-Linja | 0.065 pulzieri / 1.6mm |
| Total Line Length per Spool | 27FT / 8.3M |
| Għażliet tal-Pakkett | Set1: 6pcs spools + 1pc cap Set2: 10pcs spools + 1pc cap |

Image: Technical drawing illustrating the precise measurements of both the red cap and the black spool with red line.

Image: A single spool with its red line partially uncoiled, highlighting the durable spiral line, its 0.065 inch diameter, and 27 feet total length.
Setup u Installazzjoni
Replacing your trimmer spool is a straightforward process. Always ensure your string trimmer is unplugged or its battery is removed before performing any maintenance or part replacement.
- Ipprepara t-Trimmer: Disconnect the trimmer from its power source (unplug cord or remove battery pack).
- Remove Old Spool and Cap: Locate the spool housing on your trimmer head. Press the tabs or twist the cap to remove the old cap and then carefully lift out the old spool.
- Daħħal Rukkell Ġdid: Take a new pre-wound CDIYTOOL spool. Ensure the line is properly seated in the spool's guides. Feed the end of the trimmer line through the eyelet on the trimmer head.
- Attach New Cap: Place the new red cap over the spool and align it with the housing. Press down firmly or twist until it clicks into place, securing the spool.
- Ivverifika l-Installazzjoni: Gently pull on the line to ensure it feeds smoothly and the spool is securely seated.

Immaġni: Close-up view of a hand in the process of replacing a trimmer spool within the head of a string trimmer, demonstrating the ease of installation.

Image: A new spool and cap are shown alongside a string trimmer with an installed spool, illustrating the components involved in the replacement.
Istruzzjonijiet Operattivi
Once the new spool is installed, your trimmer is ready for operation. Always follow the safety guidelines provided in your string trimmer's original manual.
- Qawwa Mixgħul: Reconnect your trimmer to its power source.
- Għalf tal-Linja: These spools are designed for auto-feed systems. The line will automatically extend as needed during operation. If the line does not feed, briefly tap the trimmer head on a hard surface while the trimmer is running (refer to your trimmer's manual for specific auto-feed instructions).
- Teknika tal-Qtugħ: Use a sweeping motion to cut grass and weeds. Avoid hitting hard objects like rocks or fences, as this can prematurely wear down the line.
- Prestazzjoni ottimali: The durable nylon line is engineered for efficient cutting and resistance to breakage under normal use.

Image: A collage depicting different individuals effectively using string trimmers in various outdoor environments, showcasinl-applikazzjoni tal-prodott.
Manutenzjoni
Proper care of your replacement spools will ensure their longevity and consistent performance.
- Ħażna: Store unused spools in a cool, dry place away from direct sunlight. Extreme temperatures can affect the flexibility and durability of the nylon line.
- Spezzjoni: Before each use, inspect the installed spool and line for any signs of damage or excessive wear. Replace if necessary.
- Tindif: Keep the spool housing and cap free from debris, grass clippings, and dirt to ensure smooth line feeding.
Issolvi l-problemi
If you encounter issues with your trimmer line, consider the following common solutions:
- Linja Mhux Qed Tgħaddi:
- Kun żgur li r-rukkell ikun imwaħħal sew u li l-għatu jkun imwaħħal sew.
- Check for tangled line within the spool or debris in the housing.
- If your trimmer has an auto-feed mechanism, briefly tap the trimmer head on a hard, non-abrasive surface while the trimmer is running to advance the line.
- Tkissir tal-Linja Spiss:
- Avoid hitting hard surfaces like concrete, rocks, or metal objects.
- Ensure the line is not excessively long when starting, as this can put undue stress on the motor and line.
- Verify that the line diameter (0.065 inches) is appropriate for your trimmer model.
- Spool Not Fitting:
- Double-check the compatibility list in this manual and your trimmer's original manual to confirm the correct model.
- Ensure no old line or debris is obstructing the spool housing.
Garanzija u Appoġġ
CDIYTOOL is committed to providing high-quality products. While specific warranty details are not provided in this manual, please refer to the product listing or contact CDIYTOOL customer support for any inquiries regarding warranty coverage or product assistance.
For further support, please visit the official CDIYTOOL store on Amazon or contact their customer service through the platform where you purchased the product.
CDIYTOOL Store Link: Visit CDIYTOOL Store