
1. Introduzzjoni
The ASUS Prime Z790M-Plus microATX motherboard is engineered to support 12th, 13th, and 14th Gen Intel Core processors. It features robust power delivery, comprehensive cooling solutions, and intelligent tuning options, making it suitable for daily users and DIY PC builders. This manual provides essential information for setting up, operating, and maintaining your motherboard.
2. Prodott Aktarview
Karatteristiċi Ewlenin
- Sokit tal-Intel LGA 1700: Compatible with 14th, 12th, and 13th Gen Intel processors.
- Soluzzjoni ta' Enerġija Mtejba: 10+1 DrMOS, 6-layer PCB, ProCool sockets, alloy chokes, and durable capacitors for stable power delivery.
- Next-gen Connectivity: PCIe 5.0, DDR5, Intel 1 Gb Ethernet, USB 3.2 Gen2x2 Type-C, front panel USB 3.2 Gen 1 Type-C, Thunderbolt (USB4) header support.
- ASUS OptiMem II: Careful routing of traces and vias, plus ground layer optimizations to preserve signal integrity for improved memory overclocking.
- Tkessiħ Komprensiv: Large VRM heatsink, PCH heatsink, hybrid fan headers, and Fan Xpert 4 (with AI Cooling II).
Tqassim tal-motherboard
Familiarize yourself with the main components of your ASUS Prime Z790M-Plus motherboard.

Figura 1: Minn fuq għal isfel view of the ASUS Prime Z790M-Plus motherboard, highlighting the CPU socket, RAM slots, and M.2 heatsinks.

Figura 2: Angolat view of the ASUS Prime Z790M-Plus motherboard, showcasing the VRM heatsinks and PCIe slots.
3. Setup u Installazzjoni
3.1 Installazzjoni tas-CPU
Carefully align your Intel LGA 1700 processor with the socket on the motherboard. Ensure the gold triangle on the CPU matches the triangle on the socket. Gently lower the CPU into place, then secure it with the load plate and lever.

Figure 3: Close-up of the LGA 1700 CPU socket, ready for processor installation.
3.2 Installazzjoni tal-Memorja (RAM)
The motherboard supports DDR5 RAM. Open the clips on the DIMM slots, align the memory modules with the notches, and press firmly until the clips snap into place. Refer to your CPU and RAM specifications for optimal dual-channel configuration.
3.3 Installazzjoni tal-Ħażna (M.2 u SATA)
The ASUS Prime Z790M-Plus features three M.2 slots and four SATA 6Gb/s ports. For M.2 SSDs, remove the heatsink, insert the M.2 drive, and secure it with the provided M.2 Q-Latch mechanism or screws. For SATA drives, connect the SATA data and power cables.
3.4 Karti ta' Espansjoni (PCIe)
Install your graphics card (GPU) and other PCIe expansion cards into the appropriate PCIe 5.0 or PCIe 4.0 slots. Ensure the card is seated firmly and secured with the case screw. The motherboard features a Q-Release button for easy GPU ejection.
3.5 Konnessjonijiet tal-Enerġija
Connect the 24-pin ATX power connector and the 8-pin (or 4+4-pin) CPU power connector from your power supply to the motherboard. Ensure all connections are secure.
4. Istruzzjonijiet Operattivi
4.1 Setup tal-BIOS
Upon first boot, enter the BIOS/UEFI setup by pressing the DEL or F2 key during startup. Here you can configure boot order, system settings, and monitor hardware status. Regularly check the ASUS support website for BIOS updates to ensure optimal performance and compatibility.
4.2 Installazzjoni tas-sewwieq
After installing your operating system, install the necessary drivers for the motherboard components (chipset, LAN, audio, graphics, etc.). These can be found on the included support DVD or downloaded from the official ASUS support website. Ensure you install the latest drivers for stability and performance.
5. Konnettività
The ASUS Prime Z790M-Plus offers a wide range of connectivity options:
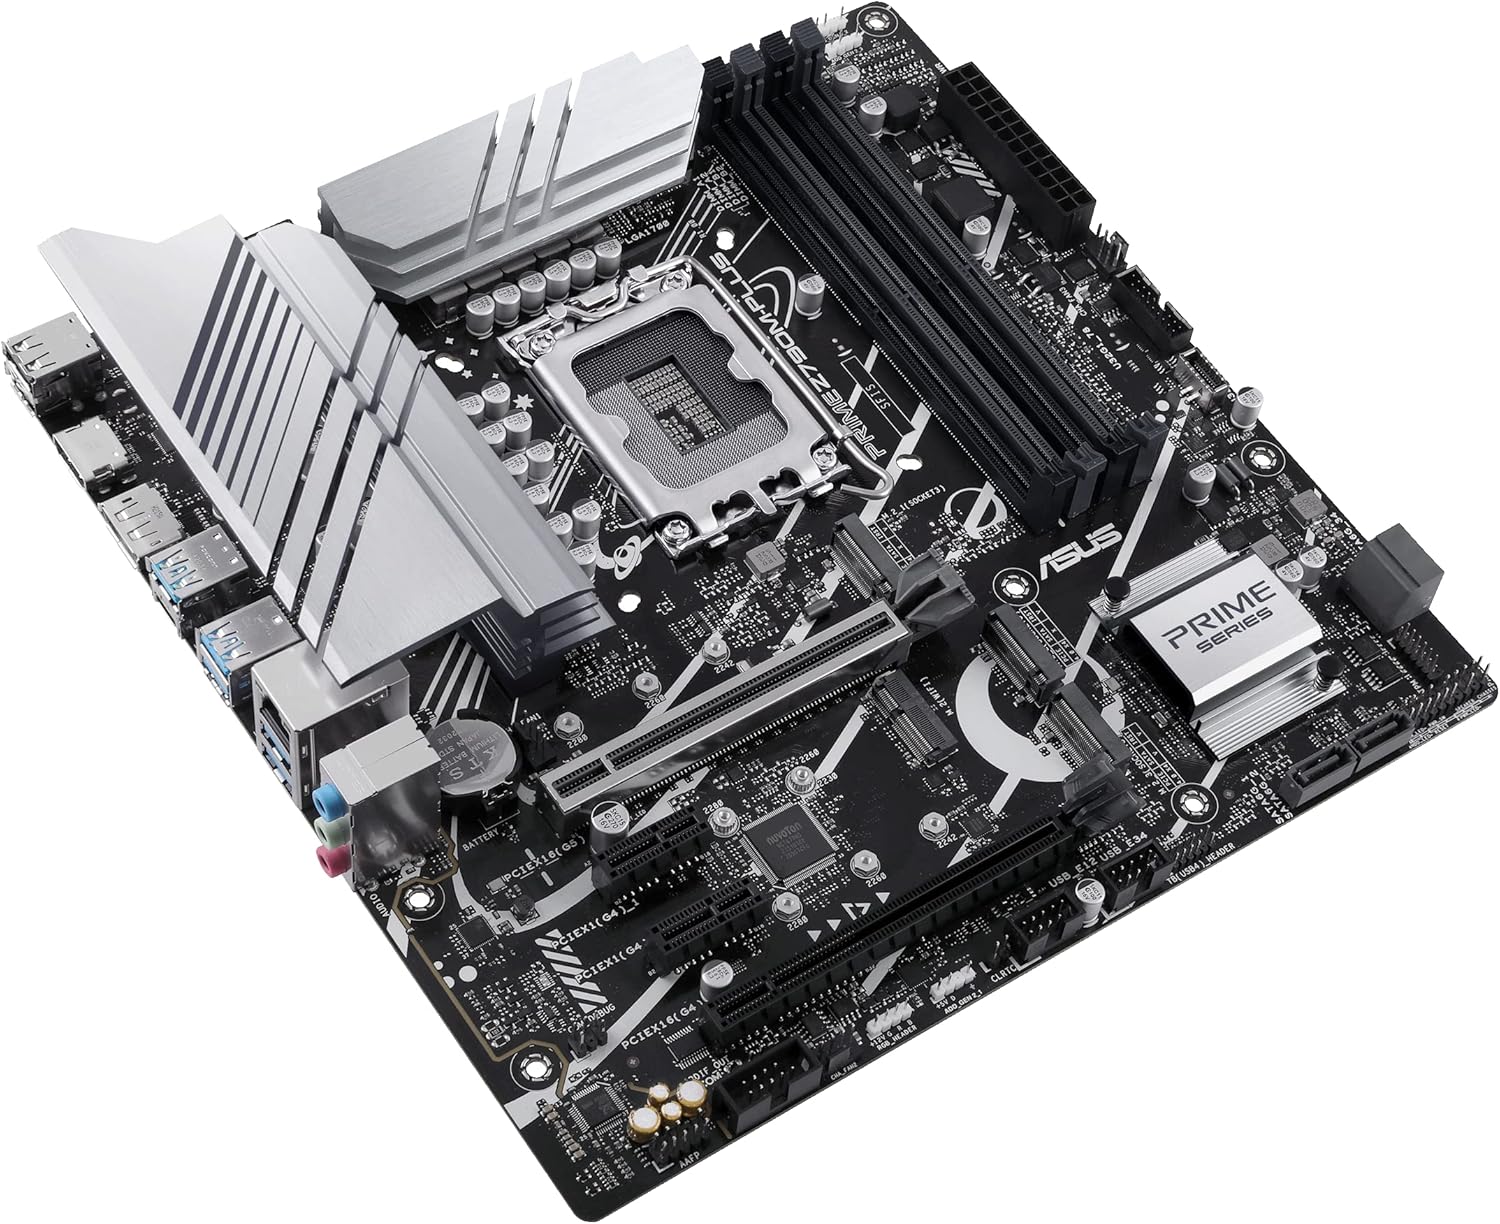
Figure 4: Rear I/O panel of the ASUS Prime Z790M-Plus, showing various USB, display, and audio ports.
- Portijiet USB: Multiple USB 3.2 Gen 2x2 Type-C, USB 3.2 Gen 2 Type-A, USB 3.2 Gen 1, and USB 2.0 ports.
- Wiri Outputs: DisplayPort (DP) and HDMI ports for integrated graphics.
- LAN: Intel 1 Gb Ethernet for reliable network connectivity.
- Awdjo: Realtek S1220A 7.1 Surround Sound High Definition Audio CODEC with premium audio capacitors.
- Thunderbolt (USB4) Support: Header for Thunderbolt (USB4) expansion cards.
6. Speċifikazzjonijiet
| Komponent | Speċifikazzjoni |
|---|---|
| Socket tas-CPU | LGA 1700 |
| Proċessuri Kompatibbli | Intel 14th, 12th, and 13th Gen Core, Pentium Gold, and Celeron Processors |
| Chipset | Intel Z790 |
| Teknoloġija tal-Memorja RAM | DDR5 |
| Slots tar-RAM | 4 x DIMM, Max. 128GB |
| PCIe Slots | 1 x PCIe 5.0 x16, 2 x PCIe 4.0 x16 (modalità x4), 1 x PCIe 3.0 x1 |
| M.2 Slots | 3 x M.2 slots (PCIe 4.0 x4 mode) |
| Portijiet SATA | 4 x portijiet SATA 6Gb/s |
| LAN | Intel 1 Gb Ethernet |
| Portijiet USB (Wara) | 1 x USB 3.2 Gen 2x2 Type-C, 3 x USB 3.2 Gen 2 Type-A, 2 x USB 3.2 Gen 1 Type-A, 2 x USB 2.0 |
| Awdjo | Realtek S1220A 7.1 Surround Sound High Definition Audio CODEC |
| Fattur tal-Formola | mikroATX |
| Dimensjonijiet | 10.5 x 2.8 x 11 pulzieri |
| Piż tal-oġġett | 2.82 liri |
7. Manutenzjoni
To ensure the longevity and optimal performance of your motherboard, regular maintenance is recommended:
- Tneħħija tat-Trab: Periodically clean dust from the motherboard and case fans using compressed air. Ensure the system is powered off and unplugged before cleaning.
- Aġġornamenti tal-BIOS: Keep your BIOS updated to the latest version available on the ASUS support website. This can improve stability, compatibility, and performance.
- Aġġornamenti tas-sewwieq: Regularly update all device drivers to their latest versions.
- Ġestjoni tal-Kejbil: Ensure cables are neatly routed to prevent obstruction of airflow and components.
8 Issolvi l-problemi
If you encounter issues with your ASUS Prime Z790M-Plus motherboard, consider the following troubleshooting steps:
- Ebda Qawwa/Ebda Boot: Double-check all power connections (24-pin ATX, CPU power). Ensure the power supply is switched on. Test with minimal components (CPU, one RAM stick, GPU) to isolate the issue.
- Kwistjonijiet tal-Wiri: Verify that your monitor is connected to the correct display output (either motherboard's integrated graphics or dedicated GPU). Ensure the graphics card is properly seated.
- Memory Errors: Reseat RAM modules. Test each RAM stick individually. Ensure RAM is compatible with the motherboard and CPU.
- Kunflitti tas-Sewwieqa: If issues arise after a driver installation, try booting into Safe Mode and uninstalling the problematic driver.
- Flashback tal-BIOS: The motherboard supports BIOS Flashback, allowing you to update the BIOS without a CPU or RAM installed. Refer to the ASUS websit għal struzzjonijiet dettaljati dwar l-użu ta' din il-karatteristika.
9. Riżorsi Addizzjonali
Related Video: ASUS Z790 Motherboard Unboxing (ProArt Z790-CREATOR WIFI)
Vidjo 1: Unboxing u aktarview of a related ASUS Z790 series motherboard, the ProArt Z790-CREATOR WIFI. This video provides a general idea of the packaging and components found in ASUS Z790 motherboards, though specific features may vary from the Prime Z790M-Plus model.
10. Garanzija u Appoġġ
For warranty information, technical support, and the latest drivers and BIOS updates, please visit the official ASUS support websit. Żomm l-irċevuta tax-xiri tiegħek bħala prova tax-xiri għal talbiet ta' garanzija.
Appoġġ ASUS Websit: https://www.asus.com/support/