
Introduzzjoni
The Vikeri 1520P 20MP Trail Camera is designed for wildlife monitoring, hunting, and property surveillance. It features high-resolution video and photo capabilities, a fast trigger speed, and a durable, waterproof design. This manual provides detailed instructions for setting up, operating, and maintaining your trail camera to ensure optimal performance.

Figure 1: Vikeri 1520P 20MP Trail Camera package contents.
Setup
1. Tneħħija tal-kaxxa u l-komponenti
Before beginning setup, ensure all components are present:
- Vikeri 1520P 20MP Trail Camera (2 units)
- Ċinga tal-Immuntar
- 32GB Micro SD Card (2 units)
- AA Batteries (8 units)
- Cable USB
- Manwal għall-Utent (dan id-dokument)
2. Installazzjoni tal-batterija
- Locate the battery compartment on the back of the camera.
- Open the two latches on the side of the camera to access the interior.
- Insert 4 AA batteries into the designated slots, ensuring correct polarity (+/-).
- Agħlaq il-kompartiment tal-batterija sew.
3. Inserzjoni tal-Kard SD
- Locate the micro SD card slot inside the camera, typically near the battery compartment.
- Insert the provided 32GB micro SD card into the slot until it clicks into place. Ensure the card is inserted in the correct orientation.
- It is recommended to format the SD card through the camera's menu before first use.
4. Immuntar tal-Kamera
The camera can be mounted to a tree or post using the included strap:
- Għaddi ċ-ċinga tal-immuntar mill-islots fuq wara tal-kamera.
- Secure the camera to a tree or post at a height of 1-2 meters (approximately 3-6 feet).
- Ensure the camera is aligned parallel to the ground in the desired direction for optimal detection.
- Tighten the strap firmly to prevent movement.

Figure 2: Camera mounted on a tree, demonstrating its IP66 waterproof rating.
It-tħaddim tal-Kamera
1. Tixgħil / Mitfi
- To power on the camera, slide the mode switch to the 'ON' position.
- Biex titfi, żżerżaq is-swiċċ għall-pożizzjoni 'OFF'.
2. Navigazzjoni fil-Menu
The camera features a built-in 2.4-inch LCD color screen and control buttons for easy navigation and settings adjustment.
- Uża l-buttuni direzzjonali (Up, Down, Left, Right) biex tinnaviga fl-għażliet tal-menu.
- Agħfas il-buttuna 'OK' biex tikkonferma l-għażliet.
- Press the 'MENU' button to access the main settings menu.
3. Photo and Video Settings
Adjust the camera settings to suit your monitoring needs:
- Riżoluzzjoni: The camera supports up to 1520P video and 20MP photos, providing clear and vibrant images.
- Veloċità ta' Trigger: With a lightning-fast 0.2-second trigger speed, the camera captures movements quickly, minimizing missed events.
- Angolu ta' sejbien: The 120° wide-angle PIR (Passive Infrared) detection provides a broad field of view, capturing more activity.
- Viżjoni bil-lejl: Equipped with 48pcs 940nm no-glow infrared LEDs, the camera provides clear night vision up to 65 feet without disturbing wildlife.
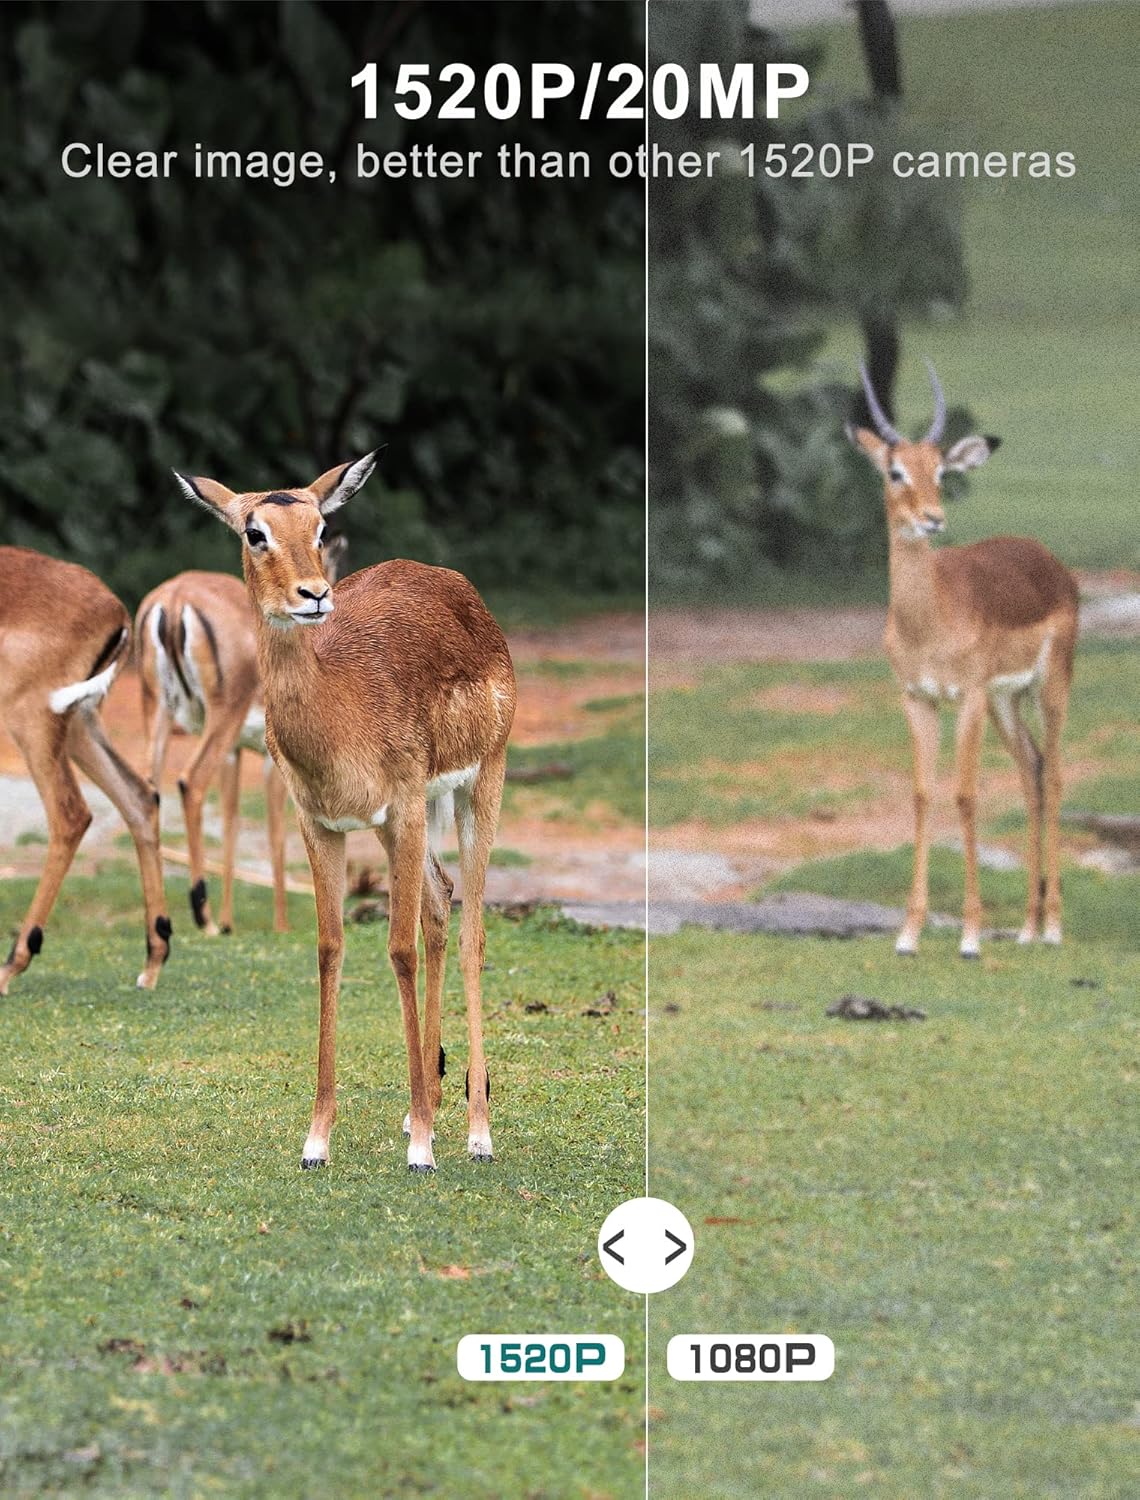
Figure 3: Image quality comparison between 1520P and 1080P resolutions.

Figure 4: Demonstration of the 0.2s trigger speed capturing fast-moving subjects.

Figure 5: The 120° wide-angle detection captures a broader area.

Figure 6: Night vision capability with 940nm no-glow IR LEDs.
4. ViewMidja Maqbuda
Tista' view photos and videos directly on the camera's LCD screen:
- Switch the camera to 'PLAYBACK' mode using the mode switch.
- Use the directional buttons to browse through captured images and videos.
- Press 'OK' to view magħżul file.
- Biex tittrasferixxi files to a computer, remove the micro SD card and insert it into a card reader, or connect the camera directly via the USB cable.
Manutenzjoni
- Tindif: Regularly clean the camera lens and PIR sensors with a soft, dry cloth to ensure clear images and accurate detection. Avoid abrasive materials.
- Iċċekkja tal-batterija: Monitor battery levels through the LCD screen. Replace all batteries when low to prevent interruption of recording.
- Ġestjoni tal-Karta SD: Periodically format the SD card to maintain optimal performance and prevent data corruption. Back up important files qabel l-ifformattjar.
- Siġill li ma jgħaddix ilma minnu: Ensure the latches are securely closed and the rubber seal around the camera housing is free from debris to maintain its IP66 waterproof rating.
- Ħażna: Meta ma tkunx qed tuża l-kamera għal perjodi twal, neħħi l-batteriji u aħżenha f'post frisk u niexef.
Issolvi l-problemi
| Problema | Kawża Possibbli | Soluzzjoni |
|---|---|---|
| Il-kamera ma tixgħelx | Low or dead batteries; Incorrect battery insertion | Replace all batteries with new ones; Ensure correct polarity (+/-) |
| Kwalità fqira tal-immaġni/vidjow | Dirty lens; Incorrect resolution settings; Insufficient lighting | Clean the lens; Adjust resolution settings in the menu; Ensure adequate light for non-night vision modes |
| Is-senser tal-moviment mhux qed jattiva | PIR sensor obstructed; Sensitivity set too low; Subject out of range | Clear any obstructions from the sensor; Increase PIR sensitivity in settings; Ensure subject is within detection range (up to 65-80ft) |
| SD card error message | SD card not formatted; Corrupted SD card; Incompatible SD card | Format the SD card via the camera menu; Try a different, high-quality micro SD card (up to 32GB) |
| Ħajja qasira tal-batterija | Frequent triggers; Extreme temperatures; Low-quality batteries | Reduce trigger frequency if possible; Use high-quality alkaline or lithium batteries; Avoid extreme temperature exposure |
Speċifikazzjonijiet Tekniċi
| Karatteristika | Speċifikazzjoni |
|---|---|
| Riżoluzzjoni tal-Qbid tal-Vidjo | 1520P |
| Riżoluzzjoni Għadha Effettiva | 20 MP |
| Trigger Veloċità | 0.2 sekonda |
| ViewIng Angolu | 120 Grad |
| Medda tal-Viżjoni Lejl | 65 Saqajn |
| Numru ta 'LEDs IR | 48 (940nm No Glow) |
| Klassifikazzjoni tal-Protezzjoni Internazzjonali | IP66 (Li ma jgħaddix ilma) |
| Sors tal-Enerġija | Li jaħdem bil-batterija (4 batteriji AA meħtieġa) |
| Teknoloġija tal-Konnettività | Wireless (USB for data transfer) |
| Wiri | 2.4" LCD Color Screen |
| Materjal | Acrylonitrile Butadiene Styrene (ABS) |
| Dimensjonijiet tal-Prodott | 5.39 x 3.42 x 2.36 pulzieri |
| Piż tal-oġġett | 2.79 pounds (for 2 cameras) |
Garanzija u Appoġġ
For information regarding product warranty, returns, or technical support, please refer to the official Vikeri brand store or contact Vikeri customer service directly.
Official Vikeri Brand Store: Visit the Vikeri Store on Amazon
Jekk jogħġbok żomm l-irċevuta tax-xiri tiegħek għal kwalunkwe talba ta' garanzija.