
Pointman N30
Pointman Nuvia N30 ID Card Printer User Manual
Introduzzjoni
This manual provides instructions for the installation, operation, and maintenance of the Pointman Nuvia N30 ID Card Printer. The Nuvia N30 is designed for producing ID badges, membership cards, and bank cards with options for single or dual-sided printing, magnetic stripe encoding, and smart card encoding.
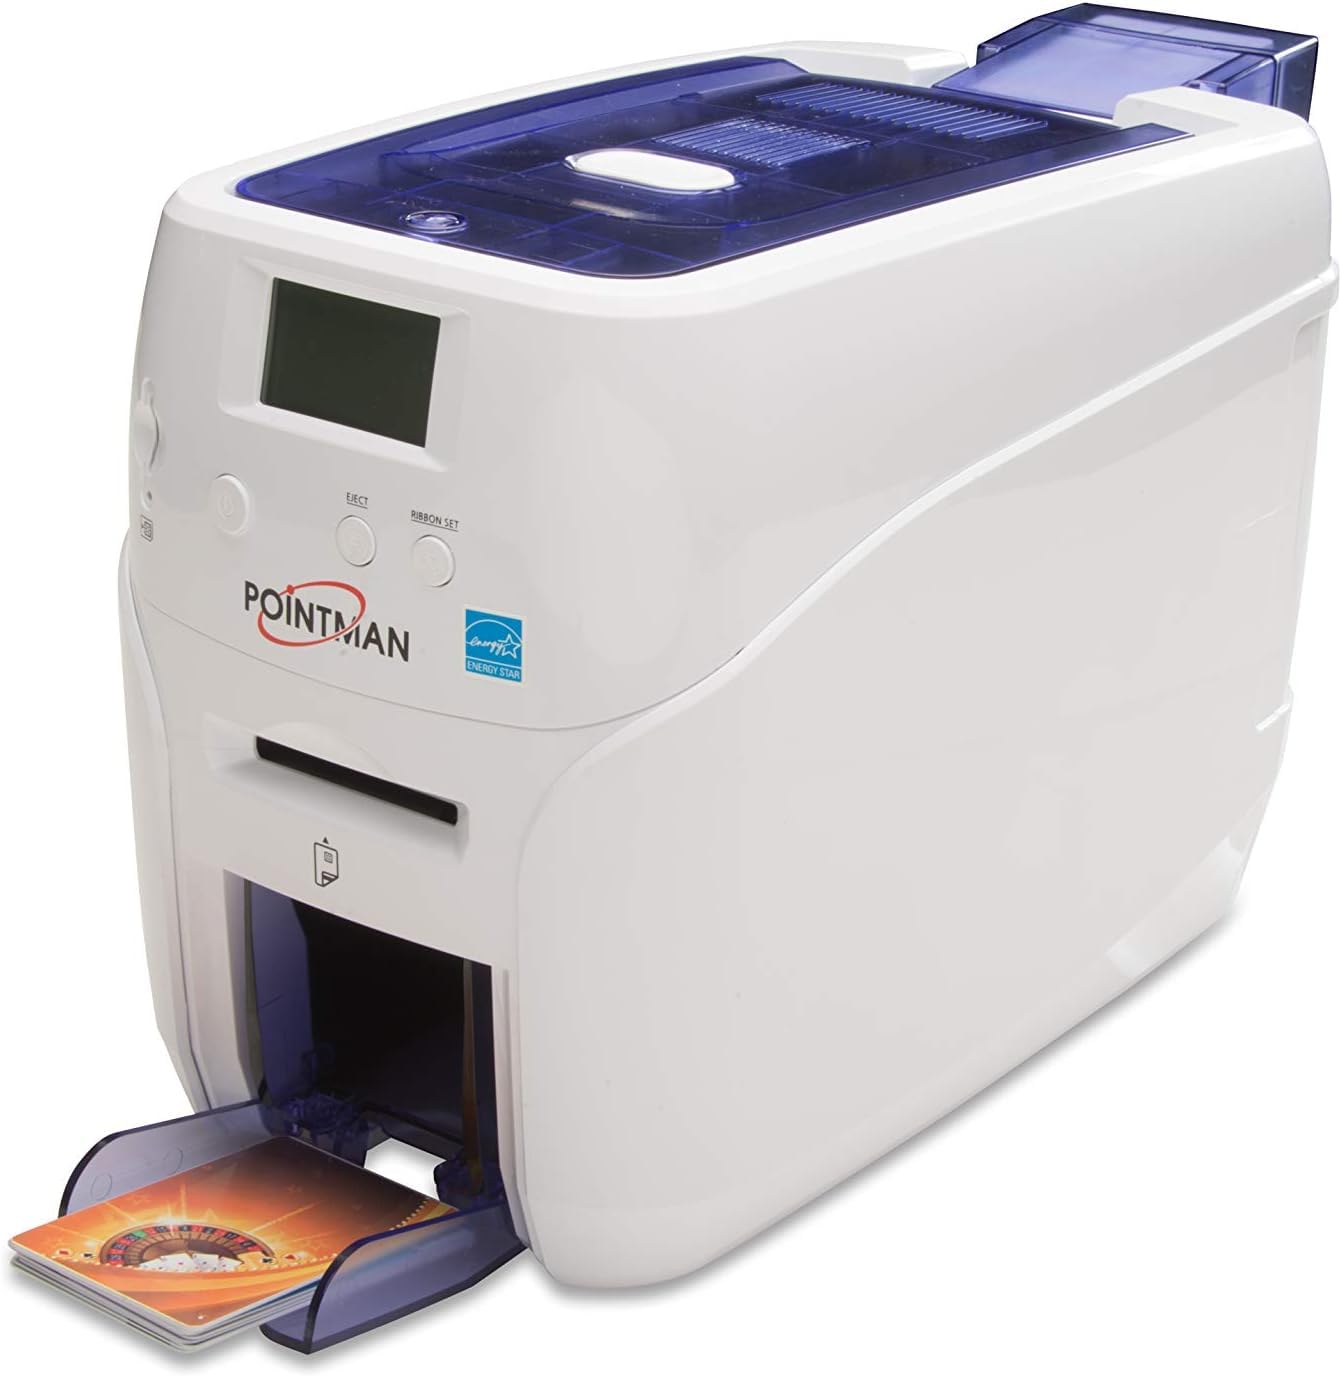
Immaġni: Quddiem view of the Pointman Nuvia N30 ID Card Printer, showing the display screen, power, eject, and ribbon set buttons, card input slot, and output hopper.
1. Setup
1.1 Żpakkjar u Kontenut
Carefully remove the printer and all accessories from the packaging. Verify that all components are present:
- Pointman Nuvia N30 Printer
- Adapter tal-Enerġija u Cable
- Cable USB
- Printer Ribbon (starter kit)
- Kit tat-Tindif
- Software CD (Card Designer 2.0)
- Gwida Quick Start
1.2 Konnessjoni tal-Istampatur
Konnessjoni tal-Enerġija: Qabbad l-adapter tal-enerġija mal-port tad-dħul tal-enerġija tal-istampatur u mbagħad daħħal il-kejbil tal-enerġija f'sokit elettriku.
Konnessjoni USB: Connect the USB cable from the printer to an available USB port on your computer.
1.3 Installazzjoni tas-Softwer
Insert the provided software CD into your computer's CD-ROM drive. Follow the on-screen instructions to install the printer drivers and the Card Designer 2.0 software. Ensure the printer is connected and powered on during installation.
1.4 Loading Cards
Open the input hopper cover. Place a stack of blank cards into the input hopper. The printer supports 100-card input (up to 200 with optional hopper). For manual single card feeding, use the designated manual feed slot.
1.5 Loading Ribbon
Open the printer cover. Follow the instructions provided with the ribbon cartridge to correctly install it into the designated slot. Close the cover securely.
2. Istruzzjonijiet Operattivi
2.1 Tixgħel/Jitfi
Press the power button on the front panel to turn the printer on or off. The display screen will show the printer status.
2.2 Using Card Designer 2.0
Launch the Card Designer 2.0 software on your computer. This software allows you to design card layouts, manage databases, and send print jobs to the Nuvia N30 printer.
2.3 Printing Cards
Design your card in Card Designer 2.0.
Select the desired print settings (single/dual-sided, color/monochrome).
Initiate the print job from the software. The printer will automatically feed cards from the input hopper and eject them into the output hopper.
2.4 Magnetic Stripe Encoding
For models equipped with the ISO Magnetic Stripe Encoder (Part# N21-1001-00), ensure your card design includes magnetic stripe data. The printer will automatically encode the magnetic stripe during the printing process.
2.5 Buttuni tal-Panew ta 'quddiem
Buttuna tal-Qawwa: Ixgħel jew jitfi l-istampatur.
Buttuna Eject: Manually ejects a card from the print path.
Ribbon Set Button: Used for ribbon calibration or resetting after ribbon replacement.
3. Manutenzjoni
Regular maintenance ensures optimal print quality and extends the life of your printer.
3.1 Tindif tal-Istampatur
Use the provided cleaning kit to clean the print head and card path periodically. Refer to the cleaning kit instructions for detailed steps. Always power off and unplug the printer before cleaning.
3.2 Sostituzzjoni taż-Żigarella
When the ribbon is depleted, the printer display will indicate a ribbon error. Replace the ribbon cartridge as described in section 1.5. Press the "Ribbon Set" button after replacement if prompted.
4 Issolvi l-problemi
This section addresses common issues you may encounter.
4.1 Il-Printer Mhux Jirrispondi
Iċċekkja l-konnessjoni tal-enerġija u kun żgur li l-istampatur huwa mixgħul.
Ivverifika l-konnessjoni tal-kejbil USB kemm mal-istampatur kif ukoll mal-kompjuter.
Erġa' ibda l-istampatur u l-kompjuter.
4.2 Kwalità tal-Istampar Fqira
Ensure the ribbon is correctly installed and not depleted.
Clean the print head and card path.
Check card quality; use recommended cards.
Adjust print settings in Card Designer 2.0.
4.3 Card Jam
Press the "Eject" button to attempt to clear the jam.
If unsuccessful, power off the printer, open the cover, and carefully remove the jammed card.
Ensure cards are loaded correctly and are not bent or damaged.
5. Speċifikazzjonijiet
| Karatteristika | Dettall |
|---|---|
| Mudell | Nuvia N30 |
| Stampa tat-Teknoloġija | Direct-to-card Dye-sublimation / Resin thermal transfer |
| Kapaċitajiet tal-Istampar | Single-sided printing (optional dual-sided), Full-color and monochrome, Alphanumeric text, logos, digitized signatures |
| Riżoluzzjoni tal-Istampar | 300 dpi (11.8 DPM), 16.7 Million Color |
| Print Speed (YMCKO Single Side) | 180 ~ 200 cards/hour |
| Print Speed (YMCKOK Dual Side) | 140 cards/hour |
| Print Speed (YMCKO Dual Side) | 95 cards/hour |
| Card Input Capacity | 100 cards (0.76mm), up to 200 with optional hopper |
| Card Output Capacity | 50-60 cards (0.76mm) |
| Għalf manwali | 1 biljett input |
| Encoding Options | ISO Magnetic Stripe Encoder (N21-1001-00), Contact & Contactless Smart Card Encoding (model dependent) |
| Konnettività | USB |
| Provvista tal-Enerġija | Input: 100-240V ~ 50/60Hz 1.7A / Output: DC24V 2.5A |
| Dimensjonijiet (L x W x H) | 36.6 x 18.4 x 22.8 ċm (14.4 x 7.2 x 9.0 pulzieri) |
| Piż | 4.5 kg (9.9 lbs) |
| Software Inkluż | Card Designer 2.0 |
6. Informazzjoni dwar Garanzija
Specific warranty details for the Pointman Nuvia N30 ID Card Printer are typically provided with the product documentation at the time of purchase. Please refer to the warranty card or contact your vendor for information regarding warranty coverage, terms, and conditions.
7. Appoġġ għall-Klijent
For technical assistance, troubleshooting beyond this manual, or to order replacement parts and consumables, please contact your authorized Pointman dealer or visit the official Pointman websit għal riżorsi ta' appoġġ.
Ask a question about this manual
Ask about setup, troubleshooting, compatibility, parts, safety, or missing instructions. Manuals+ will review the question and use this page’s manual context to help answer it.