
1. Introduzzjoni
This manual provides detailed instructions for the installation, operation, and maintenance of your XtremepowerUS Universal 25K Saltwater Chlorinator. Please read this manual thoroughly before installation and use to ensure proper function and safety. This system is designed for residential and smaller commercial pools up to 25,000 gallons.
2. Informazzjoni dwar is-Sigurtà
Always follow basic safety precautions to reduce the risk of injury, fire, electric shock, or property damage. Ensure all electrical connections are made by a qualified electrician and comply with local codes. Disconnect power before servicing. Keep children away from the equipment.
3. Kontenut tal-Pakkett
Ivverifika li l-komponenti kollha huma preżenti fil-pakkett tiegħek:
- Ċellula tal-Melħ
- Provvista tal-Enerġija / Kaxxa tal-Kontroll
- Plumbing Fittings Set
- Manwal ta' Istruzzjoni

Image: The XtremepowerUS Salt Chlorinator control box, which houses the power supply and display. The manual is visible inside the open door.
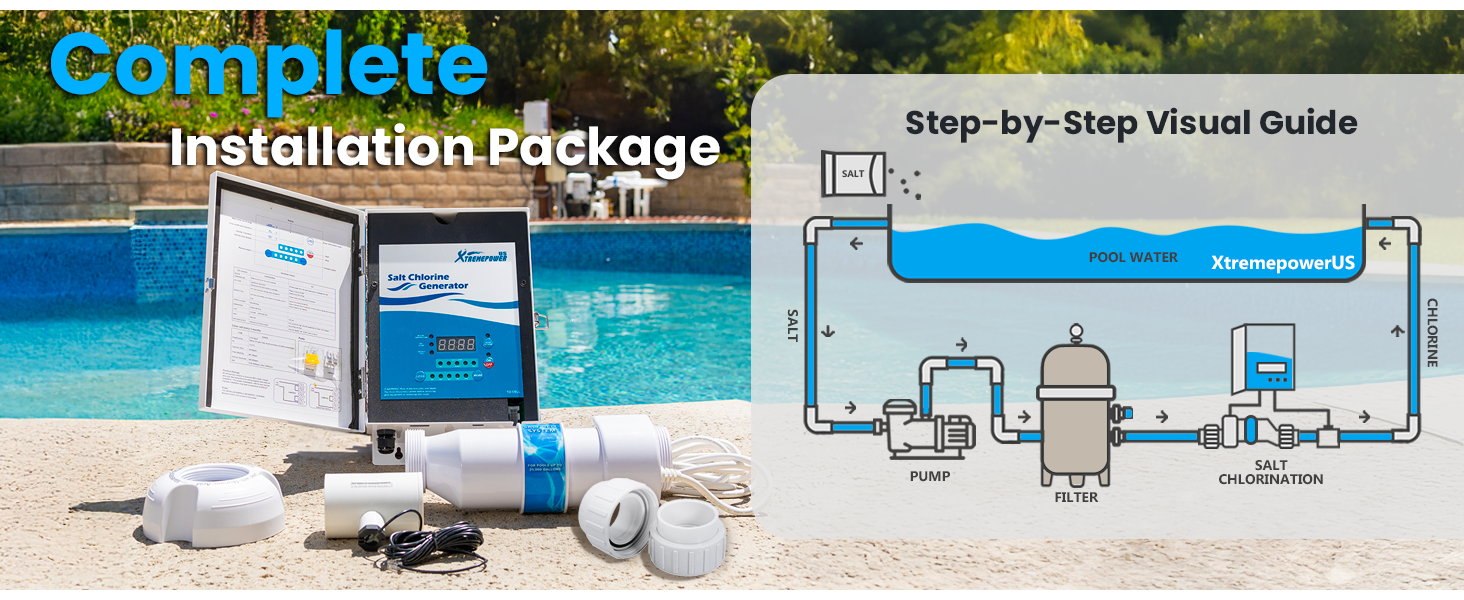
Image: A visual representation of the complete installation package, including the control box, salt cell, and various plumbing fittings, alongside a diagram of the pool system.
4. Setup u Installazzjoni
The XtremepowerUS Saltwater Chlorinator is designed for hassle-free installation. It integrates with your existing pump and filtration system.
4.1. Water Chemistry Preparation
Before installing the chlorinator, ensure your pool water chemistry is balanced. The salt level in your pool must be maintained between 3200 ppm and 4000 ppm for optimal performance. Use a reliable salt test kit to verify levels.
4.2. Passi ta' Installazzjoni Fiżika
- Install the Salt Chlorine Generator Cell: Integrate the salt cell into your pool's return plumbing line, after the filter and heater (if applicable). Ensure the flow switch is installed correctly with the arrow indicating the direction of water flow.
- Install the Flow Switch: The flow switch ensures the system only operates when water is flowing. Install it in the plumbing line according to the directional arrow on the switch.
- Immonta l-Kaxxa tal-Kontroll: Mount the control box in a dry, well-ventilated area, away from direct sunlight and excessive heat.
- Konnessjonijiet elettriċi: The unit operates at 220/115V. The jumper is pre-installed and pre-wired as 220V. Consult a qualified electrician for proper wiring to your power supply.
- Connect Salt Cell to Control Box: Connect the salt cell cable to the designated port on the control box.

Immaġni: Close-up view of the XtremepowerUS salt cell system integrated into the white PVC plumbing of a pool filtration system.

Immaġni: Dettaljata view of a threaded plumbing connection, part of the salt chlorinator installation, showing secure fitting.

Immaġni: Aktar minnview of a complete pool filtration system, including the pump, filter, and the XtremepowerUS salt chlorinator integrated into the plumbing lines.

Image: A white PVC pipe section with a black flow switch installed, clearly showing an "ATTENTION: Arrow should be in the same direction of water flow" label.

Image: The individual components of the flow switch, including the main body with the sensor and two white PVC reducers for installation.
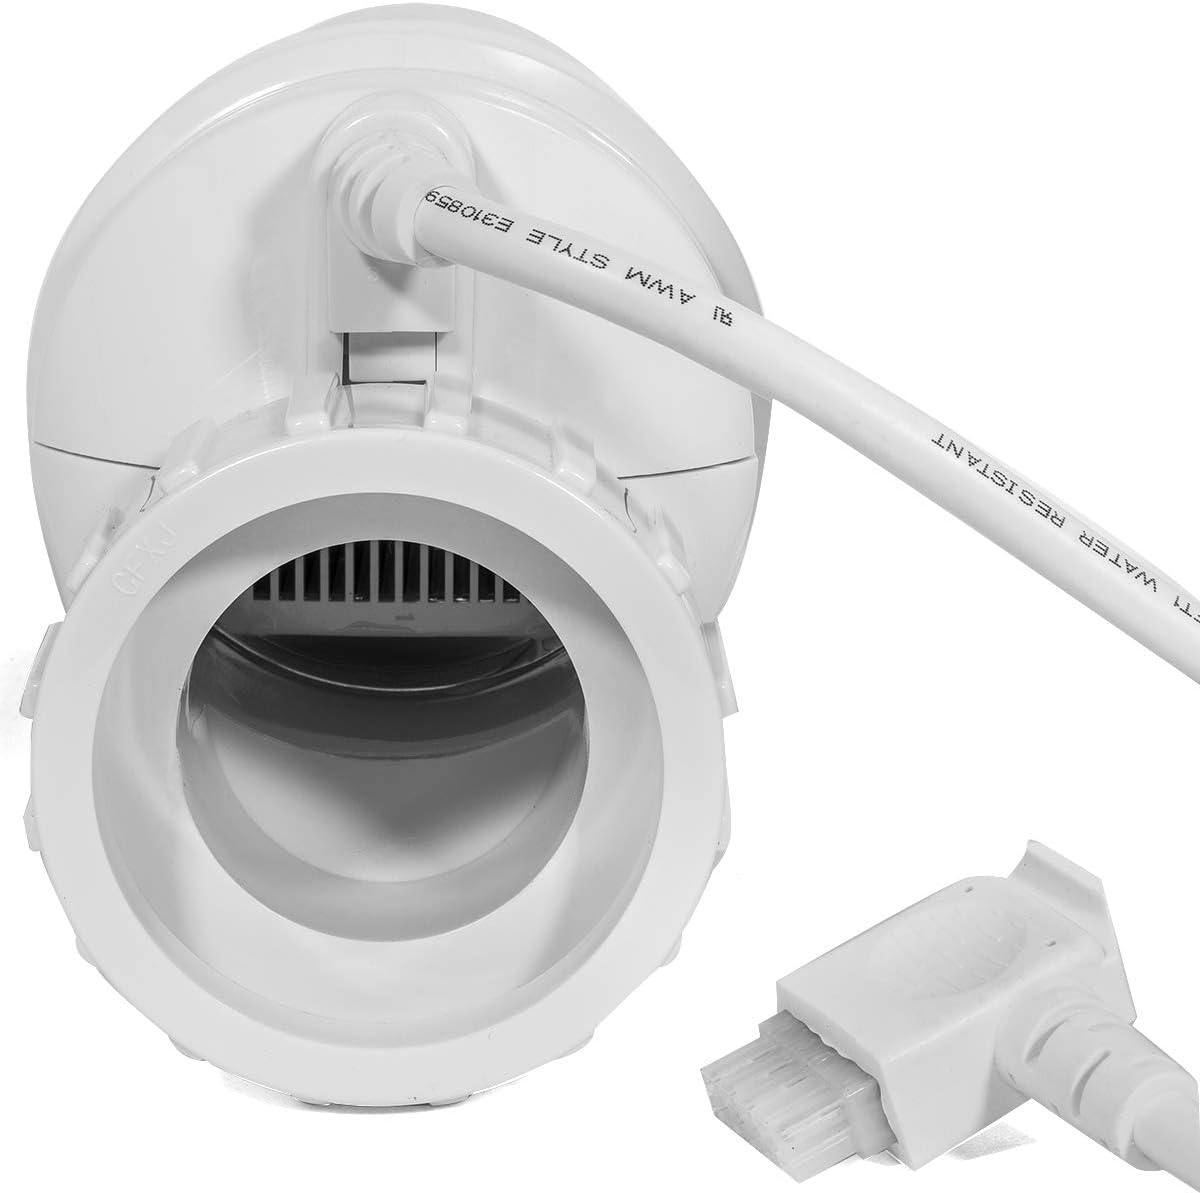
Image: A close-up of the salt cell's connection point, showing the white cable securely attached to the cell body.
4.3. Gwida bil-Vidjo għall-Installazzjoni
Video: An official XtremepowerUS video demonstrating the installation process for the salt chlorination system in an in-ground pool. This video provides a visual guide to the steps outlined above.
5. Istruzzjonijiet Operattivi
Once installed and powered, the system will begin to sanitize your pool water automatically.
5.1. Startup Inizjali
- Ensure the pool pump is running and water is flowing through the salt cell.
- Turn on the power to the control box.
- The LCD display will illuminate, showing current operating status and indicators.
5.2. Adjusting Chlorine Output
The system features an adjustable chlorine output. Use the "LESS" and "MORE" buttons on the control box to set the desired chlorine production level. The system has a maximum output of 30 grams/hour.
Monitor your pool's chlorine levels with a test kit and adjust the output as needed to maintain the recommended free chlorine range for your pool type.
5.3. Automatic Features
- Reverse Polarity Self-Cleaning: The system automatically reverses polarity to clean the salt cell, reducing scale buildup and extending cell life.
- Sensor tat-temperatura: A built-in temperature sensor automatically shuts off the unit if water temperature drops below 50℉ (10℃), protecting the cell and prolonging its lifespan.
- High/Low Salt Indicators: The control box LCD provides indicators for high or low salt levels, alerting you to adjust the pool's salinity to protect the equipment.
6. Manutenzjoni
Regular maintenance ensures the longevity and efficient operation of your saltwater chlorinator.
6.1. Tindif taċ-Ċelloli tal-Melħ
Although the system features reverse polarity for self-cleaning, periodic manual inspection and cleaning of the salt cell are recommended. It is advised to soak the cell every 3 months to remove any stubborn scale buildup.
Biex tnaddaf iċ-ċellula:
- Turn off the power to the chlorinator and pool pump.
- Disconnect the salt cell from the plumbing and control box.
- Use the provided cleaning stand (if applicable) or a suitable container.
- Prepare a cleaning solution (e.g., a diluted acid solution, following manufacturer's guidelines for cell cleaning).
- Soak the cell in the solution for the recommended time, ensuring the solution covers the plates but does not enter the electrical connection.
- Laħlaħ sew bl-ilma frisk.
- Reinstall the cell and restore power.

Image: A visual reminder emphasizing the importance of soaking the salt cell every three months for easy maintenance, showing a salt cell on a cleaning stand next to the control box.
6.2. Maintaining Proper Salt Levels
Regularly test your pool's salt level. If the control box indicates low salt, add pool-grade salt to reach the recommended 3200-4000 ppm range. If high salt is indicated, partially drain and refill the pool with fresh water.
6.3. Preparazzjoni għax-xitwa
In colder climates, the salt cell should be removed, cleaned, and stored indoors during winter months to prevent freezing damage.
7 Issolvi l-problemi
This section addresses common issues you might encounter with your saltwater chlorinator.
7.1. Low Chlorine Production
- Iċċekkja l-Livell tal-Melħ: Ensure salt levels are within the optimal range (3200-4000 ppm). Low salt will reduce chlorine production.
- Inspect Salt Cell: Check for scale buildup on the cell plates. Clean the cell if necessary.
- Adjust Output Setting: Increase the chlorine output setting on the control box.
- Iċċekkja l-Fluss tal-Ilma: Ensure the pool pump is running and there is adequate water flow through the cell. The flow switch will prevent operation without flow.
- Temperatura tal-Ilma: If water temperature is below 50℉, the system may automatically reduce or stop chlorine production.
7.2. "Low Salt" or "High Salt" Indicator
- Low Salt: Add pool-grade salt to the pool water. Allow time for it to dissolve and circulate before retesting.
- High Salt: Partially drain the pool and refill with fresh water to dilute the salt concentration.
- Ħsara tas-Sensor: If readings are consistently incorrect despite verified salt levels, the sensor or control box may require inspection.
7.3. System Not Operating
- Provvista tal-Enerġija: Verify the control box is receiving power and the circuit breaker has not tripped.
- Swiċċ tal-Fluss: Ensure the flow switch is correctly installed and detecting water flow. If there's no flow, the system will not operate.
- Kodiċi ta' Żball: Refer to the control box display for any specific error codes and consult the detailed manual for their meaning.
8. Speċifikazzjonijiet
| Karatteristika | Speċifikazzjoni |
|---|---|
| Brand | XtremepowerUS |
| Numru tal-Mudell | 90152 |
| UPC | 840166535745 |
| Kapaċità tal-Pixxina | Sa 25,000 Galun |
| Output tal-Klorin | 30 grammi/siegħa |
| Vol Operattivtage | 220/115V (pre-wired as 220V) |
| Temperatura Minima tal-Ilma | 50℉ (Automatic shut-off) |
| Recommended Salt Level | 3200 - 4000 ppm |
| Piż tal-oġġett | 26 Liri |
| Komponenti Inklużi | Manual, Plumbing Fittings Set, Power Supply, Salt Cell |
9. Informazzjoni dwar Garanzija
Specific warranty details for the XtremepowerUS Universal 25K Saltwater Chlorinator are not provided in this document. Please refer to the product packaging, the manufacturer's official webis-sit, jew il-punt tax-xiri tiegħek għal termini u kundizzjonijiet komprensivi tal-garanzija.
10. Appoġġ għall-Klijent
For technical assistance, troubleshooting beyond this guide, or inquiries regarding parts and service, please contact XtremepowerUS customer support. Contact information is typically available on the product packaging or the official XtremepowerUS websit.
Note: Always provide your product model number (90152) and purchase date when contacting support.