
1. Introduzzjoni
The Keychron Q1 Knob Version is a fully customizable mechanical keyboard designed for an enhanced typing experience. Featuring a 75% layout and a solid full aluminum frame, it offers premium comfort and extensive customization possibilities. This manual provides detailed instructions for setting up, operating, maintaining, and troubleshooting your Keychron Q1 keyboard.

2. X'hemm fil-Kaxxa
Upon unboxing your Keychron Q1 Knob Version keyboard, please ensure all the following components are present:
- 1x Fully Assembled Keyboard (including Aluminum Case, PCB, Steel Plate, Sound Absorbing Foam, Case Foam)
- 16x Gaskits (8 Installati u 8 fil-Kaxxa)
- 4 settijiet x Stabbilizzaturi
- Sett wieħed x Keycaps (Double-Shot OSA PBT)
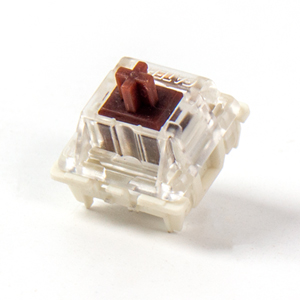
- 1 set x Switches (Gateron G Pro Brown Switch)
- 1x Kejbil tat-Tip Ċ għal Tip Ċ
- 1x Adapter tat-Tip A għal Tip Ċ
- 1x Iswiċċ Puller
- 1x Keycap Puller
- 1x Tornavit
- 1x Hex Key
Note: All tools are typically placed on the bottom of the box.

3. Setup
3.1 Konnessjoni tat-Tastiera
To connect your Keychron Q1 keyboard to your computer:
- Sib il-port USB-C fuq wara tat-tastiera.
- Connect one end of the provided Type-C to Type-C cable to the keyboard.
- Connect the other end of the cable to a compatible USB-C port on your computer. If your computer only has USB-A ports, use the included Type-A to Type-C adapter.
- It-tastiera hija plug-and-play u għandha tiġi rikonoxxuta awtomatikament mis-sistema operattiva tiegħek.
3.2 Swiċċ tas-Sistema Operattiva
The Keychron Q1 features a physical switch on the back to toggle between Windows/Android and Mac/iOS modes. Ensure this switch is set to the correct operating system for optimal key mapping and functionality.
4. Istruzzjonijiet Operattivi
4.1 Funzjonijiet Bażiċi tat-Tastiera
The Keychron Q1 features a standard 75% layout. Most keys function as labeled. Refer to the keycap legends for primary and secondary functions (accessed via the 'Fn' key).
4.2 Funzjonalità tal-Buttuni
The integrated knob on the top right of the keyboard is primarily used for multimedia control. By default, it controls volume:
- Dawwar lejn l-arloġġ: Żid il-Volum
- Dawwar kontra l-arloġġ: Naqqas il-Volum
- Agħfas 'l isfel: Mute/Unmute Awdjo
The knob's function can be customized using the VIA software (see Section 5.1).

4.3 Kontroll tad-dawl ta' wara
The Keychron Q1 features south-facing RGB backlighting. You can cycle through various lighting effects and adjust brightness directly on the keyboard using key combinations. Specific key combinations for lighting control are typically found in the included quick start guide or on the Keychron websit.

5. Customization and Advanced Features
5.1 Programmabilità QMK/VIA
The Keychron Q1 supports QMK and VIA firmware, allowing for extensive customization of key assignments, macros, and lighting effects. VIA is a user-friendly graphical interface for configuring your keyboard without needing to flash firmware.
To use VIA:
- Download the VIA software from the official Keychron website or use the web-based VIA configurator.
- Connect your Keychron Q1 keyboard.
- The software should automatically detect your keyboard. You can then remap keys, create macros, adjust lighting, and customize the knob's function across different layers.

5.2 Swiċċijiet li jistgħu jinbidlu bis-sħana
The Keychron Q1 features hot-swappable sockets, allowing you to change mechanical switches without soldering. This provides flexibility to customize your typing feel with various 3-pin and 5-pin MX mechanical switches.
Biex tissostitwixxi s-swiċċijiet:
- Use the included keycap puller to carefully remove the keycap from the desired switch.
- Use the included switch puller to gently grasp the top and bottom clips of the switch and pull it straight up.
- Align the pins of the new switch with the holes on the PCB and press it firmly into place until it clicks. Ensure the pins are not bent.
- Erġa' waħħal il-keycap.


5.3 Double Gasket Design
The Keychron Q1 features an innovative double-gasket design. This structure incorporates silicone pads between the top and bottom cases, in addition to the gaskets on the plate. This design enhances typing flexibility, improves the overall typing sound profile, and significantly reduces sound resonance and noise from metal-on-metal impact.

5.4 Double-shot PBT Keycaps
The Q1 comes with durable double-shot PBT keycaps in Keychron's unique OSA profile. Dan profile is designed to provide a comfortable and subtle fingertip feel. PBT material offers excellent oil resistance, ensuring the keycaps maintain their texture and legends over long-term use.

6. Manutenzjoni
6.1 Tindif
Regular cleaning helps maintain the performance and appearance of your keyboard:
- Tindif Ġenerali: Uża drapp ratba u mingħajr ħelu ftit dampLaħlaħ bl-ilma jew b'soluzzjoni ħafifa tat-tindif biex timsaħ il-keycaps u l-qafas. Evita umdità eċċessiva.
- Tneħħija tat-Trab: Uża arja kkompressata biex tneħħi t-trab u l-fdalijiet minn bejn il-keycaps.
- Tindif fil-fond (Tastiera): For thorough cleaning, remove the keycaps using the keycap puller and wash them with warm, soapy water. Ensure they are completely dry before re-attaching.
6.2 Switch and Stabilizer Maintenance
While Gateron G Pro switches are pre-lubed, over time, you may consider re-lubing switches or stabilizers for optimal smoothness and sound. This is an advanced maintenance step and requires specific lubricants and tools.
7 Issolvi l-problemi
If you encounter issues with your Keychron Q1 keyboard, try the following troubleshooting steps:
- It-Tastiera Mhux Tirrispondi:
- Kun żgur li l-kejbil USB-C huwa konness sew kemm mat-tastiera kif ukoll mal-kompjuter.
- Ipprova port USB differenti fuq il-kompjuter tiegħek.
- Test with a different USB-C cable.
- Verify the OS switch on the back of the keyboard is set to the correct operating system (Windows/Mac).
- Ċwievet Speċifiċi Mhux Jaħdmu:
- Carefully remove the keycap and then the switch using the provided tools.
- Spezzjona l-brilli tas-swiċċ għal xi liwjiet jew ħsara. Iddritta bil-mod jekk ikunu mgħawġin.
- Reinsert the switch firmly. If the issue persists, try swapping it with a known working switch from another less-used key.
- Kwistjonijiet tad-Dawl ta' Wara:
- Kun żgur li t-tastiera hija mħaddma kif suppost.
- Cycle through lighting modes and brightness levels using the keyboard's built-in shortcuts.
- Iċċekkja s-settings tas-softwer VIA għall-konfigurazzjonijiet tad-dawl.
- Is-Softwer VIA Mhux Qed Jiskopri t-Tastiera:
- Ensure the latest version of VIA is installed or use the webkonfiguratur ibbażat fuq.
- Verify the keyboard is connected and the OS switch is correctly set.
- Sometimes, a specific JSON file for the keyboard model needs to be loaded into VIA. Refer to the Keychron support page for your Q1 model.
Għal aktar assistenza, jekk jogħġbok żur l-appoġġ uffiċjali ta' Keychron website or consult their community forums.
8. Speċifikazzjonijiet
| Karatteristika | Dettall |
|---|---|
| Dimensjonijiet tal-Prodott | 12.93 x 5.71 x 1.41 pulzieri |
| Piż tal-oġġett | 5.92 liri |
| Manifattur | Keychron |
| Numru tal-Mudell tal-Oġġett | Keychron Q1 |
| Brand | Keychron |
| Apparati Kompatibbli | Laptop, PC, Mac |
| Teknoloġija tal-Konnettività | USB-C |
| Deskrizzjoni tat-Tastiera | Logħob |
| Karatteristiċi Speċjali | QMK/VIA, Fully Customizable, Full Aluminum, Hot-swappable |
| Color (Switch Type) | Hot-swap Gateron G Pro Brown Switch |
| Numru ta' Ċwievet | 82 |
| Backlight tat-Tastiera | RGB |
| Stil | Moderna |
9. Garanzija u Appoġġ
Keychron products are typically covered by a limited warranty. For detailed information regarding warranty terms, conditions, and duration, please refer to the official Keychron webis-sit jew il-karta tal-garanzija inkluża mal-prodott tiegħek.
For technical support, frequently asked questions, and additional resources, please visit the official Keychron support page. You can also find the official user guide in PDF format hawn.
Keychron also maintains an active online community where users can share tips, troubleshoot issues, and discuss product features.