
1. Introduzzjoni
The Keychron Q7 is a 70% layout, all-metal custom mechanical keyboard designed for versatility and performance. It features a CNC machined aluminum body, double-gasket design, and supports QMK/VIA for extensive customization. This manual provides essential information for setting up, operating, maintaining, and troubleshooting your Keychron Q7 keyboard.

Image 1.1: Keychron Q7 Wired Custom Mechanical Keyboard with Gateron G Pro Blue Switches.
2. Kontenut tal-Pakkett
Before proceeding, please verify that all items are present in your Keychron Q7 package:

Image 2.1: Diagram illustrating the contents included with the Keychron Q7 keyboard.
- 1x Fully Assembled Keyboard (including Aluminum Case, PCB, Steel Plate, Sound Absorbing Foam, Case Foam, 10 Gaskets)
- 5 settijiet x Stabbilizzaturi
- Sett wieħed x Keycaps (Double-Shot PBT)
- 1 sett x Swiċċijiet (Gateron G Pro)
- 1x Kejbil tat-Tip Ċ għal Tip Ċ
- 1x Adapter tat-Tip A għal Tip Ċ
- 1x Iswiċċ Puller
- 1x Keycap Puller
- 1x Tornavit
- 1x Hex Key
Note: All tools are typically located at the bottom of the packaging.
3. Setup
3.1 Konnessjoni tat-Tastiera
- Locate the USB-C port on the back of the Keychron Q7 keyboard.
- Connect the provided Type-C to Type-C cable to the keyboard and your computer. If your computer only has USB-A ports, use the included Type-A to Type-C adapter.
- It-tastiera hija plug-and-play u għandha tiġi rikonoxxuta mis-sistema operattiva tiegħek awtomatikament.
Stampa 3.1: Wara view of the Keychron Q7 showing the USB-C port and the Mac/Windows toggle switch.
3.2 Swiċċ tas-Sistema Operattiva
The Keychron Q7 features a physical switch to toggle between Windows and macOS layouts. This switch is located on the back edge of the keyboard, near the USB-C port.
- Slide the switch to "Win" for Windows and Linux operating systems.
- Slide the switch to "Mac" for macOS.
Ensure the switch is set to your operating system for correct key functionality.
4. Operazzjoni
4.1 QMK/VIA Customization
The Keychron Q7 is fully compatible with QMK and VIA firmware, allowing for extensive customization of key assignments, macros, and lighting effects. VIA is a graphical user interface that simplifies the customization process without requiring firmware flashing.
- Download the VIA software from the official Keychron website or the VIA GitHub repository.
- Connect your Keychron Q7 keyboard to your computer.
- Launch the VIA application. The software should automatically detect your keyboard.
- Use the intuitive interface to remap keys, create macros, and adjust RGB lighting settings across multiple layers.

Image 4.1: Screenshot of the VIA software interface demonstrating key remapping and macro programming for the Keychron Q7.
4.2 Swiċċijiet li jistgħu jinbidlu bis-sħana
The Keychron Q7 features hot-swappable sockets, allowing you to change mechanical switches without soldering. This supports most 3-pin and 5-pin MX-style mechanical switches.
- Tneħħija ta' Swiċċ: Use the provided switch puller. Gently grip the switch from the top and bottom clips and pull straight up.
- Installazzjoni ta' Swiċċ: Align the pins of the new switch with the holes on the PCB. Ensure the pins are straight. Press the switch firmly until it clicks into place. Do not force it if resistance is met; check pin alignment.

Immaġni 4.2: Mill-qrib view of the Keychron Q7's hot-swappable switch sockets with various Gateron switches.
4.3 Double-Shot PBT Keycaps
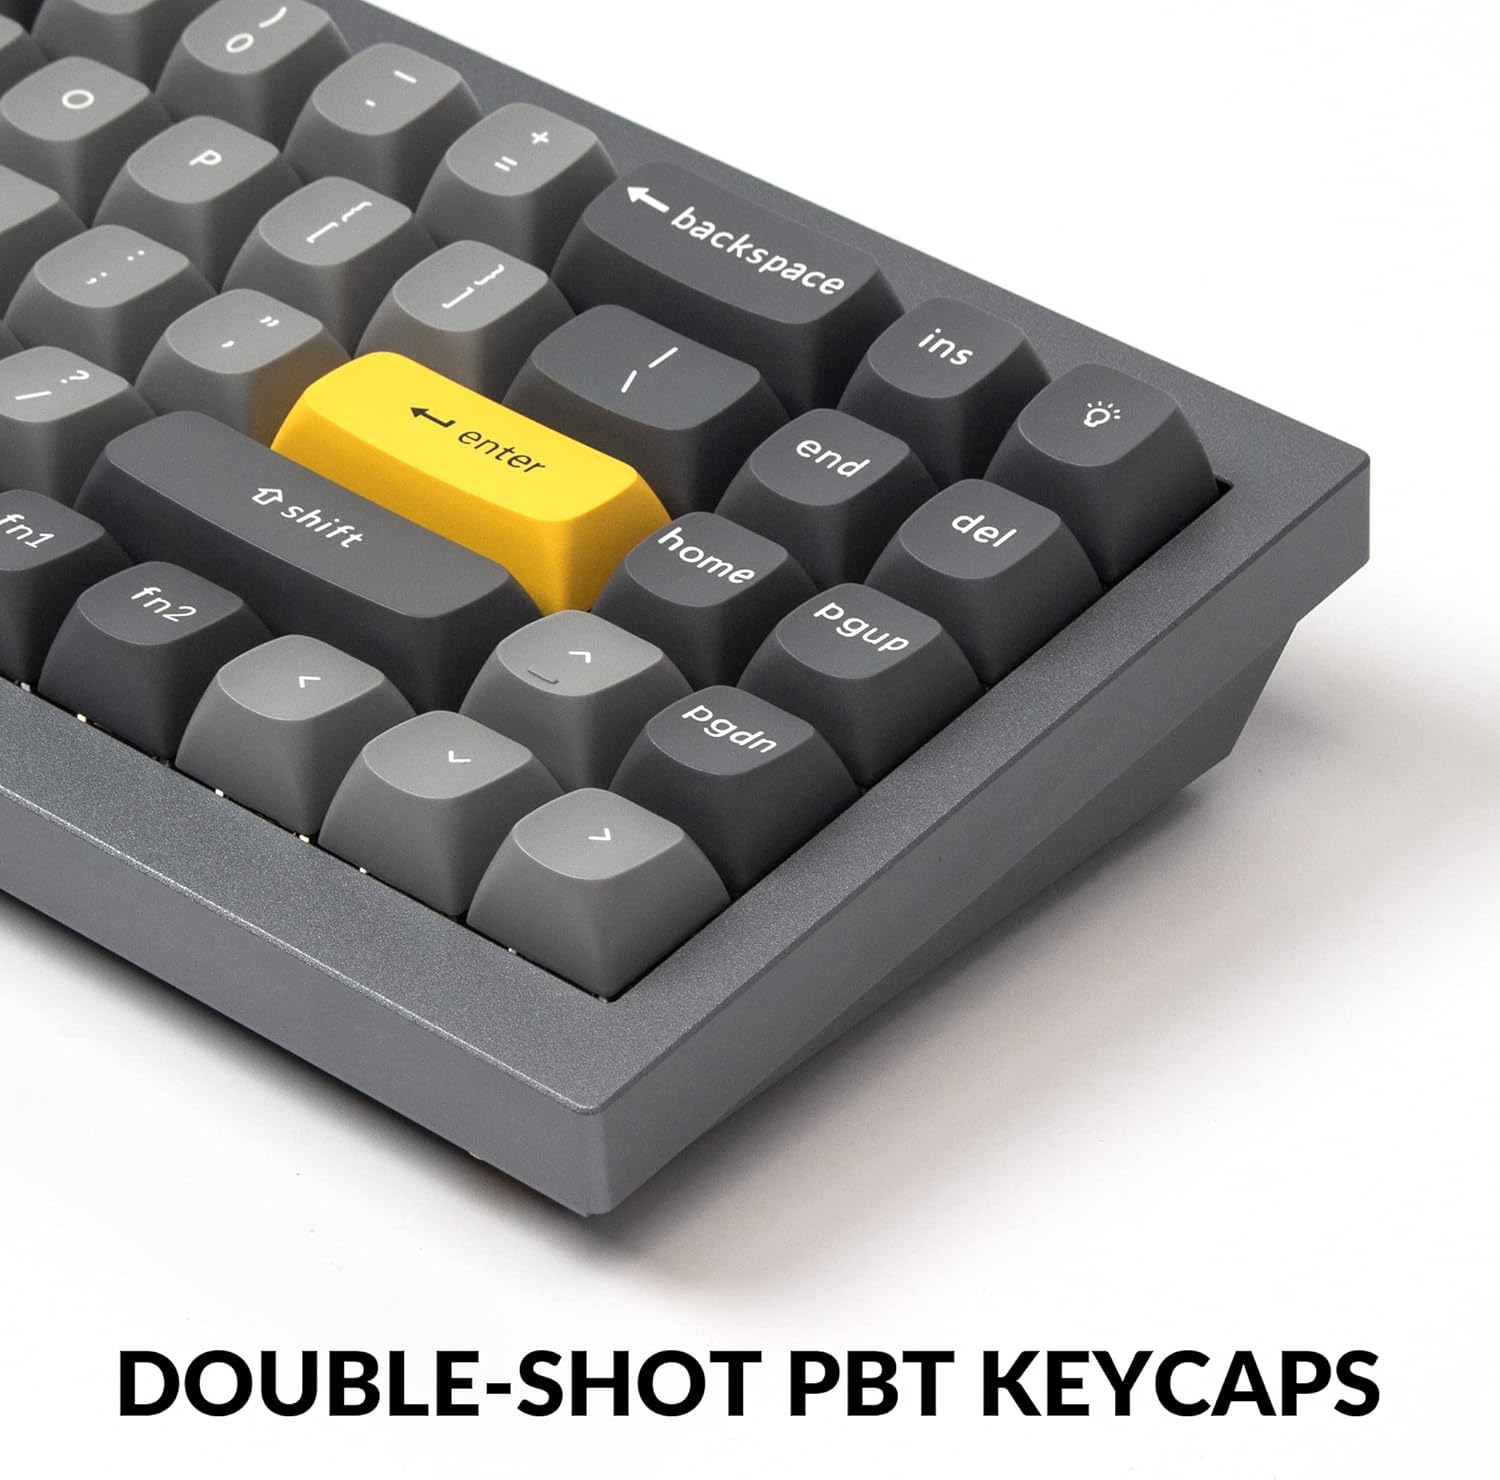
The Q7 comes equipped with durable double-shot PBT keycaps in an OSA profile. These keycaps offer enhanced comfort, excellent oil resistance, and long-term legibility due to their manufacturing process where two plastics are molded together.

Image 4.3: Close-up of the Keychron Q7's double-shot PBT keycaps, highlighting their texture and profile.
4.4 South-Facing RGB Backlight
The keyboard features south-facing RGB LEDs. This design ensures that the backlight illuminates the key legends effectively from the typist's perspective and prevents interference with Cherry-profile keycaps, should you choose to install them.

Image 4.4: Illuminated south-facing RGB LEDs beneath the keycaps of the Keychron Q7.
5. Manutenzjoni
5.1 Tindif Ġenerali
- Tneħħija tat-Trab: Uża bott ta' arja kkompressata biex tneħħi t-trab u l-fdalijiet minn bejn il-keycaps.
- Tindif tal-wiċċ: Wipe the keyboard's aluminum case and keycaps with a soft, slightly damp, drapp mingħajr suf. Evita kimiċi ħarxa jew materjali li joborxu.
- Tindif fil-fond (Tastiera): For thorough cleaning, keycaps can be removed using the provided keycap puller and washed with mild soap and water. Ensure they are completely dry before reattaching.
5.2 Component Disassembly and Assembly
The Keychron Q7 is designed for easy disassembly and assembly, facilitating modifications and maintenance. Refer to the exploded view dijagramma għall-identifikazzjoni tal-komponenti.

Immaġni 5.1: Splodiet view of the Keychron Q7, showing individual components like keycaps, switches, top case, plate, gaskets, sound absorbing foam, PCB, case foam, silicone gaskets, and bottom case.
When disassembling, use the provided screwdriver and hex key. Exercise caution to avoid damaging internal components or stripping screws. Reassemble components in reverse order, ensuring all connections are secure.
6 Issolvi l-problemi
- It-Tastiera Mhux Tirrispondi:
- Kun żgur li l-kejbil USB-C huwa konness sew kemm mat-tastiera kif ukoll mal-kompjuter tiegħek.
- Ipprova port USB differenti fuq il-kompjuter tiegħek.
- Verify the Mac/Windows switch on the back of the keyboard is set to the correct operating system.
- Ittestja b'kejbil USB-C differenti jekk disponibbli.
- Ċwievet Speċifiċi Mhux Jaħdmu:
- Due to the hot-swappable design, a switch might not be fully seated. Gently remove the keycap and then the switch using the puller, then reinsert the switch firmly.
- If the issue persists, try swapping the problematic switch with a known working switch from another key to determine if the switch itself is faulty.
- Check VIA software to ensure the key has not been accidentally remapped or disabled.
- Kwistjonijiet tad-Dawl ta' Wara:
- Ensure the backlight is enabled via the keyboard's function keys or through the VIA software.
- Aġġusta s-settings tal-luminożità.
- If only certain LEDs are not working, it might indicate a faulty LED or switch.
- QMK/VIA Software Not Detecting Keyboard:
- Ensure the VIA software is the latest version.
- Try restarting your computer and the VIA application.
- Ensure the keyboard is connected directly to your computer, not through a USB hub.
For further assistance, please refer to the Keychron official support resources.
7. Speċifikazzjonijiet
| Karatteristika | Dettall |
|---|---|
| Mudell | Keychron Q7 |
| Tqassim | 70% (72 Ċwievet) |
| Materjal tal-Korp | Full CNC Machined Aluminum |
| Tip ta' Swiċċ | Gateron G Pro Blue (Hot-swappable) |
| Tappijiet ewlenin | Double-Shot PBT, OSA Profile |
| Konnettività | Bil-wajer (USB-C) |
| Dawl ta' wara | RGB li jħares lejn in-Nofsinhar |
| Firmware | QMK/VIA Programmable |
| Gasket Design | Double-Gasket Structure |
| OS kompatibbli | Mac, Windows, Linux |
| Dimensjonijiet tal-Prodott | 13.44 x 4.76 x 1.33 pulzieri |
| Piż tal-oġġett | 5.17 liri |

Image 7.1: Detailed specifications for the Gateron G Pro Blue Switch, including operating force, pre-travel, travel distance, and sound level.
8. Garanzija u Appoġġ
8.1 Garanzija tal-Prodott
Keychron products are covered by a manufacturer's warranty against defects in materials and workmanship. The specific terms and duration of the warranty may vary by region and product. Please retain your proof of purchase for warranty claims.
8.2 Appoġġ għall-Klijent
For technical support, warranty inquiries, or additional information, please visit the official Keychron websit jew ikkuntattja lid-dipartiment tas-servizz tal-konsumatur tagħhom.