1. Introduzzjoni
This Yunir 8-Channel Level Converter Module is designed for interface matching between PLCs or MCUs and other circuits. It facilitates level conversion for external circuits or between control circuits. The module features 8 independent channels and utilizes an isolation chip with a 10 MHz bandwidth, ensuring signal speed and integrity during conversion and ampproċessi ta’ lifikazzjoni.
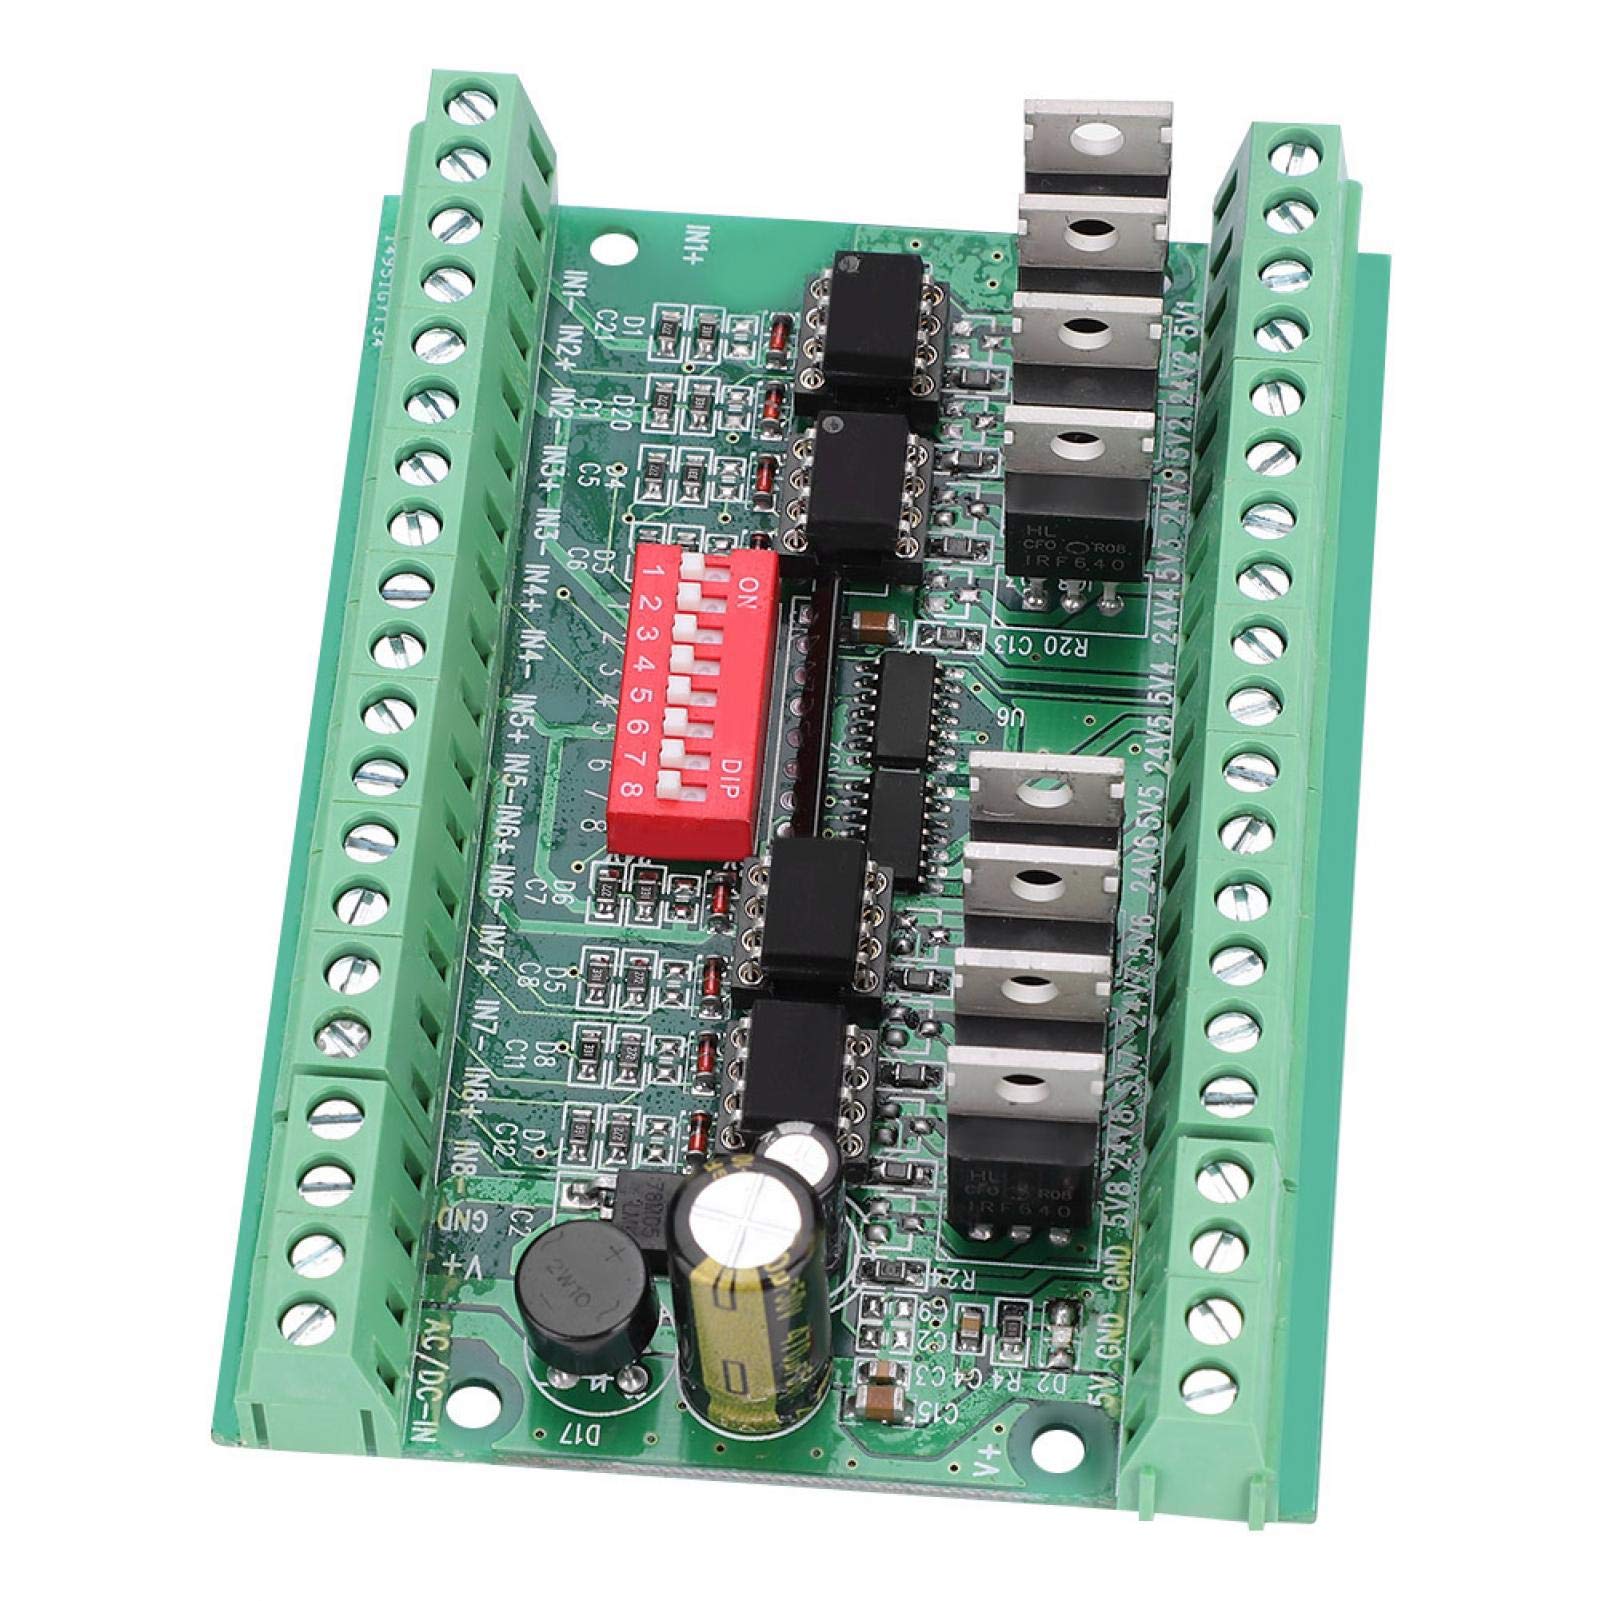
Immaġni 1.1: Fuqview of the Yunir 8-Channel Level Converter Module. This image shows the module's overall layout, including the terminal blocks, DIP switches, and main components.
2. Karatteristiċi
- Converts 5V input signals to 24V levels, or 24V input signals to 5V levels.
- Supports 5V to 5V or 24V to 24V level conversion with optocoupler isolation, enhancing interference suppression.
- Input level selection configurable via DIP switches.
- NPN-OC output for 24V level, with an output current capacity of 100 mA.
- Integrated conversion and amplification circuitry for robust performance and strong drive capability.
- Compatible with common cathode or common anode input connections, adhering to European and Japanese PLC interface standards.
3. Speċifikazzjonijiet
| Speċifikazzjoni | Valur |
|---|---|
| Mudell | 8-5V24V |
| Kanali | 8-kanali |
| Tip ta' Input | NPN jew PNP |
| Input Voltage Livelli | 5V jew 24V |
| Tip ta' Output | NPN |
| Ħruġ Voltage Livelli | 5V jew 24V |
| Bandwidth | 10 MHz |
| Output Current (NPN-OC) | 100 mA |
| Dimensjonijiet (Approx.) | 10.3 x 7.3 x 3 ċm (4.1 x 2.9 x 1.2 pulzieri) |
| Piż (Approx.) | 100 g (3.49 uqija) |

Image 3.1: Physical dimensions of the module, showing approximate length, width, and height.
4. Setup u Wiring
Proper wiring and DIP switch configuration are essential for correct operation. Refer to the images below for terminal identification and DIP switch settings.
4.1 Konnessjonijiet Terminali
The module features screw terminals for input and output connections. Ensure all connections are secure.
- Input Terminals (IN1+ to IN8+ / IN1- to IN8-): Connect your NPN or PNP input signals here. Each channel has a positive (+) and negative (-) input.
- Power Input (V+, GND): Connect the main power supply for the module.
- Output Terminals (5V GND, 24V GND, 5V1-5V8, 24V1-24V8): These are the NPN-OC outputs. Connect your load to the appropriate 5V or 24V output and its corresponding GND.
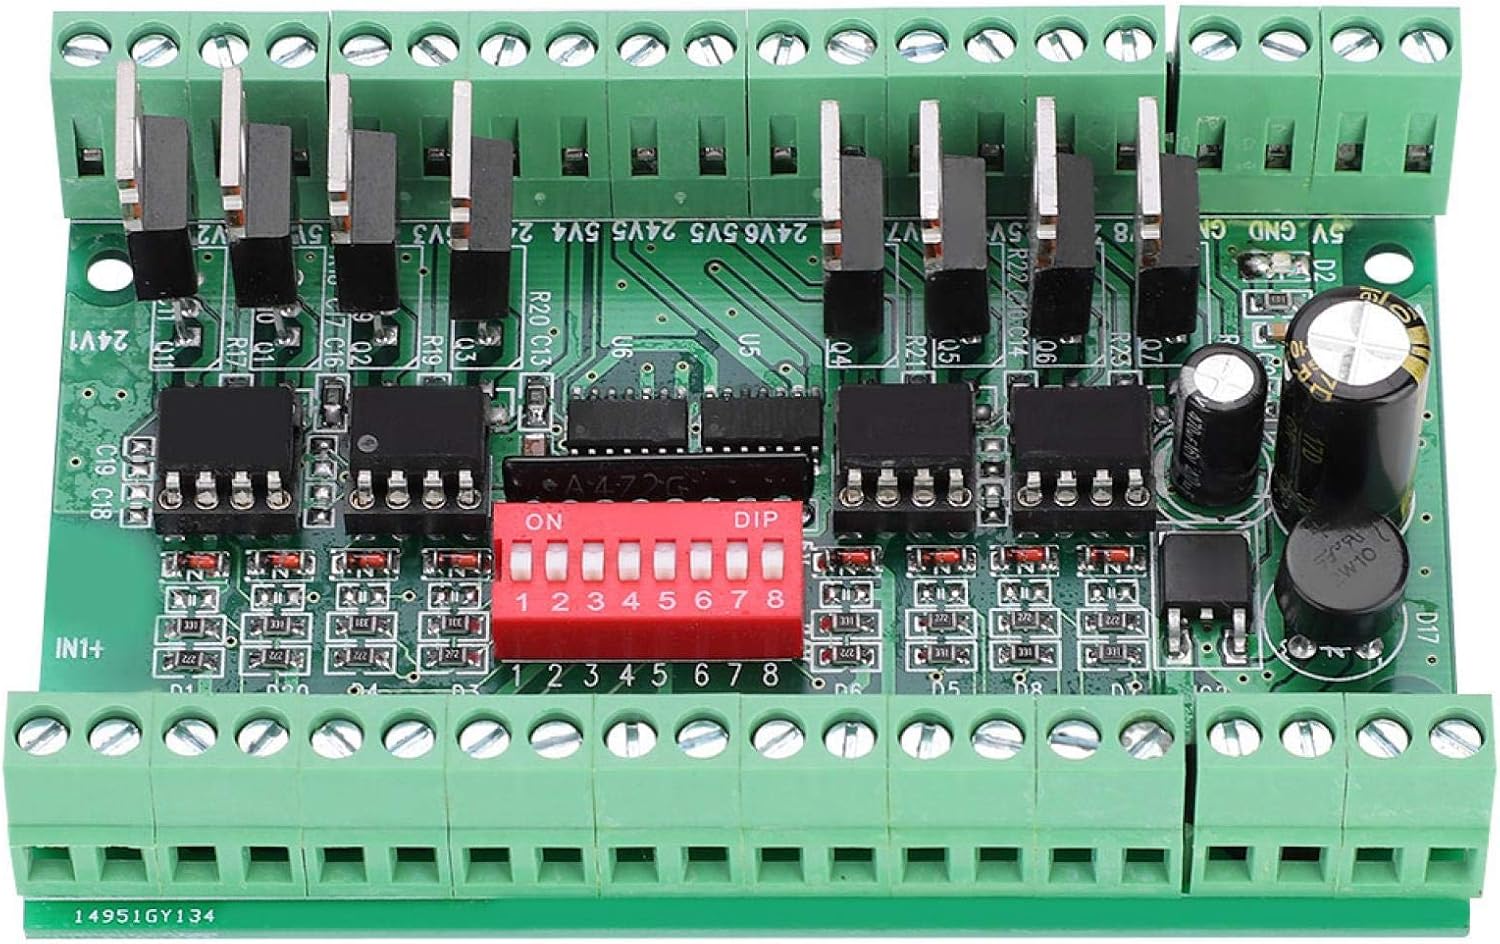
Immaġni 4.1: Mill-qrib view of the module, highlighting the input/output terminals and the DIP switch block.
4.2 Konfigurazzjoni tal-Iswiċċ DIP
The red DIP switch block (SW1 to SW8) controls the input voltage level for each of the 8 channels. Each switch corresponds to one channel (SW1 for Channel 1, SW2 for Channel 2, etc.).
- Ixgħel il-Pożizzjoni: Set the corresponding channel to accept a 5V input level.
- Aqleb il-Pożizzjoni OFF: Set the corresponding channel to accept a 24V input level.
Ensure all DIP switches are set correctly according to the input voltage levels of your signals before applying power.
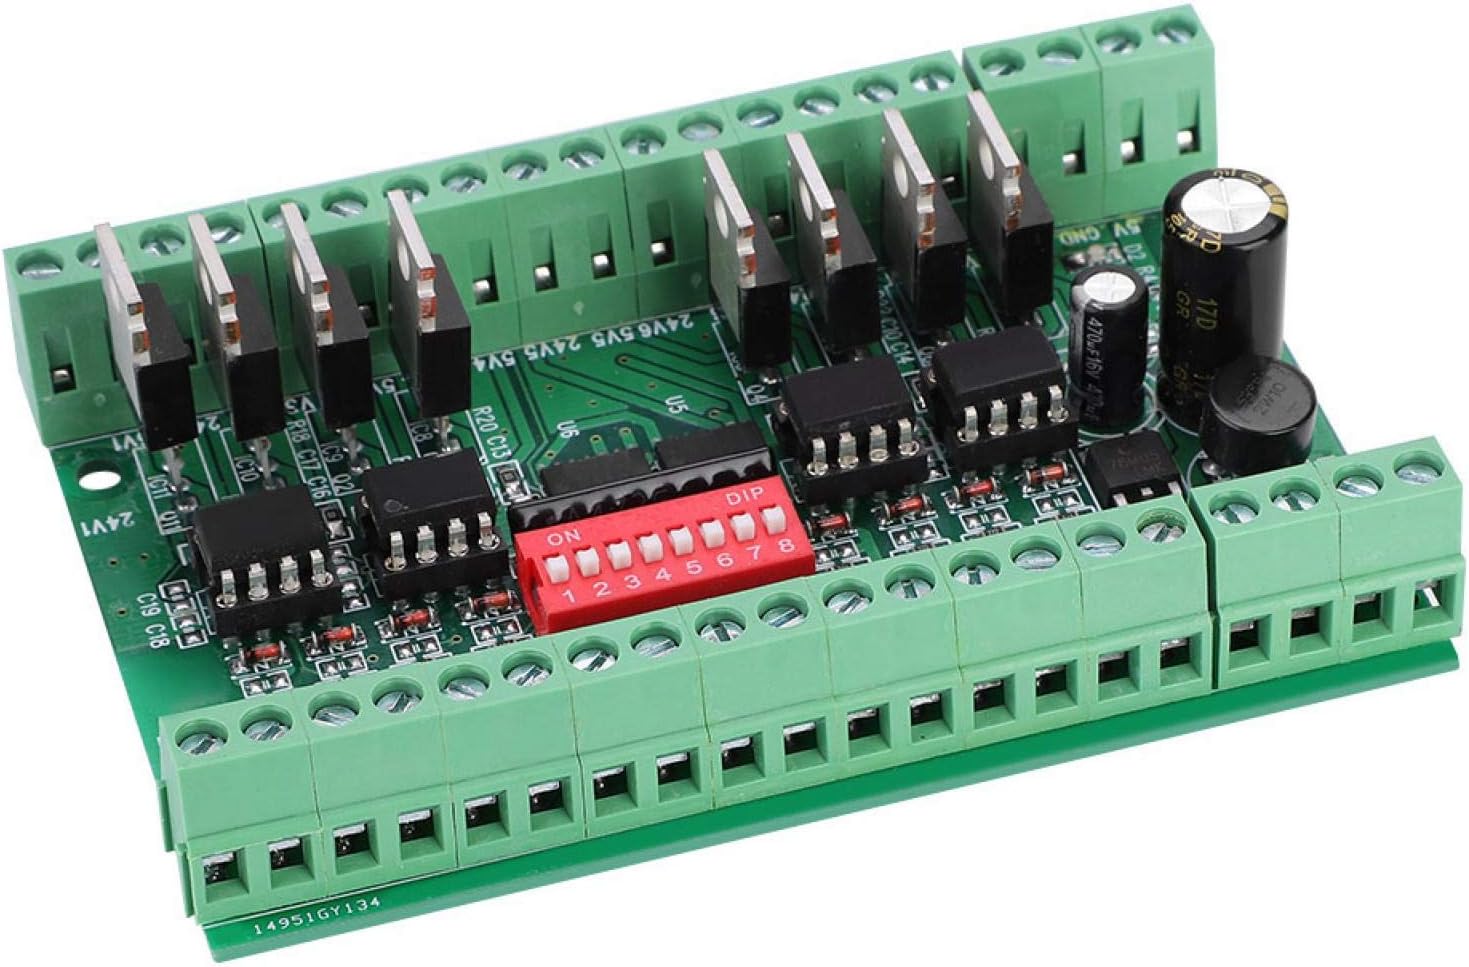
Immaġni 4.2: Angolata view of the module, clearly showing the red DIP switches and their 'ON' position indicator.
5. Istruzzjonijiet Operattivi
Once the module is correctly wired and the DIP switches are configured for the desired input voltage levels, apply power to the V+ and GND terminals. The module will then convert the input signals according to its configuration.
- Input Signal Application: Apply your NPN or PNP signals to the respective IN+ and IN- terminals for each channel.
- Output Signal Retrieval: The converted NPN-OC signals will be available at the 5V1-5V8 or 24V1-24V8 output terminals, depending on the desired output level. Connect your receiving circuit or load to these outputs.
- Iżolament tal-optocoupler: The integrated optocouplers provide electrical isolation between the input and output circuits, protecting sensitive components and improving noise immunity.
6. Manutenzjoni
The Yunir Level Converter Module is designed for reliable operation with minimal maintenance. Follow these guidelines to ensure longevity:
- Ambjent: Operate the module in a clean, dry environment, free from excessive dust, moisture, and corrosive gases.
- Temperatura: Avoid exposing the module to extreme temperatures outside its specified operating range.
- Provvista tal-Enerġija: Ensure a stable and correctly rated power supply is used to prevent damage.
- Konnessjonijiet: Periodically check all screw terminal connections to ensure they remain tight and secure.
- Tindif: If necessary, gently clean the module with a soft, dry cloth. Do not use liquid cleaners or solvents.
7 Issolvi l-problemi
If you encounter issues with the module, consider the following troubleshooting steps:
- L-ebda Sinjal tal-Ħruġ:
- Verify that the power supply (V+, GND) is correctly connected and providing the specified voltage.
- Check all input and output wiring for correct polarity and secure connections.
- Ensure the DIP switches for the affected channels are set correctly for the input voltage level (ON for 5V, OFF for 24V).
- Confirm the input signal is present and within the expected voltagfirxa e.
- Volum tal-Ħruġ Mhux Korretttage/Level:
- Re-check the DIP switch settings for the specific channel. An incorrect setting will lead to improper conversion.
- Ensure the load connected to the output is compatible with NPN-OC output and its current requirements do not exceed 100 mA.
- Interference or Unstable Operation:
- Aċċerta ruħek li s-sistema tiegħek hija ertjata sew.
- Check for strong electromagnetic interference sources near the module.
- Verify that the input and output cables are shielded if operating in a noisy environment.
8. Garanzija u Appoġġ
For warranty information and technical support, please refer to the documentation provided at the time of purchase or contact Yunir customer service directly. Keep your purchase receipt or order details handy for any warranty claims.