LIECTROUX C30B
LIECTROUX C30B Hybrid Robot Vacuum and Mop User Manual
Model: C30B
1. Introduzzjoni
Thank you for choosing the LIECTROUX C30B Hybrid Robot Vacuum and Mop. This intelligent cleaning device is designed to simplify your home maintenance with its advanced features, including dynamic navigation, powerful 4KPA suction, and versatile 2-in-1 vacuuming and mopping capabilities. It integrates seamlessly with smart home systems like Amazon Alexa and Google Assistant for convenient control. Please read this manual thoroughly before operating the device to ensure proper use and maintenance.

Figure 1.1: LIECTROUX C30B Robot Vacuum and Mop with its accompanying mobile application interface and the interchangeable dustbin/water tank.
2. Istruzzjonijiet Importanti dwar is-Sigurtà
To reduce the risk of injury or damage, read these safety instructions carefully and keep them handy for future reference. This appliance is for household use only.
- Do not operate the robot in environments with open flames or fragile objects.
- Ensure all power cords, small objects, and loose items are cleared from the floor before operation to prevent entanglement.
- Do not allow children or pets to play with the robot. Supervise children when the robot is in use.
- Use only the original charging dock and power adapter provided by the manufacturer.
- Tużax ir-robot biex tiġbor debris kbir, likwidi, jew materjali li qed jaqbdu/jpejpu.
- Naddaf il-pinzell u s-sensuri regolarment biex iżżomm prestazzjoni ottimali.
- Do not immerse the robot or its electronic components in water.
- If the robot is not used for a long period, fully charge it and store it in a cool, dry place.
3. Kontenut tal-Pakkett
Ivverifika li l-komponenti kollha huma preżenti u f'kundizzjoni tajba meta tiftaħ il-pakkett.
- Robot Host (Main Unit)
- Stazzjon ta 'ċċarġjar
- Kontroll mill-bogħod (batteriji mhux inklużi)
- Adapter tal-Enerġija
- Tank tal-Ilma
- Trab tat-trab
- Għodda tat-Tindif
- Filtri HEPA (2x)
- Xkupilji tal-ġenb (4x)
- Mopping Pads (2x)
- Manwal ta' Istruzzjoni
- Gwida għall-Installazzjoni tal-App
4. Prodott Aktarview
Familiarize yourself with the main components of your LIECTROUX C30B robot vacuum.
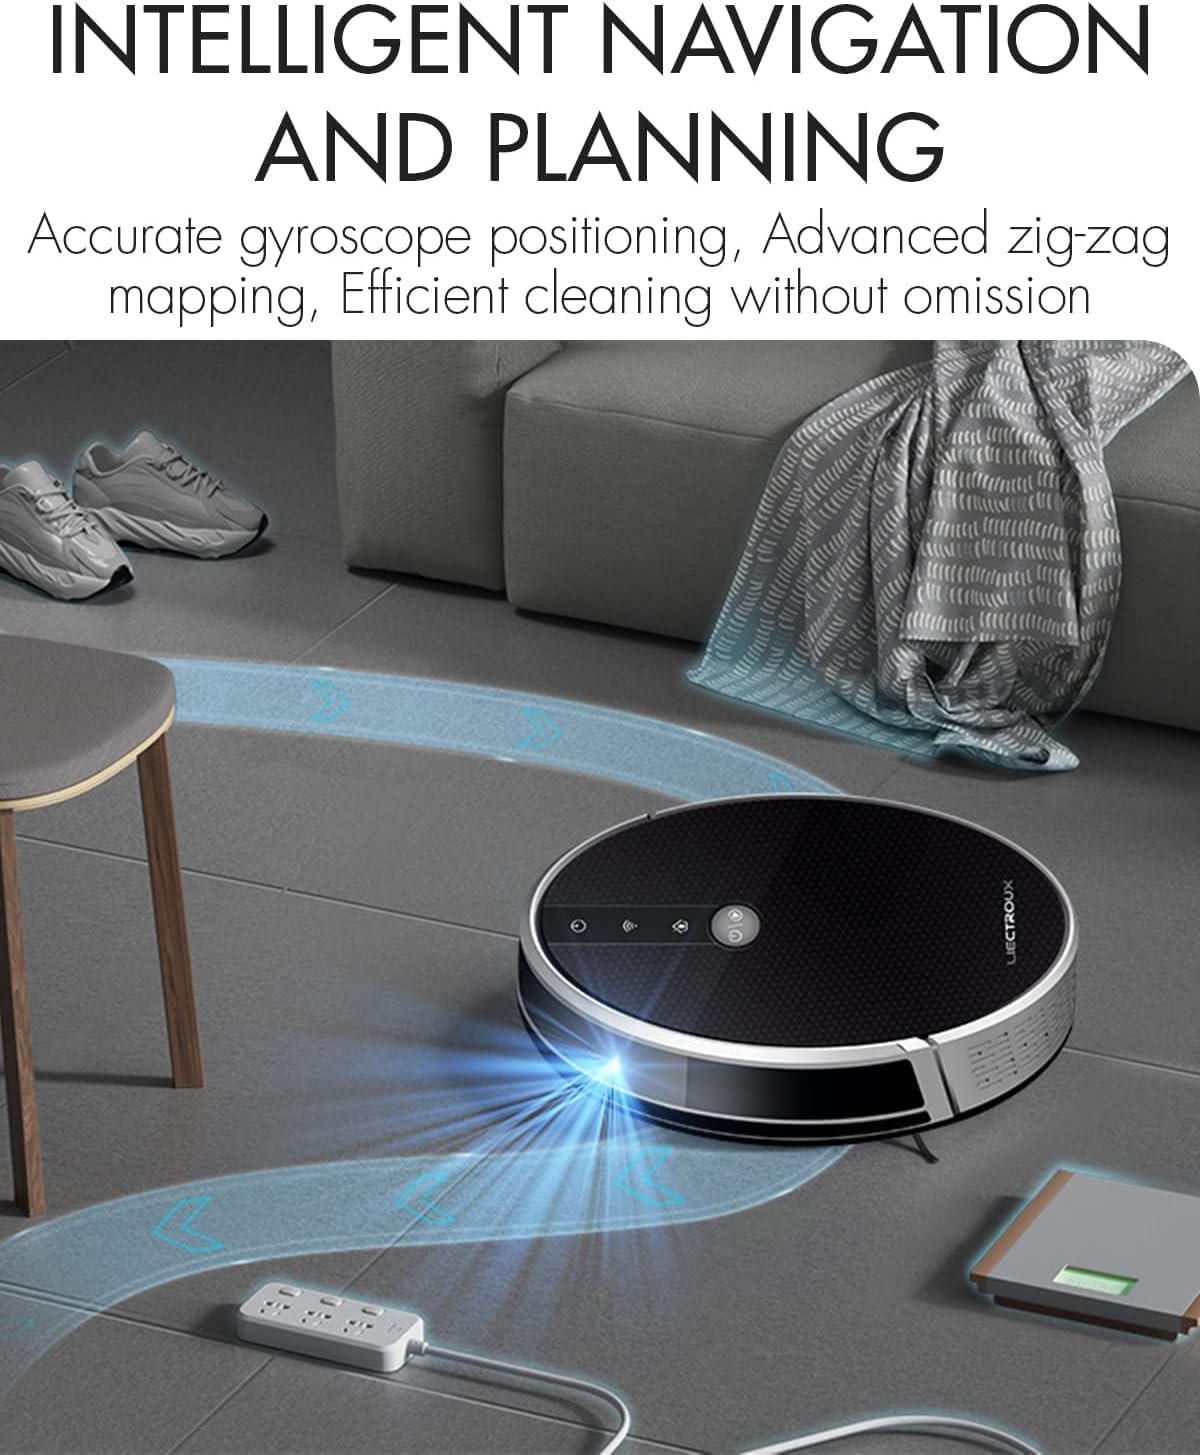
Figure 4.1: The robot vacuum utilizing its intelligent navigation system to plan and execute efficient cleaning paths, ensuring thorough coverage of your home.
4.1. Karatteristiċi ewlenin
- Gyroscope Smart Navigation: Detects the entire house and builds a real-time cleaning roadmap for efficient, room-to-room cleaning.
- Super Suction & 2-in-1 Functionality: Equipped with a NIDEC brushless motor and V-shaped floating central brush for deep cleaning. Interchangeable 600ml dustbin and water tank allow for simultaneous vacuuming and mopping.
- Slim Body Design: At 7.4 cm (2.9 inches) thin, it can easily clean under furniture and hard-to-reach areas.
- Sensuri Kontra l-Waqgħa: Integrated infrared sensors detect obstacles and prevent falls from stairs or ledges.
- Operazzjoni kwieta: Designed to operate at a low noise level (45 dB), minimizing disturbance.
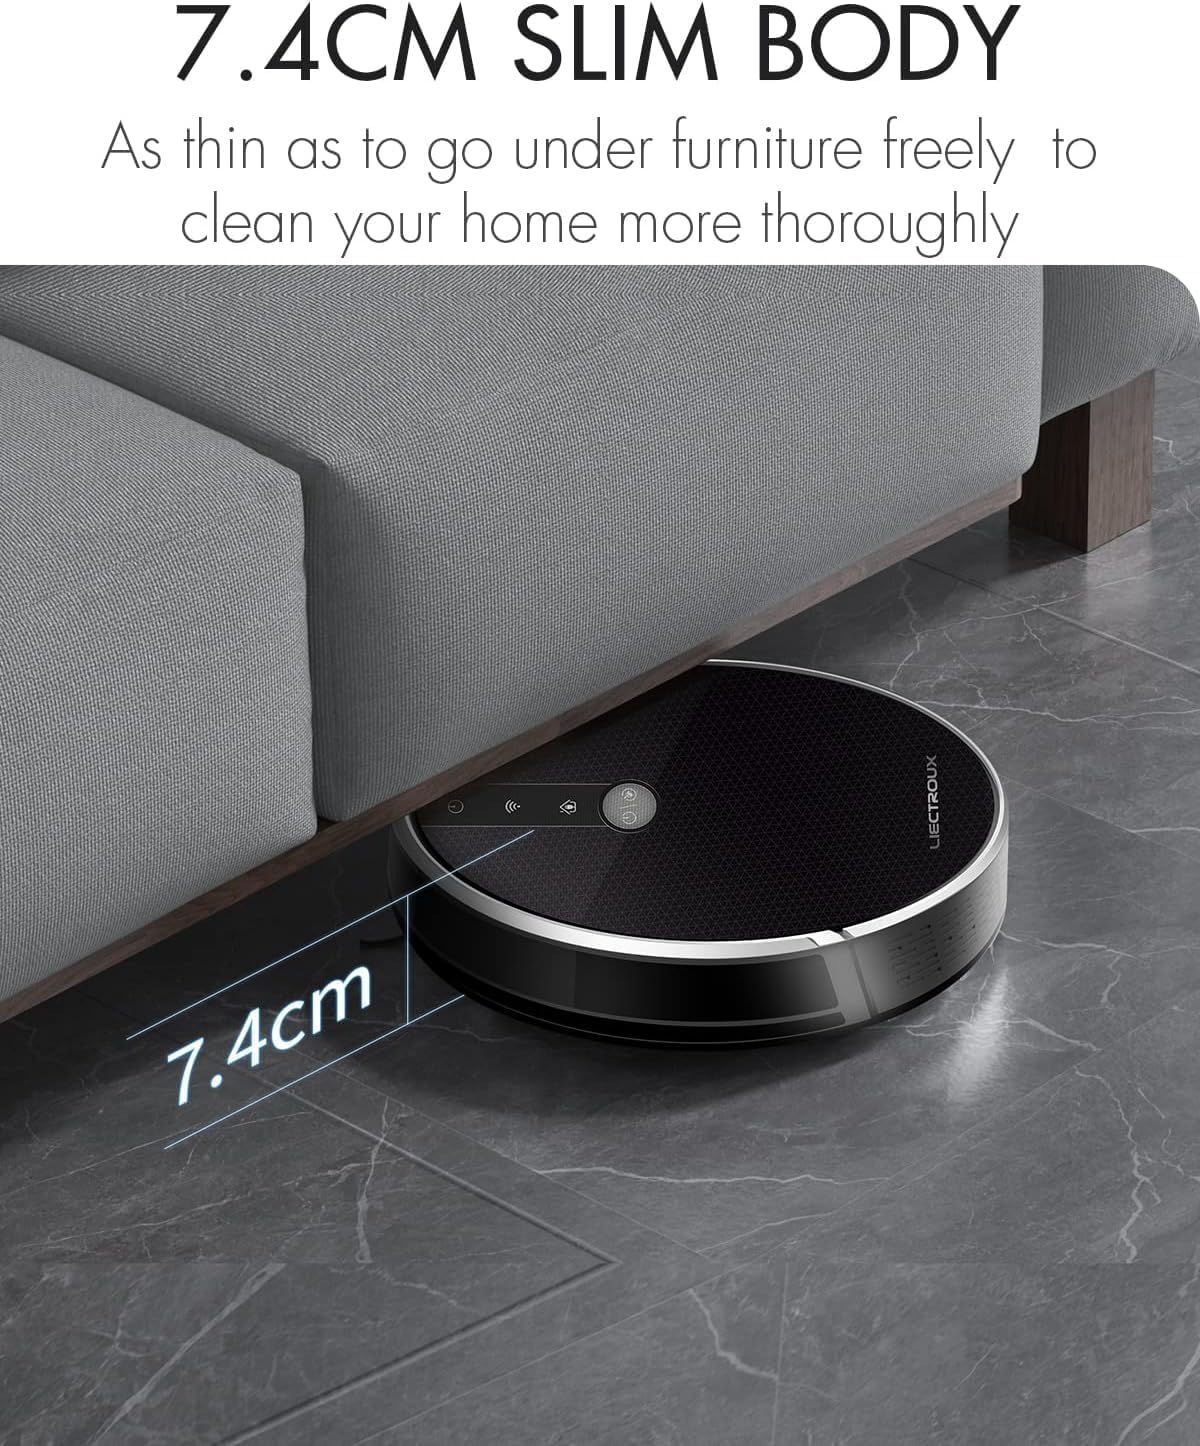
Figure 4.2: The robot's ultra-slim 7.4 cm body allows it to effortlessly clean under low-lying furniture, ensuring no dust or debris is left behind.
5. Setup
5.1. Iċċarġjar tar-Robot
- Place the charging station against a wall in an open, uncluttered area. Ensure there is at least 1 meter (3.3 feet) of clear space on both sides and 2 meters (6.6 feet) in front of the station.
- Connect the power adapter to the charging station and plug the other end into a wall outlet.
- Place the robot onto the charging station, ensuring the charging contacts align. The robot will automatically begin charging. A full charge takes approximately 4-5 hours.
- For initial use, it is recommended to fully charge the robot before its first cleaning cycle.
5.2. Installazzjoni ta' Xkupilji tal-Ġenb
Attach the side brushes by pressing them onto the square posts at the bottom of the robot until they click into place. Ensure the left (L) and right (R) brushes are installed on the correct sides.
5.3. Installing Dustbin or Water Tank
The LIECTROUX C30B comes with an interchangeable dustbin and water tank. Choose the appropriate container for your cleaning needs.
- Għall-vakwu: Insert the dustbin into the designated slot at the rear of the robot until it locks securely.
- For Mopping: Fill the water tank with clean water (do not use detergents or harsh chemicals). Attach a mopping pad to the bottom of the water tank. Insert the water tank into the designated slot at the rear of the robot until it locks securely.
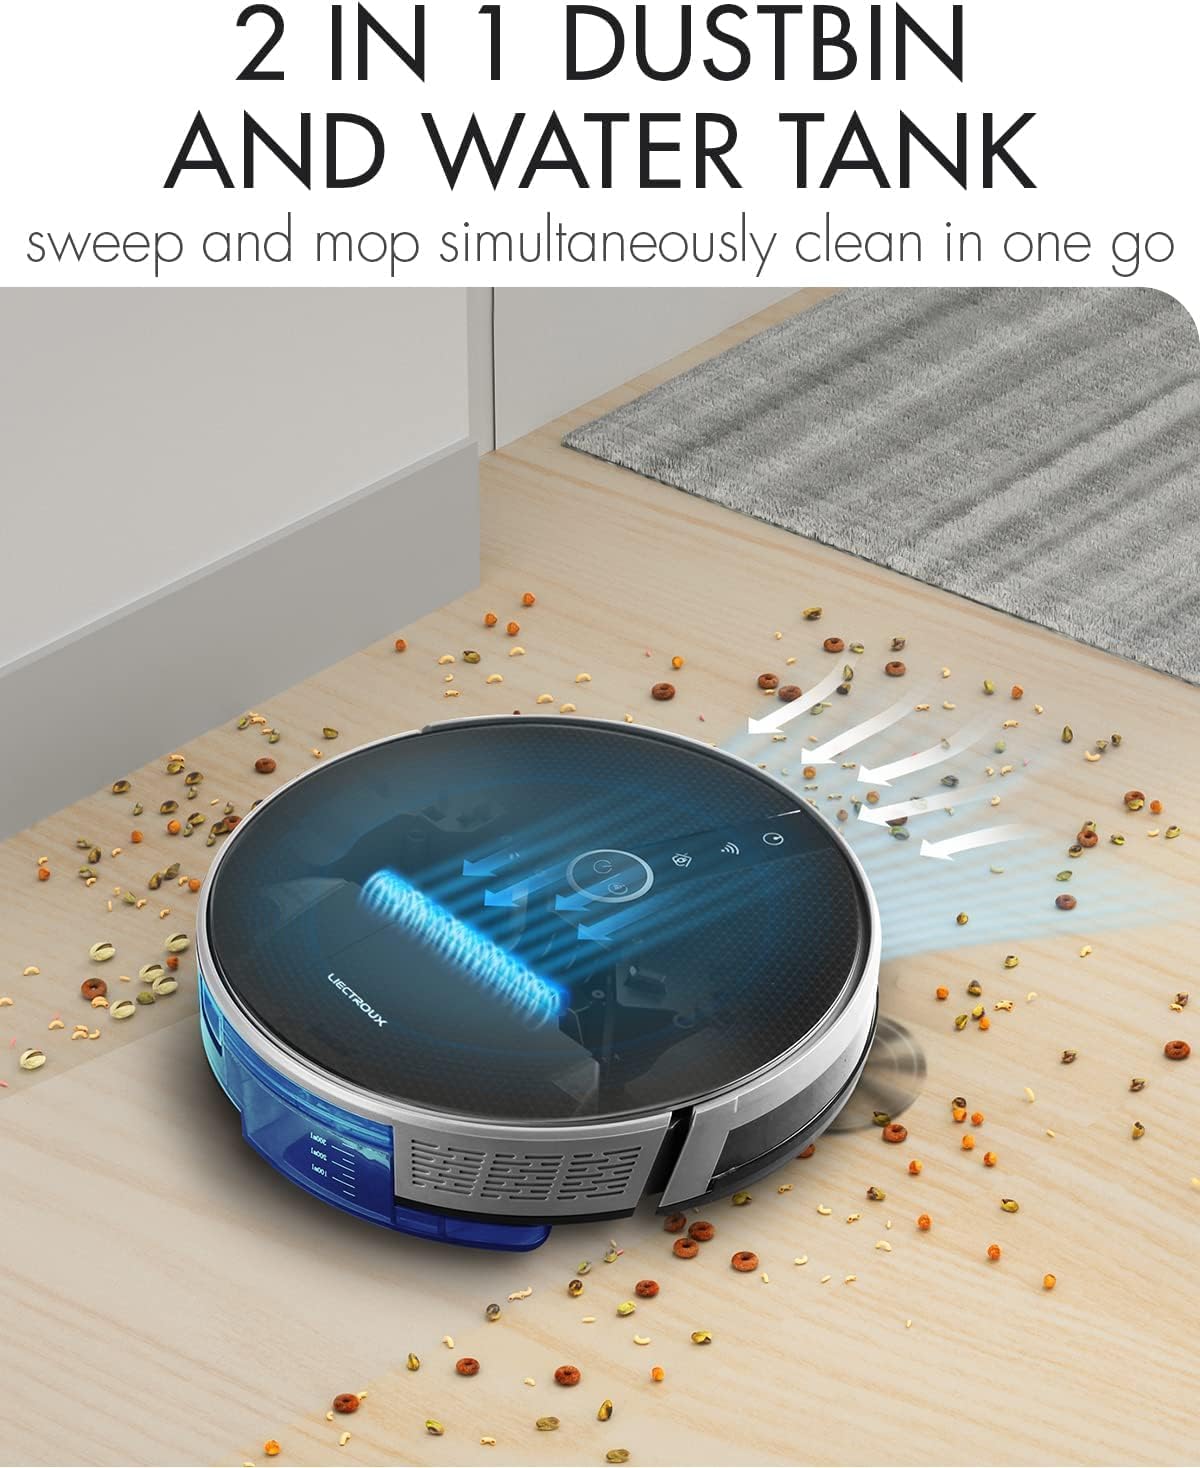
Figure 5.1: The robot's innovative 2-in-1 design allows for easy switching between the dustbin for vacuuming and the water tank for mopping, enabling simultaneous sweep and mop functions.
5.4. Installazzjoni u Konnessjoni tal-App
The LIECTROUX C30B can be controlled via the Tuya Smart app. It also supports voice control through Amazon Alexa and Google Assistant.
- Download the "Tuya Smart" app from the App Store (iOS) or Google Play Store (Android).
- Irreġistra kont u illoggja.
- Ensure your robot is charged and powered on.
- In the app, tap "+" to add a device. Select "Small Home Appliance" > "Robot Vacuum".
- Follow the on-screen instructions to connect the robot to your home Wi-Fi network (2.4GHz only).
- Ladarba tkun konness, tista' tikkontrolla r-robot, tiskeda t-tindif, u timmonitorja l-istatus tiegħu mill-ismartphone tiegħek.

Figure 5.2: The mobile application provides comprehensive remote control, allowing users to manage cleaning modes, schedules, and monitor the robot's status from anywhere.
6. Istruzzjonijiet Operattivi
6.1. Modi ta 'tindif
The LIECTROUX C30B offers 6 cleaning modes to suit various needs:
- Tindif Awtomatiku: The robot intelligently plans its route to clean the entire area.
- Modalità tat-Tqaxxir: When the water tank is installed, the robot will perform wet mopping.
- Tindif b'Kamra Unika: Cleans a specific room. Close the door to confine the robot to that area.
- Tindif tax-Xfer: Ir-robot inaddaf tul il-ħitan u t-truf tal-għamara.
- Tindif tal-Post: Jikkonċentra t-tindif fuq żona maħmuġa speċifika f'disinn spirali.
- Tindif Skedat: Issettja ħinijiet speċifiċi biex ir-robot jibda jnaddaf awtomatikament permezz tal-app.
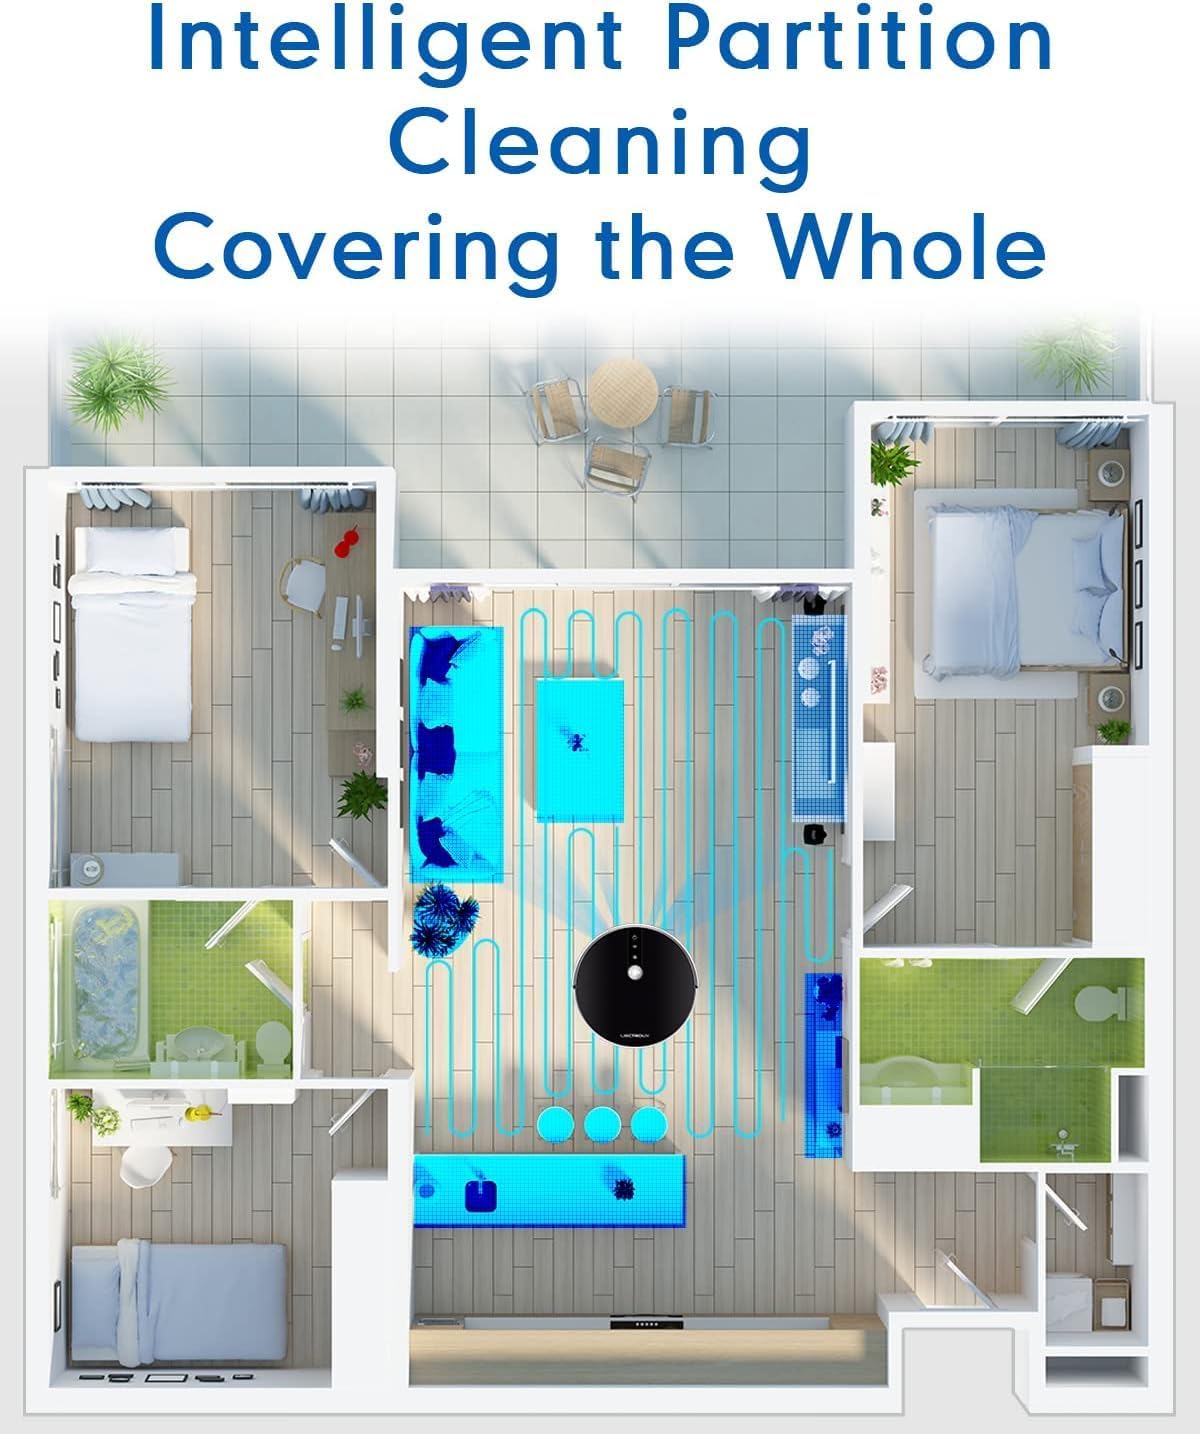
Figure 6.1: The robot's intelligent partition cleaning capability allows it to map and clean different areas of your home systematically, ensuring comprehensive coverage.
6.2. Starting/Pausing Cleaning
- Fuq ir-Robot: Press the power button on the robot's top panel to start or pause cleaning.
- Bl-użu tal-Kontroll mill-Bogħod: Use the "Auto Clean" button on the remote control.
- Permezz tal-App: Use the "Start" or "Pause" buttons within the Tuya Smart app.
6.3. Voice Control (Alexa/Google Assistant)
Once connected to the Tuya Smart app, you can link your robot to Amazon Alexa or Google Assistant for voice commands.
- Enable the "Tuya Smart" skill in your Alexa or Google Home app.
- Irreġistra l-kont Tuya Smart tiegħek.
- Skopri apparati.
- Issa tista' tuża kmandi bħal:
- "Alexa, start cleaning the robot vacuum."
- "Hey Google, tell the robot vacuum to go back to charging."
- "Alexa, stop the robot vacuum."

Figure 6.2: The robot vacuum seamlessly integrates with smart home assistants like Amazon Alexa and Google Assistant, allowing for convenient voice-activated control of cleaning tasks.
7. Manutenzjoni
Manutenzjoni regolari hija kruċjali għall-prestazzjoni ottimali u l-lonġevità tal-vacuum cleaner robot tiegħek.
7.1. Tbattil tal-landa taż-żibel
Empty the dustbin after each use or when the "Dustbin Full" indicator appears on the app.
- Agħfas il-buttuna tal-ftuħ tal-kontenitur tat-trab u iġbed il-kontenitur tat-trab 'il barra.
- Iftaħ l-għatu tal-landa taż-żibel u vojta l-kontenut tagħha ġo landa taż-żibel.
- Clean the dustbin with the provided cleaning tool or a soft cloth. It can also be rinsed with water, but ensure it is completely dry before re-installing.
7.2. Tindif tal-Filtri
Clean the HEPA filter and sponge filter weekly. Replace HEPA filters every 3-6 months, depending on usage.
- Neħħi l-dustbin.
- Take out the HEPA filter and sponge filter.
- Tap the filters gently to remove dust. Do not wash HEPA filters with water.
- Rinse the sponge filter with water if necessary, and ensure it is completely dry before re-installing.
7.3. Cleaning Main Brush and Side Brushes
Clean the main brush and side brushes weekly to remove tangled hair and debris.
- Pinzell Prinċipali: Flip the robot over. Press the release tabs on the brush guard to remove it. Lift out the main brush. Use the cleaning tool to cut and remove any tangled hair. Reinstall the brush and guard.
- Xkupilji tal-ġenb: Gently pull the side brushes off their posts. Remove any hair or debris. If brushes are worn, replace them.
7.4. Cleaning Water Tank and Mopping Pads
Wara kull sessjoni ta' tindif tal-wiċċ:
- Battal kull ilma li jifdal mit-tank.
- Remove the mopping pad and rinse it thoroughly with water. Allow it to air dry completely.
- Clean the water tank interior if necessary.
7.5. Tindif tas-Sensuri u l-Kuntatti tal-Iċċarġjar
Wipe the sensors and charging contacts regularly with a clean, dry cloth to ensure proper function.
- Sensuri Kontra l-Waqgħa: Located on the bottom of the robot.
- Wall Sensors: Located on the front bumper.
- Kuntatti tal-Iċċarġjar: On the bottom of the robot and on the charging station.

Figure 7.1: The robot is equipped with anti-drop sensors that detect changes in elevation, such as stairs, preventing it from falling and ensuring safe operation.
8 Issolvi l-problemi
Jekk tiltaqa' ma' problemi bil-vacuum cleaner robot tiegħek, irreferi għat-tabella t'hawn taħt għal problemi u soluzzjonijiet komuni.
| Problema | Kawża Possibbli | Soluzzjoni |
|---|---|---|
| Robot ma jixgħelx. | Batterija baxxa jew mhux iċċarġjata. | Place the robot on the charging station and ensure it is fully charged. |
| Ir-robot jeħel spiss. | Obstacles, tangled brushes, or dirty sensors. | Clear obstacles from the cleaning path. Clean main brush, side brushes, and all sensors. |
| Prestazzjoni fqira tat-tindif. | Full dustbin, clogged filter, or worn brushes. | Empty dustbin. Clean/replace filters. Clean/replace brushes. |
| Ir-robot ma jirritornax lejn l-istazzjon tal-iċċarġjar. | Charging station obstructed or out of range. Dirty charging contacts. | Ensure charging station is in an open area. Clean charging contacts on both robot and station. |
| Problemi bil-konnessjoni tal-app. | Incorrect Wi-Fi password, 5GHz network, or robot too far from router. | Ensure you are using a 2.4GHz Wi-Fi network. Re-enter Wi-Fi password. Move robot closer to router. Restart robot and router. |
Jekk il-problema tippersisti wara li tipprova dawn is-soluzzjonijiet, jekk jogħġbok ikkuntattja l-appoġġ għall-klijenti.
9. Speċifikazzjonijiet Tekniċi
| Karatteristika | Speċifikazzjoni |
|---|---|
| Numru tal-Mudell | C30B |
| Brand | LIECTROUX |
| Dimensjonijiet (L x W x H) | 33 x 33 x 7.4 ċm (13 x 13 x 2.9 pulzieri) |
| Piż | 2.7 kg (5.95 lbs) |
| Qawwa | 28 Watts |
| Voltage | 14.4 Volts |
| Tip ta 'batterija | Lithium-ion (2500mAh) |
| Livell ta' Storbju | 45 dB |
| Kapaċità ta 'Dustbin | 0.6 Litri |
| Tip ta 'filtru | HEPA |
| Rakkomandazzjoni tal-wiċċ | Pavimenti Iebsin, Twapet |
| Tip ta' Kontroll | App Control, Voice Control (Alexa, Google Assistant), Remote Control |
| Runtime | 100-120 minutes (approx. 170-220 sq meters) |
10. Garanzija u Appoġġ
The LIECTROUX C30B Hybrid Robot Vacuum and Mop comes with a 24-month professional warranty mid-data tax-xiri. Din il-garanzija tkopri difetti fil-manifattura u malfunzjonamenti taħt użu normali.
10.1. Esklużjonijiet ta' Garanzija
Il-garanzija ma tkoprix:
- Ħsara kkawżata minn użu mhux xieraq, negliġenza, jew aċċident.
- Normal wear and tear of consumable parts (e.g., brushes, filters, mopping pads).
- Ħsara kkawżata minn tiswijiet jew modifiki mhux awtorizzati.
- Ħsara kkawżata minn fatturi esterni bħal żidiet fil-vultaġġ jew diżastri naturali.
10.2. Appoġġ għall-Klijent
For technical assistance, warranty claims, or general inquiries, please contact LIECTROUX customer support through the retailer where you purchased the product or visit the official LIECTROUX websit għal informazzjoni ta' kuntatt.
Please have your model number (C30B) and proof of purchase ready when contacting support.
Ask a question about this manual
Ask about setup, troubleshooting, compatibility, parts, safety, or missing instructions. Manuals+ will review the question and use this page’s manual context to help answer it.