
1. Introduzzjoni
This manual provides detailed instructions for the installation, operation, and maintenance of your CNBINGO Wi-Fi Smart Controller (Model RSR02). Please read this manual thoroughly before installation and use to ensure proper functionality and safety. This device allows you to control your lights and other appliances remotely via the Smart Life application, voice commands with Amazon Alexa or Google Home, and set schedules.
2. Karatteristiċi tal-prodott
- Disinn kompatt: Small and lightweight, approximately 5.5 x 3.8 x 2.5 cm and 40 grams.
- Materjal tas-Sigurtà: Constructed from fire-resistant PC material.
- Kompatibilità Għolja: Suitable for most household appliances and lights with a maximum load of 1500W (resistive) or 300W (LED).
- Flexible Power-Off Status: Choose between 'ON', 'OFF', or 'Maintain status before offline' for the device's state after a power outage.
- Kontroll intelliġenti: Compatible with the Smart Life App for remote control, device sharing, and group control.
- Kontroll tal-Vuċi: Works seamlessly with Amazon Alexa and Google Assistant for hands-free operation.
- Skedar: Create timers, schedules, or countdowns to automate your devices.
- Ċertifikazzjonijiet: CE/RoHS certified.

Immaġni: Fuqview of product features including compact size and comparison with a larger alternative.
3. Informazzjoni dwar is-Sigurtà
- Always ensure the main power supply is turned off before installation or maintenance.
- L-installazzjoni għandha titwettaq minn elettriċista kwalifikat jekk m'intix ċert.
- This device requires a neutral wire for operation. Verify the presence of a neutral wire in your electrical box before installation.
- Do not exceed the maximum load capacity of 1500W (resistive) or 300W (LED).
- Jopera fil-volum speċifikattage firxa ta 'AC 90-250V.
4. Kontenut tal-Pakkett
Il-pakkett tipikament jinkludi:
- CNBINGO Wi-Fi Smart Controller (RSR02)
- Manwal ta' Istruzzjoni
- Aċċessorji tal-immuntar (jekk applikabbli)

Image: Contents of the product package, showing multiple smart controllers and the instruction manual.
5. Setup
5.1 Istruzzjonijiet tal-Wiring
The CNBINGO Wi-Fi Smart Controller requires a neutral wire for installation. Follow the diagrams below for typical wiring configurations. Always ensure power is off before wiring.
- Itfi l-provvista ewlenija tal-enerġija mis-circuit breaker.
- Connect the Live (L) wire to the 'L IN' terminal and the Neutral (N) wire to the 'N IN' terminal of the controller.
- Connect the Live (L) wire of your appliance (e.g., light, fan) to the 'L OUT' terminal and the Neutral (N) wire of your appliance to the 'N OUT' terminal.
- Securely fasten all wires.

Image: Two wiring methods for connecting the smart controller to a light or a fan, emphasizing the need for a neutral wire.
5.2 Installazzjoni tal-App
The CNBINGO Wi-Fi Smart Controller uses the Smart Life app. Download it from your device's app store.
- Fittex għal "Ħajja Intelliġenti" fl-Apple App Store jew fil-Google Play Store.
- Alternatively, scan the QR code provided in the product packaging or visit http://e.tuya.com/smartlife.
- Install the app and register for an account.
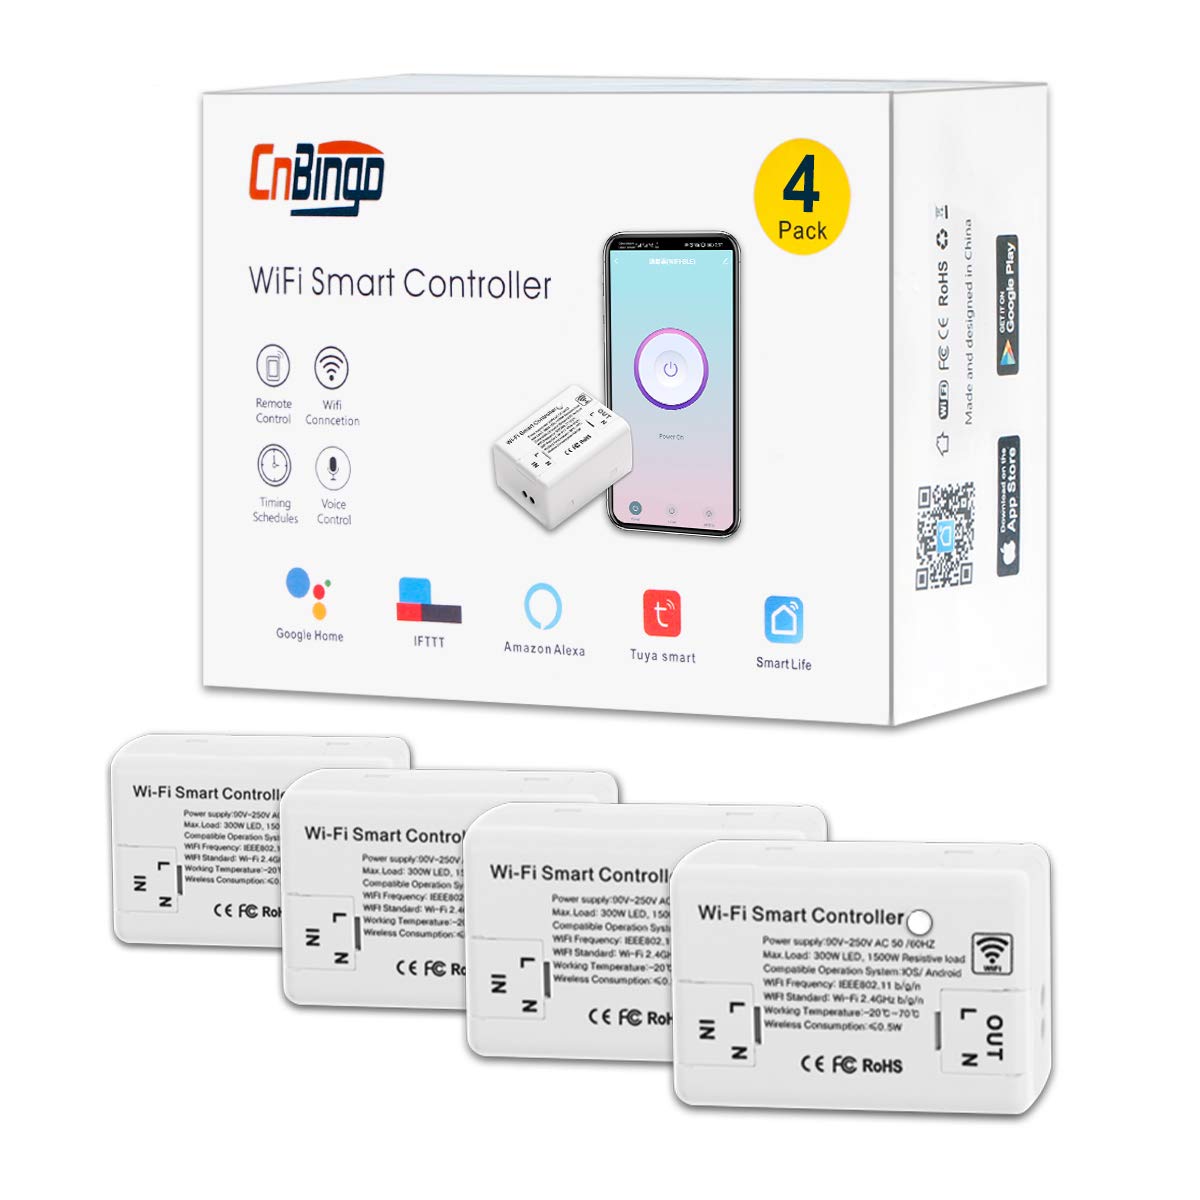
Image: Shows the Smart Life app icon, download links for App Store and Google Play, and the device's app interface.
5.3 Tqabbil tal-Apparat
To pair the controller with the Smart Life app:
- Kun żgur li n-netwerk Wi-Fi tiegħek huwa 2.4GHz. L-apparat ma jappoġġjax Wi-Fi ta' 5GHz.
- Power on the smart controller.
- Open the Smart Life app and tap 'Add Device' or the '+' icon.
- Select the appropriate device type (e.g., 'Switch (Wi-Fi)').
- Put the controller into pairing mode: Press and hold the button on the controller for 5 seconds until the indicator light flashes rapidly red.
- Follow the in-app instructions to connect to your Wi-Fi network and complete the pairing process.
6. Istruzzjonijiet Operattivi
6.1 App Control
Once paired, you can control your device from anywhere using the Smart Life app.
- Mixgħul/Mitfi: Tap the power icon in the app to turn the connected appliance on or off.
- Kondiviżjoni tal-Apparat: Aqsam il-kontroll tal-apparat mal-membri tal-familja permezz tal-app.
- Kontroll tal-Grupp: Group multiple smart controllers to control them simultaneously.
- Xeni: Create custom scenes for automated actions based on conditions or preferences.

Image: A smartphone displaying the Smart Life app interface, demonstrating remote control capabilities and features like scenes and schedules.
6.2 Kontroll tal-Vuċi
Integrate your CNBINGO Smart Controller with Amazon Alexa or Google Home for voice commands.
- In the Smart Life app, navigate to 'Me' > 'More Services' > 'Alexa' or 'Google Assistant'.
- Follow the instructions to link your Smart Life account with your Alexa or Google Home account.
- Once linked, you can use voice commands such as: "Alexa, turn on the bedroom light" or "Hey Google, turn off the fan."

Image: A person using voice commands with Amazon Alexa and Google Home devices to control a light connected to the smart controller.
6.3 Skedar u Tajmers
Automate your devices by setting schedules, timers, or countdowns.
- In the Smart Life app, select your device and tap on 'Schedule' or 'Timer'.
- Issettja ħinijiet speċifiċi biex l-apparat jixgħel jew jitfi kuljum jew f'jiem magħżula.
- Use the countdown function for a one-time automatic turn-off after a set duration.
- Simulate occupancy during vacations by setting random on/off times.

Image: A smartphone displaying the Smart Life app's timing functions, including options for setting schedules and countdowns.
6.4 Initial Status Setting
You can configure the device's state after a power interruption.
- In the Smart Life app, go to the device settings.
- Under 'Restart status', choose one of the following options:
- FUQ: The device will turn on automatically after a power outage.
- MITFI: The device will remain off after a power outage.
- Maintain status before offline: The device will return to its last known state before the power outage.

Image: A screenshot from the Smart Life app showing the 'Restart status' options: 'ON', 'OFF', and 'Maintain status before offline'.
6.5 Lock tat-Tfal
The device offers a child lock feature to prevent accidental operation.
- In the Smart Life app, navigate to the device settings.
- Enable the 'Child Lock' option. When activated, the device will be locked if powered off or if the button is pressed 4 times in succession.

Image: A screenshot from the Smart Life app showing the 'Child Lock' setting, with a child's hand reaching for the device.
6.6 Modalità tad-Dawl Indikatur
You can adjust the behavior of the indicator light on the device.
- In the Smart Life app, go to the device settings.
- Under 'Light Mode', choose from options such as:
- Indicate switch on/off: The indicator signals the device's power status.
- Indicate switch location: When the light is off, the indicator can help locate the switch at night.
- Indicator LED off: Turn off the indicator light completely.

Image: A screenshot from the Smart Life app showing the 'Light Mode' settings for the device's indicator LED.
7. Manutenzjoni
- Żomm l-apparat nadif u ħieles mit-trab. Uża drapp niexef u artab għat-tindif.
- Tużax kimiċi ħarxa jew tindif li joborxu.
- Kun żgur li l-apparat ma jkunx espost għal umdità eċċessiva jew temperaturi estremi.
- Periodically check wiring connections for security.
8 Issolvi l-problemi
8.1 Kwistjonijiet Ġenerali
- L-apparat ma jirrispondix: Check if the main power is on. Ensure the device is properly wired and connected to Wi-Fi.
- Device works before placing cover, but not after: Turn off main power. Gently slide the glass cover into place. Wait 5-10 minutes, then restore power. Wait at least 3 minutes for the switch to reset before use.
8.2 Kwistjonijiet ta' Konnessjoni tal-Wi-Fi
- Ma tistax tikkonnettja mal-Wi-Fi:
- Ensure the switch is in rapid red flashing pairing state (press and hold for 5 seconds).
- Iċċekkja li l-password tal-Wi-Fi tiegħek hija korretta.
- Confirm your Wi-Fi signal is strong enough.
- Ensure your Wi-Fi network is 2.4GHz. If it's 5GHz, switch to a 2.4GHz network or configure your router to broadcast a 2.4GHz signal.
8.3 Kwistjonijiet ta' Kontroll tal-Vuċi
- Alexa/Google Home not finding the switch:
- Ensure the Smart Life app is installed and the device is added to it.
- Link your Smart Life account to Alexa/Google Home through their respective apps.
- Try discovering devices again in the Alexa/Google Home app.
8.4 Ir-Resetjar tas-Swiċċ
- To reset the switch, turn off the power supply to the device for approximately 10 minutes, then restore power. This will reset the switch.
9. Speċifikazzjonijiet
| Numru tal-Mudell | RSR02 |
| Brand | CNBINGO |
| Dimensjonijiet (L x W x H) | 5.5 x 3.8 x 2.5 ċm |
| Piż | 40 gramma |
| Materjal | Plastic (Fire-resistant PC) |
| Input Voltage | AC 90-250V, 50/60Hz |
| Max Load (Resistive) | 1500W |
| Max Load (LED) | 300W |
| Wi-Fi Standard | IEEE802.11 b/g/n (2.4GHz only) |
| Temperatura tax-Xogħol | -20°C sa 70°C |
| Konsum bla fili | ≤0.5W |
10. Garanzija u Appoġġ
CNBINGO offers a 5-year free warranty for this product. For technical support or warranty claims, please contact CNBINGO customer service through the platform where you purchased the product or refer to the contact information provided in your product packaging.