
1. Informazzjoni dwar is-Sigurtà
Please read and understand all safety information and operating instructions before using this multimeter. Failure to follow these instructions may result in electric shock, fire, or damage to the meter.
- Always ensure the test leads are properly connected and the function switch is set to the correct range before making any measurements.
- Tippruvax tkejjel il-voltages or currents exceeding the maximum rated values for this meter.
- Oqgħod attent ħafna meta taħdem ma' ċirkwiti ħajjin. Volum għolitagJista’ jkun perikoluż.
- Never open the meter casing unless specifically instructed for battery or fuse replacement. Ensure test leads are disconnected before opening.
- Ibdel il-batterija meta jidher l-indikatur ta' batterija baxxa biex tiżgura qari preċiż.
- Tużax il-miter jekk jidher li hu bil-ħsara jew jekk l-insulazzjoni fuq il-wajers tat-test tkun kompromessa.
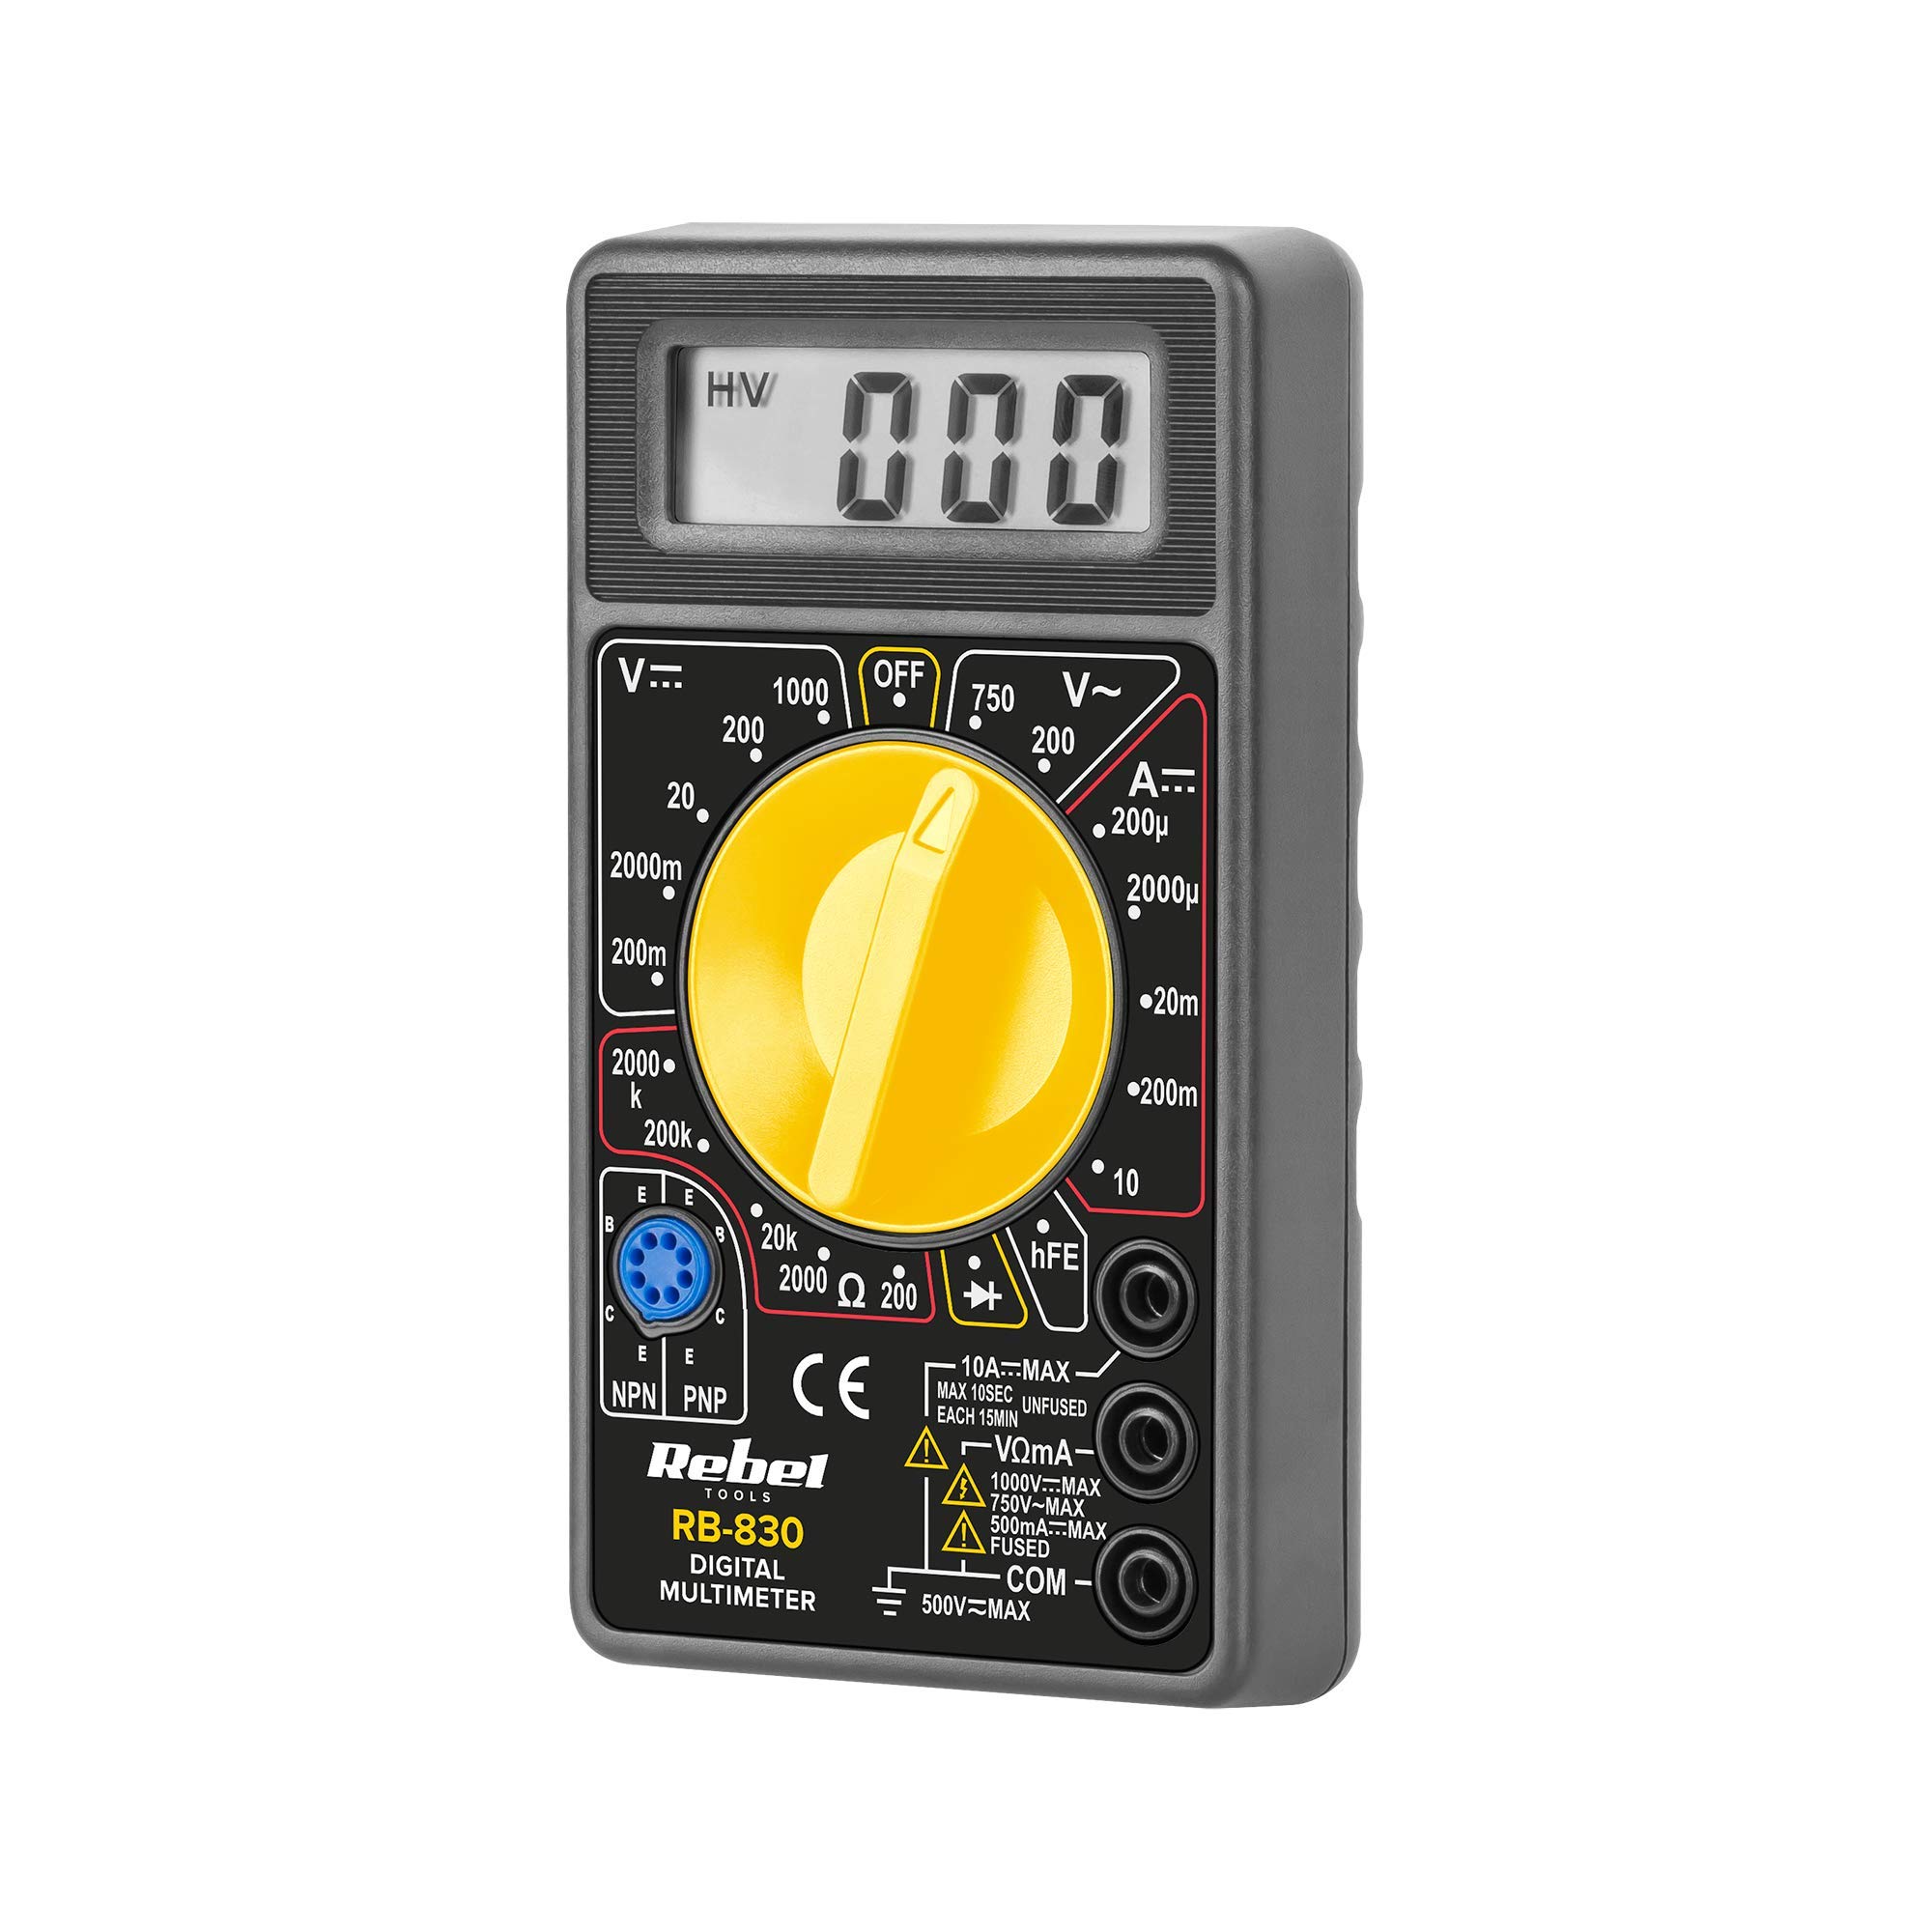
Figura 1: Wara view of the Rebel MIE-RB-830 Multimeter, showing the battery compartment cover and a warning label. The label advises removing test leads before opening the case to avoid electrical shock and to install fuses with correct amp/volt ratings. It also indicates the power supply is a 9V battery, type NEDA 1604 9V 6F22.
2. Prodott Aktarview
The Rebel MIE-RB-830 is a compact, battery-operated digital multimeter designed for measuring DC/AC voltage, DC current, resistance, diode, and transistor (hFE) values. It is suitable for general electrical testing and troubleshooting.
2.1. Komponenti
- Digital Multimeter Unit
- Wavel tat-Test (Aħmar u Iswed)
- Batterija ta' 9V (tista' tkun inkluża jew tinbiegħ separatament)
- Manwal għall-Utent (dan id-dokument)

Figura 2: The Rebel MIE-RB-830 Digital Multimeter shown with its accompanying red and black test leads. The multimeter features a large LCD display and a rotary function switch.

Figura 3: Close-up view of the red and black test leads. These leads are essential for connecting the multimeter to the circuit under test.
3. Setup
3.1. Installazzjoni tal-batterija
- Kun żgur li l-multimetru jkun MITFI u li l-wajers tat-test kollha jkunu skonnettjati.
- Locate the battery compartment cover on the back of the meter (refer to Figure 1).
- Ħoll il-vit(i) taż-żamma u neħħi l-għatu bir-reqqa.
- Insert a new 9V battery (NEDA 1604 or 6F22 type), observing the correct polarity (+ and -).
- Erġa’ poġġi l-għatu tal-kompartiment tal-batterija u waħħalha bil-vit(i).
3.2. Konnessjoni tal-wajers tat-test
- Qabbad il- aħmar test lead to the "VΩmA" input jack.
- Qabbad il- iswed test lead to the "COM" (common) input jack.
- For current measurements exceeding 200mA (up to 10A), connect the red test lead to the "10A" input jack.
4. Istruzzjonijiet Operattivi
4.1. Għażla tal-Funzjoni
Turn the rotary switch to the desired measurement function and range. Always start with a higher range if the approximate value is unknown to prevent overloading the meter.
4.2. Kejl tal-Volum DCtage (V–)
- Issettja s-swiċċ rotatorju għall-Volum DC mixtieqtage (V–) range (e.g., 20V, 200V).
- Qabbad il-wajer tat-test aħmar man-naħa pożittiva (+) taċ-ċirkwit u l-wajer tat-test iswed man-naħa negattiva (-).
- Aqra l-voltage valur fuq il-wiri LCD.
4.3. Kejl AC Voltage (V∼)
- Issettja s-swiċċ rotatorju għall-Volum AC mixtieqtage (V∼) range (e.g., 200V, 750V).
- Qabbad il-wajers tat-test mal-vultaġġ ACtagsors e.
- Aqra l-voltage valur fuq il-wiri LCD.
4.4. Kejl tal-Kurrent DC (A–)
Attenzjoni: To measure current, the meter must be connected in series with the circuit. Never connect the meter in parallel with a voltage source when in current mode, as this can damage the meter and the circuit.
- Set the rotary switch to the desired DC Current (A–) range (e.g., 20mA, 200mA, 10A).
- For currents up to 200mA, ensure the red lead is in the "VΩmA" jack. For currents up to 10A, move the red lead to the "10A" jack.
- Iftaħ iċ-ċirkwit fejn se titkejjel il-kurrent u qabbad il-miter f'serje.
- Aqra l-valur kurrenti fuq il-wiri LCD.
4.5. Kejl tar-Reżistenza (Ω)
Attenzjoni: Ensure the circuit or component under test is de-energized before measuring resistance.
- Set the rotary switch to the desired Resistance (Ω) range (e.g., 200Ω, 2kΩ, 200kΩ).
- Qabbad il-wajers tat-test mal-komponent jew iċ-ċirkwit li għandu jitkejjel.
- Aqra l-valur tar-reżistenza fuq id-displej LCD.
4.6. Diode Test (→|–)
- Set the rotary switch to the Diode Test (→|–) position.
- Qabbad il-wajer tat-test aħmar mal-anodu tad-dijodu u l-wajer tat-test iswed mal-katodu.
- Id-displej se juri l-volum 'il quddiemtagtnaqqis fl-e (tipikament 0.5V sa 0.8V għal dijodi tas-silikon).
- Dawwar il-wajers. Id-displej għandu juri "OL" (Open Loop) għal dijodu tajjeb.
4.7. Test tat-Tranżistor (hFE)
- Issettja l-iswiċċ li jdur fil-pożizzjoni hFE.
- Identifika jekk it-transistor huwiex NPN jew PNP.
- Insert the transistor's emitter, base, and collector leads into the corresponding sockets on the hFE test socket.
- Read the hFE (DC current gain) value on the display.
5. Manutenzjoni
5.1. Sostituzzjoni tal-batterija
Meta l-indikatur ta’ batterija baxxa jidher fuq id-displej, ibdel il-batterija ta’ 9V kif deskritt fit-Taqsima 3.1. L-użu ta’ batterija baxxa jista’ jwassal għal qari mhux preċiż.
5.2. Sostituzzjoni tal-fjus
If the current measurement function stops working, the fuse may need replacement. This operation should only be performed by qualified personnel.
- Kun żgur li l-multimetru jkun MITFI u li l-wajers tat-test kollha jkunu skonnettjati.
- Open the back casing of the meter (this may involve more screws than just the battery compartment).
- Locate the blown fuse and replace it with a fuse of the exact same type and rating (e.g., F200mA/250V for mA range, F10A/250V for 10A range). Refer to the internal markings or specifications for precise fuse ratings.
- Erġa' arma l-miter bir-reqqa, waqt li tiżgura li l-viti kollha jkunu ssikkati.
5.3. Tindif
Imsaħ il-miter b'reklamaramp cloth and mild detergent. Do not use abrasives or solvents. Keep the meter dry.
6 Issolvi l-problemi
| Problema | Kawża Possibbli | Soluzzjoni |
|---|---|---|
| L-ebda wiri jew wiri dgħajjef | Batterija baxxa jew mejta | Ibdel il-batterija ta '9V. |
| Qari mhux korrett | Low battery; Incorrect range selection; Poor test lead connection | Replace battery; Select appropriate range; Ensure leads are firmly connected. |
| Il-kejl tal-kurrent mhux qed jaħdem | Blown fuse; Incorrect lead connection for current | Replace fuse (see Section 5.2); Ensure red lead is in "VΩmA" or "10A" jack as appropriate. |
| "OL" (Tagħbija żejda) muri | Measured value exceeds selected range; Open circuit (for resistance/continuity) | Agħżel firxa ogħla; Iċċekkja ċ-ċirkwit għal ksur. |
7. Speċifikazzjonijiet
| Funzjoni tal-Kejl | Firxa | Eżattezza |
|---|---|---|
| DC Voltage (V–) | 200mV, 2V, 20V, 200V, 1000V | ±(0.5% + 2 ċifri) |
| AC Voltage (V∼) | 200V, 750V | ±(1.2% + 10 ċifri) |
| DC Current (A–) | 200µA, 2mA, 20mA, 200mA, 10A | ±(1.0% + 2 ċifri) |
| Reżistenza (Ω) | 200Ω, 2kΩ, 20kΩ, 200kΩ, 2MΩ | ±(0.8% + 2 ċifri) |
| Test tad-Diode | Iva | Quddiem voltagqatra e |
| Test tat-Tranżistor (hFE) | Iva | hFE value |
| Provvista tal-Enerġija | 9V Battery (NEDA 1604 or 6F22) | |
| Wiri | 3½ Digit LCD, Max. 1999 | |
| Dimensjonijiet | Appross. 13.5 x 10 x 4 cm | |
| Piż | Approx. 107 grams (without battery) | |
| Temperatura operattiva | 0°C sa 40°C (32°F sa 104°F) | |
| Temperatura tal-Ħażna | -10°C sa 50°C (14°F sa 122°F) | |
| Standards tas-Sigurtà | CE, RoHS |
8. Garanzija u Appoġġ
This Rebel MIE-RB-830 Digital Multimeter is covered by a standard manufacturer's warranty against defects in materials and workmanship. Please refer to the warranty card included with your purchase or contact your retailer for specific warranty terms and conditions.
For technical support or service inquiries, please contact the point of purchase or visit the official Rebel websit għal informazzjoni ta' kuntatt.