
1. Introduzzjoni
This manual provides essential information for the safe and efficient operation of your ASUS ROG Strix XG27WQ gaming monitor. Please read this manual thoroughly before using the product to ensure proper setup, usage, and maintenance. Retain this manual for future reference.
The ASUS ROG Strix XG27WQ is a 27-inch WQHD (2560 x 1440) curved gaming monitor designed for an immersive visual experience. It features a native 165Hz refresh rate, 1ms MPRT response time, ASUS Extreme Low Motion Blur (ELMB) technology, FreeSync Premium Pro, and DisplayHDR 400 support.
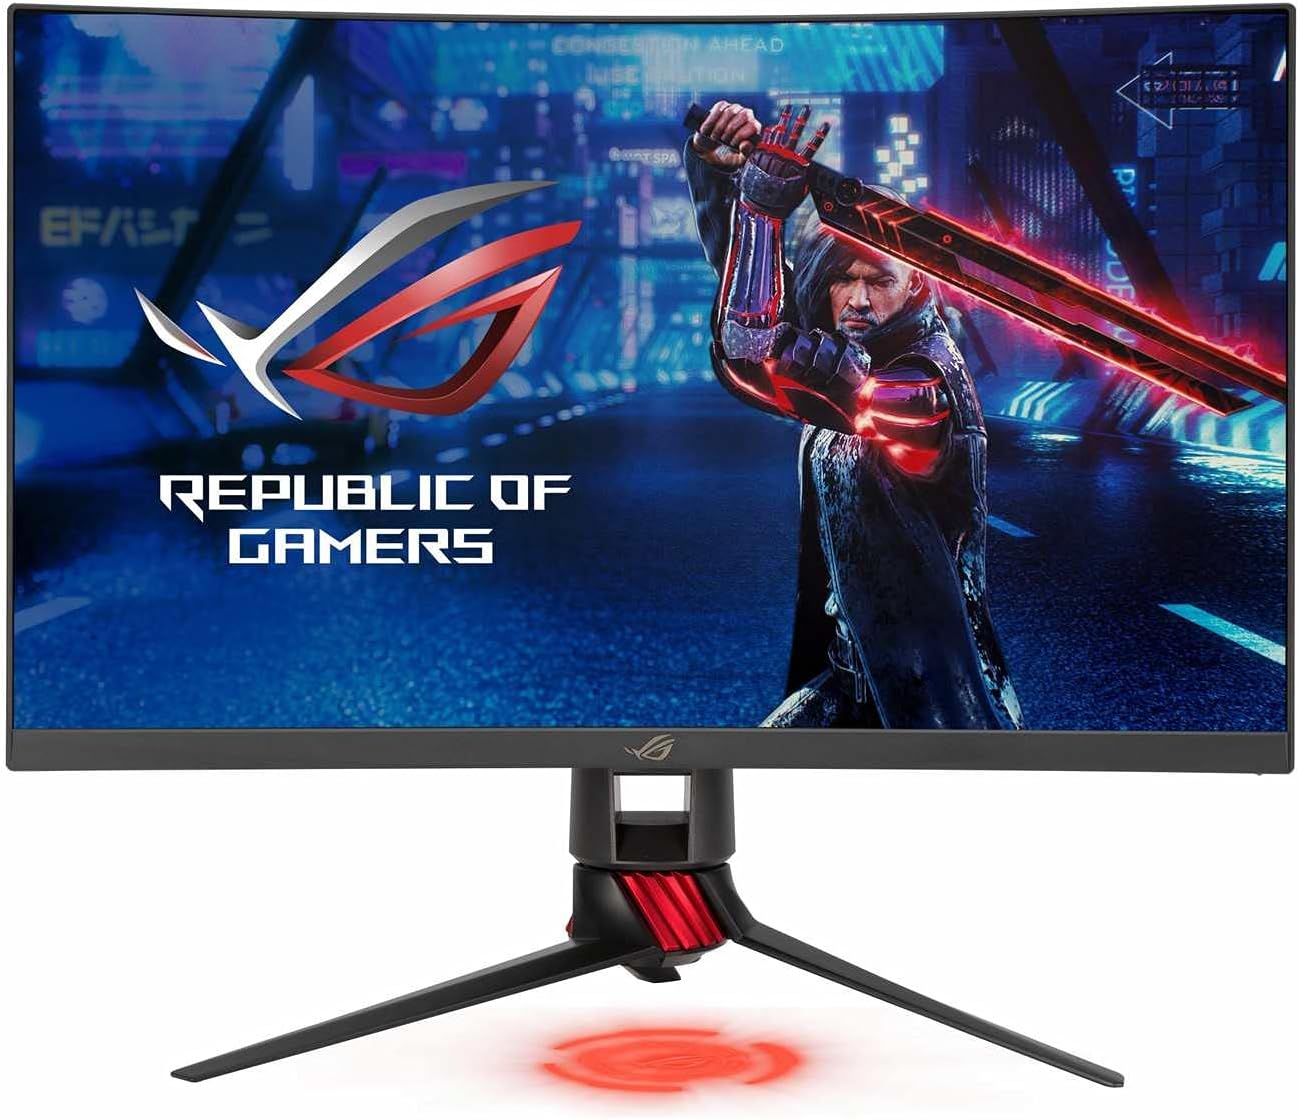
Figura 1: Quddiem view of the ASUS ROG Strix XG27WQ gaming monitor, showcasing its curved display and stand.
2. Informazzjoni dwar is-Sigurtà
- Sors tal-Enerġija: Use only the power adapter and cable supplied with your monitor. Ensure the power outlet is properly grounded.
- Ventilazzjoni: Timblokkax il-fetħiet tal-ventilazzjoni. Ħalli biżżejjed spazju madwar il-monitor għal fluss tal-arja xieraq biex tevita li jisħon iżżejjed.
- Likwidu u Umdità: Keep the monitor away from water, rain, or any wet environments. Do not spill liquids onto the monitor.
- Tindif: Skonnettja l-kejbil tal-enerġija qabel it-tindif. Uża drapp artab u niexef. Evita li tuża prodotti tat-tindif likwidi jew aerosol.
- Pjazzament: Poġġi l-monitor fuq wiċċ stabbli u ċatt. Evita li tpoġġih fid-dawl tax-xemx dirett jew ħdejn sorsi ta’ sħana.
- Servizzi: Tippruvax tagħmel manutenzjoni tal-monitor int stess. Irreferi għal kull manutenzjoni għand persunal tas-servizz kwalifikat.
3. Kontenut tal-Pakkett
Verify that your package contains the following items. If any item is missing or damaged, contact your retailer.
- ASUS ROG Strix XG27WQ Monitor
- Monitor Stand Base
- Għonq tal-Stand tal-Monitor
- Adapter tal-Enerġija
- Korda tal-Enerġija
- DisplayPort Cable
- Cable HDMI
- USB 3.0 Upstream Cable
- Gwida Quick Start
- Karta ta' Garanzija
4. Setup
4.1 L-Immuntar tal-Istand tal-Monitor
- Poġġi l-pannell tal-monitor wiċċu 'l isfel fuq wiċċ artab u nadif biex tevita l-grif.
- Attach the stand neck to the back of the monitor panel. Ensure it clicks securely into place.
- Attach the stand base to the stand neck. Tighten the captive screw at the bottom of the base to secure it.
4.2 Kejbils tal-Konnessjoni
Qabbad il-kejbils meħtieġa mal-portijiet korrispondenti fuq il-monitor u l-kompjuter tiegħek jew apparati oħra.

Figura 2: Wara view of the monitor, illustrating the location of various input ports and the stand attachment point.
- Qawwa: Connect the power adapter to the monitor's DC-in port, then plug the power cord into a power outlet.
- DisplayPort: For optimal performance and to utilize the 165Hz refresh rate, connect the DisplayPort cable from your computer's graphics card to the monitor's DisplayPort input.
- HDMI: Connect an HDMI cable from your computer or console to one of the monitor's HDMI inputs. Note that HDMI 2.0 supports up to 144Hz at WQHD resolution.
- USB Upstream: Connect the USB 3.0 upstream cable from your computer to the monitor's USB upstream port to enable the monitor's USB 3.0 downstream ports.
- USB Downstream: Connect USB devices (e.g., keyboard, mouse) to the monitor's USB 3.0 downstream ports.
- Awdjo Jack: Qabbad headphones jew kelliema esterni mal-jack tal-awdjo ta' 3.5mm.
4.3 Tixgħel Inizjali
After connecting all cables, press the power button located on the back of the monitor to turn it on. The monitor will automatically detect the active input source.
5. Istruzzjonijiet Operattivi
5.1 Power On/Off
Press the power button on the rear of the monitor to turn it on or off.
5.2 Navigating the OSD Menu
The monitor features a 5-way joystick and several hotkeys on the rear for navigating the On-Screen Display (OSD) menu and quick access to functions.
- Joysticks: Push the joystick up, down, left, or right to navigate menu options. Press the joystick in to confirm a selection.
- Hotkeys: Dedicated buttons provide shortcuts to features like GamePlus, GameVisual, and input selection.
5.3 Issettjar Ewlenin tal-OSD
- Logħob: Adjust settings such as OverDrive, FreeSync Premium Pro, ELMB, and refresh rate.
- Immaġni: Control brightness, contrast, sharpness, and aspect ratio.
- Kulur: Fine-tune color temperature, saturation, and gamma.
- Agħżel l-Input: Ibdel manwalment bejn l-inputs DisplayPort u HDMI.
- Setup tas-Sistema: Access general monitor settings like OSD language, OSD timeout, and LED indicators.
6. Manutenzjoni
6.1 Tindif tal-Monitor
- Dejjem itfi l-monitor u aqla’ l-korda tal-enerġija qabel ma tnaddaf.
- Uża drapp artab u mingħajr suf biex timsaħ bil-mod l-iskrin u l-uċuħ ta' barra.
- Għal marki iebsa, ħassar bil-modampen the cloth with water. Avoid using alcohol-based cleaners, ammonia, or abrasive materials, as these can damage the screen coating.
6.2 Ħażna
If storing the monitor for an extended period, disconnect all cables, clean it thoroughly, and pack it in its original packaging if possible. Store in a cool, dry place.
7 Issolvi l-problemi
If you encounter issues with your monitor, refer to the following troubleshooting guide. If the problem persists, contact ASUS customer support.
| Problema | Soluzzjoni Possibbli |
|---|---|
| Ebda qawwa | Ensure the power cord is securely connected to the monitor and a working power outlet. Check the power adapter connection. |
| L-ebda sinjal | Verify that the video cable (DisplayPort or HDMI) is securely connected to both the monitor and your computer. Ensure the correct input source is selected in the OSD menu. Check if your computer is powered on and not in sleep mode. |
| L-immaġni hija skura wisq jew qawwi wisq | Adjust the brightness and contrast settings in the OSD menu (Image section). |
| L-immaġni hija mċajpra jew distorta | Check the display resolution settings on your computer to ensure they match the monitor's native resolution (2560x1440). Adjust sharpness in the OSD menu. |
| Teptip tal-iskrin | Ensure your graphics card drivers are up to date. Check the refresh rate setting on your computer and in the OSD menu. Try a different video cable. |
| No audio from headphones/speakers | Ensure the audio cable is properly connected. Check the volume settings on the monitor and your computer. |
8. Speċifikazzjonijiet
The following table outlines the technical specifications for the ASUS ROG Strix XG27WQ monitor.

Figura 3: Ġenb view of the monitor, indicating its physical dimensions.
| Karatteristika | Speċifikazzjoni |
|---|---|
| Mudell | XG27WQ |
| Daqs tal-Iskrin | 27 Pulzier |
| Tip ta' Panel | VA |
| Riżoluzzjoni | 2560 x 1440 (WQHD) |
| Proporzjon ta' l-aspett | 16:9 |
| Kurvatura | 1500R |
| Riffriskar Rata | 165 Hz (Native) |
| Ħin ta' Rispons | 1ms (MPRT) |
| Appoġġ HDR | DisplayHDR 400 |
| Sinkronizzazzjoni Adattiva | FreeSync Premium Pro |
| Luminożità | 400 cd/m² (Tipiku) |
| Proporzjon ta' Kuntrast | 3000:1 (Tipiku) |
| Wiri Kuluri | 16.7 Miljun |
| Portijiet tal-vidjo | 1 x DisplayPort 1.2, 2 x HDMI 2.0 |
| Portijiet USB | 3 x USB 3.0 (1 Upstream, 2 Downstream) |
| Portijiet Awdjo | Jack tal-Earphone 3.5mm |
| Konsum tal-Enerġija | 10W (Tipiku) |
| Dimensjonijiet (bl-istand) | Appross. 75.03 x 53.04 x 26 cm |
| Piż (bl-istand) | 6.2 kg |
9. Garanzija u Appoġġ
This ASUS product comes with a limited warranty. The specific terms and duration of the warranty may vary by region and local laws. Please refer to the warranty card included in your package for detailed information.
For technical support, troubleshooting assistance, or service inquiries, please visit the official ASUS support website or contact your local ASUS customer service center. You may need your product's serial number and proof of purchase when seeking support.
Appoġġ ASUS Websit: https://www.asus.com/support/