Shure SLXD14/98H
Shure SLXD14/98H Digital Wireless Microphone System User Manual
Model: SLXD14/98H | Brand: Shure
1. Introduzzjoni
The Shure SLXD14/98H Digital Wireless Microphone System provides transparent, 24-bit digital audio and reliable RF performance. This system is suitable for various applications, from conferences to live performances. It operates within the G58 Band (470-514 MHz) and offers easy setup with optional rechargeability accessories.
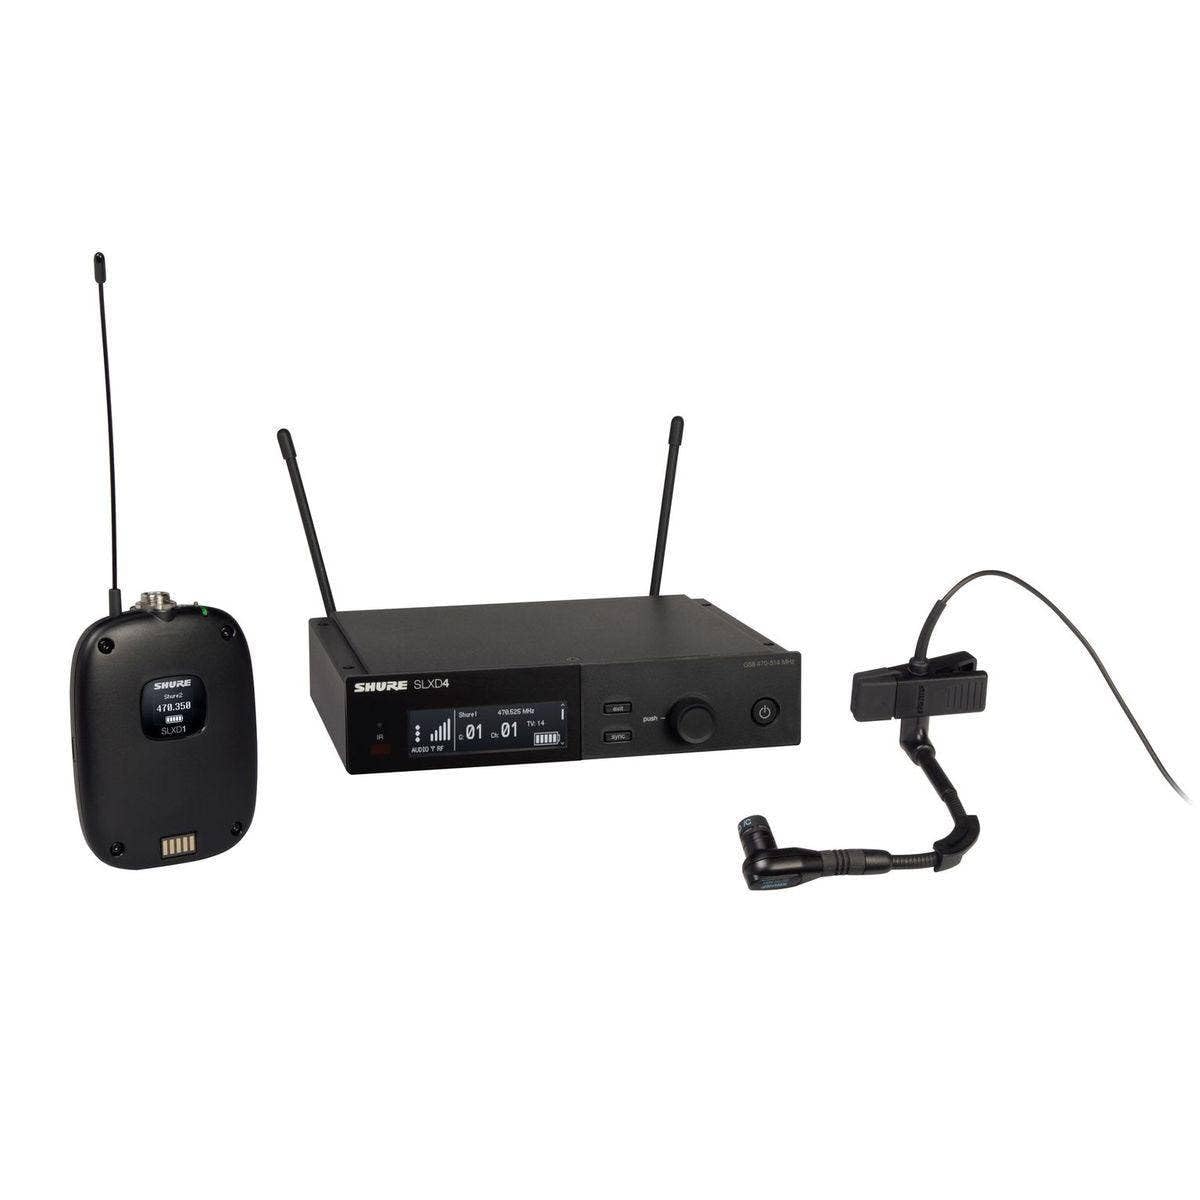
Image: Shure SLXD14/98H Digital Wireless Microphone System, showing the SLXD4 receiver and SLXD1 bodypack transmitter.
Prodott Overview Video
Video: Shure SLX-D Digital Wireless Product Overview. This video highlights the system's key features, including crystal clear digital audio, RF stability, and ease of use.
2. X'hemm fil-Kaxxa
Your Shure SLXD14/98H Digital Wireless Microphone System package includes the following components:
- 1 x Beta 98H/C miniature instrument microphone
- 1 x SLXD1 bodypack transmitter
- 1 x SLXD4 single-channel receiver
- Aċċessorji tal-antenna u tal-immuntar fuq rack
- 1 x Zippered bag
- 2 x batteriji AA
3. Setup
3.1 Setup tal-Hardware
Follow these steps to connect your system hardware:
- Qabbad l-Antenni u l-Enerġija: Securely connect the antennas to the SLXD4 receiver. Then, connect the power supply to the receiver and a power outlet.
- Qabbad mas-Sistema tal-Ħoss: Connect the receiver's audio output to your sound system (mixer, amplifier, or audio recorder) using an XLR or 1/4-inch cable.
- Installa Batteriji: Open the battery compartment on the SLXD1 bodypack transmitter. Insert the two included 1.5V AA batteries, ensuring correct polarity. For optional extended use, consider the Shure SB903 Lithium-ion rechargeable battery.
- Riċevituri Multipli: If using two receivers, connect them with an Ethernet cable. For three or more receivers, use a network switch.
Video: Shure SLX-D How To: Set Up and Use. This video demonstrates the physical hardware setup, including antenna and power connections, and battery installation for the transmitter.
3.2 Setup ta' Frekwenza Ggwidata
To ensure optimal performance, perform a guided frequency setup:
- Turn on the SLXD4 receiver. Ensure all transmitters are turned OFF.
- Fuq ir-riċevitur, uża l-pum tal-kontroll biex tinnaviga lejn Frequency Setup > Guided Frequency Setup > Initialize My System.
- Follow the on-screen prompts. The receiver will scan for the best group of channels.
- Once a frequency is assigned, proceed to sync the transmitter.
3.3 Syncing the Transmitter and Receiver
After setting up the frequency, sync your transmitter with the receiver:
- Turn on the SLXD1 bodypack transmitter.
- Fuq ir-riċevitur SLXD4, agħfas il-buttuna Sinkronizzazzjoni button. The IR port will illuminate.
- Align the IR ports on the transmitter and receiver (typically within 15 cm / 6 inches) and hold until the sync is confirmed on the receiver screen.
- Once synced, your system is ready for use.
3.4 Adding an Additional Receiver
If you are expanding your system with more receivers, follow these steps:
- Connect the new receiver to your network (via Ethernet cable or network switch if using three or more receivers).
- Turn on the new receiver.
- On the new receiver, navigate to Frequency Setup > Guided Frequency Setup > Add Receiver to My System.
- Ensure all existing synced transmitters are ON to avoid interference during the scan.
- Follow the on-screen prompts to scan and assign a frequency.
- Confirm the new receiver is set to the same group number as other receivers in your system.
- Select 'Apply' to save the settings.
- Sync the new transmitter with the new receiver as described in Section 3.3.
Video: Shure SLX-D How To: Add a Receiver. This video guides you through adding an additional receiver to your SLX-D system.
4. Joperaw
4.1 Locking and Unlocking the Receiver
To prevent accidental changes to settings, you can lock the receiver controls:
- On the SLXD4 receiver, use the control knob to navigate to Advanced Settings > Device Lock.
- Push the knob to edit the setting. You can choose between:
- Lock Menu: Jippermetti viewing menu options but prevents changes.
- Lock Menu & Power: Prevents menu changes and powering off the device.
- Push the knob again to save your selection.
- To unlock, return to the Serratura tal-Apparat menu u agħżel Nisfruttaw.
4.2 Activating/Disabling Auto-Lock (Handheld & Bodypack)
Transmitters can also be set to auto-lock:
- On the handheld or bodypack transmitter, press the Menu button to navigate to the Auto Lock skrin.
- Agħfas Daħħal, imbagħad Menu biex tibdel l-issettjar għal On or Mitfi.
- Agħfas Daħħal biex issalva l-issettjar.
4.3 Setting Lock Type (Handheld & Bodypack)
You can choose the type of lock for your transmitter:
- On the transmitter, press the Menu button to navigate to the Tip Lock skrin.
- Agħfas Daħħal, imbagħad Menu biex tagħżel bejn:
- Menu Only: Jippermetti viewing menu options but prevents changes.
- Menu & Power: Prevents menu changes and powering off the device.
- Agħfas Daħħal biex issalva l-għażla tiegħek.
Video: Shure SLX-D How To: Lock and Unlock. This video demonstrates how to lock and unlock both the receiver and transmitters, and how to configure auto-lock settings.
5. Manutenzjoni
5.1 Ħajja tal-batterija
The SLXD1 bodypack transmitter provides up to 8 hours of operation using two AA batteries. For enhanced monitoring and extended use, consider upgrading to the optional Shure SB903 Lithium-ion rechargeable battery. This rechargeable battery allows you to monitor battery charge status in hours and minutes, as well as battery life and health statistics directly on the device.
6 Issolvi l-problemi
If you encounter issues with your Shure SLXD14/98H system, consider the following:
- Ebda Awdjo: Check all cable connections, ensure the transmitter is powered on and synced to the receiver, and verify the receiver's audio output is connected to your sound system.
- Interferenza/Twaqqigħ fil-Veloċità: Perform a new Guided Frequency Setup (Section 3.2) to find a clear frequency. Ensure transmitters are not too far from the receiver and that there are no obstructions.
- Batterija Baxxa: Replace AA batteries or recharge the SB903 Lithium-ion battery.
- Kontrolli Mblukkati: Refer to Section 4.1 and 4.2 to unlock the receiver or transmitter controls.
For detailed troubleshooting guides and frequency band compatibility in your area, please refer to the official Shure websit.
7. Speċifikazzjonijiet
| Karatteristika | Speċifikazzjoni |
|---|---|
| Brand | Shure |
| Isem tal-Mudell | SLXD14/98H |
| Teknoloġija tal-Konnettività | Digital Predictive Switching Diversity |
| Tip ta' Konnettur | 4-Pin mini connector (TA4F) and 1/4 inch (6.35 mm) |
| Karatteristika Speċjali | Clip |
| Apparati Kompatibbli | Kelliem, Amplifier, Audio Recorder |
| Kulur | Iswed |
| Mudell Polari | Unidirezzjonali |
| Fattur tal-Forma tal-Mikrofonu | Sistema tal-Mikrofonu |
| Sors tal-Enerġija | Mħaddma bil-batterija |
| Numru ta' Batteriji | 2 batteriji AA meħtieġa (inklużi) |
| Sinjal-mal-ħoss Ratio | 120 dB |
| Numru ta 'Kanali | 1 |
| Rispons ta' Frekwenza | 20 KHz |
| Ħoss li jinstema' | 120 Deċibel |
| Materjal tal-għeluq | Stainless Steel |
| Piż tal-oġġett | 7.1 Liri |
| Dimensjonijiet tal-oġġett | 17.72 x 13.78 x 4.33 pulzieri |
| Manifattur | Shure |
| UPC | 042406562522 |
8. Garanzija u Appoġġ
This Shure SLXD14/98H Digital Wireless Microphone System comes with a Garanzija ta' 2 snin mill-manifattur.
For technical support, warranty claims, or additional product information, please visit the official Shure webis-sit jew ikkuntattja lis-servizz tal-klijenti ta' Shure direttament.
Ask a question about this manual
Ask about setup, troubleshooting, compatibility, parts, safety, or missing instructions. Manuals+ will review the question and use this page’s manual context to help answer it.