
1. Prodott Aktarview
The rockspace AC750 WiFi Range Extender is designed to expand your existing WiFi network coverage, eliminating dead zones and providing stable, high-speed internet access throughout your home or office. Operating on both 2.4 GHz and 5 GHz frequency bands, it offers a combined speed of up to 733Mbps, enhancing streaming and online gaming experiences. It is universally compatible with 802.11n/g/b/ac standard routers and gateways and includes an Ethernet port for wired connections or Access Point (AP) mode functionality.
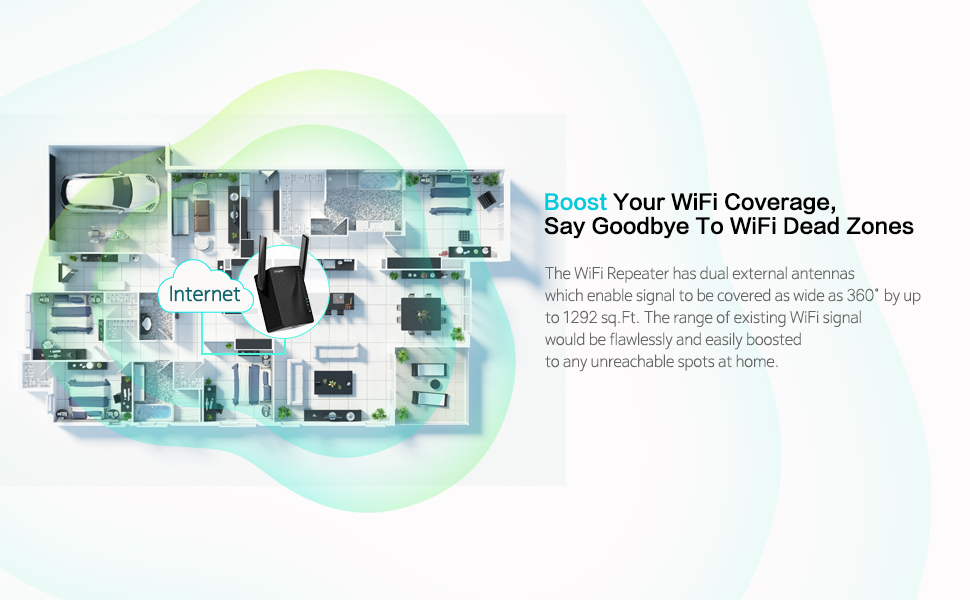
Diagram illustrating the rockspace AC750 WiFi Range Extender boosting WiFi coverage across a home.
2. Kontenut tal-Pakkett
- rockspace AC750 WiFi Range Extender Unit
- Ethernet Cable (for Access Point mode or wired connection)
- Gwida ta 'Installazzjoni Mgħaġġla
3. Istruzzjonijiet ta' Setup
There are two primary methods to set up your rockspace AC750 WiFi Range Extender: via a web browser or using the WPS button.
3.1. Web-based Setup Method
- Ipplaggja l-Extender: Plug the rockspace AC750 WiFi Range Extender into a power outlet near your main router. Wait for the Power (PWR) indicator light to turn solid blue.
- Connect to the Extender's WiFi: On your smartphone or computer, turn off mobile data (if applicable) and connect to the WiFi network named rockspace_EXT. This is the extender's default network.
- Access the Setup Page: Iftaħ a web browser (e.g., Safari, Chrome) and type re.rockspace.local fil-bar tal-indirizz.
- Create a Login Password: Follow the on-screen prompts to create a new login password for the extender's management page. This password is for accessing the extender's settings, not your WiFi network.
- Agħżel in-Netwerk WiFi tiegħek: The extender will scan for available WiFi networks. Select your existing home WiFi network (the one you want to extend).
- Enter Your WiFi Password: Enter the password for your existing home WiFi network.
- Confirm and Extend: The extender will now connect to your router and create extended networks. The extended networks will typically have '_EXT' or '_5GEXT' appended to your original WiFi name.

Quddiem view of the rockspace AC750 WiFi Range Extender.
Ġenb view of the rockspace AC750 WiFi Range Extender, highlighting its compact design.
3.2. WPS (Wi-Fi Protected Setup) Method
The WPS method offers a quick way to set up the extender if your router supports it.
- Ipplaggja l-Extender: Plug the rockspace AC750 WiFi Range Extender into a power outlet near your main router. Wait for the Power (PWR) indicator light to turn solid blue.
- Agħfas WPS fuq l-Estensur: Press the WPS button on the rockspace AC750 WiFi Range Extender. The WPS indicator light will start blinking.
- Agħfas WPS fuq ir-Router: Within two minutes, press the WPS button on your main WiFi router.
- Konferma tal-Konnessjoni: Once connected, the WPS indicator and Signal indicator on the extender will turn solid blue. This indicates a successful connection.

The rockspace AC750 WiFi Range Extender with its signal indicator lights.
3.3. Gwida bil-Vidjo tas-Setup
For a visual walkthrough of the setup process, please refer to the official setup video:
Official setup video for the rockspace 750 WiFi Range Extender, demonstrating connection methods.
4. Istruzzjonijiet Operattivi
After successful setup, the rockspace AC750 WiFi Range Extender will broadcast extended WiFi signals. You can connect your devices to these new networks for improved coverage and speed.
4.1. Dual-Band Operation
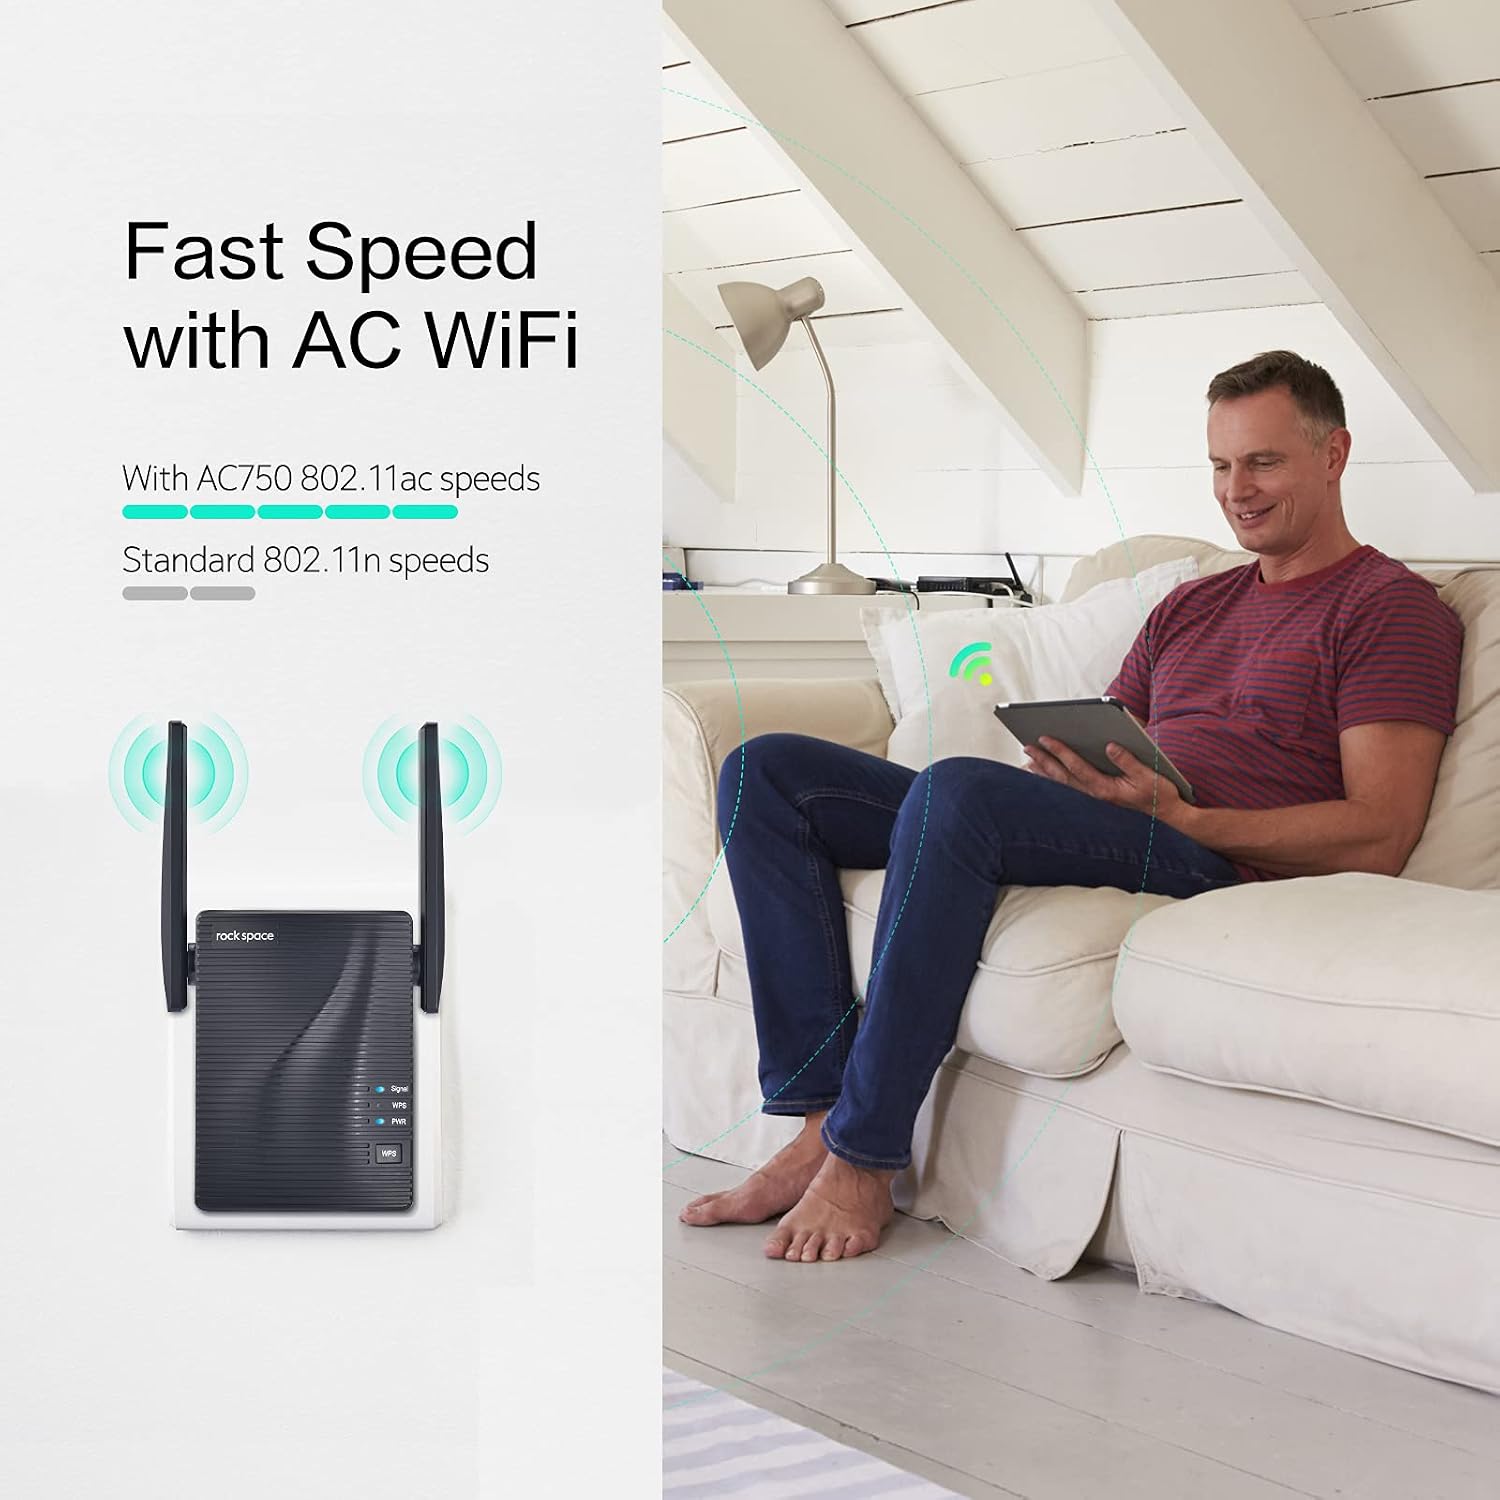
- The extender supports both 2.4 GHz and 5 GHz bands. The 2.4 GHz band offers wider coverage, while the 5 GHz band provides faster speeds for devices closer to the extender.
- Your devices will automatically connect to the appropriate extended network based on their capabilities and signal strength.
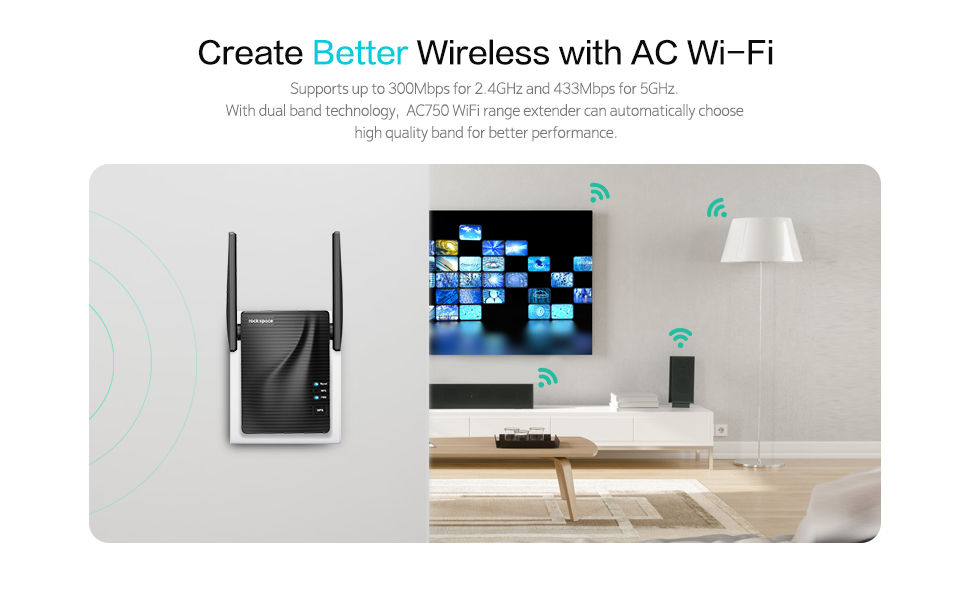
Illustration showing the speed benefits of AC WiFi compared to older standards, with the rockspace AC750 WiFi Range Extender.
4.2. Modalità tal-Punt ta' Aċċess (AP)
- The Ethernet port on the extender allows it to function as a wireless access point.
- Connect an Ethernet cable from your router to the extender's Ethernet port. The extender will then create a new WiFi network, converting your wired connection into a wireless one.

Close-up of the rockspace AC750 WiFi Range Extender showing the Ethernet port.
4.3. Indikatur tas-Sinjal
- The smart signal indicator on the extender helps you determine the connection status and optimal placement.
- A dawl blu indicates a strong signal from your router, suggesting a good location for the extender.
- Other colors (e.g., red or orange, if applicable) would indicate a weak signal, suggesting the extender is too far from the router.

The rockspace AC750 WiFi Range Extender in a home setting, extending WiFi coverage to multiple devices.
5. Optimal Placement for the Extender
Proper placement of your extender is crucial for maximizing WiFi coverage and performance. The ideal location is halfway between your main router and the WiFi dead zone you wish to cover.
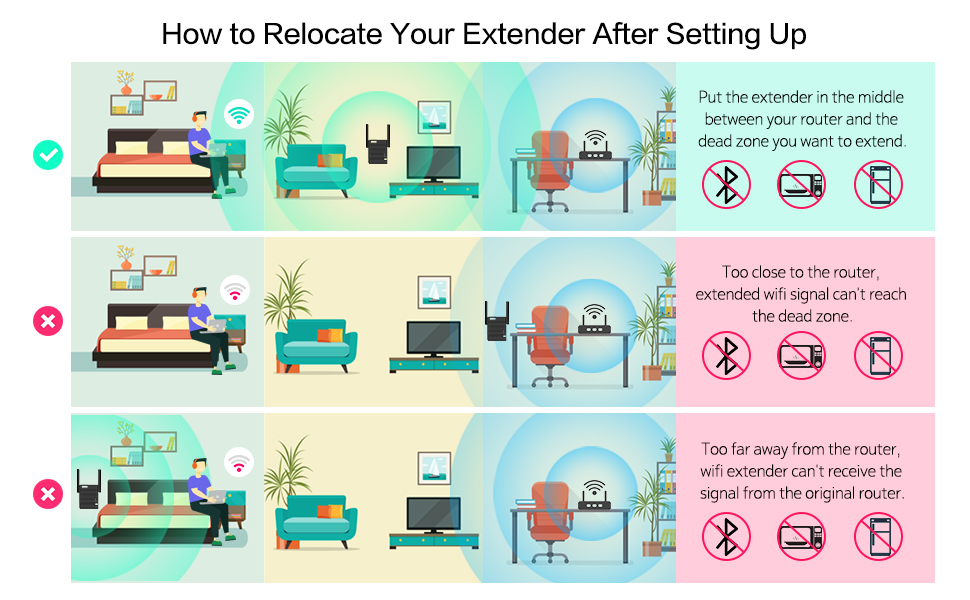
Visual guide on optimal placement for the rockspace AC750 WiFi Range Extender to maximize signal extension.
- Poġġiment korrett: Place the extender in a location where its signal indicator shows a strong connection (blue light) to your main router, ensuring it can effectively reach the areas with weak or no signal.
- Avoid Too Close: If the extender is too close to the router, the extended signal may not reach the desired dead zones.
- Avoid Too Far: If the extender is too far from the router, it will receive a weak signal, resulting in poor extended WiFi performance.
- Evita l-Interferenza: Keep the extender away from large electrical appliances (like microwaves, refrigerators) and Bluetooth devices, as these can cause signal interference.
6 Issolvi l-problemi
If you encounter issues with your rockspace AC750 WiFi Range Extender, consider the following:
6.1. Weak or Unstable Signal
- Irriloka l-Estensur: Ensure the extender is placed optimally, as described in Section 5. Use the signal indicator to find the best spot.
- Minimizza l-Interferenza: Move the extender away from other electronic devices that might cause interference. WiFi signals can be affected by physical obstructions like walls and metal objects, as well as electromagnetic waves from appliances.
- Iċċekkja s-Sinjal tar-Router: Ensure your main router is providing a strong and stable signal.
Understanding factors that affect WiFi signal strength can help in troubleshooting:
Video explaining common causes of weak WiFi signals, including distance and various types of interference.
6.2. Cannot Access Setup Page
- Ivverifika l-Konnessjoni: Ensure your device is connected to the extender's default WiFi network (rockspace_EXT).
- Iċċekkja URL: Double-check that you have typed re.rockspace.local correctly in the browser's address bar.
- Neħħi l-Cache tal-Browser: Ipprova neħħi l-cache tal-browser tiegħek jew uża browser ieħor.
- Restart Extender: Unplug and replug the extender to restart it.
6.3. Resetting the Extender to Factory Defaults
If other troubleshooting steps fail, you can reset the extender to its factory default settings. This will erase all custom configurations.
- Qawwa Mixgħul: Plug the extender into a power outlet and wait for the indicator lights to turn on.
- Locate Reset Button: Use a needle-shaped object (like a paperclip or toothpick) to press and hold the 'RESET' button on the extender.
- Żomm u Rilaxx: Continue holding the button for approximately 8-10 seconds until all indicator lights blink. Release the button when the PWR indicator light flashes, indicating a successful factory reset.
- Ikkonfigura mill-ġdid: After resetting, the extender will return to its default settings, and you will need to reconfigure it using either the web-based or WPS setup method.
7. Manutenzjoni
To ensure optimal performance and longevity of your rockspace AC750 WiFi Range Extender, follow these maintenance guidelines:
- Żomm Nadif: Regularly wipe the exterior of the extender with a soft, dry cloth. Avoid using liquid cleaners or aerosols.
- Żgura Ventilazzjoni: Do not block the ventilation holes on the extender. Ensure it is placed in a well-ventilated area to prevent overheating.
- Evita Kundizzjonijiet Estremi: Tesponix l-estensur għal temperaturi estremi, umdità, jew dawl tax-xemx dirett.
- Aġġornamenti tal-Firmware: Periodically check the official rockspace webżur is-sit għal kwalunkwe aġġornament tal-firmware disponibbli. L-aġġornament tal-firmware jista' jtejjeb il-prestazzjoni, iżid karatteristiċi ġodda, u jtejjeb is-sigurtà.
8. Speċifikazzjonijiet
| Numru tal-Mudell | AC750 |
| Komunikazzjoni mingħajr fili Standard | 802.11a/b/g/n/ac |
| Rata ta' Trasferiment tad-Data | Up to 750 Mbps (Combined) |
| Klassi ta' Banda ta' Frekwenza | Doppju Banda (2.4 GHz u 5 GHz) |
| Karatteristika Speċjali | Modalità ta 'Punt ta' Aċċess |
| Piż tal-oġġett | 0.01 uqija |
| Dimensjonijiet tal-Pakkett | 5.79 x 4.65 x 4.29 pulzieri |
9. Informazzjoni dwar Garanzija
For detailed warranty information, please refer to the warranty card included with your product or visit the official rockspace websit. Żomm l-irċevuta tax-xiri tiegħek bħala prova tax-xiri għal talbiet ta' garanzija.
10. Appoġġ
If you require further assistance or have questions not covered in this manual, please contact rockspace customer support through their official website or the contact information provided in your product packaging. Online resources, FAQs, and troubleshooting guides may also be available on the rockspace support page.