1. Introduzzjoni
This manual provides essential information for the safe and efficient operation of your Neo Electric High-Pressure Washer. Please read these instructions carefully before use and retain them for future reference. This high-pressure washer is designed for cleaning various outdoor surfaces such as patios, driveways, vehicles, and garden equipment.
2. Informazzjoni dwar is-Sigurtà
WARNING: Always follow basic safety precautions when using electrical appliances to reduce the risk of fire, electric shock, and personal injury.
- Sigurtà Elettrika: Żgura li l-provvista tal-enerġija taqbel mal-voltage specified on the product label. Always use a properly grounded outlet. Do not operate the pressure washer with a damaged cord or plug. Keep all connections dry and off the ground.
- Pressjoni tal-Ilma: The high-pressure jet can be dangerous if misused. Never direct the water jet at people, pets, electrical equipment, or the unit itself.
- Tagħmir Protettiv Personali: Always wear appropriate eye protection (safety glasses) and protective clothing when operating the pressure washer.
- Stabbiltà: Operate the pressure washer on a stable, level surface.
- Tfal u Pets: Żomm it-tfal u l-annimali domestiċi 'l bogħod miż-żona tal-operat.
- Kimiċi: Use only detergents recommended for pressure washers. Follow detergent manufacturer's instructions for use and disposal.
- Qabel l-Użu: Inspect the unit, hose, and accessories for any damage before each use. Do not use if any part is damaged.
3. Kontenut tal-Pakkett
Ivverifika li l-oġġetti kollha huma preżenti u f'kundizzjoni tajba:
- Neo Electric High-Pressure Washer Unit
- Pistola ta' Pressjoni Għolja
- Lanza
- Adjustable Twist Nozzle
- Pajp ta' Pressjoni Għolja ta' 5 metri
- Foam Tank (Detergent Bottle)
- Cleaning Brush Attachment
- 5-meter Power Cord (integrated)
- Wheels (pre-attached for mobility)

4. Assemblaġġ u Setup
Segwi dawn il-passi biex tiġbor u tipprepara l-magna tal-ħasil bil-pressjoni tiegħek għall-użu:
- Qabbad il-Manka ta' Pressjoni Għolja: Securely attach one end of the 5-meter high-pressure hose to the outlet on the main pressure washer unit and the other end to the high-pressure gun. Ensure connections are tight to prevent leaks.
- Waħħal il-Lance u ż-Żennuna: Connect the lance to the high-pressure gun. Then, attach the adjustable twist nozzle to the end of the lance. For specific cleaning tasks, you may attach the brush attachment or the foam tank instead of the twist nozzle.
- Qabbad il-Provvista tal-Ilma: Connect a standard garden hose (not included) to the water inlet on the pressure washer unit. Ensure the water supply hose is free of kinks and has a steady flow. Turn on the water tap fully.
- Qabbad l-Enerġija: Plug the 5-meter power cord into a grounded electrical outlet.
- Ipprajma l-Pompa: Before turning on the power, squeeze the trigger on the high-pressure gun to allow water to flow through the system and expel any air. Continue until a steady stream of water emerges from the nozzle.

5. Istruzzjonijiet Operattivi
Once assembled and primed, you can begin operating your pressure washer:
- Ixgħel: Flip the power switch on the pressure washer unit to the 'ON' position. The motor will start, and the unit will build pressure.
- Ibda t-Tindif: Aim the nozzle at the surface to be cleaned, keeping a safe distance. Squeeze the trigger on the high-pressure gun to start the water flow. Release the trigger to stop the flow.
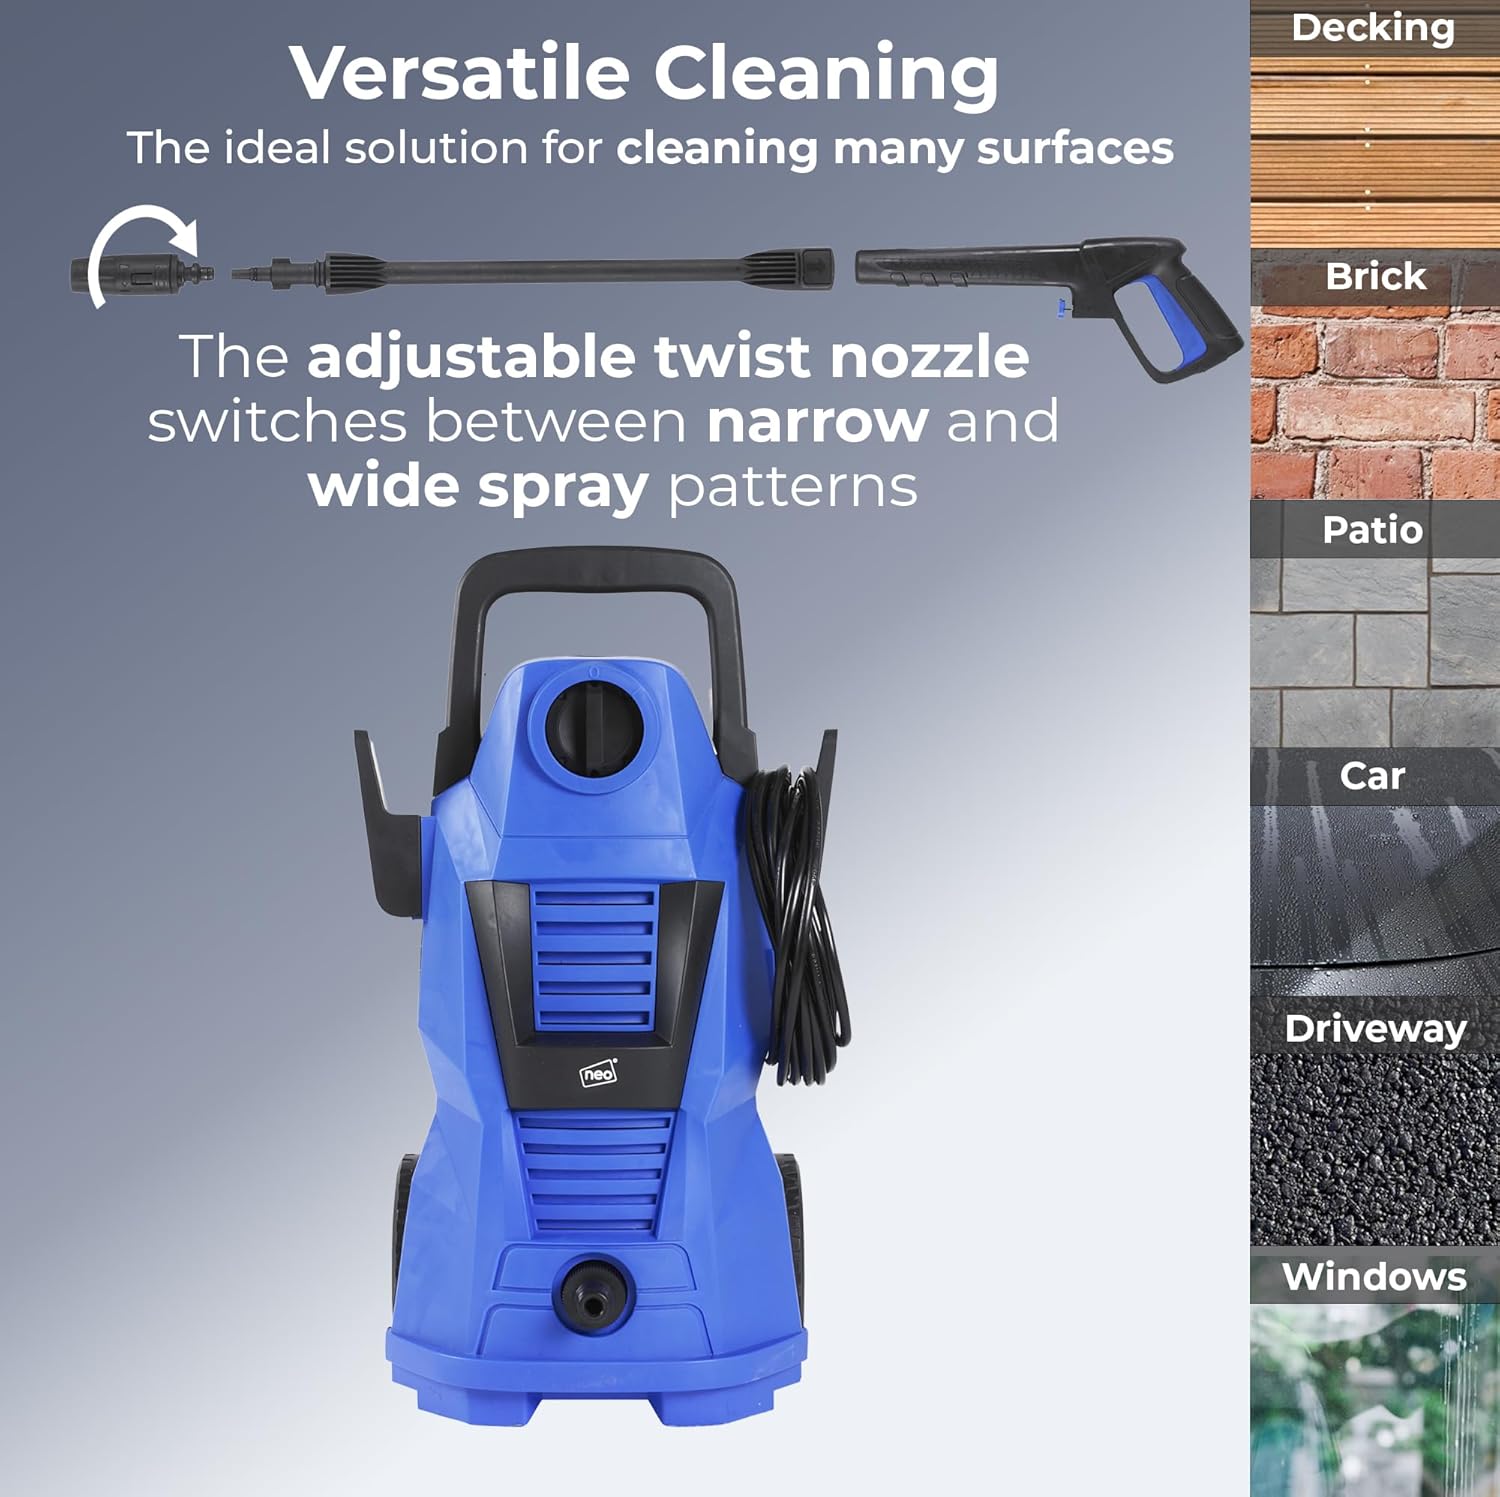
- Aġġustament taż-Żennuna: The adjustable twist nozzle allows you to switch between a narrow, concentrated spray for stubborn dirt and a wider, fan-shaped spray for general cleaning or delicate surfaces. Rotate the nozzle head to change the spray pattern.
- Using the Foam Tank: To apply detergent, fill the foam tank with an appropriate pressure washer detergent. Attach the foam tank to the high-pressure gun (replacing the lance/nozzle assembly). The unit will then spray a mixture of water and detergent.
- L-Użu tal-Pinzell tat-Tindif: For surfaces requiring scrubbing, attach the cleaning brush to the high-pressure gun. This is ideal for gentle cleaning of vehicles or other delicate items.
- Teknika tat-Tindif: Always start cleaning from a distance and move closer to the surface as needed. Use sweeping motions to ensure even cleaning.
- Tfigħ: When finished, turn off the power switch on the unit. Turn off the water supply. Squeeze the trigger on the gun to release any remaining pressure in the system. Disconnect the water hose and power cord.

6. Manutenzjoni
Manutenzjoni xierqa tiżgura l-lonġevità u l-prestazzjoni ottimali tal-magna tal-ħasil bil-pressjoni tiegħek:
- Tindif: After each use, flush the system with clean water to remove any detergent residue. Wipe down the exterior of the unit with a damp drapp.
- Tindif taż-żennuna: If the nozzle becomes clogged, use the included nozzle cleaning tool (if applicable) or a thin wire to clear any debris.
- Ħażna: Store the pressure washer in a dry, frost-free location. Disconnect all hoses and drain any remaining water from the unit and accessories to prevent freezing damage. Coil the high-pressure hose and power cord neatly.
- Winterization: If storing in freezing temperatures, use a pump protector or antifreeze solution specifically designed for pressure washers to prevent internal damage.
7 Issolvi l-problemi
Irreferi għal din it-taqsima għal kwistjonijiet komuni u s-soluzzjonijiet tagħhom:
| Problema | Kawża Possibbli | Soluzzjoni |
|---|---|---|
| Ebda pressjoni jew pressjoni baxxa |
|
|
| Il-mutur ma jibdax |
|
|
| Tnixxijiet tal-ilma |
|
|
8. Speċifikazzjonijiet
| Karatteristika | Speċifikazzjoni |
|---|---|
| Brand | Neo |
| Numru tal-Mudell | 0C-AX1X-3O2G |
| Numru tal-Parti | NEO-HPW-110 |
| Sors tal-Enerġija | Kejbil Elettriku |
| Qawwa tal-Mutur | 1400 W (implikat mid-deskrizzjoni tal-prodott) |
| Pressjoni massima | 110 Bars |
| Tul tal-Manka | 5 Meters |
| Tul tal-Kunda tal-Enerġija | 5 Meters (from product description) |
| Dimensjonijiet tal-Prodott (L x W x H) | 34.01 x 24 x 42.01 ċm |
| Piż tal-oġġett | 5 Kilogrammi |
| Kulur | Iswed |
| Speċifikazzjonijiet Konformi | CE |
9. Garanzija u Appoġġ
Neo is committed to providing quality products and professional customer service. For any questions, technical assistance, or warranty claims, please contact Neo customer support through your retailer or the official Neo website. Please have your model number (0C-AX1X-3O2G) and purchase information ready when contacting support.