
Introduzzjoni
The Silverlit Exost Loop Gravity Challenge Set is an innovative racing system designed for endless creativity and thrilling challenges. This set allows you to build and race without limits, defying gravity with the vehicle's speed through various track configurations.
This manual provides essential information for setting up, operating, maintaining, and troubleshooting your Exost Loop Gravity Challenge Set. Please read it carefully before use to ensure safe and optimal performance.
Kontenut tal-Pakkett
- 1 x Exost Loop Remote Controlled Car (rechargeable)
- 1 x Kontrollur mill-bogħod
- 31 x Track Tubes (various shapes for building)
- 1 x Recharging Cable for the car
- Gwida tal-Istruzzjonijiet (dan il-manwal)
Note: 2 x AAA batteries for the remote controller are mhux inklużi u għandhom jinxtraw separatament.
Setup Istruzzjonijiet
1. Installazzjoni tal-Batterija (Kontrollur mill-Bogħod)
- Sib il-kompartiment tal-batterija fuq wara tal-kontrollur remot.
- Bl-użu ta' tornavit żgħir, iftaħ l-għatu tal-kompartiment tal-batterija.
- Daħħal 2 batteriji AAA, waqt li tiżgura l-polarità korretta (+/-).
- Agħlaq l-għatu tal-kompartiment tal-batterija u waħħalha bil-kamin.
2. Iċċarġjar tal-Vettura
The Exost Loop car is rechargeable. Before first use, fully charge the vehicle.
- Connect the provided recharging cable to the charging port on the car.
- Connect the other end of the cable to a suitable USB power source (e.g., computer USB port, USB wall adapter).
- The charging indicator light on the car will illuminate during charging and turn off when fully charged.
- L-iċċarġjar tipikament jieħu madwar siegħa.
Importanti: Do not overcharge the vehicle. Disconnect the charging cable once charging is complete.
3. L-Immuntar tat-Track
The set includes 31 tubes allowing for various track designs, including 2 loops, 1 vertical zone, 1 jump zone, and 1 overtake section. Use your creativity to build different challenging layouts.

Image: The complete Exost Loop Gravity Challenge Set, showcasing an assembled track with loops, the remote-controlled car, and the remote controller.
- Connect the tube pieces firmly together to form your desired track layout. Ensure all connections are secure to prevent the car from derailing.
- Experiment with different configurations to create unique challenges.
- Place the starting gate or a flat section of the track on a stable, flat surface.

Immaġni: Eksample of a complex track layout, demonstrating how the various tube pieces can be connected to create loops and turns.
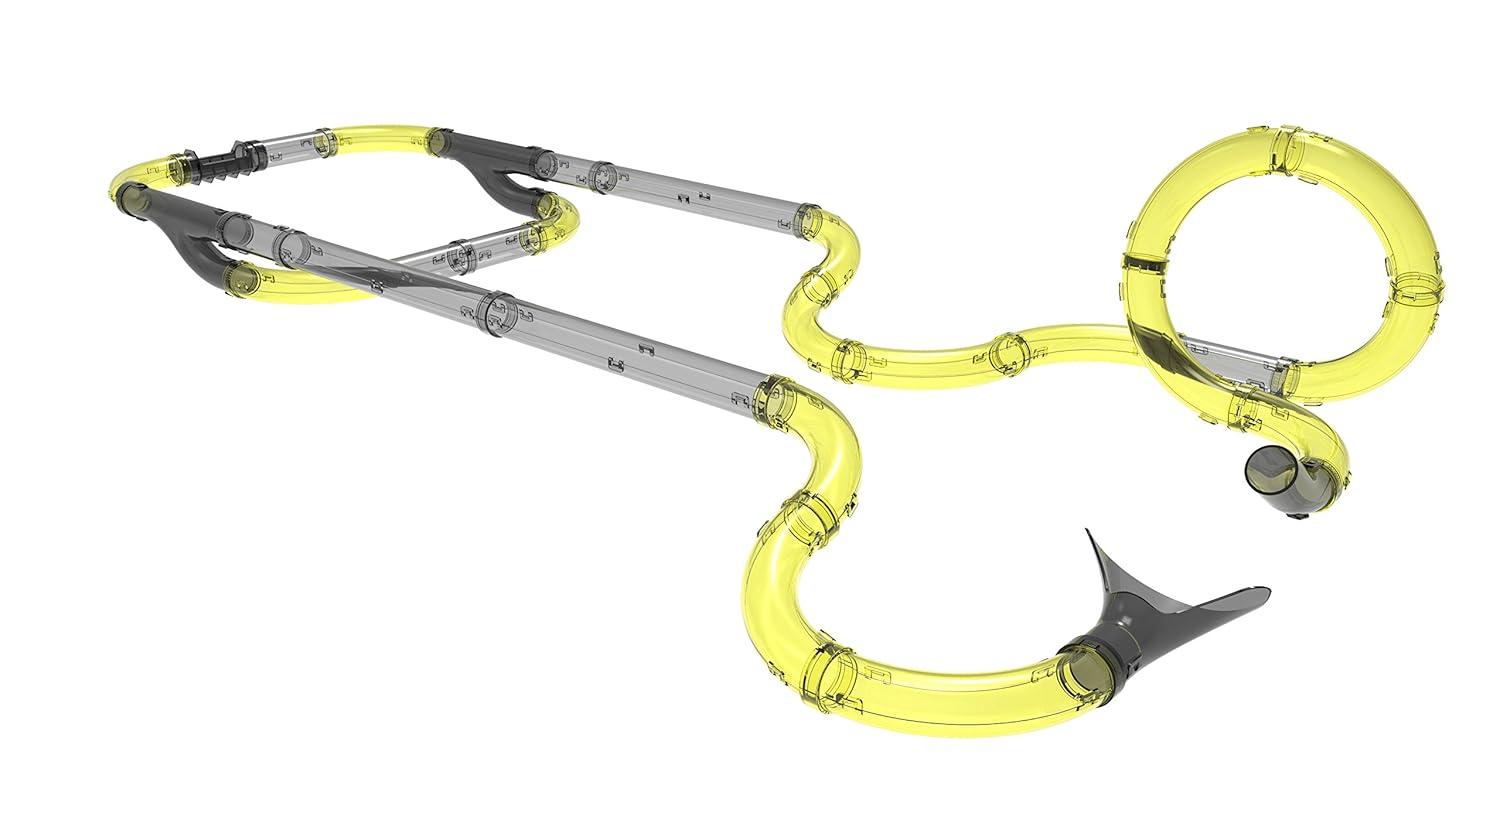
Image: A different perspective of an assembled track, highlighting the flexibility in design and the potential for varied challenges.
Istruzzjonijiet Operattivi
1. Tixgħel
- Ensure the remote controller has fresh batteries.
- Turn on the power switch on the Exost Loop car. The car's LED light will illuminate.
2. It-tqabbil tal-Kontrollur mill-Bogħod
The car and remote should automatically pair when both are powered on. If they do not pair, try turning both off and then on again.
3. Driving the Car
The remote controller features controls for forward, backward, and a 5-second high-speed boost function.

Immaġni: Dettaljata view of the Exost Loop remote-controlled car, highlighting its sleek design and LED light feature.
- Use the joystick or directional buttons (depending on remote design) to move the car forward or backward.
- Press the "Boost" button for a temporary burst of high speed (up to 8 km/h) to tackle loops and vertical zones.
- The car's LED light provides an excellent lighting effect during operation.
Tip: Practice controlling the car's speed to master gravity-defying maneuvers and navigate challenging track sections.
Typical playtime is over 10 minutes on a full charge.
Manutenzjoni
- Tindif: Wipe the car and track tubes with a soft, dry cloth. Do not use water or cleaning solvents, as this may damage the electronic components.
- Ħażna: When not in use, store the set in a cool, dry place away from direct sunlight and extreme temperatures.
- Kura tal-batterija: Remove batteries from the remote controller if the set will not be used for an extended period to prevent leakage.
- Kejbil tal-Iċċarġjar: Keep the recharging cable free from kinks and damage.
Issolvi l-problemi
| Problema | Kawża Possibbli | Soluzzjoni |
|---|---|---|
| Il-karozza ma tiċċaqlaqx. |
|
|
| Car derails on track. |
|
|
| LED light on car not working. |
|
|
Speċifikazzjonijiet
| Numru tal-Mudell | 20233 |
| Brand | SilverLit |
| Veloċità Massima | 8 km/h |
| Numru ta' Tubi | 31 |
| Challenges Included | 2 Loops, 1 Vertical Zone, 1 Jump Zone, 1 Overtake |
| Batterija tal-Karozza | Rechargeable (via included USB cable) |
| Batteriji tal-Kontrollur Remote | 2 x AAA (mhux inklużi) |
| Ħin tal-logħob | Over 10 minutes (per charge) |
| Età Rakkomandata | 5 - 7 snin |
| Assemblea Meħtieġa | Iva |
| Dimensjonijiet tal-Prodott (LxWxH) | 60 x 94.5 x 55 ċm |
| Piż tal-oġġett | 850 g |
Garanzija u Appoġġ
For warranty information and customer support, please refer to the contact details provided on the product packaging or visit the official SilverLit websit. Żomm l-irċevuta tax-xiri tiegħek bħala prova tax-xiri.
Manufacturer: Silverlit
Data tal-Ewwel Disponibbli: 4 ta' Settembru 2018