1. Introduzzjoni
This manual provides detailed instructions for the installation, operation, and maintenance of your ASUS Prime H370M-Plus motherboard. The ASUS Prime H370M-Plus is designed to support 8th generation Intel Core processors, offering a robust platform for personal computing. It features 5X Protection III for hardware safeguards, FanXpert 4 Core for cooling control, support for multiple GPUs via CrossFireX, and high-speed data transfer with dual M.2 slots and USB 3.1 Gen2 connectivity.
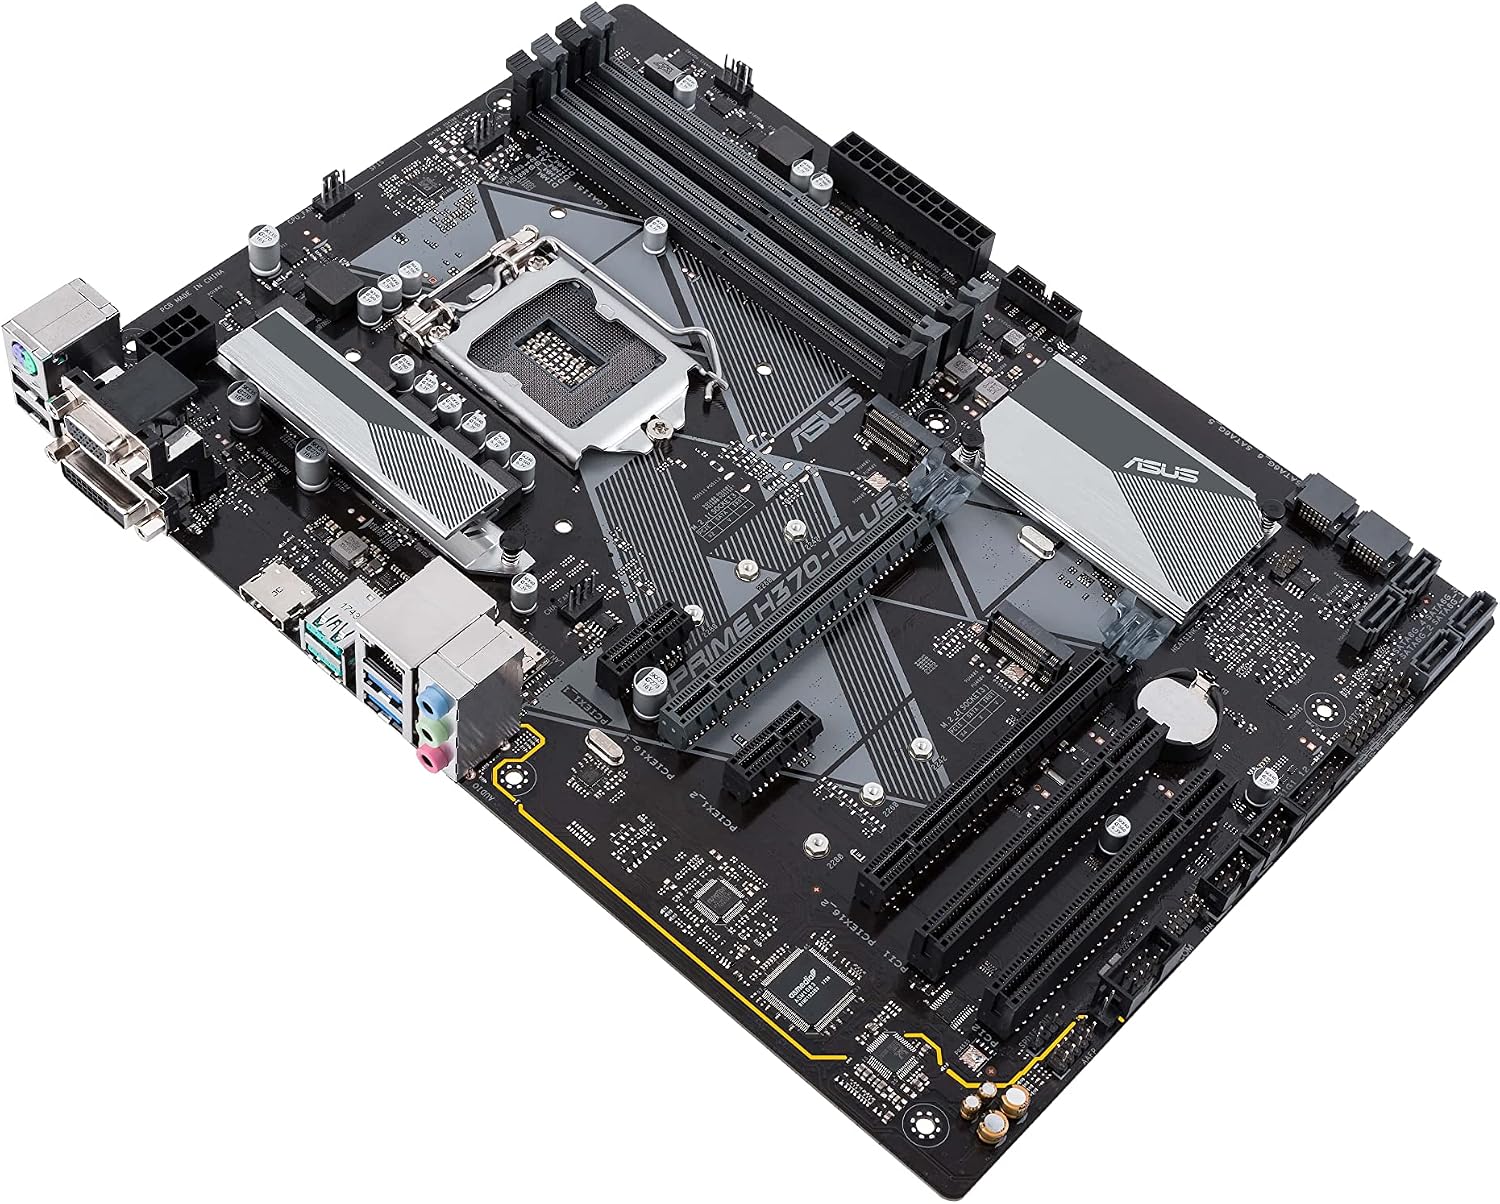
Figura 1: Minn fuq għal isfel view of the ASUS Prime H370M-Plus motherboard. This image displays the central LGA1151 CPU socket, four DDR4 RAM slots, multiple PCIe slots, dual M.2 slots, and various I/O ports and headers.
2. Kontenut tal-Pakkett
Ivverifika li l-oġġetti kollha huma preżenti fil-pakkett tal-prodott tiegħek:
- ASUS Prime H370M-Plus Motherboard
- Manwal għall-Utent
- Sewwieqa tas-Softwer CD/DVD
- Karta ta' Garanzija
3. Setup u Installazzjoni
3.1 Prekawzjonijiet tas-Sigurtà
- Dejjem skonnettja l-korda tal-enerġija mis-sokit tal-ħajt qabel ma tmiss xi komponenti.
- Ilbes ċinga tal-polz anti-statika jew tmiss ta' spiss oġġett tal-metall ertjat biex teħles mill-elettriku statiku.
- Immaniġġja l-motherboard mit-truf tagħha biex tevita li tagħmel ħsara lill-komponenti.
3.2 Installazzjoni tas-CPU
Iftaħ il-lieva tas-sokit tas-CPU bir-reqqa. Allinja l-marka trijangulari fuq is-CPU mal-marka fuq is-sokit. Poġġi s-CPU bil-mod fis-sokit mingħajr ma tisforzah. Agħlaq il-lieva biex twaħħal is-CPU.
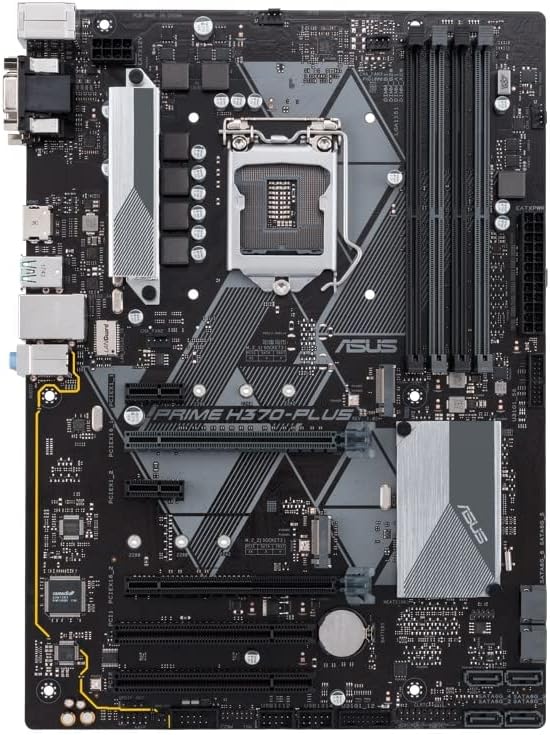
Figura 2: Close-up view of the LGA1151 CPU socket. Note the orientation key (triangle) for correct CPU placement.
3.3 Installazzjoni tas-CPU Cooler
Apply thermal paste to the CPU if not pre-applied on the cooler. Mount the CPU cooler according to its manufacturer's instructions, ensuring even pressure. Connect the CPU fan cable to the CPU_FAN header on the motherboard.
3.4 Installing RAM Modules
Open the clips on both ends of the DIMM slots. Align the notch on the DDR4 memory module with the key in the DIMM slot. Press down firmly on both ends of the module until the clips snap into place. For dual-channel operation, refer to the motherboard manual for recommended slot configurations (e.g., A2 and B2).
3.5 Immuntar tal-Motherboard
Install standoffs in your PC case that correspond to the Micro ATX form factor. Carefully place the motherboard onto the standoffs, aligning the screw holes. Secure the motherboard with screws.
3.6 Konnessjoni tal-Provvista tal-Enerġija
Qabbad il-konnettur ewlieni tal-enerġija ATX ta' 24 pin u l-konnettur tal-enerġija ATX ta' 8 pin 12V mill-provvista tal-enerġija tiegħek mal-portijiet korrispondenti fuq il-motherboard.
3.7 Installing M.2 Storage Devices
The motherboard features dual M.2 slots. Insert the M.2 SSD into the slot at an angle, then push it down and secure it with the provided screw.

Figura 3: Angolat view of the motherboard, showing the location of the dual M.2 slots and PCIe expansion slots.
3.8 Connecting SATA Devices
Connect SATA data cables from your storage drives (HDDs, SSDs, optical drives) to the SATA 6Gb/s ports on the motherboard. Connect SATA power cables from your power supply to these devices.
3.9 Connecting Front Panel Headers
Connect the power switch, reset switch, HDD LED, and power LED cables from your PC case to the corresponding pins on the front panel header (F_PANEL). Refer to the motherboard's detailed diagram for correct pin assignments.
3.10 Installazzjoni ta' Karti ta' Espansjoni
Insert graphics cards or other PCIe expansion cards into the appropriate PCIe x16 or PCIe x1 slots. Ensure they are fully seated and secured with the case's retention mechanism.
4. Istruzzjonijiet Operattivi
4.1 Initial Boot and BIOS/UEFI Access
After assembling your system, connect a monitor, keyboard, and mouse. Power on the system. To enter the BIOS/UEFI setup utility, repeatedly press the DEL or F2 ċavetta matul il-proċess tal-Power-On Self-Test (POST). Il-BIOS/UEFI jippermettilek tikkonfigura s-settings tas-sistema, l-ordni tal-ibbutjar, u timmonitorja l-istatus tal-ħardwer.
4.2 Installazzjoni tas-Sistema Operattiva
Insert your operating system installation media (USB drive or DVD). Access the BIOS/UEFI to set the boot priority to your installation media. Follow the on-screen prompts to install your operating system.
4.3 Installazzjoni tas-sewwieq
After installing the operating system, install the necessary drivers for the motherboard components. Use the provided driver CD/DVD or download the latest drivers from the official ASUS support website. Key drivers include chipset, audio, LAN, and integrated graphics (if applicable).
5. Manutenzjoni
5.1 Tindif
Naddaf it-trab mill-kaxxa tal-kompjuter tiegħek u l-komponenti tal-motherboard regolarment bl-użu ta' arja kkompressata. Kun żgur li s-sistema tkun mitfija u skonnettjata qabel ma tnaddafha. Evita li tuża prodotti tat-tindif likwidi direttament fuq il-komponenti.
5.2 Aġġornamenti tal-BIOS/UEFI
Iċċekkja l-appoġġ tal-ASUS perjodikament website for BIOS/UEFI updates. Updates can improve system stability, compatibility, and performance. Follow the instructions provided by ASUS for safe BIOS flashing procedures.
5.3 Aġġornamenti tas-Sewwieqa
Keep your system drivers updated to ensure optimal performance and compatibility with new software and hardware. Download drivers only from the official ASUS website or component manufacturers' websiti.
6 Issolvi l-problemi
6.1 Ebda Qawwa / Ebda POST (Test Awtomatiku tal-Power-On)
- Ensure all power cables (24-pin ATX, 8-pin ATX 12V) are securely connected to the motherboard.
- Verify that the CPU and RAM are correctly installed. Try reseating them.
- Check that the power supply is functioning correctly.
- Remove all non-essential components (e.g., graphics card, extra storage drives) and attempt to boot with only the CPU, one RAM stick, and the CPU cooler.
6.2 Instabbiltà tas-Sistema / Ħabtiet
- Iċċekkja t-temperaturi tas-CPU u l-GPU biex tiżgura li jkunu fil-limiti operattivi sikuri.
- Verify that RAM modules are compatible and correctly installed. Run a memory diagnostic tool.
- Kun żgur li s-sewwieqa kollha huma aġġornati.
- Check for BIOS/UEFI updates that might address stability issues.
6.3 Peripheral Detection Issues
- Kun żgur li l-apparati USB huma konnessi mal-portijiet funzjonali.
- For SATA devices, check data and power cable connections. Verify they are enabled in BIOS/UEFI.
- For M.2 devices, ensure they are properly seated and secured. Check BIOS/UEFI settings for M.2 slot configuration, as some slots may share bandwidth with SATA ports.
For further assistance, refer to the comprehensive troubleshooting section in the official ASUS user manual or contact ASUS technical support.
7. Speċifikazzjonijiet
| Karatteristika | Dettall |
|---|---|
| Brand | ASUS |
| Isem tal-Mudell | PRIME H370M-PLUS/CSM |
| Socket tas-CPU | LGA 1151 |
| Proċessuri Kompatibbli | 8 Ġenerazzjoni Intel Core |
| Tip ta' Ċipset | Intel H370 |
| Teknoloġija tal-Memorja RAM | DDR4 |
| Veloċità tal-Arloġġ tal-Memorja | 2400 MHz |
| Slots tal-Memorja Disponibbli | 4 |
| Daqs Massimu tal-Memorja RAM | 1 GB (Note: This value is from product data and may not reflect typical motherboard capacity.) |
| Interface tal-Kard Grafika | Integrata |
| Portijiet USB totali | 6 |
| Numru Totali ta' Portijiet HDMI | 1 |
| Standard tal-Bus tas-Sistema Appoġġjat | SATA 3 |
| Piż tal-oġġett | 0.7 Kilogrammi |
8. Garanzija u Appoġġ
8.1 Garanzija tal-Prodott
The ASUS Prime H370M-Plus motherboard comes with a garanzija ta 'sena. Please retain your proof of purchase for warranty claims. For detailed warranty terms and conditions, refer to the warranty card included in your package or visit the official ASUS support websit.
8.2 Appoġġ Tekniku
Għal assistenza teknika, downloads ta' sewwieqa, jew aktar informazzjoni dwar il-prodott, jekk jogħġbok żur is-sit uffiċjali tal-appoġġ tal-ASUS websit. Tista' ssib FAQs, gwidi għas-soluzzjoni tal-problemi, u informazzjoni ta' kuntatt għas-servizz tal-konsumatur.
Appoġġ Uffiċjali tal-ASUS: https://www.asus.com/support/