
ASUS ROG-STRIX-RXVEGA64-O8G-GAMING
Manwal tal-Utent tal-Karta Grafika ASUS ROG Strix RX Vega 64
Model: ROG-STRIX-RXVEGA64-O8G-GAMING
1. Introduzzjoni
This manual provides essential information for the installation, operation, and maintenance of your ASUS ROG Strix RX Vega 64 graphics card. Please read this manual thoroughly before using the product to ensure proper setup and to maximize its performance and longevity. This graphics card is designed for high-performance computing and gaming, leveraging AMD's Vega architecture and 8GB of HBM2 memory.
2. Informazzjoni dwar is-Sigurtà
Observe the following safety precautions to prevent damage to the graphics card or injury to yourself:
- Dejjem skonnettja l-provvista tal-enerġija mill-kompjuter tiegħek qabel ma tinstalla jew tneħħi xi komponenti.
- Immaniġġja l-karta grafika mit-truf tagħha biex tevita li tmiss komponenti sensittivi.
- Aċċerta ruħek li jkun hemm ertjar xieraq biex tevita ħsara minn skarika elettrostatika (ESD).
- Do not twist or bend the graphics card during installation or removal.
- Ensure the PCI Express card socket locking mechanism on the motherboard is open before inserting or removing the graphics card.
- Avoid shaking and excessive movement of the PC system when the graphics card is installed. If bundled, the support bracket should be removed when the PC system is being moved.
- Install the card in a well-ventilated computer case to prevent overheating.
3. Kontenut tal-Pakkett
Ivverifika li l-oġġetti kollha huma preżenti fil-pakkett tal-prodott tiegħek:
- ASUS ROG Strix RX Vega 64 Graphics Card (Model: ROG-STRIX-RXVEGA64-O8G-GAMING)
- Karta ta' Garanzija
- DVD ta' appoġġ (li fih sewwieqa u utilitajiet)
- Gwida għall-Utent

Figure 3.1: The ASUS ROG Strix RX Vega 64 graphics card shown alongside its retail packaging.
4. Setup u Installazzjoni
4.1. Installazzjoni Fiżika
- Ipprepara s-sistema tiegħek: Turn off your computer and disconnect the power cable. Open the computer case.
- Locate the PCI Express slot: Identifika slott PCI Express x16 disponibbli fuq il-motherboard tiegħek.
- Neħħi l-għata tas-slots: Remove the necessary slot covers from the back of your computer case corresponding to the graphics card's size.
- Daħħal il-karta grafika: Carefully align the graphics card with the PCI Express slot and press it down firmly until it is securely seated. The locking mechanism on the motherboard should click into place.
- Żomm il-karta f'post sigur: Fasten the graphics card to the computer case with screws.

Figura 4.1: Angolat view of the graphics card, highlighting its triple-fan cooling system and overall design.
4.2. Konnessjoni tal-Enerġija
The ASUS ROG Strix RX Vega 64 requires two 8-pin PCI Express power connectors from your power supply. Ensure your power supply has sufficient wattage u konnetturi disponibbli.
- Locate the two 8-pin PCI Express power cables from your power supply.
- Connect these cables firmly into the corresponding power sockets on the graphics card.
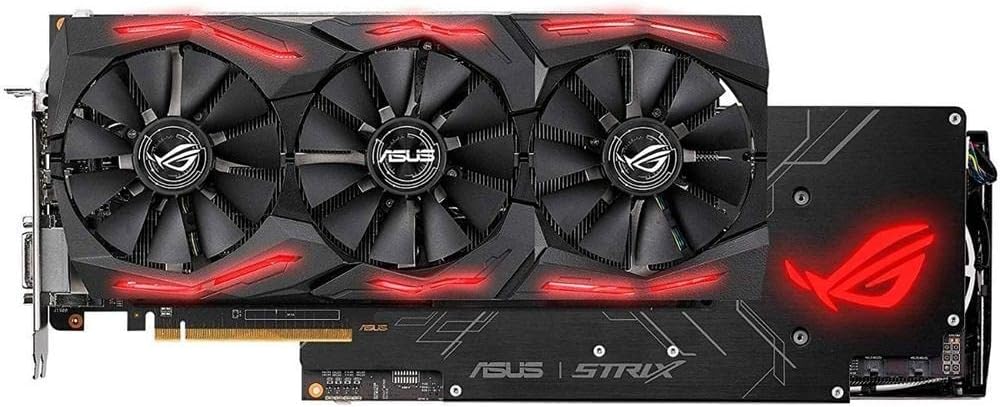
Figura 4.2: Fuq view of the graphics card, showing the triple fans and the location of the power connectors.
4.3. Konnessjoni tal-Wiri
Connect your display monitor(s) to the appropriate output ports on the graphics card. This model features DisplayPort and HDMI outputs.

Figure 4.3: The I/O panel of the graphics card, displaying the DisplayPort and HDMI output options.
4.4. Installazzjoni tas-softwer
After physical installation, power on your computer and install the necessary drivers and utilities.
- Installa Sewwieqa: Insert the provided Support DVD or download the latest drivers from the ASUS official websit. Segwi l-istruzzjonijiet fuq l-iskrin biex tlesti l-installazzjoni tas-sewwieq.
- Install GPU Tweak II: This utility allows for intuitive performance monitoring and control, including overclocking and fan speed adjustments.
- Install ASUS Aura Sync: For customizing the RGB lighting effects on your graphics card and synchronizing them with other Aura Sync compatible components.
5. It-Tħaddim tal-Karta Grafika Tiegħek
5.1. Operazzjoni Bażika
Once drivers are installed, your graphics card will automatically handle graphics processing for your system. For optimal performance in games and applications, ensure your operating system and game settings are configured to utilize the dedicated graphics card.
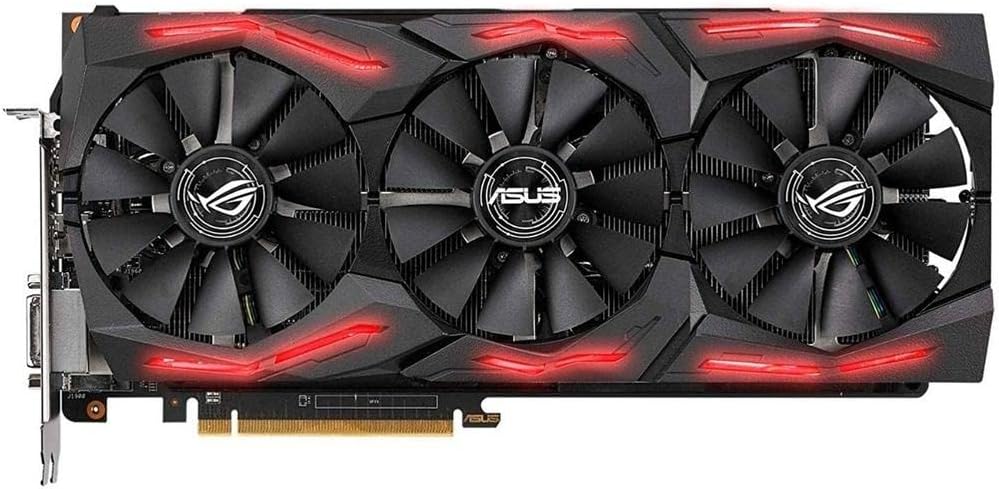
Figura 5.1: Quddiem view tal-karta grafika, wirjaasing the three fans and the customizable RGB lighting elements.
5.2. ASUS Aura Sync RGB Lighting
The graphics card features ASUS Aura Sync RGB lighting, allowing for personalized aesthetic customization. Use the ASUS Aura Sync software to choose from a spectrum of colors and various lighting effects. You can also synchronize these effects with other ASUS Aura Sync compatible devices in your system.
5.3. GPU Tweak II
GPU Tweak II is a powerful utility for advanced users to fine-tune their graphics card. It provides features such as:
- Overclocking: Adjust GPU clock speed and memory clock for increased performance.
- Kontroll tal-fann: Customize fan curves to balance cooling efficiency and noise levels.
- Monitoraġġ: Real-time display of GPU temperature, usage, and clock speeds.
- Spinta tal-Logħba: Optimize system resources for gaming.
5.4. BIOS Switch Setting
The graphics card may feature a dual BIOS switch, offering different performance profiles. Refer to the quick installation guide or the support DVD for specific instructions on how to use this switch. Typically, these modes allow you to prioritize either maximum performance or quieter operation.

Figure 5.2: The backplate of the graphics card, featuring the ROG logo and providing structural support and heat dissipation.
6. Manutenzjoni
6.1. Tindif
Regular cleaning helps maintain optimal cooling performance and extends the lifespan of your graphics card.
- Kun żgur li l-kompjuter ikun mitfi u skonnettjat qabel ma tnaddaf.
- Uża arja kkompressata biex tneħħi bil-mod it-trab mill-fannijiet u x-xewk tas-sink tas-sħana.
- Avoid using liquid cleaners directly on the card. If necessary, use a slightly damp, lint-free cloth for external surfaces.
6.2. Aġġornamenti tas-Sewwieqa
Periodically check the ASUS official website for the latest graphics drivers. Keeping your drivers updated ensures compatibility with new games and applications, and often provides performance improvements and bug fixes.
7 Issolvi l-problemi
Jekk tiltaqa' ma' problemi bil-karta grafika tiegħek, ikkunsidra l-passi komuni li ġejjin għas-soluzzjoni tal-problemi:
- Ebda Display:
- Kun żgur li l-kejbil tal-monitor huwa konness sew kemm mal-karta grafika kif ukoll mal-monitor.
- Verify that the graphics card is fully seated in the PCI Express slot.
- Check that all necessary power connectors are securely attached to the graphics card.
- Ittestja b'kejbil tad-displej jew monitor differenti jekk possibbli.
- Instabbiltà/Ħsarat tas-Sistema:
- Kun żgur li l-provvista tal-enerġija tiegħek tissodisfa l-minimu ta' wattstage requirements for the graphics card.
- Aġġorna s-sewwieqa tal-grafika tiegħek għall-aħħar verżjoni.
- Monitor GPU temperatures using GPU Tweak II to ensure it's not overheating. Improve case airflow if temperatures are high.
- Jekk qed tagħmel overclocking, erġa' lura għas-settings default biex tiċċekkja l-istabbiltà.
- Prestazzjoni Fqira fil-Logħob:
- Kun żgur li s-sewwieqa tal-grafika tiegħek huma aġġornati.
- Check in-game graphics settings; reduce settings if performance is unsatisfactory.
- Verify that the graphics card is operating at its expected clock speeds using GPU Tweak II.
8. Speċifikazzjonijiet
| Karatteristika | Dettall |
|---|---|
| Brand | ASUS |
| Numru tal-Mudell | ROG-STRIX-RXVEGA64-O8G-GAMING |
| Koproċessur tal-Grafika | Radeon Pro Duo |
| Chipset Brand | AMD |
| Deskrizzjoni tal-Kard | RADEON RX VEGA64 |
| Daqs tar-RAM tal-Grafika | 8 GB HBM2 |
| Veloċità tal-Memorja | 945 MHz (Base), 1590 MHz (Boost) |
| Riżoluzzjoni Massima tal-Iskrin | 8192 x 8192 |
| Interface tal-Output tal-Vidjo | DisplayPort, HDMI |
| Piż tal-oġġett | 3.5 liri |
| Dimensjonijiet tal-Prodott (LxWxH) | 11.73 x 2.07 x 5.47 pulzieri |
| Compatible OS Platforms | Windows 10 (32/64 bit), Windows 8.1 (32/64 bit), Windows 8 (32/64 bit), Windows 7 (32/64 bit) |
9. Garanzija u Appoġġ
Your ASUS ROG Strix RX Vega 64 graphics card comes with a manufacturer's warranty. Please refer to the included Warranty Card in your package for detailed terms and conditions, including warranty period and coverage.
Għal appoġġ tekniku, downloads ta' sewwieqa, u informazzjoni addizzjonali dwar il-prodott, jekk jogħġbok żur is-sit uffiċjali tal-appoġġ tal-ASUS websit. Hemmhekk tista’ ssib ukoll riżorsi utli u FAQs.
Appoġġ ASUS Websit: www.asus.com/support/
Ask a question about this manual
Ask about setup, troubleshooting, compatibility, parts, safety, or missing instructions. Manuals+ will review the question and use this page’s manual context to help answer it.