
1. Introduzzjoni
This manual provides essential information for the safe and efficient operation of your Atomos Sumo 19 HDR High Bright Monitor. Please read this manual thoroughly before using the device to ensure proper setup, operation, and maintenance. Retain this manual for future reference.
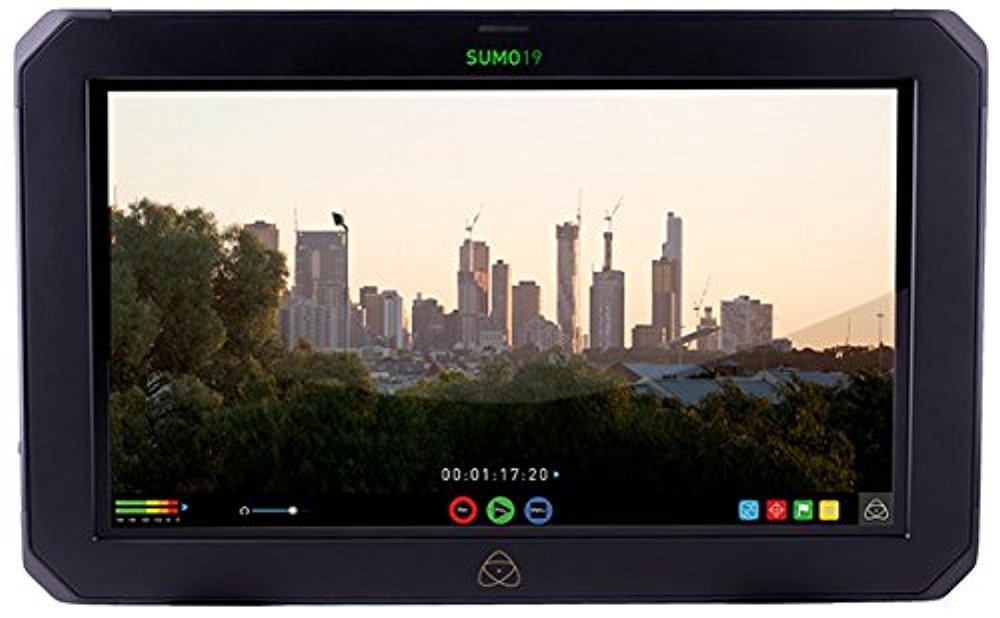
Figura 1.1: Quddiem view of the Atomos Sumo 19 HDR High Bright Monitor, showcasing its large display and robust casing.
2. Informazzjoni dwar is-Sigurtà
Osserva l-prekawzjonijiet ta' sigurtà li ġejjin biex tevita ħsara lill-apparat u tiżgura s-sigurtà tal-utent:
- Sors tal-Enerġija: Use only the specified power adapter. Incorrect voltagJista' jagħmel ħsara lill-unità.
- Ventilazzjoni: Do not block ventilation openings. Ensure adequate airflow to prevent overheating.
- Ilma u Umdità: Keep the device away from water, rain, and high humidity. Do not operate with wet hands.
- Impatt: Evita li twaqqa’ jew tissuġġetta l-apparat għal impatti qawwija.
- Tindif: Skonnettja l-provvista tal-enerġija qabel it-tindif. Uża drapp artab u niexef. Tużax prodotti tat-tindif likwidi jew aerosol.
- Servizzi: Tippruvax isservi l-apparat lilek innifsek. Irreferi l-manutenzjoni kollha lil persunal kwalifikat.
- Propożizzjoni 65 Twissija: Dan il-prodott jista 'jkun fih kimiċi magħrufa mill-Istat ta' Kalifornja li jikkawżaw kanċer u difetti fit-twelid jew ħsara riproduttiva oħra.
3. Setup
3.1. Kontenut tal-Pakkett
Ivverifika li l-oġġetti kollha huma preżenti fil-pakkett:
- Atomos Sumo 19 HDR High Bright Monitor
- Adapter tal-Qawwa AC
- Gwida Quick Start
- SSD/HDD Caddy (for recording media)
3.2. L-Immuntar tal-Monitor
The Sumo 19 can be mounted using standard VESA mounts or a dedicated C-stand mounting bracket (sold separately). Ensure the mounting solution is robust enough to support the monitor's weight (approximately 11.99 pounds).
- Attach the appropriate mounting plate to the rear of the monitor using the provided screws.
- Secure the monitor to your desired stand or rig.
Figura 3.1: Illustration of the rear panel with VESA mounting points. Ensure secure attachment to a compatible mount.
3.3. Qawwa tal-Konnessjoni
Connect the AC power adapter to the DC input port on the monitor and then to a suitable power outlet.
- Locate the DC input port on the side or rear of the monitor.
- Plug the power adapter into the monitor, then into a wall socket.
3.4. Connecting Video Inputs
The Sumo 19 accepts video signals via HDMI or SDI. It features dual 12/6/3G-SDI inputs and HDMI input.
- HDMI: Connect an HDMI cable from your source device to the HDMI input port on the monitor.
- SDI: Connect SDI cables from your source devices to the SDI input ports. The monitor supports up to 4Kp60 or HDp240 over SDI.
Figura 3.2: Diagram illustrating the location of HDMI and SDI input/output ports for video signal connection.
3.5. Inserting Recording Media
To enable recording, insert a compatible SSD or HDD into the provided caddy, then slide the caddy into the monitor's media slot.
- Open the SSD/HDD caddy and securely place your recording media inside.
- Slide the loaded caddy into the designated slot on the monitor until it clicks into place.
4. It-tħaddim tal-Monitor
4.1. Tixgħil / Mitfi
Press and hold the power button located on the monitor's frame until the screen illuminates or shuts down.
4.2. Navigazzjoni tal-Interfaċċja tal-Utent
The Sumo 19 features a touchscreen interface for menu navigation and control.
- Tektek: Select an option or activate a function.
- Swipe: Navigate through menus or adjust parameters.
- Agħfas/Żumja: (If supported) Magnify parts of the image.
Figura 4.1: Example of the touchscreen user interface, showing main menu options and monitoring tools.
4.3. Għażla tal-Input
To switch between connected video sources:
- Tap the 'Input' icon on the screen.
- Select the desired HDMI or SDI input from the list.
4.4. HDR and SDR Monitoring
The Sumo 19 supports both HDR (High Dynamic Range) and SDR (Standard Dynamic Range) monitoring. It provides real-time exposure tools for Log footage.
- Access the 'Display' settings from the main menu.
- Select 'HDR' or 'SDR' mode based on your workflow.
- Adjust HDR settings such as brightness and contrast as needed.
4.5. Loading Custom LUTs
You can load custom Look Up Tables (LUTs) onto the Sumo 19 via the HDD/SSD slot to preview different looks on set.
- Save your .cube LUT files to the root directory of your recording media (SSD/HDD).
- Insert the media into the monitor.
- Navigate to the 'LUT' section in the monitor's menu.
- Select 'Load LUT' and choose your desired LUT from the list.
4.6. Funzjonijiet ta' Reġistrazzjoni
The Sumo 19 is capable of recording video directly to SSD/HDD media.
- Ensure recording media is properly inserted and formatted.
- Select your desired recording codec and resolution in the 'Record' menu.
- Press the 'Record' button on the touchscreen to start and stop recording.
5. Manutenzjoni
5.1. Tindif tal-Monitor
Biex iżżomm prestazzjoni u dehra ottimali:
- Always power off and disconnect the monitor from power before cleaning.
- Uża drapp artab u mingħajr suf biex timsaħ bil-mod l-iskrin u l-qafas.
- Għal marki iebsa, d ftitampLaħlaħ id-drapp bl-ilma. Evita kimiċi ħarxa jew materjali li joborxu.
5.2. Aġġornamenti tal-Firmware
Atomos periodically releases firmware updates to improve performance and add features. Check the official Atomos website for the latest firmware for your Sumo 19.
- Niżżel il-firmware file to a formatted SSD/HDD.
- Insert the media into the monitor.
- Navigate to the 'Settings' menu and select 'Firmware Update'.
- Follow the on-screen instructions to complete the update. Do not power off the monitor during this process.
5.3. Ħażna
When not in use, store the monitor in a cool, dry place, protected from dust and extreme temperatures. Use a protective case for transport.
6 Issolvi l-problemi
If you encounter issues with your Atomos Sumo 19, refer to the following common problems and solutions:
| Problema | Kawża Possibbli | Soluzzjoni |
|---|---|---|
| Il-monitor ma jixgħelx. | No power, faulty power adapter, loose connection. | Check power cable connections. Ensure power adapter is functional and plugged into a live outlet. |
| Ma muri l-ebda sinjal tal-vidjo. | Incorrect input selected, faulty cable, source device off/incorrect output. | Verify correct input is selected on the monitor. Check video cables for damage and ensure they are securely connected. Confirm source device is outputting a signal. |
| Screen is too dark or too bright. | Display settings are incorrect. | Adjust brightness, contrast, and HDR/SDR settings in the 'Display' menu. |
| Recording not starting. | No media, unformatted media, media full, incorrect recording settings. | Ensure SSD/HDD is inserted, formatted, and has sufficient space. Check recording codec and resolution settings. |
If the problem persists, please contact Atomos customer support.
7. Speċifikazzjonijiet
| Karatteristika | Dettall |
|---|---|
| Numru tal-Mudell | ATOMSUMO19 |
| Daqs tal-Wiri | 19 pulzieri |
| Riżoluzzjoni | 1920x1200 |
| Proporzjon ta' l-aspett | 16:9 native |
| Luminożità | 1200 nit (High Bright) |
| Profond tal-Kulur | 10-bit HDR |
| Inputs tal-Vidjo | HDMI, Dual 12/6/3G-SDI |
| Max Input Resolution/Framerate | 4Kp60 (HDMI/SDI), HDp240 (SDI) |
| Midja tar-Reġistrazzjoni | SSD/HDD via caddy |
| Dimensjonijiet tal-Prodott | 14.96 x 12.99 x 19.84 pulzieri |
| Piż tal-oġġett | 11.99 liri |
| Manifattur | atomi |
8. Informazzjoni dwar Garanzija
The Atomos Sumo 19 HDR High Bright Monitor comes with a Garanzija Limitata tal-Manifattur ta' Sena. This warranty covers defects in materials and workmanship under normal use. For full terms and conditions, please refer to the warranty card included with your product or visit the official Atomos websit.
Żomm il-prova tax-xiri tiegħek għal pretensjonijiet ta' garanzija.
9. Appoġġ għall-Klijent
For technical assistance, product inquiries, or warranty claims, please visit the official Atomos support websit:
You may also find FAQs, firmware downloads, and additional resources on their websit.