Introduzzjoni
The ThermoPro TP06S Digital Grill Meat Thermometer is designed to help you achieve perfectly cooked meals every time. This professional-grade thermometer features preset temperatures for various meat types and doneness levels, a versatile timer, and a clear, colored backlight display. Its durable stainless steel probe ensures accurate and fast temperature readings, making it ideal for grilling, smoking, baking, and deep frying.

Figure 1: ThermoPro TP06S Digital Grill Meat Thermometer with probe.
Setup
1. Żpakkjar u Komponenti
Neħħi l-komponenti kollha mill-imballaġġ bir-reqqa. Kun żgur li għandek l-oġġetti li ġejjin:
- 1 x ThermoPro TP06S Digital Meat Thermometer Unit
- 1 x Food Grade Stainless Steel Temperature Probe with Cable
- 2 x Batteriji AAA (inklużi)
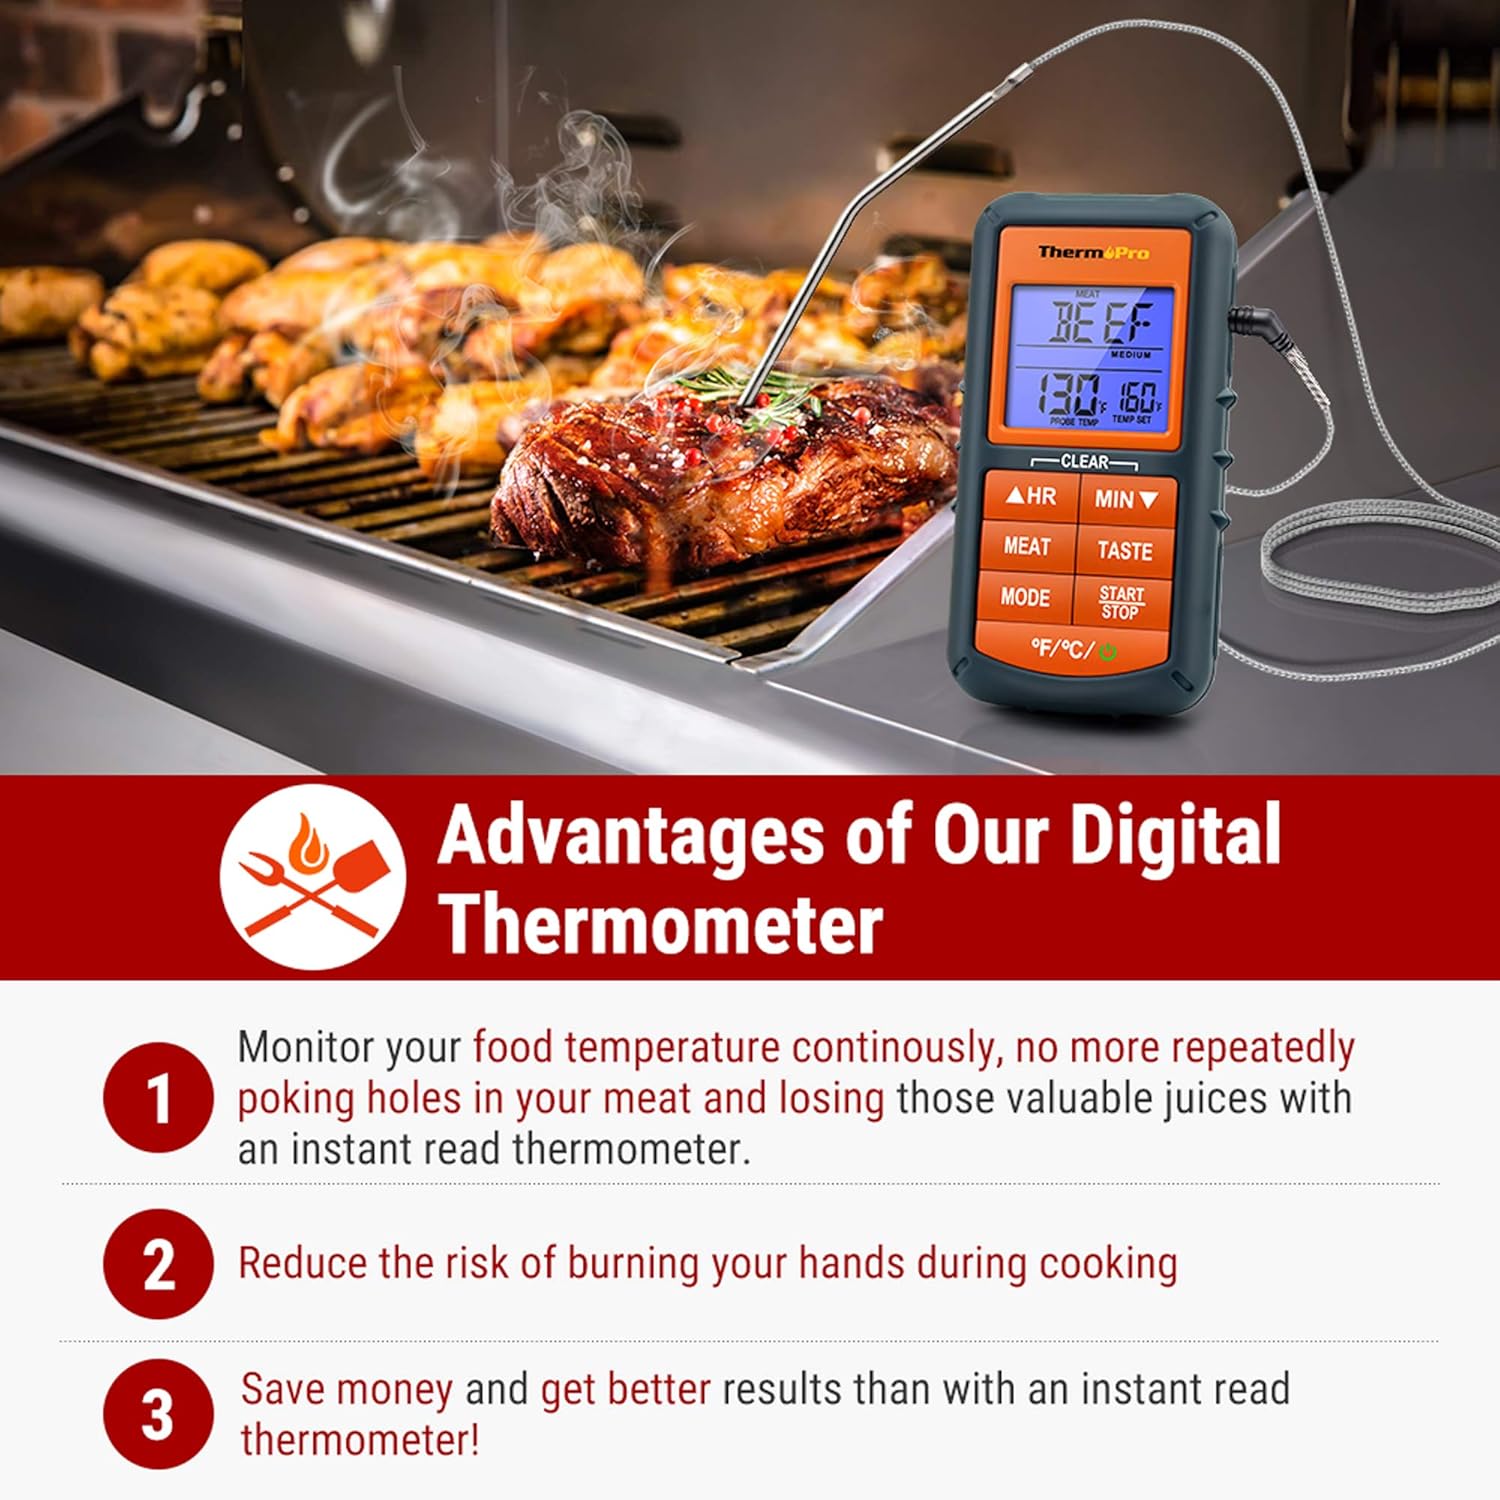
Figure 2: The ThermoPro TP06S thermometer in use on a grill, highlighting its benefits.
2. Installazzjoni tal-batterija
The ThermoPro TP06S requires 2 AAA batteries for operation. To install the batteries:
- Sib il-kompartiment tal-batterija fuq wara tal-unità tat-termometru.
- Iftaħ il-kompartiment tal-batterija.
- Daħħal iż-2 batteriji AAA, waqt li tiżgura l-polarità korretta (+ u -) kif indikat ġewwa l-kompartiment.
- Agħlaq l-għatu tal-kompartiment tal-batterija sew.
3. Konnessjoni tas-sonda
Connect the stainless steel temperature probe to the jack located on the side of the main thermometer unit. Ensure the connection is firm.

Figura 3: Dettaljat view of the food-grade stainless steel probe, emphasizing its accuracy and heat resistance.
Istruzzjonijiet Operattivi
1. Power On/Off
Agħfas il- QAWWA button (located at the bottom right) to turn the unit ON or OFF.
2. Għażla tal-Unità tat-Temperatura
Agħfas il- °F/°C button (located at the bottom left) to switch between Fahrenheit and Celsius temperature readings.
3. Preset Meat Settings
The thermometer comes with preset temperatures for 9 types of meat recommended by USDA. Press the LAĦAM button to cycle through the different meat types:
- Ground Beef (Gbeef)
- Ground Poultry (Gpoult)
- Ċanga
- Vitella
- Chicken (Chcke)
- Majjal
- Poultry (Poult)
- Ħaruf
- Ħut
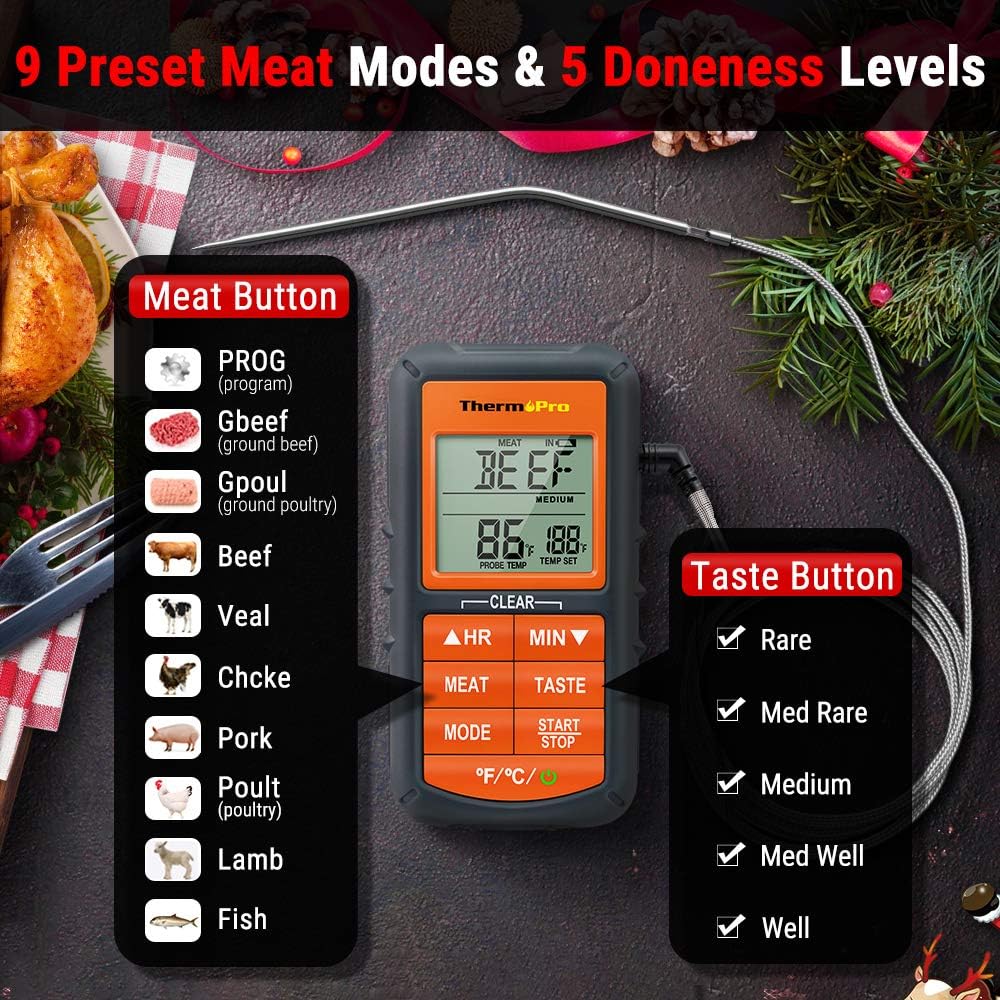
Figure 4: Display showing the 9 preset meat modes and 5 doneness levels available on the TP06S.
4. Doneness Level Selection
After selecting a meat type, press the TOGĦMA button to choose your desired doneness level (e.g., Rare, Medium Rare, Medium, Medium Well, Well Done). The target temperature will adjust accordingly.
5. Custom Temperature Setting (PROG Mode)
To set a custom target temperature:
- Agħfas il- MODALITÀ button until "PROG" appears on the display.
- Uża l- HR (Hour) and MIN (Minute) buttons to adjust the target temperature up or down.
- Agħfas BIDU/WAQQF to confirm your custom setting.
6. Funzjoni Timer
The TP06S includes a count-up and countdown timer. To use the timer:
- Agħfas il- MODALITÀ button to switch to Timer mode.
- Uża l- HR u MIN buttons to set the desired countdown time (up to 23 hours, 59 minutes).
- Agħfas BIDU/WAQQF to begin or pause the timer.
- To reset the timer, press and hold both HR u MIN buttuni fl-istess ħin.
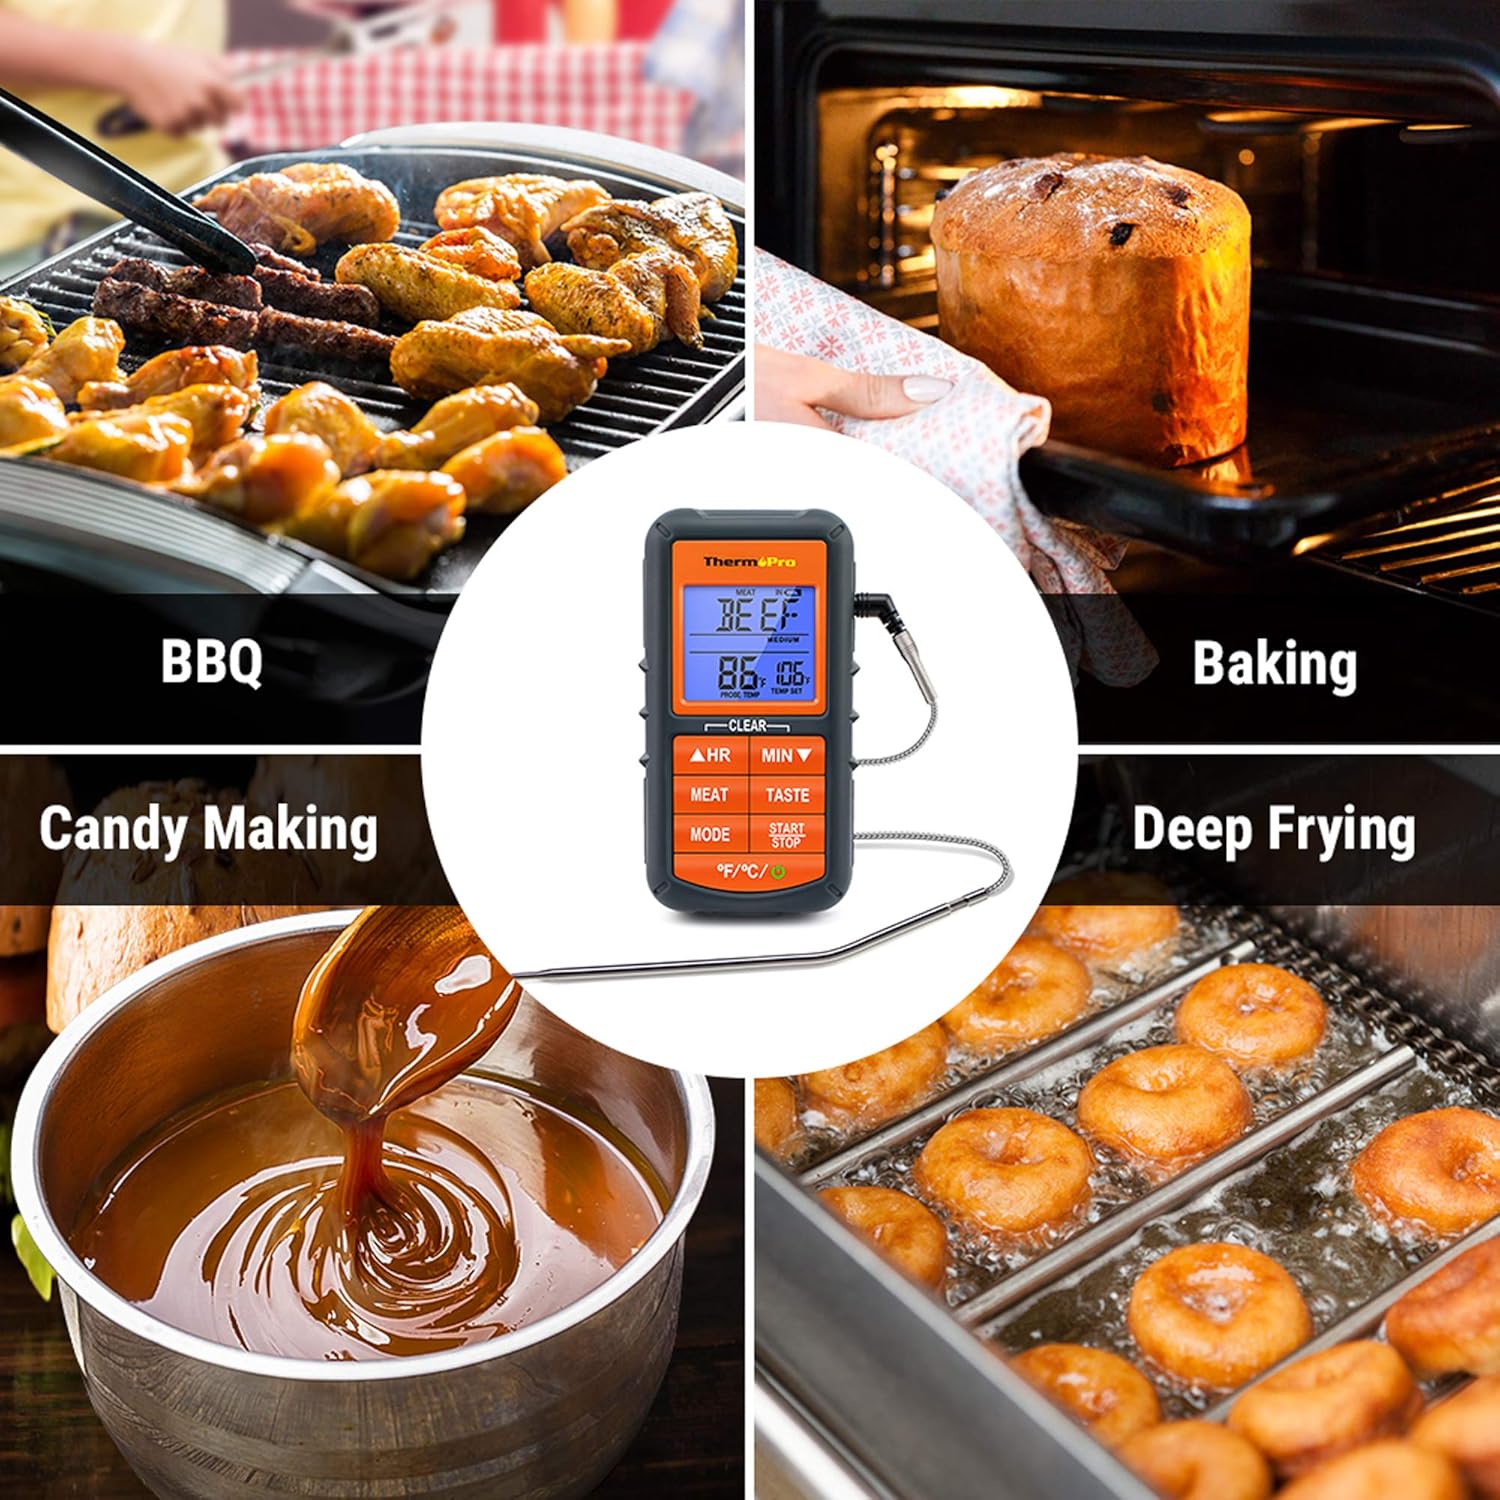
Figure 5: The TP06S unit showing both the current temperature and the countdown timer on its display.
7. Smart Backlight and Alarm
The display backlight changes color to indicate temperature progression:
- Blu: Temperature increases by 10°F.
- Aħdar: Temperature is within 15°F of the set target temperature.
- Aħmar: Current temperature reaches the set target temperature, and an alarm sounds.

Figure 6: Visual representation of the smart backlit LCD, indicating temperature status with different colors.
Manutenzjoni
1. Tindif
The stainless steel probe can be cleaned with warm soapy water. Wipe the main thermometer unit with a damp drapp. MA immerse the main unit in water or place it in a dishwasher, as this can damage the electronic components.
2. Ħażna
Store the thermometer and probe in a dry place at room temperature when not in use. Ensure the probe tip protector is in place to prevent damage.
Issolvi l-problemi
1. Qari tat-Temperatura Mhux Preċiż
- Ensure the probe is fully inserted into the thickest part of the meat, avoiding bones or gristle.
- Check that the probe cable is securely connected to the main unit.
- Verify that the probe cable is not damaged or frayed. A damaged probe may need replacement.
- Test the probe in boiling water (212°F / 100°C at sea level) or ice water (32°F / 0°C) to check its accuracy.
2. Display Not Working / No Power
- Iċċekkja jekk il-batteriji humiex installati sew bil-polarità korretta.
- Ibdel il-batteriji b'batteriji AAA friski.
- Kun żgur li l-buttuna tal-qawwa hija ppressata sew.
3. Allarm Mhux Ddoqq
- Confirm that a target temperature has been set.
- Check if the unit's volume is not set to mute (if applicable, though this model typically has a fixed alarm sound).
Speċifikazzjonijiet
| Ditta: | ThermoPro |
| Isem tal-Mudell: | Digital Grill Meat Thermometer with Probe for Smoker Grilling Food |
| Numru tal-Mudell tal-Oġġett: | TP06S |
| Sors tal-Enerġija: | Imħaddem bil-batterija (2 batteriji AAA inklużi) |
| Firxa tat-Temperatura: | Sa 482°F (250°C) |
| Materjal tas-Sonda: | Azzar li ma jsaddadx ta' Grad ta' Ikel |
| Probe Wire Rating: | Rated for 716°F (380°C) |
| Tip ta' wiri: | LCD with Smart Backlight |
| Karatteristika Speċjali: | Alarm, Preset Temperatures, Timer |
| Ċertifikazzjonijiet: | Ċertifikat NSF |

Figure 7: Certifications for the ThermoPro TP06S, including NSF, CE, and RoHS compliance.
Garanzija u Appoġġ
For warranty information, technical support, or to purchase replacement parts, please visit the official ThermoPro website or contact their customer service. You can also refer to the detailed user guides available online: