
1. Introduzzjoni
This manual provides detailed instructions for the installation, configuration, and maintenance of your ASUS H110M-D motherboard. The ASUS H110M-D is designed to support 6th generation Intel Core i7/i5/i3/Pentium/Celeron processors with an LGA 1151 socket, featuring DDR4 memory support up to 32GB, integrated graphics, and Intel Turbo Boost Technology 2.0. It is a Micro ATX form factor motherboard, ideal for building compact yet capable systems.
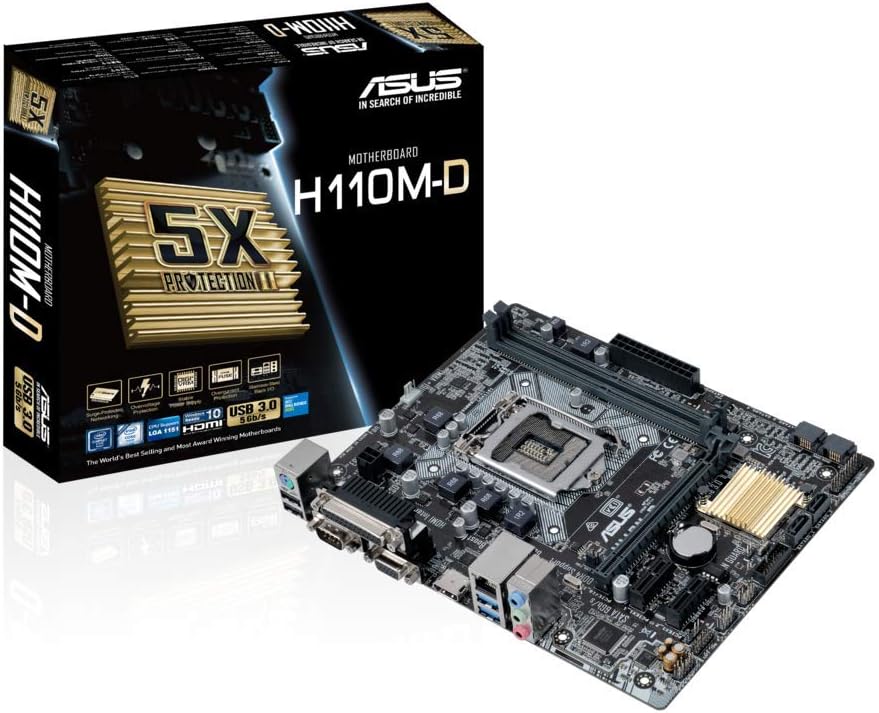
Figure 1.1: ASUS H110M-D Motherboard and Packaging.
This image displays the ASUS H110M-D motherboard alongside its retail packaging, highlighting its compact Micro ATX form factor and key features.
2. Informazzjoni dwar is-Sigurtà
- Dejjem skonnettja l-korda tal-enerġija mis-sokit tal-ħajt qabel ma tmiss xi komponenti.
- Ilbes ċinga tal-polz anti-statika jew tmiss ta' spiss oġġett imqabbad mal-ert biex tevita ħsara minn skarika elettrostatika (ESD).
- Żgura ventilazzjoni xierqa fil-kaxxa tal-PC tiegħek biex tevita li tissaħħan iżżejjed.
- Tesponix il-motherboard għall-umdità jew temperaturi estremi.
3. Setup u Installazzjoni
3.1. Verifika tal-Kompatibbiltà
IMPORTANTI: Before proceeding with installation, verify the compatibility of your CPU and RAM with the ASUS H110M-D motherboard. Refer to the official ASUS website for the latest CPU and memory Qualified Vendor Lists (QVL). This motherboard supports Intel Socket 1151 for 6th generation Core i7/i5/i3/Pentium/Celeron processors and DDR4 memory up to 32GB.
3.2. Layout tal-Motherboard

Figure 3.1: ASUS H110M-D Motherboard Top View.
This image provides a comprehensive top-down view of the motherboard, illustrating the placement of the CPU socket, RAM slots, PCIe slots, and various connectors.
3.3. Passi tal-Installazzjoni tal-Komponenti
- Installa s-CPU: Carefully align the CPU with the socket (LGA 1151) and gently place it. Close the retention arm to secure the CPU.
- Installa l-CPU Cooler: Apply thermal paste (if not pre-applied) and install the CPU cooler according to its instructions. Connect the CPU fan cable to the CPU_FAN header.
- Installa l-Moduli tal-Memorja: Open the clips on the DDR4 DIMM slots. Align the memory modules with the key notch and press firmly until the clips snap into place. This motherboard has two DDR4 slots.
- Immonta l-Motherboard: Secure the motherboard into your PC case using the appropriate standoffs and screws.
- Qabbad Kejbils tal-Enerġija: Qabbad il-konnettur tal-enerġija ATX ta' 24 pin u l-konnettur tal-enerġija tas-CPU ta' 8 pin (jew 4 pin) mill-provvista tal-enerġija tiegħek mal-motherboard.
- Qabbad l-Apparati tal-Ħażna: Use SATA 6Gbps cables to connect your SSDs/HDDs to the SATA ports on the motherboard.
- Installa l-Kards tal-Espansjoni: Insert graphics cards or other PCIe expansion cards into the appropriate PCIe slots (e.g., PCIe 3.0 x16 for graphics).
- Qabbad il-Kejbils tal-Panel ta' Quddiem: Connect the power button, reset button, USB ports, audio jacks, and LED indicators from your PC case to the corresponding headers on the motherboard. Refer to the motherboard manual's detailed diagrams for correct pin assignments.
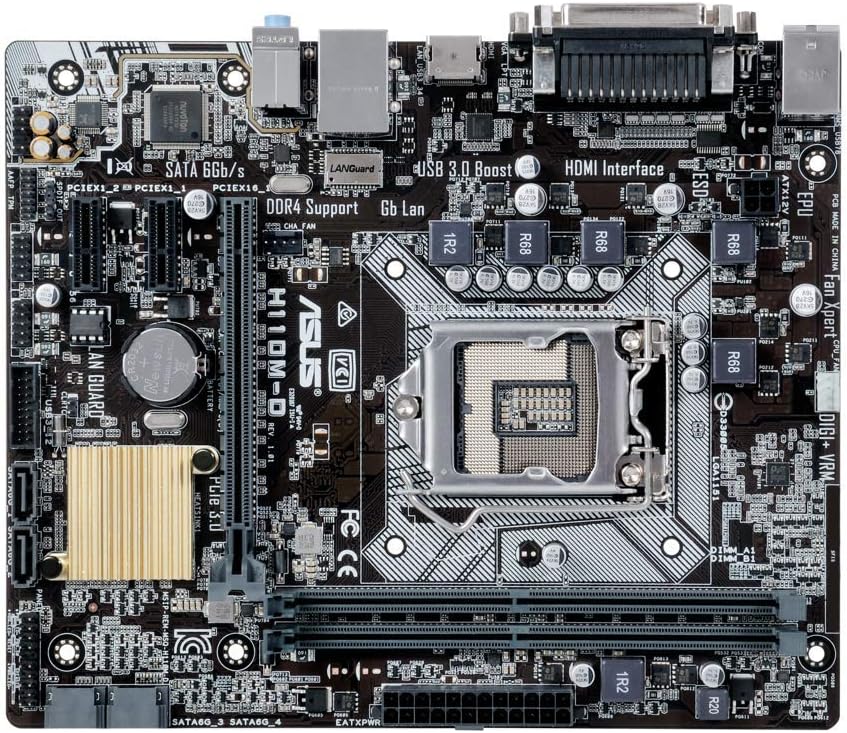
Figure 3.2: CPU Socket and Memory Slots.
Dan il-close-up view highlights the LGA 1151 CPU socket and the two DDR4 memory slots, crucial for proper component installation.
3.4. Konnessjonijiet tal-Panel I/O ta' Wara
Connect your peripherals to the rear I/O panel. This motherboard includes various ports such as USB 2.0, USB 3.0, HDMI, VGA, DVI, LAN, and audio jacks.
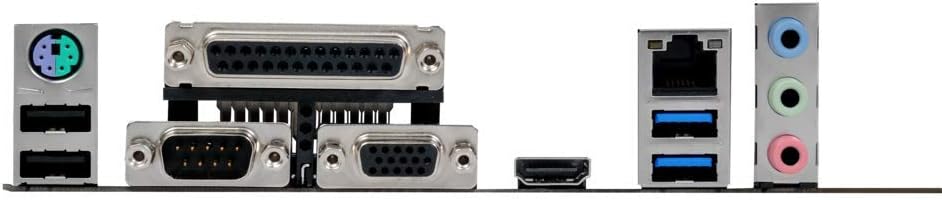
Figura 3.3: Il-Panel tal-I/O ta' wara.
This image shows the various input/output ports available on the rear of the motherboard, including USB, video outputs (VGA, HDMI), and audio jacks.
4. It-Tħaddim tas-Sistema Tiegħek
4.1. Konfigurazzjoni tal-BIOS
Upon first boot, or by pressing the DEL key during startup, you can enter the UEFI BIOS utility. The ASUS BIOS is designed to be intuitive, offering both a simple EZ Mode and an advanced mode for detailed configuration. Here you can set boot order, configure system settings, and monitor hardware.
4.2. Installazzjoni tas-sewwieq
After installing your operating system (e.g., Windows 10), install the necessary drivers for the motherboard components. These drivers are typically provided on a support CD included with the motherboard or can be downloaded from the official ASUS support website. Key drivers include chipset, audio (Realtek), LAN, and graphics drivers (if using integrated graphics).
4.3. L-Ewwel Boot u l-Installazzjoni tas-Sistema Operattiva
Ensure all connections are secure. Power on your system. If all components are correctly installed, the system should boot to the BIOS or your operating system installation media. Follow the on-screen prompts to install your preferred operating system.
5. Manutenzjoni
- Tneħħija tat-Trab: Regularly clean dust from inside your PC case and motherboard components using compressed air. Ensure the system is powered off and unplugged.
- Aġġornamenti tal-BIOS: Iċċekkja l-appoġġ tal-ASUS perjodikament website for BIOS updates. Updating the BIOS can improve compatibility, stability, and performance. Follow ASUS's specific instructions for BIOS flashing carefully.
- Aġġornamenti tas-sewwieq: Żomm is-sewwieqa tiegħek aġġornati biex tiżgura prestazzjoni ottimali u kompatibilità ma' softwer u ħardwer ġdid.
- Verifiki tal-Komponenti: Periodically inspect cables and connections to ensure they are secure and free from damage.
6 Issolvi l-problemi
6.1. No Display/No Boot
- Ivverifika li l-kejbils tal-enerġija kollha (24-pin ATX, 8-pin CPU) huma konnessi sew.
- Erġa' poġġi l-moduli tar-RAM. Ipprova boot b'RAM stick wieħed biss.
- Ensure the graphics card (if dedicated) is properly seated and has power. If using integrated graphics, ensure the monitor is connected to the motherboard's video output.
- CMOS ċar (irreferi għall-manwal tal-motherboard għall-post tal-jumper).
6.2. Kwistjonijiet Awdjo
- Ensure audio drivers are correctly installed.
- Check front panel audio cable connection to the motherboard header.
- Ivverifika s-settings tal-output tal-awdjo fis-sistema operattiva tiegħek.
- Ensure audio is enabled in the BIOS.
6.3. Front Panel Connector Issues (e.g., Speaker)
- Double-check the front panel header connections. The manual provides detailed diagrams for correct pin assignments. Incorrect connection is a common cause for issues like non-functional speakers or power buttons.
7. Speċifikazzjonijiet
| Karatteristika | Speċifikazzjoni |
|---|---|
| Brand | ASUS |
| Isem tal-Mudell | H110M-D |
| Socket tas-CPU | LGA 1151 |
| Proċessuri Kompatibbli | Intel Core i7/i5/i3/Pentium/Celeron (6th Gen) |
| Chipset | Intel H110 |
| Teknoloġija tal-Memorja | DDR4 SDRAM |
| Memorja Massima Appoġġjata | 32 GB |
| Veloċità tal-Arloġġ tal-Memorja | 2133 MHz (up to 667 MHz listed, but 2133 is standard for H110 DDR4) |
| Fattur tal-Formola | Mikro ATX |
| Dimensjonijiet | 23 x 3 x 28 ċm |
| Piż | 812 g |
| Portijiet USB | USB 2.0, USB 3.0 |
| Interfaċċa tal-Vidjo | HDMI, VGA (D-Sub) |
| Interface tal-Ħażna | SATA 6Gbps |
| Konnettività bla fili | 801.11ac (if applicable, though typically via add-in card) |
Note: Specifications are subject to change without notice. For the most up-to-date information, please visit the official ASUS websit.
8. Garanzija u Appoġġ
ASUS products are manufactured to the highest quality standards. This motherboard comes with a standard manufacturer's warranty. For detailed warranty terms and conditions, please refer to the warranty card included with your product or visit the official ASUS support websit.
8.1. Appoġġ Tekniku
If you encounter any issues that cannot be resolved using this manual, please contact ASUS technical support. You can find contact information and additional resources on the official ASUS support websit: www.asus.com/support/
8.2. Riżorsi Online
- ASUS Download Center: For drivers, utilities, BIOS updates, and manuals.
- ASUS FAQ: Frequently asked questions and troubleshooting guides.