
1. Introduzzjoni
This manual provides detailed instructions for installing, configuring, and maintaining your GIGABYTE GA-B150M-D3H Micro ATX motherboard. The GA-B150M-D3H is designed to support 6th Generation Intel Core Processors and features Dual Channel DDR4 memory, PCIe Gen3 x4 M.2 connector, SATA Express, and 8-channel HD audio with Audio Noise Guard.
Please read this manual thoroughly before beginning installation to ensure proper setup and operation.
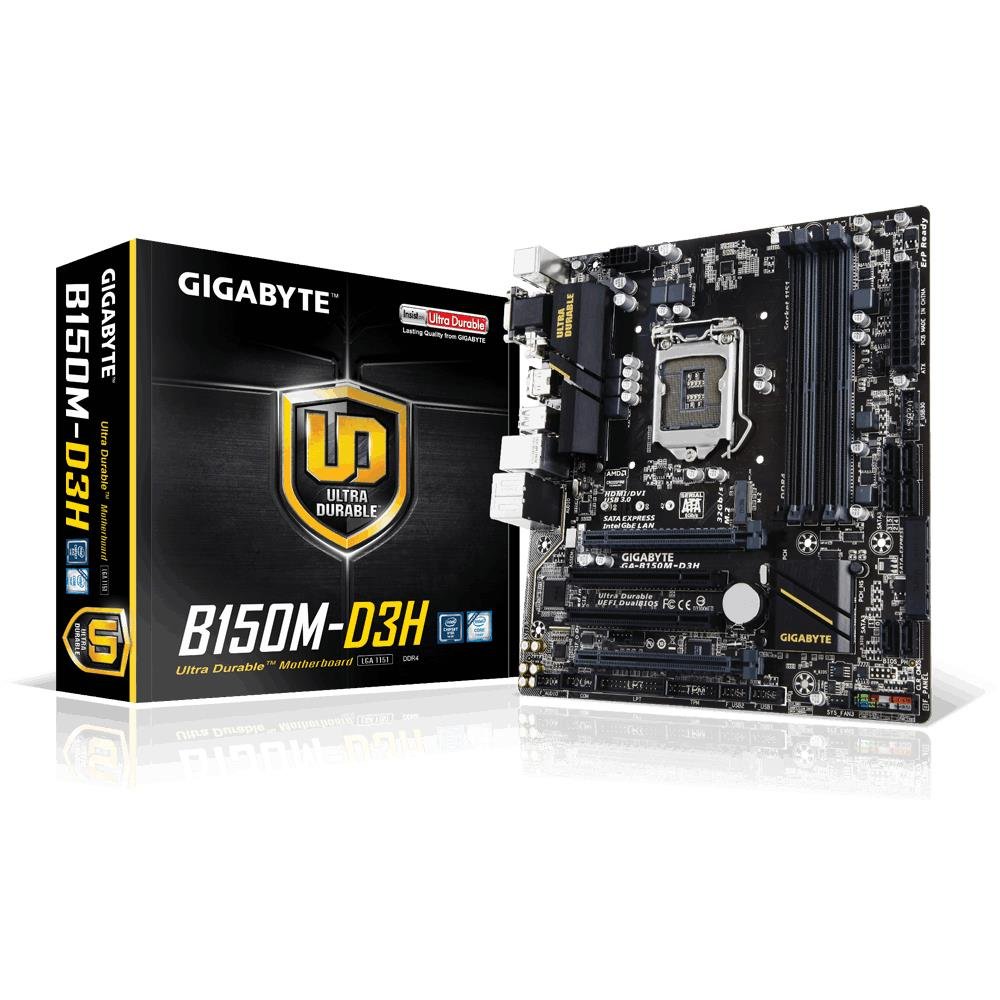
Image 1.1: GIGABYTE GA-B150M-D3H Micro ATX Motherboard. This image displays the overall layout of the motherboard, highlighting its compact Micro ATX form factor and various component slots.
2. Informazzjoni dwar is-Sigurtà
Observe the following safety precautions to prevent damage to the motherboard and injury to yourself:
- Dejjem skonnettja l-korda tal-enerġija mis-sokit tal-ħajt qabel ma tmiss xi komponenti.
- Ilbes ċinga tal-polz anti-statika jew tmiss ta' spiss oġġett tal-metall ertjat biex teħles mill-elettriku statiku.
- Immaniġġja l-motherboard mit-truf tagħha biex tevita li tmiss komponenti sensittivi.
- Żomm il-motherboard 'il bogħod mill-umdità u minn temperaturi estremi.
- Kun żgur li jkun hemm ventilazzjoni xierqa fil-kaxxa tal-kompjuter biex tevita li jisħon iżżejjed.
3. Kontenut tal-Pakkett
Ivverifika li l-oġġetti kollha huma preżenti fil-pakkett tal-motherboard tiegħek:
- GIGABYTE GA-B150M-D3H Motherboard
- Manwal għall-Utent
- Tarka I / O
- Kejbils SATA
- CD/DVD tas-Sewwieq
Note: Contents may vary slightly depending on region or revision.
4. Layout tal-Motherboard
Familiarize yourself with the various components and connectors on the GA-B150M-D3H motherboard.
Image 4.1: GIGABYTE GA-B150M-D3H Motherboard Layout. This image provides a visual reference for the location of key components such as the CPU socket, DIMM slots, PCIe slots, SATA ports, and M.2 connector.
Komponenti Ewlenin:
- Sokit tas-CPU LGA 1151: For 6th Generation Intel Core Processors.
- Slottijiet tad-DIMM DDR4 (4): Supports Dual Channel DDR4 memory up to 2133 MHz.
- Slots PCIe: Includes PCIe Gen3 x16 for graphics cards and PCIe x1 slots for expansion.
- M.2 Connector: Supports PCIe NVMe & SATA SSDs with up to 32Gb/s data transfer.
- SATA Express Connector: For up to 16Gb/s data transfer.
- Portijiet SATA 6Gb/s: For connecting traditional SATA storage devices.
- 24-Pin ATX Power Connector: Dħul tal-enerġija prinċipali.
- 8-Pin ATX 12V Power Connector: CPU power input.
- Intestaturi tal-Panel ta' Quddiem: For power button, reset button, LED indicators, and USB ports.
- Konnetturi tal-awdjo: 8-channel HD Audio with high quality capacitors and Audio Noise Guard.
5. Setup u Installazzjoni
Segwi dawn il-passi għall-installazzjoni xierqa tal-motherboard u l-komponenti tiegħek.
5.1. Installazzjoni tas-CPU
- Locate the LGA 1151 CPU socket.
- Iftaħ il-lieva tas-sokit tas-CPU u erfa' l-pjanċa tat-tagħbija.
- Allinja s-CPU mas-sokit bir-reqqa, filwaqt li tiżgura li t-trijangolu tad-deheb fuq is-CPU jaqbel mat-trijangolu fuq is-sokit. Tisforzax is-CPU fis-sokit.
- Niżżel il-pjanċa tat-tagħbija u waħħalha bil-lieva.
5.2. Installing the CPU Cooler
Refer to your CPU cooler's instruction manual for specific installation steps. Ensure thermal paste is applied correctly between the CPU and cooler base.
5.3. Installazzjoni tal-Memorja (RAM)
- Iftaħ il-klipps fiż-żewġt itruf tas-slots tad-DDR4 DIMM.
- Allinja l-modulu tal-memorja mas-slott, filwaqt li tiżgura li l-islott fuq il-modulu taqbel maċ-ċavetta fis-slott.
- Agħfas sew 'l isfel fuq iż-żewġt itruf tal-modulu tal-memorja sakemm il-klipps jidħlu f'posthom.
- For dual-channel performance, install memory modules in matching colored slots (e.g., DIMM1 and DIMM2).
5.4. Installing Expansion Cards
- Remove the metal bracket from the desired PCIe slot on your computer case.
- Align the expansion card with the PCIe slot and press down firmly until it is seated correctly.
- Waħħal il-kard mal-kaxxa tal-kompjuter b'kamin.
5.5. Konnessjoni ta' Apparati tal-Ħażna
- Apparati SATA: Connect one end of the SATA data cable to a SATA 6Gb/s port on the motherboard and the other end to your hard drive or SSD. Connect the SATA power cable from your power supply to the device.
- M.2 SSD: Daħħal l-SSD M.2 fl-islott tal-M.2 f'angolu, imbagħad imbottah bil-mod 'l isfel u waħħalha bil-vit provdut.
- SATA Express: If using a SATA Express device, connect it to the designated SATA Express connector.
5.6. Konnessjoni tal-Konnetturi tal-Panel ta' Quddiem
Connect the cables from your computer case's front panel (power button, reset button, HDD LED, power LED, front USB, front audio) to the corresponding headers on the motherboard. Refer to the motherboard layout diagram for exact locations and pin assignments.
5.7. Konnessjoni tal-Provvista tal-Enerġija
- Connect the 24-pin ATX main power connector from your power supply to the 24-pin power socket on the motherboard.
- Connect the 8-pin ATX 12V CPU power connector to the 8-pin socket near the CPU.
- Kun żgur li l-konnessjonijiet kollha tal-enerġija huma siguri.
6. Istruzzjonijiet Operattivi
6.1. L-Ewwel Boot
After assembling all components, connect your monitor, keyboard, and mouse. Power on the system. The system should display the GIGABYTE splash screen and then enter the BIOS/UEFI setup or attempt to boot from a connected storage device.
6.2. Konfigurazzjoni tal-BIOS/UEFI
Biex tidħol fis-setup tal-BIOS/UEFI, agħfas il-buttuna DEL key repeatedly during the boot process when the GIGABYTE logo appears. Here you can configure system settings, boot order, and monitor hardware status. The GA-B150M-D3H features GIGABYTE UEFI Dual BIOS for enhanced reliability.
6.3. Installazzjoni tas-sewwieq
After installing your operating system, install the necessary drivers for the motherboard components. These can be found on the included driver CD/DVD or downloaded from the official GIGABYTE website. Key drivers include chipset, audio (Realtek ALC892 codec), LAN, and any integrated graphics drivers.
6.4. Installazzjoni tas-Sistema Operattiva
Insert your operating system installation media (USB drive or DVD) and configure the boot order in the BIOS/UEFI to boot from it. Follow the on-screen instructions to install your preferred operating system (e.g., Windows 8.1, Windows 10).
7. Manutenzjoni
7.1. Tindif
Regularly clean the interior of your computer case to prevent dust buildup, which can lead to overheating. Use compressed air to remove dust from fans, heatsinks, and motherboard components. Ensure the system is powered off and unplugged before cleaning.
7.2. Aġġornamenti tal-BIOS
GIGABYTE periodically releases BIOS updates to improve system stability, compatibility, and performance. Visit the official GIGABYTE website for your motherboard model (GA-B150M-D3H) to check for the latest BIOS version and follow the provided instructions for updating. Exercise caution during BIOS updates, as an interruption can render the motherboard inoperable.
8 Issolvi l-problemi
Din it-taqsima tindirizza kwistjonijiet komuni li tista’ tiltaqa’ magħhom.
8.1. Ebda Qawwa / Is-Sistema Ma Tixgħelx
- Check if the power supply is connected correctly to the motherboard (24-pin and 8-pin connectors).
- Kun żgur li s-swiċċ tal-provvista tal-enerġija jkun fil-pożizzjoni ON.
- Ivverifika li l-kejbil tal-buttuna tal-enerġija tal-pannell ta' quddiem huwa konness sew mal-header tal-motherboard.
- Ittestja l-provvista tal-enerġija b'sistema oħra jew b'tester tal-provvista tal-enerġija.
8.2. L-ebda Output tal-Wiri
- Ensure the monitor is connected to the correct graphics output (either integrated graphics on the motherboard or a dedicated graphics card).
- Erġa' poġġi l-karta grafika u l-moduli tal-memorja f'posthom.
- Try booting with only one memory module installed.
- Iċċekkja jekk il-monitor huwiex mixgħul u ssettjat għas-sors tad-dħul korrett.
8.3. Instabbiltà tas-Sistema / Ħabtiet
- Iċċekkja t-temperaturi tas-CPU u l-GPU biex tiżgura li jkunu fil-limiti operattivi sikuri.
- Verify that all drivers are installed and up to date.
- Mexxi għodod dijanjostiċi tal-memorja biex tiċċekkja jekk hemmx RAM difettuża.
- Ensure the power supply provides sufficient and stable power to all components.
9. Speċifikazzjonijiet
Detailed technical specifications for the GIGABYTE GA-B150M-D3H motherboard:
| Karatteristika | Speċifikazzjoni |
|---|---|
| Isem tal-Mudell | GA-B150M-D3H |
| Fattur tal-Formola | Mikro ATX (24.4cm x 22.5cm) |
| Socket tas-CPU | LGA 1151 |
| Proċessuri Kompatibbli | 6th Generation Intel Core Processors |
| Chipset | Intel B150 Express Chipset |
| Teknoloġija tal-Memorja | DDR4 |
| Slots tal-Memorja | 4 x DDR4 DIMM sockets (Dual Channel) |
| Kapaċità Massima tal-Memorja | 16 GB |
| Veloċità tal-Arloġġ tal-Memorja | 2133 MHz |
| PCIe Slots | 1 x PCI Express x16, 1 x Total PCIe Ports |
| Interfejsijiet tal-Ħażna | PCIe Gen3 x4 M.2, SATA Express, SATA 6Gb/s |
| Codec Awdjo | Realtek ALC892 codec, 8-channel HD Audio |
| Portijiet USB | Total ta' 8 Portijiet USB (inkluż USB 2.0) |
| Konnettur Ewlieni tal-Enerġija | ATX ta' 24-Pin |
| Konnettur tal-Enerġija tas-CPU | 8-Pin ATX 12V |
| Karatteristiċi Uniċi | GIGABYTE UEFI Dual BIOS, Audio Noise Guard with LED Trace Path Lighting, App Center (Easy Tune, Cloud Station) |
10. Garanzija u Appoġġ
For warranty information, please refer to the warranty card included in your product package or visit the official GIGABYTE websit. It-termini u l-kundizzjonijiet tal-garanzija jistgħu jvarjaw skont ir-reġjun.
For technical support, driver downloads, BIOS updates, and further product information, please visit the GIGABYTE official support websit:
https://www.gigabyte.com/Support
When contacting support, please have your motherboard model (GA-B150M-D3H) and serial number ready.