
ASUS P8H77-V LE
Manwal tal-Utent tal-Motherboard tal-ASUS P8H77-V LE
Model: P8H77-V LE
1. Introduzzjoni
This manual provides detailed instructions for the installation, operation, maintenance, and troubleshooting of the ASUS P8H77-V LE motherboard. Designed for Intel LGA1155 3rd/2nd Generation 22/32 nm Intel Core i7/i5/i3 Processors, this motherboard integrates advanced features for enhanced performance and stability.
Il-karatteristiċi ewlenin jinkludu:
- DIGI+ VRM: Digital power design for superior system stability and power efficiency.
- EPU: System-level energy saving and real-time power management.
- ASUS USB 3.0 Boost: Enhances USB 3.0 device read/write performance with Normal, Turbo, and UASP modes.
- Spinta tal-GPU: Provides flexible frequency and voltage adjustments for graphics performance.
- Fan Xpert: Adjusts fan speed based on system loading for optimal stability and lifespan.
- Protezzjoni Kontra ż-Żieda fil-Vultaġġ: Protects against unstable voltage.
- UEFI BIOS: User-friendly graphical interface for system settings.
2. Setup u Installazzjoni
Qabel tibda l-installazzjoni, kun żgur li s-sistema tiegħek hija mitfija u skonnettjata mill-plagg tal-ħajt. Dejjem immaniġġja l-motherboard mit-truf tagħha biex tevita skariku statiku.
2.1. Motherboard Overview
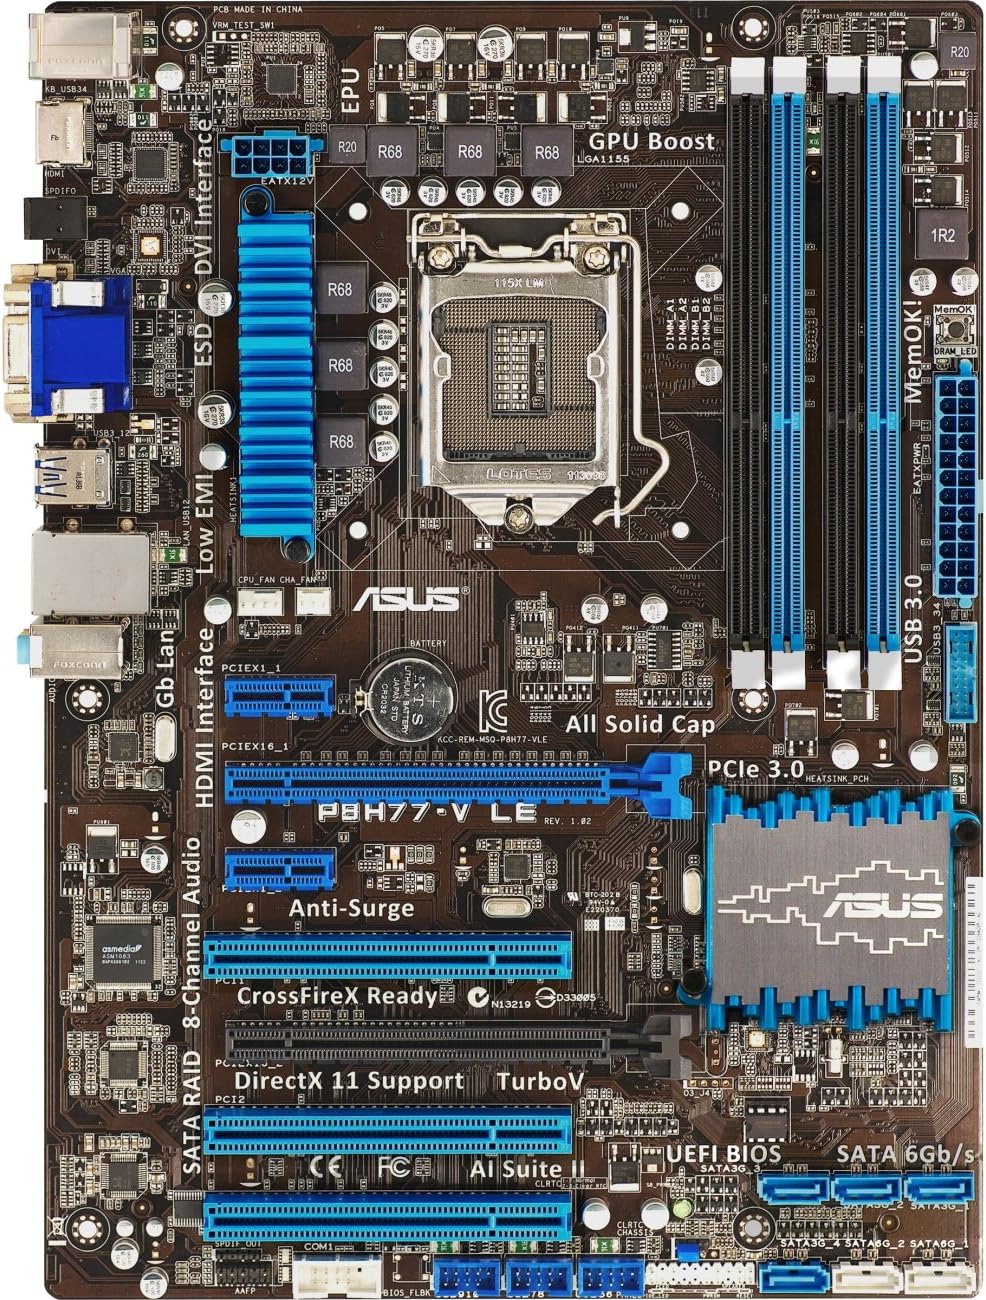
Figura 2.1: Minn fuq għal isfel view of the ASUS P8H77-V LE motherboard, highlighting the LGA 1155 CPU socket, four DDR3 DIMM slots, multiple PCIe slots, SATA ports, and I/O panel connectors.
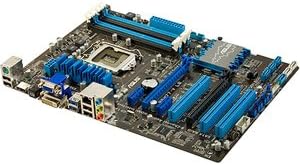
Figure 2.2: An angled perspective of the ASUS P8H77-V LE motherboard, providing a clearer view of the heatsinks on the chipset and VRM, as well as the layout of the expansion slots and ports.
2.2. Installazzjoni tal-Komponent
- Installazzjoni tas-CPU: Iftaħ il-lieva tas-sokit tas-CPU bir-reqqa, allinja s-CPU mal-markatur trijangolu fuq is-sokit, poġġi s-CPU bil-mod fis-sokit, u agħlaq il-lieva biex twaħħalha.
- Installazzjoni tal-Cooler tas-CPU: Applika l-pejst termali (jekk ma jkunx ġie applikat minn qabel) u installa l-cooler tas-CPU skont l-istruzzjonijiet tal-manifattur tiegħu. Qabbad il-kejbil tal-fann tas-CPU mal-header CPU_FAN fuq il-motherboard.
- Installazzjoni tal-Memorja (RAM): Open the clips on the DDR3 DIMM slots. Align the memory module with the slot key, and press down firmly on both ends until the clips snap into place. Refer to the motherboard manual for recommended dual-channel configurations.
- Installazzjoni tal-Kard Grafika: Insert your PCI Express graphics card into the primary PCIe 3.0 x16 slot (usually the top blue slot). Ensure it is fully seated and secured with the retention clip.
- Konnessjoni tal-Apparat tal-Ħażna: Connect your SATA 6Gb/s (SATA III) and SATA 3Gb/s (SATA II) devices (SSDs, HDDs, optical drives) to the appropriate SATA ports using SATA data cables. Connect power cables from your power supply to these devices.
- Konnessjoni tal-Provvista tal-Enerġija: Connect the 24-pin ATX power connector and the 8-pin (or 4-pin) ATX 12V power connector from your power supply to the corresponding ports on the motherboard.
- Konnessjonijiet tal-Panew ta' Quddiem: Connect the power button, reset button, HDD LED, power LED, and USB/audio headers from your computer case to the corresponding pins on the motherboard's front panel header. Refer to the motherboard manual for the exact pin layout.
3. It-Tħaddim tal-Motherboard
Once all components are installed and connected, you can power on your system. The ASUS P8H77-V LE features a user-friendly UEFI BIOS and several software utilities to optimize performance.
3.1. Il-BIOS tal-UEFI
The UEFI BIOS provides a graphical interface for configuring system settings. To enter the BIOS, press the Ħassar key during system startup. Here you can adjust boot order, monitor system temperatures, configure fan speeds, and enable/disable various features.
3.2. ASUS AI Suite II
AI Suite II is an all-in-one software package that consolidates various ASUS utilities. It allows for real-time system monitoring, power management (EPU), fan control (Fan Xpert), and performance tuning (DIGI+ VRM, GPU Boost, USB 3.0 Boost) directly from your operating system.
3.3. Installazzjoni tas-sewwieq
After installing your operating system, install the latest drivers for your motherboard chipset, audio, LAN, and any other integrated components. These can typically be found on the ASUS support websit għall-mudell speċifiku tal-motherboard tiegħek.
4. Manutenzjoni
Manutenzjoni xierqa tiżgura l-lonġevità u t-tħaddim stabbli tal-motherboard tiegħek.
- Tneħħija tat-Trab: Regularly clean dust from inside your computer case, especially from heatsinks and fans, using compressed air. Dust accumulation can lead to overheating.
- Fluss tal-arja: Ensure proper airflow within your case. Arrange cables neatly to avoid obstructing air pathways.
- Aġġornamenti tal-BIOS: Iċċekkja l-appoġġ tal-ASUS perjodikament website for BIOS updates. Updates can improve compatibility, stability, and performance. Follow the instructions provided by ASUS carefully when updating the BIOS.
- Aġġornamenti tas-sewwieq: Żomm id-drajvers tas-sistema tiegħek aġġornati biex tiżgura prestazzjoni ottimali u kompatibilità ma' softwer u ħardwer ġdid.
5 Issolvi l-problemi
This section addresses common issues you might encounter with your ASUS P8H77-V LE motherboard.
- System Does Not Power On / No Post:
- Check all power connections (24-pin ATX, 8-pin/4-pin ATX 12V) to the motherboard and ensure they are fully seated.
- Verify that the CPU and RAM are correctly installed. Try reseating RAM modules.
- Disconnect all non-essential peripherals (storage drives, expansion cards) and try booting with only CPU, one RAM stick, and graphics card (if integrated graphics are not used).
- Clear the CMOS by removing the CMOS battery for 5-10 minutes or using the CLRTC jumper.
- Integrated Graphics Driver Issues:
- Ensure you have the latest Intel graphics drivers installed from the ASUS support website or Intel's official site.
- If using a discrete graphics card, ensure it is properly seated in the correct PCIe slot and its drivers are installed. Some users report better stability in the lower PCIe slot if issues arise with the top slot.
- Insufficient Fan Power Ports:
- If you have more fans than available headers, consider using fan splitter cables or a fan hub powered directly from your power supply.
- Ensure CPU fan is connected to the CPU_FAN header. If a 'CPU Fan Error' message appears, check the connection or adjust fan speed monitoring settings in BIOS.
- Kwistjonijiet ta' Sejbien tad-Drajv SATA:
- Verify SATA cables are securely connected to both the drive and the motherboard.
- Check BIOS settings to ensure SATA ports are enabled and configured correctly (e.g., AHCI mode for SSDs).
- ASUS AI Suite II Software Problems:
- If encountering UAC warnings or uninstallation issues, try running the uninstaller as an administrator. If problems persist, consult ASUS support for specific removal tools or instructions.
6. Speċifikazzjonijiet
| Karatteristika | Speċifikazzjoni |
|---|---|
| Brand | ASUS |
| Isem tal-Mudell | P8H77-V LE |
| Socket tas-CPU | LGA 1155 |
| Proċessuri Kompatibbli | Intel Core i3, Intel Core i5, Intel Core i7 |
| Tip ta' Ċipset | Intel H77 Express |
| Teknoloġija tal-Memorja RAM | DDR3 1333; DDR3 1600; DDR3 1800; DDR3 2000; DDR3 2133; DDR3 2200 |
| RAM Massima Appoġġjata | 32 GB |
| Veloċità tal-Arloġġ tal-Memorja | 1866 MHz |
| Dimensjonijiet tal-Prodott (LxWxH) | 13.78 x 11.69 x 2.26 pulzieri |
| Piż tal-oġġett | 2.55 liri |
| Numru ta 'USB 2.0 Ports | 4 |
| Voltage | 1.5 Volts |
7. Garanzija u Appoġġ
For warranty information and technical support, please refer to the documentation included with your motherboard or visit the official ASUS support websit. Il website provides drivers, BIOS updates, FAQs, and contact information for customer service.
You can visit the ASUS support page at www.asus.com/support/ for the most up-to-date resources.
Ask a question about this manual
Ask about setup, troubleshooting, compatibility, parts, safety, or missing instructions. Manuals+ will review the question and use this page’s manual context to help answer it.